1. Введение
The VEVOR Emergency Weather Radio MD-091 is a multi-functional device designed for emergency preparedness, outdoor activities, and daily use. It integrates FM/AM/WB/NOAA radio reception, multiple power sources, a powerful flashlight, a reading light, and an SOS alarm. This manual provides detailed instructions for the safe and effective operation of your radio.

Болееview of the VEVOR Emergency Weather Radio, showcasing its compact design, integrated flashlight, reading light, and connectivity options for charging a smartphone and using headphones.
2. Инструкции по технике безопасности
- Не подвергайте устройство воздействию экстремальных температур, прямых солнечных лучей или высокой влажности.
- Не допускайте падений радиостанции и сильных ударов по ней.
- Keep the device away from water. While it has an IPX3 rating for damp conditions, it is not waterproof for submersion.
- Do not attempt to disassemble or modify the radio. This will void the warranty and may cause damage or injury.
- Для зарядки используйте только прилагаемый USB-кабель или сертифицированный аналог.
- Утилизируйте батарею и устройство в соответствии с местными правилами.
3. Продукт закончилсяview
Familiarize yourself with the various components and controls of your VEVOR Emergency Weather Radio.

A comprehensive diagram labeling the key features of the radio, such as the emergency power bank, Type-C input, reading light, survival bracelet with compass, headphone jack, dual USB output, flashlight, battery indicator, FM/AM/WB radio, weather alert radio, and SOS alarm.
Органы управления и функции:
- Ручка питания/громкости: Turn clockwise to power on and adjust volume.
- Селектор диапазонов: Switch between FM, AM, and WB (Weather Band).
- Ручка настройки: Adjust frequency to find radio stations.
- Кнопка SOS: Press and hold to activate the emergency alarm and flashing light.
- Кнопка фонарика: Activate the front flashlight.
- Reading Light Switch: Turn on/off the top reading light.
- Выходные порты USB: Для зарядки внешних устройств.
- Входной порт типа C: Для зарядки внутреннего аккумулятора радиостанции.
- Порт для наушников: Для частного прослушивания.
- Телескопическая антенна: Расширьте диапазон для улучшения приема радиосигнала.
- Солнечная панель: For supplementary charging.
- Ручная рукоятка: Для ручного производства электроэнергии.
4. Настройка
4.1 Первоначальная зарядка
Before first use, fully charge the radio's internal 8000mAh battery using the provided USB-C cable. Connect the cable to the Type-C input port on the radio and a standard USB power adapter (not included) or a computer USB port. The battery indicator lights will show charging progress.
4.2 Удлинитель антенны
For optimal radio reception, fully extend the telescopic antenna when listening to FM or Weather Band (WB) broadcasts.
5. Инструкция по эксплуатации
5.1 Включение/выключение и регулировка громкости
Поверните Регулятор питания/громкости Поверните ручку по часовой стрелке, чтобы включить радио и увеличить громкость. Поверните против часовой стрелки, чтобы уменьшить громкость и выключить радио.
5.2 Radio Operation (FM/AM/WB)
- Select the desired band (FM, AM, or WB) using the Переключатель диапазонов выключатель.
- Extend the telescopic antenna for better reception, especially for FM and WB.
- Поверните Ручка настройки to scan for stations. The frequency will be displayed on the screen.
- For Weather Band (WB), tune to one of the 7 NOAA channels (162.400 MHz to 162.550 MHz).
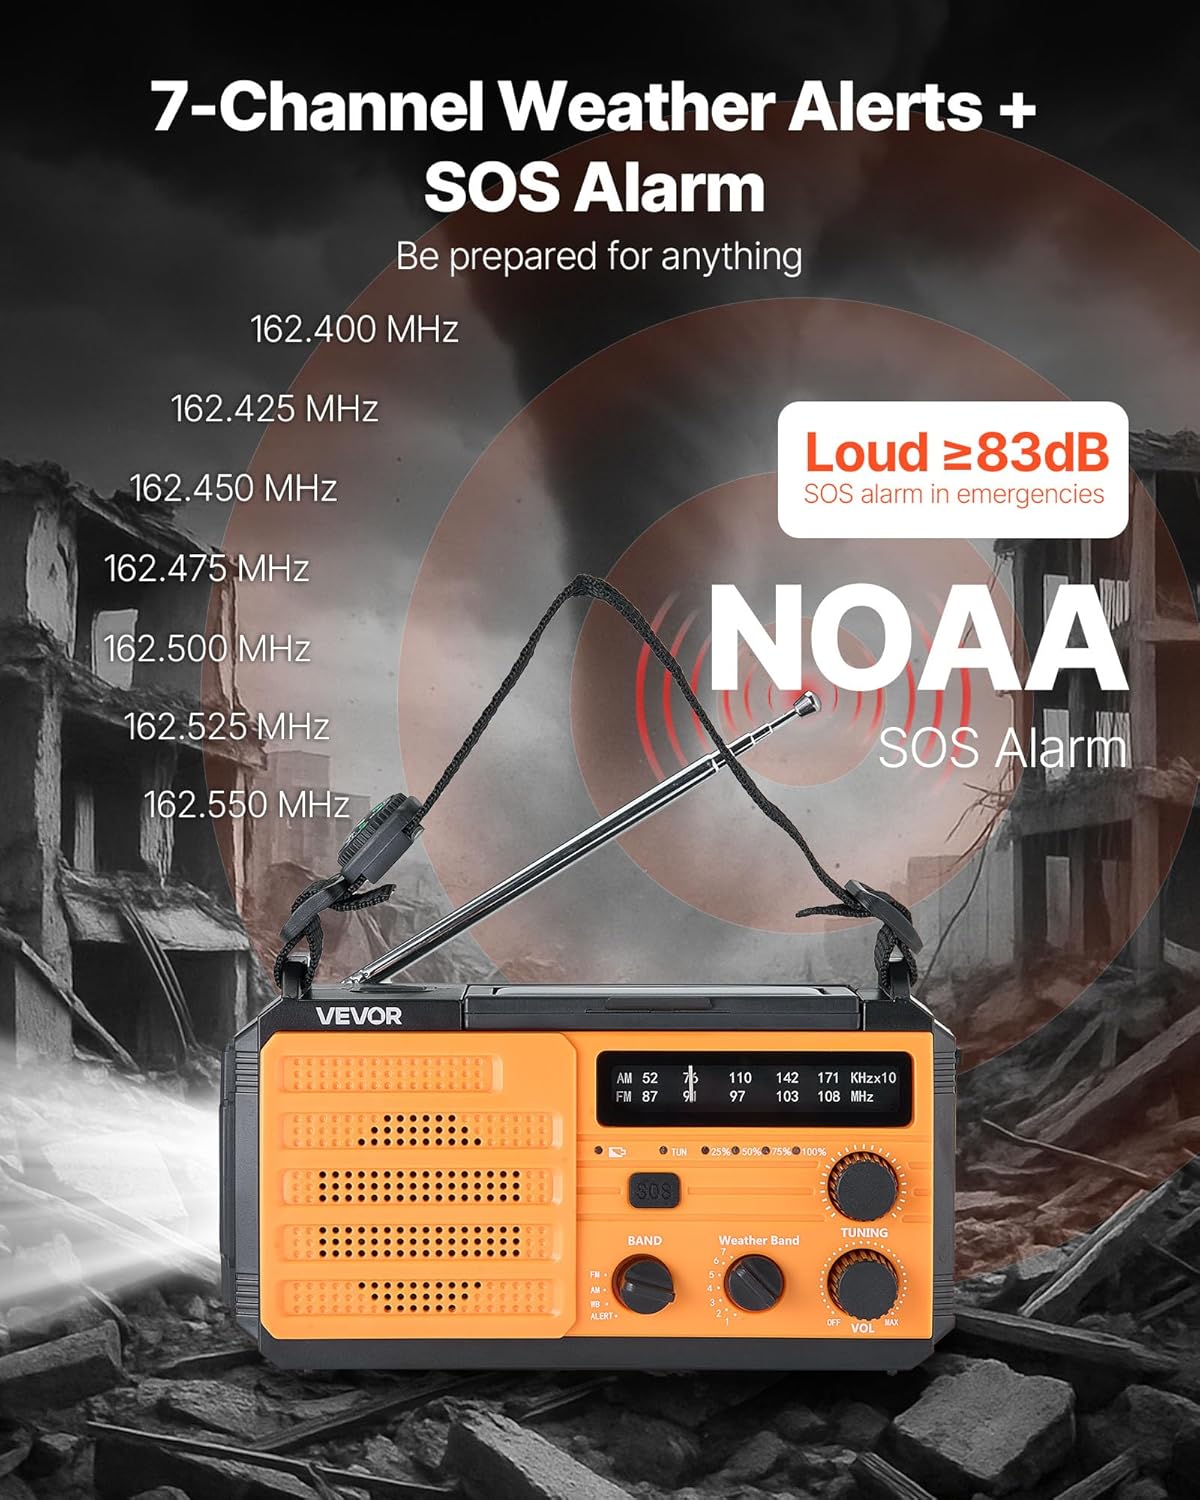
This image illustrates the radio's capability to receive 7 NOAA weather channels and activate a loud SOS alarm (over 83dB) during emergencies, with frequencies listed for reference.
5.3 NOAA Weather Alert Function
When the radio is set to the WB band, it can automatically detect and alert you to severe weather warnings from NOAA. A green light indicates normal operation, while a yellow light flashing with an alert sound warns of an impending weather event.
5.4 Тревога SOS
В экстренной ситуации нажмите и удерживайте кнопку. Кнопка SOS to activate a loud alarm (≥83dB) and a flashing light. This feature is designed to attract attention and signal for help. Press the button again briefly to deactivate.
5.5 Функции освещения

This image displays the radio's versatile lighting features, including a soft 6500K reading light for tasks and a powerful flashlight for long-range illumination, suitable for various emergency and outdoor scenarios.
- Фонарик: Нажмите Кнопка фонарика on the side to turn on the 1W high-beam LED flashlight. Press again to cycle through modes (high, low, off).
- Лампа для чтения: Flip up the solar panel to reveal the reading light. Use the Выключатель света для чтения to turn on/off the 6 COB LEDs for soft area lighting.
5.6 Зарядка внешних устройств (павербанк)
The radio can act as a power bank to charge your mobile devices. Connect your device's USB charging cable to one of the Выходные USB-порты on the radio. Ensure the radio has sufficient battery charge for this function.
5.7 Multiple Power Sources

A visual guide to the various power sources available for the radio, including USB charging, solar panel, hand crank, built-in lithium battery, and Type-C input, ensuring continuous operation in diverse situations.
- Зарядка USB-C: Connect the provided USB-C cable to the Входной порт типа C and a power source. This is the primary method for a full charge.
- Солнечная зарядка: Place the radio with the solar panel facing direct sunlight. This method is primarily for maintaining the battery charge or for emergency trickle charging, not for a full charge from empty.
- Ручная рукоятка: Rotate the hand crank clockwise or counter-clockwise at a steady pace (approximately 130-150 RPM) to generate power. Cranking for 1 minute can provide several minutes of radio use or flashlight operation.
- Внутренняя батарея: The built-in 8000mAh battery powers all functions. Monitor the battery indicator for charge level.
6. Техническое обслуживание
- Уборка: Протрите радио мягкой, damp Ткань. Не используйте абразивные чистящие средства или растворители.
- Хранилище: Store the radio in a cool, dry place away from direct sunlight and extreme temperatures. If storing for extended periods, charge the battery to at least 50% every 3-6 months to prolong battery life.
- Уход батареи: Avoid fully discharging the battery frequently. Regular partial charges are better for lithium-ion battery longevity.
7. Поиск Неисправностей
| Проблема | Возможная причина | Решение |
|---|---|---|
| Радио не включается. | Батарея разряжена. | Заряжайте радиостанцию с помощью USB-C, солнечной энергии или ручного генератора. |
| Плохой радиоприем. | Антенна не выдвинута; слабый сигнал. | Полностью выдвиньте телескопическую антенну. Попробуйте изменить положение радиостанции. |
| Внешнее устройство не заряжается. | Radio battery too low; incorrect cable. | Ensure radio battery is sufficiently charged. Use a compatible USB cable. |
| Hand crank is stiff or not generating power. | Improper cranking speed; internal issue. | Crank at a steady, moderate pace. If issue persists, contact support. |
8. Технические характеристики

This image provides the physical dimensions of the radio (6.89 x 3.15 x 3.86 inches) and a summary of its technical specifications, including model number, power, battery capacity, waterproof rating, and materials.
| Особенность | Деталь |
|---|---|
| Номер модели | МД-091 |
| Емкость аккумулятора | 8000мАч |
| Поддерживаемые радиодиапазоны | FM, AM, WB (7-Band NOAA) |
| Источник питания | Battery Powered (Internal), USB, Solar, Hand Crank |
| Технология связи | USB (Type-C input, Dual USB output) |
| Особые возможности | Portable, SOS Alarm, Flashlight (1W), Reading Light (6 COB LEDs), Compass |
| Рейтинг водонепроницаемости | IPX3 |
| Размеры продукта | 6.89"Д x 3.15"Ш x 3.86"В (175 x 80 x 98 мм) |
| Вес товара | 1.2 фунта (0.545 кг) |
| Shell Main Material | АБС |
| Включенные компоненты | 1 x Emergency Weather Radio, 1 x USB Cable, Owner's Manual |
9. Гарантия и поддержка
For warranty information, technical support, or any questions regarding your VEVOR Emergency Weather Radio MD-091, please refer to the official VEVOR webили обратитесь в службу поддержки напрямую. Сохраните чек о покупке для предъявления гарантийных претензий.
Официальный VEVOR Webсайт: www.vevor.com


