Инструкция по эксплуатации электрической жерновой кофемолки SHARDOR CG836B
Model: CG836B
1. Введение
Thank you for choosing the SHARDOR Electric Burr Coffee Grinder. This manual provides essential information for the safe and efficient operation, maintenance, and troubleshooting of your new coffee grinder. Please read all instructions carefully before first use and retain for future reference.
This electric burr coffee grinder is designed for home use, offering 32 precise grind settings and an adjustable timer to achieve the ideal texture for various brewing methods, from fine espresso to coarse French press.
2. Информация по технике безопасности
- Перед использованием прибора прочтите все инструкции.
- Этот прибор предназначен только для домашнего использования. Не используйте на открытом воздухе.
- Храните прибор и его шнур в недоступном для детей месте.
- Always unplug the grinder from the power outlet when not in use, before cleaning, or when assembling/disassembling parts.
- Не погружайте основание двигателя в воду или любую другую жидкость.
- To protect the motor, avoid grinding too much coffee at once. The grinder has a built-in safety program allowing up to 120 seconds of continuous grinding, followed by a short cooldown period. For best performance, grind in smaller batches.
- Перед началом работы убедитесь, что все детали правильно собраны.
3. Продукт закончилсяview
Familiarize yourself with the components of your SHARDOR Electric Burr Coffee Grinder:
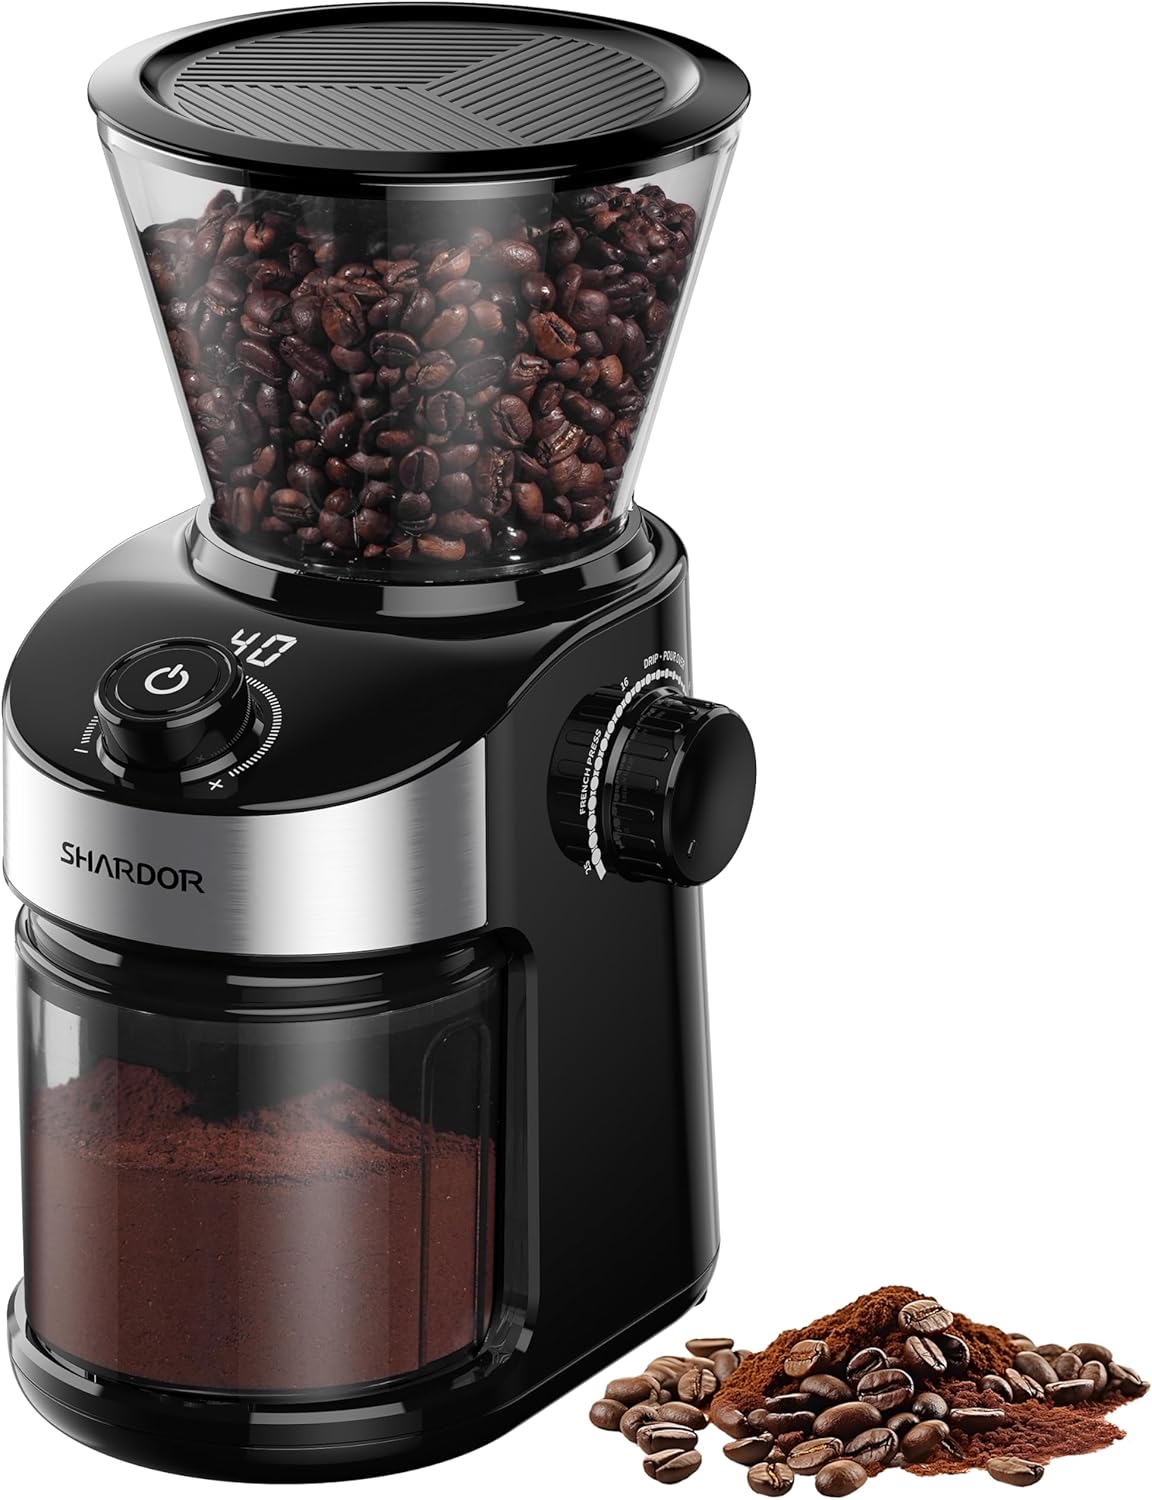
Рисунок 1: В целом view of the SHARDOR Electric Burr Coffee Grinder CG836B.
- Бобовый бункер: Вмещает целые кофейные зерна для помола.
- Верхний заусенец: The removable top burr for grinding.
- Выбор размера помола: Adjustable dial to choose desired grind fineness (1-32).
- Панель управления: Features digital timer display, time adjustment buttons (+/-), and Start/Stop button.
- Контейнер для гущи: Collects the freshly ground coffee.
- Чистящая щетка: For easy maintenance of the burrs and chamber.

Figure 2: Premium metal flat burr mechanism ensures uniform grinding.
4. Настройка
- Распаковать: Аккуратно извлеките все компоненты из упаковки.
- Размещение: Place the grinder on a clean, dry, and stable surface.
- Собрать бункер: Align the arrow symbol on the bean hopper with the lock symbol on the grinder base. Twist clockwise until it locks into place.
- Insert Grounds Container: Slide the grounds container into its designated slot at the front of the grinder.

Figure 3: Ensure proper alignment of the bean hopper for secure operation.
Video 1: Demonstrates the setup and basic operation of the SHARDOR Burr Coffee Grinder.
5. Инструкция по эксплуатации
- Добавить кофейные зерна: Open the lid of the bean hopper and pour in your desired amount of whole coffee beans. Close the lid securely.
- Выберите размер помола: Rotate the grind size selector dial to choose your preferred fineness. The settings range from 1 (finest, for espresso) to 32 (coarsest, for French press). Refer to the markings for Drip, Pour Over, and French Press.
- Set Grind Time: Use the '+' and '-' buttons on the control panel to adjust the grinding time. The digital timer allows for precise control up to 40 seconds.
- Начать шлифовку: Press the Start/Stop button to begin grinding. The grinder will automatically stop once the set time is reached. You can also press the button again to stop grinding manually at any time.
- Удалить основания: Once grinding is complete, carefully remove the grounds container from the grinder.

Figure 4: Ensure coffee beans are dry before adding to the hopper.

Figure 5: The grind size selector offers 32 options for various brewing methods.

Figure 6: The digital timer allows for precise control over grinding duration.

Figure 7: One-touch operation for convenience.
6. Техническое обслуживание и очистка
Регулярная очистка обеспечивает оптимальную производительность и продлевает срок службы вашей кофемолки.
- Отключить: Перед чисткой всегда отключайте кофемолку от сети.
- Удалить детали: Remove the bean hopper and grounds container. The upper burr can be removed by twisting it counter-clockwise after unlocking the hopper.
- Чистые заусенцы: Use the included cleaning brush to remove any residual coffee grounds from the upper and lower burrs.
- Чистая тара: Wash the bean hopper and grounds container with warm, soapy water. Rinse thoroughly and dry completely before reassembling. Do not wash the main motor unit.
- Основа для протирки: Протрите внешнюю поверхность основания двигателя с помощьюamp ткань.
- Собрать заново: Reassemble all parts, ensuring the bean hopper is locked securely in place.

Figure 8: Use the cleaning brush to remove residual coffee grounds from the burrs.
7. Поиск Неисправностей
- Измельчитель не включается: Ensure the power cord is securely plugged into a working outlet. Check that the bean hopper is correctly locked into position.
- Измельчитель неожиданно останавливается: The grinder has a safety feature that limits continuous operation to 120 seconds. Allow it to cool down before resuming. Ensure the bean hopper is not empty.
- Непостоянный помол: Check that the burrs are clean and free of obstructions. Adjust the grind setting to a different level to see if consistency improves.
- Coffee grounds sticking to container: This grinder features anti-static technology to minimize this issue. If grounds still stick, gently tap the container or use the cleaning brush.
8. Технические характеристики
| Особенность | Деталь |
|---|---|
| Бренд | ШАРДОР |
| Номер модели | CG836B |
| Цвет | Чистый черный |
| Размеры продукта | 5"Д x 9.7"Ш x 6.5"В |
| Вес товара | 2.92 фунта |
| Емкость | 6.7 ounces (coffee beans) |
| Настройки помола | 32 Precision Settings |
| Таймер | 40-Second Adjustable Digital Timer |
| Томtage | 120 Вольт |
| Производитель | ШАРДОР |
9. Гарантия и поддержка
Your SHARDOR Electric Burr Coffee Grinder is covered by a manufacturer's warranty. Please refer to the warranty card included in your packaging for specific terms and conditions.
For product support, troubleshooting assistance, or to inquire about replacement parts, please contact SHARDOR customer service through the contact information provided on your warranty card or the official SHARDOR webсайт.


