1. Введение
Thank you for choosing the ONBRILL 24 Inch Floating Bathroom Vanity with Sink Combo. This manual provides essential information for the safe assembly, installation, operation, and maintenance of your new vanity. Please read these instructions thoroughly before beginning assembly and retain them for future reference.
2. Информация по технике безопасности
- Always ensure the vanity is securely mounted to a wall stud or appropriate wall anchors to prevent tipping.
- Для сборки требуется как минимум двое взрослых.
- Wear appropriate safety gear, such as gloves and eye protection, during assembly and installation.
- Не затягивайте винты слишком сильно, так как это может повредить материал.
- Храните мелкие детали и крепежные элементы в недоступном для детей и домашних животных месте, чтобы предотвратить опасность удушья.
- Ensure all plumbing connections are properly sealed to prevent leaks.
- Avoid using harsh chemicals or abrasive cleaners on the vanity or sink, as this may damage the finish.
3. Содержимое упаковки
Перед началом сборки убедитесь в наличии всех компонентов и крепежных элементов. Если какие-либо детали отсутствуют или повреждены, обратитесь в службу поддержки клиентов.

Рисунок 3.1: В разобранном виде view of vanity components.
The package includes the vanity cabinet, ceramic integrated sink, and all necessary assembly hardware. Faucet and drain kit are not included.
4. Настройка и сборка
Assembly is estimated to take approximately 1 hour with two adults. A screwdriver and drill are recommended tools.
4.1. Сборка проходит по этапамview
For a visual guide, please refer to the official installation video below. Detailed step-by-step instructions are also provided in the images.
Video 4.1: Official ONBRILL Bathroom Vanity Installation Guide. This video demonstrates the complete assembly process for the vanity cabinet and mounting to the wall.
4.2. Detailed Assembly Instructions
- Prepare the Side Panels: Attach the drawer slides to the side panels (parts 1 and 2) using screws (A). (Refer to image for step 1)
- Assemble the Back Panel: Connect the back panel (part 4) to the bottom panel (part 14) using cam locks (B) and dowels (C). (Refer to image for step 2)
- Attach Side Panels to Base: Secure the side panels (parts 3 and 5) to the bottom panel (part 1) using cam locks (B) and dowels (C). (Refer to image for step 3)
- Complete the Cabinet Frame: Attach the top panel (part 2) to the assembled structure using cam locks (B) and dowels (C). (Refer to image for step 4)
- Соберите выдвижные ящики: Construct the drawer boxes (parts 7, 8, 9, 10, 11, 12) by screwing the sides together with screws (D). (Refer to image for step 5)
- Прикрепите фасады ящиков: Secure the fluted drawer fronts (part 6) to the assembled drawer boxes using cam locks (B). (Refer to image for step 6)
- Установите ручки выдвижных ящиков: Attach the metal handles to the drawer fronts using screws (E) and brackets (F). (Refer to image for step 7)
- Крепление шкафа к стене: Drill pilot holes in the wall, insert wall anchors (G), and secure the mounting brackets (H) using screws (J) and washers (I). Hang the cabinet onto the brackets. (Refer to image for step 8)
- Вставьте ящики: Carefully slide the assembled drawers into the cabinet. (Refer to image for step 9)
- Install Sink Top: With the help of another adult, gently lower the ceramic integrated sink (part 15) onto the vanity. Apply a bead of caulk (not included) around the edges for a secure and waterproof seal. Wipe away any excess caulk with a soft cloth and allow approximately 24 hours for it to dry. (Refer to image for step 10)

Image 4.2.1: Attaching drawer slides to side panels.

Image 4.2.2: Assembling the back panel.

Image 4.2.3: Attaching side panels.

Image 4.2.4: Completing the cabinet frame.

Image 4.2.5: Assembling drawer boxes.

Image 4.2.6: Attaching drawer fronts.

Image 4.2.7: Installing drawer handles.

Image 4.2.8: Mounting cabinet to wall.

Image 4.2.9: Inserting drawers.

Image 4.2.10: Installing sink top.
5. Операция
5.1. Drawer Functionality
The vanity features two fluted drawers with soft-closing slide rails. To open, gently pull the metal handle. To close, push the drawer until the soft-close mechanism engages, allowing it to close smoothly and quietly.

Figure 5.1: Drawers provide ample storage and feature a U-shaped cutout for plumbing.
5.2. Sink Features
The ceramic integrated sink includes an anti-spill hole and a thoughtful overflow drain design to prevent water from overflowing if the faucet is left on. The smooth, rounded edges enhance safety and ease of cleaning.
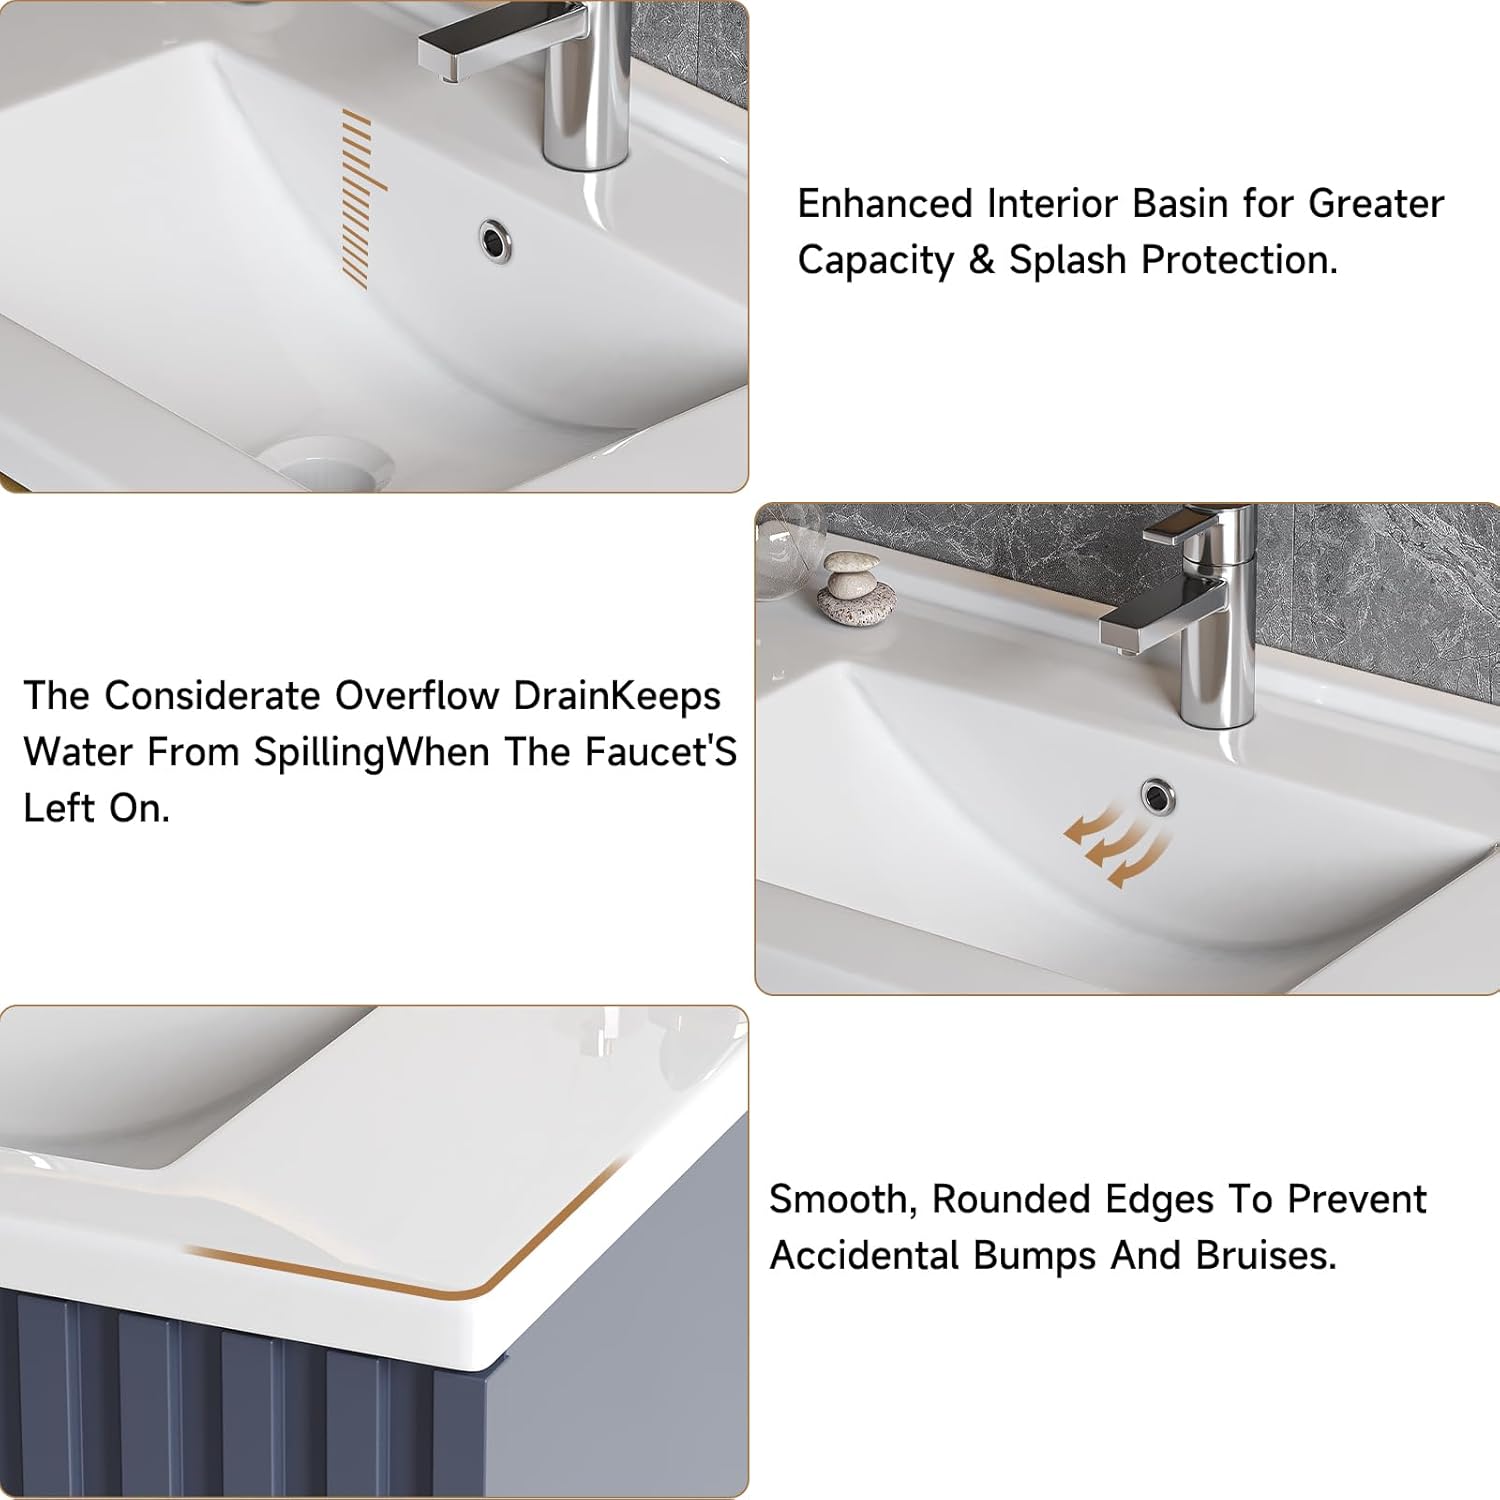
Рисунок 5.2: Подробная информация view of the sink's practical and safe design features.
6. Техническое обслуживание и уход
Proper care will ensure the longevity and appearance of your ONBRILL vanity.
- Чистка шкафа: Wipe down the painted surface with a damp, soft cloth. Avoid abrasive cleaners or harsh chemicals that could damage the finish.
- Чистка раковины: Use a mild soap and water solution with a soft sponge or cloth. Rinse thoroughly and dry to prevent water spots.
- Разливы: Promptly clean up any spills to prevent moisture damage, especially on the cabinet surfaces.
- Аппаратное обеспечение: Periodically check and tighten any loose screws on handles or drawer slides.
7. Поиск Неисправностей
If you encounter any issues with your vanity, please refer to the following common solutions:
- Ящики закрываются не плавно: Проверьте, правильно ли выровнены направляющие ящиков и нет ли на них препятствий. Убедитесь, что все винты на направляющих затянуты.
- Water leaks around the sink: Verify that the caulk seal between the sink and vanity is intact. Check all plumbing connections for tightness and proper sealing.
- Тщеславие чувствует себя неустойчиво: Ensure the wall mounting brackets are securely fastened to wall studs and that the vanity is properly seated on the brackets.
- Царапины или незначительные повреждения: For minor scratches on the cabinet, touch-up paint matching the finish may be used. Consult a professional for significant damage.
If the problem persists, please contact ONBRILL customer support.
8. Технические характеристики
| Особенность | Деталь |
|---|---|
| Бренд | ОНБРИЛЛ |
| Название модели | ON 1002VA-24 |
| Размеры продукта | 18.1"Д x 24"Ш x 18.5"В |
| Цвет | Синий |
| Материал | Инженерная древесина |
| Верхний тип материала | Керамика |
| Тип крепления | Настенное крепление |
| Количество ящиков | 2 |
| Специальная характеристика | Soft Closing Drawer, Storage |
| Вес товара | 70 фунта |

Рисунок 8.1: Подробные размеры изделия.
9. Гарантия и поддержка
For warranty information and customer support, please refer to the product's original purchase documentation or contact ONBRILL directly through their official channels. You can visit the ONBRILL Store on Amazon для получения более подробной информации.


