1. Введение
Thank you for choosing the AYJYZHIAG WS-6916 DVB-S2/S Satellite Signal Meter. This portable device is designed to assist in the installation and verification of digital satellite TV services. It is compatible with DVB-S/S2 and MPEG-2/4 H.265 (8-bit) standards, offering a comprehensive set of features in a compact and lightweight design. This manual provides detailed instructions for its operation and maintenance.
2. Продукт закончилсяview
2.1 Компоненты устройства
The WS-6916 features a 3.5-inch High Definition TFT LCD screen for clear display of menus and signal information. It includes various ports for connectivity and a user-friendly button layout.

Рисунок 1: Передняя часть view of the WS-6916 Satellite Signal Meter with main menu displayed.
The main menu provides access to functions such as Satellite Find, Loop Search, Channel List, Angle Calculation, Multimedia, EPG, Sat Installation, and System Setting.

Figure 2: Front panel details including indicators and key buttons, along with HD OUT, AV OUT, and AN IN ports.
Key buttons include MENU, EXIT, numerical keys (0-9), INFO, MUTE, TTXT, SUBT, TV/R, AUDIO, and a directional pad with an OK button. Indicators for POWER, 22K, 13V/18V, LOCK, and CHARGE are also present.
2.2 Порты подключения
The device offers various input and output options for versatile use.

Figure 3: Top, bottom, and side views illustrating the device's ports.
В число портов входят:
- DVB-S2 LNB Input: For connecting to the satellite LNB.
- USB-порт: For software updates and file переводы.
- 12V Power Supply Input: Для зарядки и внешнего питания.
- Выключатель: Включение/выключение устройства.
- AV OUT: 3.5mm jack for video (CVBS) and audio output.
- ВЫХОД HD: Для вывода видео высокого разрешения.
- AN IN: Аналоговый вход.

Рисунок 4: Сзади view highlighting the LNB input, torch, speaker, and power connections.
2.3 Аккумулятор
The device is powered by a rechargeable Lithium-ion battery.
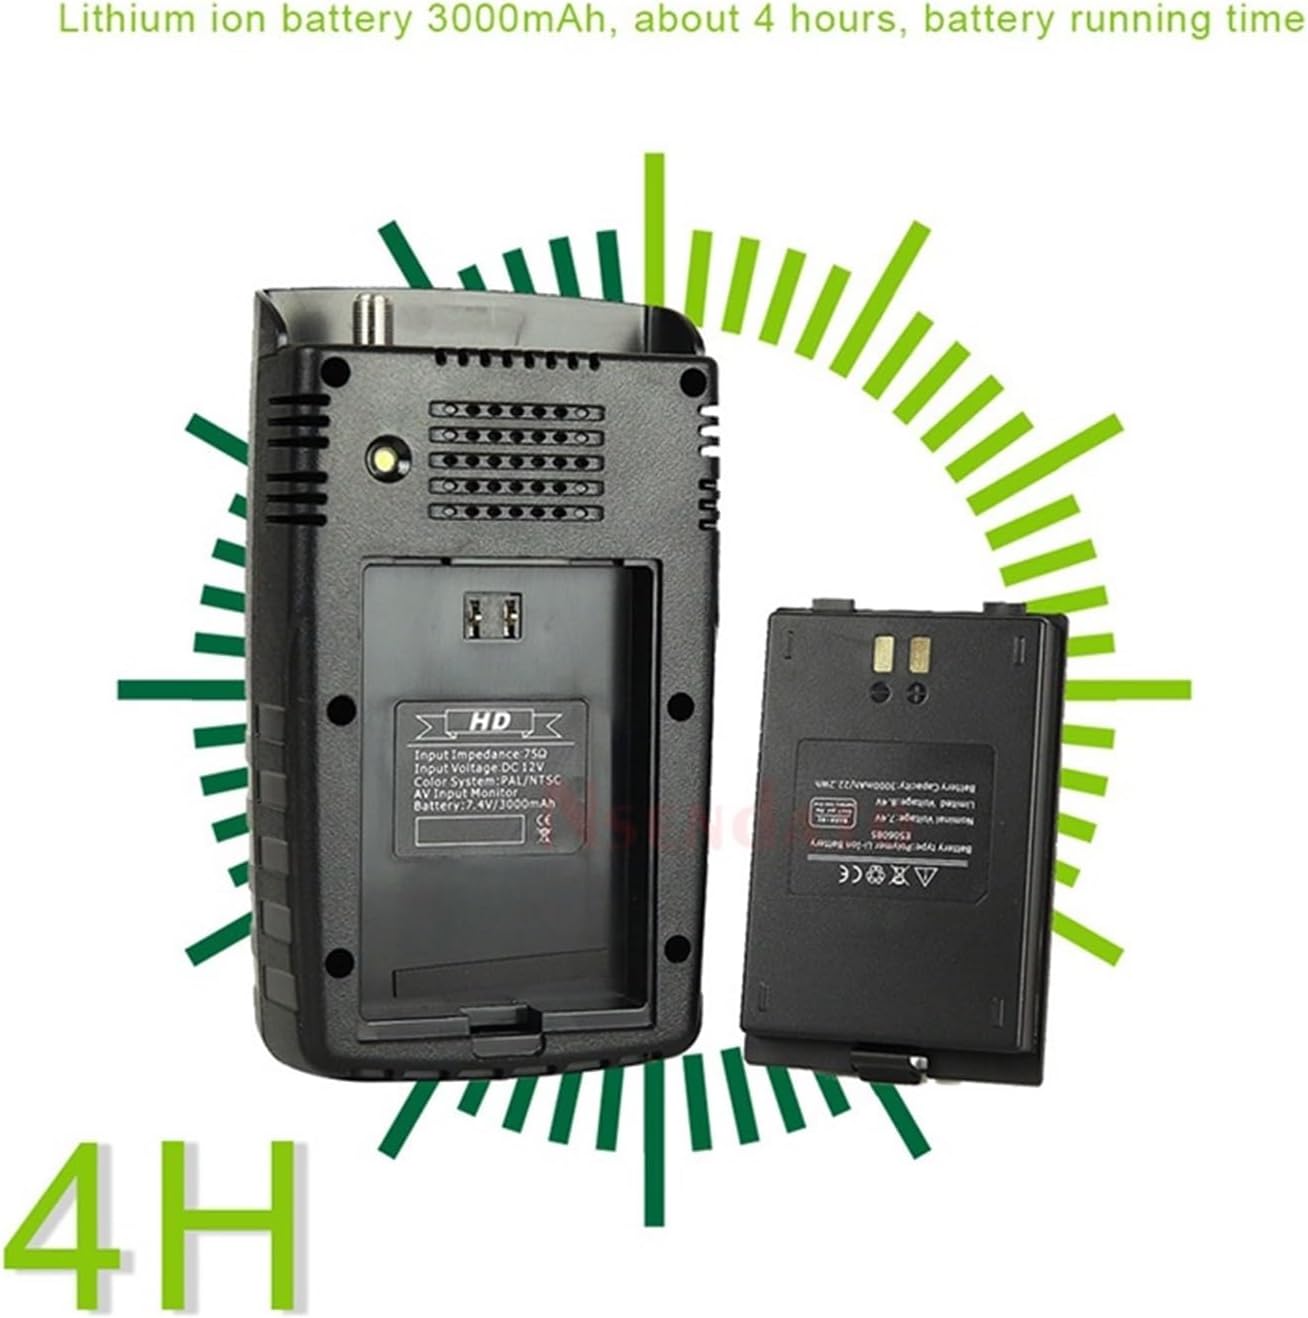
Figure 5: Battery compartment and Lithium-ion battery.
The WS-6916 includes a 3000mAh Lithium-ion battery, providing approximately 4 hours of operation on a full charge.
3. Настройка
3.1 Зарядка устройства
- Connect the provided power adapter to the 12V power supply input on the device.
- Plug the adapter into a wall outlet. The CHARGE indicator LED will illuminate.
- Allow the device to charge fully before first use. A full charge typically takes several hours. The CHARGE indicator will change or turn off when charging is complete.
3.2 Первоначальное включение питания
- Убедитесь, что устройство достаточно заряжено.
- Locate the power switch on the side/bottom of the device.
- Flip the power switch to the 'ON' position. The device will boot up and display the main menu on the LCD screen.
4. Инструкция по эксплуатации
4.1 Навигация по меню
Use the directional pad (up, down, left, right) to navigate through menu options. Press the OK button to select an option or confirm a setting. Press the ВЫХОД button to go back to the previous menu or exit a function.
4.2 Satellite Find
This function helps you locate and align your satellite dish to receive the strongest signal.
- From the main menu, select "Satellite Find" and press OK.
- Choose the desired satellite from the list. If your satellite is not listed, you may need to add it in the "Sat Installation" menu.
- Connect the LNB cable from your satellite dish to the DVB-S2 LNB input on the meter.
- Adjust your satellite dish's azimuth and elevation while observing the signal strength and quality readings on the screen. The meter will provide visual and audible feedback.
- Aim for the highest possible signal strength and quality (BER, MER, S/N). The LOCK indicator LED will illuminate when a signal is acquired.
4.3 Список каналов
View and manage channels found on a selected satellite.
- Select "Channel List" from the main menu.
- You can browse, edit, or delete channels.
4.4 Расчет угла
This feature automatically calculates the azimuth and elevation angles for your location and selected satellite.
- Select "Angle Calculation" from the main menu.
- Enter your geographical coordinates (latitude and longitude) or allow the device to use its internal GPS (if available and enabled).
- Select the target satellite. The device will display the calculated angles.
4.5 Sat Installation
Configure satellite parameters, transponders, and LNB settings.
- Access "Sat Installation" from the main menu.
- Here you can add new satellites, edit existing ones, configure LNB type (Universal, C-Band, etc.), and set DiSEqC switch parameters (1.0, 1.1, 1.2).
- The device supports DiSEqC 1.0/1.1, 1.2, and 22KHz tone control.
4.6 Настройки системы
Adjust general device settings.
- Go to "System Setting" from the main menu.
- Options typically include language, time zone, display brightness, factory reset, and software information.
4.7 USB Functions
The USB port allows for software updates and multimedia file воспроизведение.
- Обновление программного обеспечения: Download the latest firmware from the manufacturer's website, place it on a USB drive, and follow the on-screen instructions in the System Setting menu to update.
- Воспроизведение мультимедиа: Устройство поддерживает различные file formats (wma, mp3, mp4, avi, jpg, jpeg, bmp, img). Insert a USB drive with media files and select "Multimedia" from the main menu to browse and play.
5. Техническое обслуживание
5.1 Очистка
- Протрите устройство мягкой сухой тканью.
- Не используйте жидкие чистящие средства или абразивные материалы, так как они могут повредить экран или...asing.
5.2 Уход за аккумулятором
- Чтобы продлить срок службы аккумулятора, избегайте его частой полной разрядки.
- If storing the device for an extended period, charge it to about 50% and store in a cool, dry place. Recharge every few months.
5.3 Обновления программного обеспечения
Периодически проверяйте информацию производителя. webСайт для обновлений программного обеспечения, обеспечивающий оптимальную производительность и доступ к новым функциям.
6. Поиск Неисправностей
| Проблема | Возможная причина | Решение |
|---|---|---|
| Устройство не включается. | Низкий заряд батареи или выключение выключателя питания. | Charge the device using the provided adapter. Ensure the power switch is in the 'ON' position. |
| Сигнал не обнаружен. | Incorrect LNB connection, wrong satellite selected, or dish misalignment. | Check LNB cable connection. Verify the correct satellite is selected in the "Satellite Find" menu. Re-align the satellite dish carefully. Check LNB power settings. |
| Плохое качество сигнала. | Minor dish misalignment, LNB issue, or cable problem. | Fine-tune dish alignment. Inspect LNB for damage. Check cable for kinks or damage. |
| Экран пустой или завис. | Сбой в программном обеспечении. | Perform a soft reset by holding the power button until the device turns off, then restart. If persistent, consider a factory reset (data loss may occur) or software update. |
| USB-накопитель не распознан. | Неправильно file system format or incompatible drive. | Ensure USB drive is formatted to NTFS, FAT32, or FAT16. Try a different USB drive. |
7. Технические характеристики
- Стандарт трансмиссии: DVB-S/S2, MPEG-2, MPEG-4, H.265 (8-bit)
- Тип разъема: F Type (LNB Input)
- Входная частота: 950–2150 МГц
- Signal Input Level: от -65 до -25 дБм
- LNB Power Supply: 13 В / 18 В, IMax 400 мА
- Band Change Control: 22 кГц
- Demodulation Type: QPSK, 8PSK, 16APSK, 32APSK
- Тип ЖК-дисплея: TFT пропускающий
- Разрешение ЖК-дисплея: 320 х 240 (RGB)
- Active Area (WxH): 70.02 х 52.58 мм²
- AV выход: CVBS (3.5mm Jack)
- Data Service Port: USB интерфейс 2.0
- File Система управления: NTFS, FAT32, FAT16
- Поддерживается File Форматы: wma, mp3, mp4, avi, jpg, jpeg, bmp, img
- Аккумулятор: Lithium-ion 3000mAh, approx. 4 hours operation
- Вес товара: 800 грамм
8. Гарантия и поддержка
Информацию о гарантии и техническую поддержку можно получить в документации, прилагаемой к товару, или напрямую у продавца/производителя. Сохраните чек на случай предъявления гарантийных претензий.


