1. Введение
This manual provides detailed instructions for the installation, operation, and maintenance of your Jennov 5MP Wireless Security Camera System P48. This system includes an 8-channel NVR with a built-in monitor and four 5MP wireless cameras, designed for both indoor and outdoor surveillance. Please read this manual thoroughly before using the product to ensure proper setup and functionality.
2. Содержимое упаковки
Verify that all items listed below are included in your package. If any items are missing or damaged, please contact Jennov customer support.
- 4 x Security Cameras (Outdoor Wireless)
- 1 x NVR Monitor
- 1 x P48 Security System (Integrated NVR with Monitor)
- 1 x 1TB Hard Disk (Pre-installed)
- Кабель 1 x Ethernet
- 1 х Мышь
- 4 x Hole Stickers (for camera mounting)
- 4 x Camera Bases
- 1 блок питания NVR
- 4 x Camera Power Supplies
- 1 х HDMI-кабель
- 1 х предупреждение стикер
- 1 x Руководство пользователя (этот документ)
- 1 x Screws Pack (for mounting)
3. Продукт закончилсяview
The Jennov P48 system is a comprehensive wireless security solution designed for ease of use and reliable performance. Key features include:
- Разрешение HD 5 МП: Cameras capture clear, detailed video.
- Беспроводное подключение: Cameras connect to the NVR wirelessly, simplifying installation.
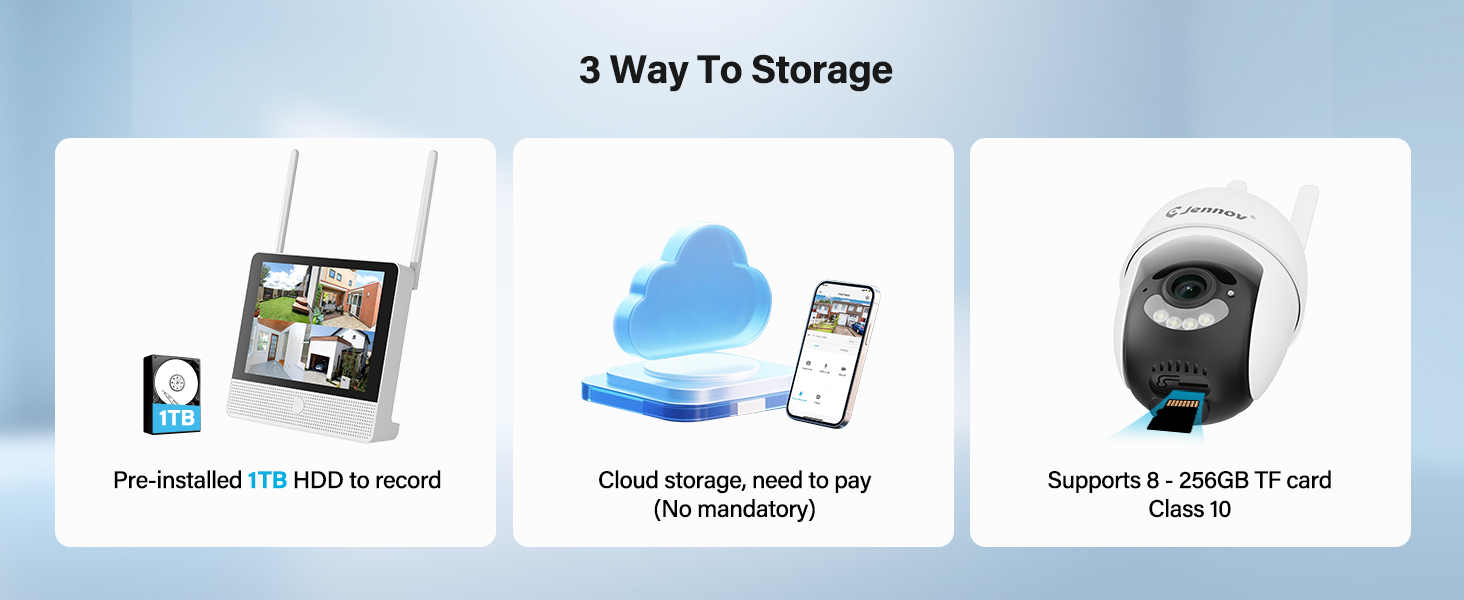
- Хранилище на жестком диске объемом 1 ТБ: Pre-installed hard drive for local recording without subscription fees.
- Ночное видение: Улучшенная видимость в условиях низкой освещенности на расстоянии до 15 метров.
- Обнаружение движения: Запускает запись и оповещения при обнаружении движения.
- Защита от атмосферных воздействий IP66: Cameras are designed to withstand various outdoor weather conditions.
- Подключи и играй: Simple setup with cameras pre-paired to the NVR.
- Двустороннее аудио: Communicate through the cameras using the mobile app.
- Удаленный доступ: View live feeds and recordings from anywhere via the Jennov app.
3.1 Компоненты системы

The system consists of a Network Video Recorder (NVR) with an integrated monitor and four wireless IP cameras. The NVR manages video recording, storage, and provides a local viewing interface. The cameras capture video and transmit it wirelessly to the NVR.
3.2 NVR Ports and Connections
- Порт питания: Подключите адаптер питания видеорегистратора.
- USB-порт: For connecting the included mouse or a USB drive for backup.
- Порт HDMI: Connect to an external monitor for larger display (optional).
- Порт локальной сети: Подключитесь к маршрутизатору для доступа в интернет и удалённого управления. viewинж.
- Кнопка сброса: Used to reset the NVR to factory settings.
- Слот для SD-карты: For additional local storage (supports up to 256GB TF card, Class 10).
4. Руководство по установке
4.1 Первоначальная настройка NVR
- Подключите питание: Connect the NVR power adapter to the Power Port and plug it into an electrical outlet. The NVR will power on automatically.
- Подключить мышь: Plug the included USB mouse into the USB Port on the NVR.
- Первоначальная загрузка: The NVR will boot up and display the live view from the pre-paired cameras on its integrated monitor.
- Подключение к сети (необязательно для удаленного доступа): Для удаленного viewing via the mobile app, connect the NVR's LAN Port to your internet router using the provided Ethernet cable.
4.2 Установка камеры
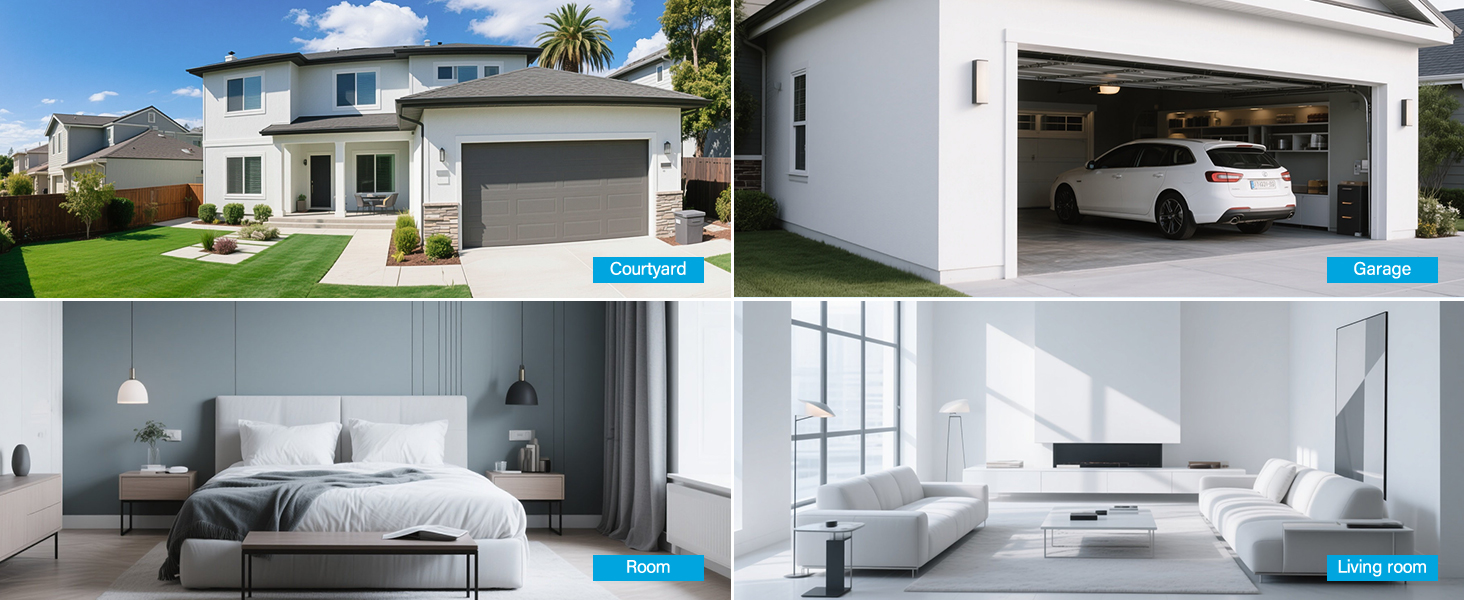
The cameras are designed for both indoor and outdoor use (IP66 rated). Choose mounting locations that provide optimal coverage and are within range of a power outlet.
- Выберите местоположение: Identify suitable locations for each camera. Consider areas like entryways, driveways, garages, and backyards. Ensure the camera has a clear line of sight to the area you wish to monitor.
- Монтаж:
- Use the included hole stickers to mark drilling points on the wall or ceiling.
- Просверлите направляющие отверстия и при необходимости вставьте дюбели в стену.
- Закрепите основание камеры с помощью прилагаемых винтов.
- Attach the camera to the base and adjust its angle.
- Подключите питание: Connect each camera to its individual power adapter and plug it into an electrical outlet. The cameras will power on and automatically connect to the NVR.
Примечание: The cameras are pre-paired to the NVR. If a camera does not display a live feed, ensure it is powered on and within wireless range of the NVR. You may need to re-pair it if issues persist (refer to Troubleshooting section).
5. Инструкция по эксплуатации
5.1 Прямой эфир View и навигация
Once the system is powered on, the NVR's integrated monitor will display the live feeds from all connected cameras. Use the included mouse to navigate the NVR interface.
- Главное меню: Щелкните правой кнопкой мыши в любом месте трансляции view экран для доступа к главному меню.
- Переключение каналов: Click on a specific camera feed to view it in full screen, or use the layout options to change the multi-camera display.
5.2 Запись и воспроизведение
The system records continuously to the pre-installed 1TB HDD. Recording settings can be adjusted via the NVR's menu.
- Непрерывная запись: The system is configured for 24/7 continuous recording by default.
- Запись, активируемая движением: You can configure cameras to record only when motion is detected, saving storage space.
- Воспроизведение: From the main menu, select "Playback" to review записано фуtage. Вы можете осуществлять поиск по дате, времени и типу события (например, обнаружение движения).
5.3 Обнаружение движения и оповещения
The cameras feature smart motion detection to alert you to activity.
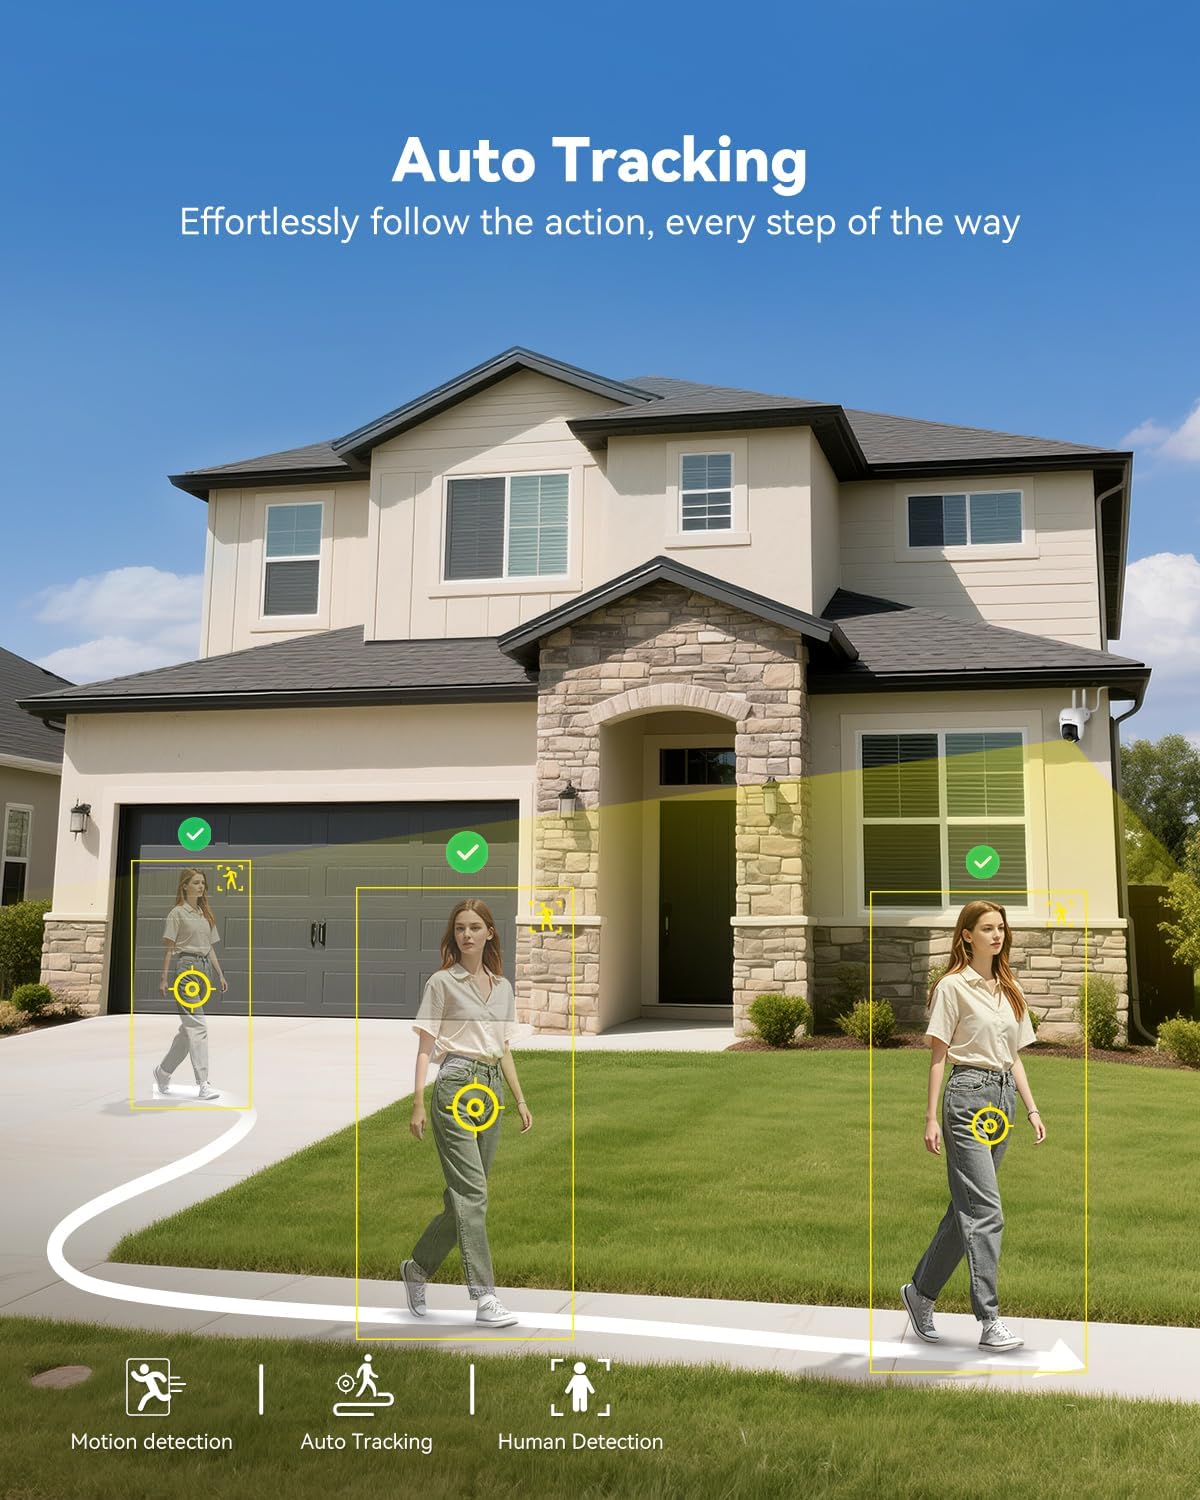
- Конфигурация: Access motion detection settings from the NVR's main menu. You can define detection zones and sensitivity levels for each camera.
- Оповещения: When motion is detected, the system can trigger recordings, send push notifications to your mobile app (if configured), and activate audible alarms or spotlights on the camera (if supported and enabled).

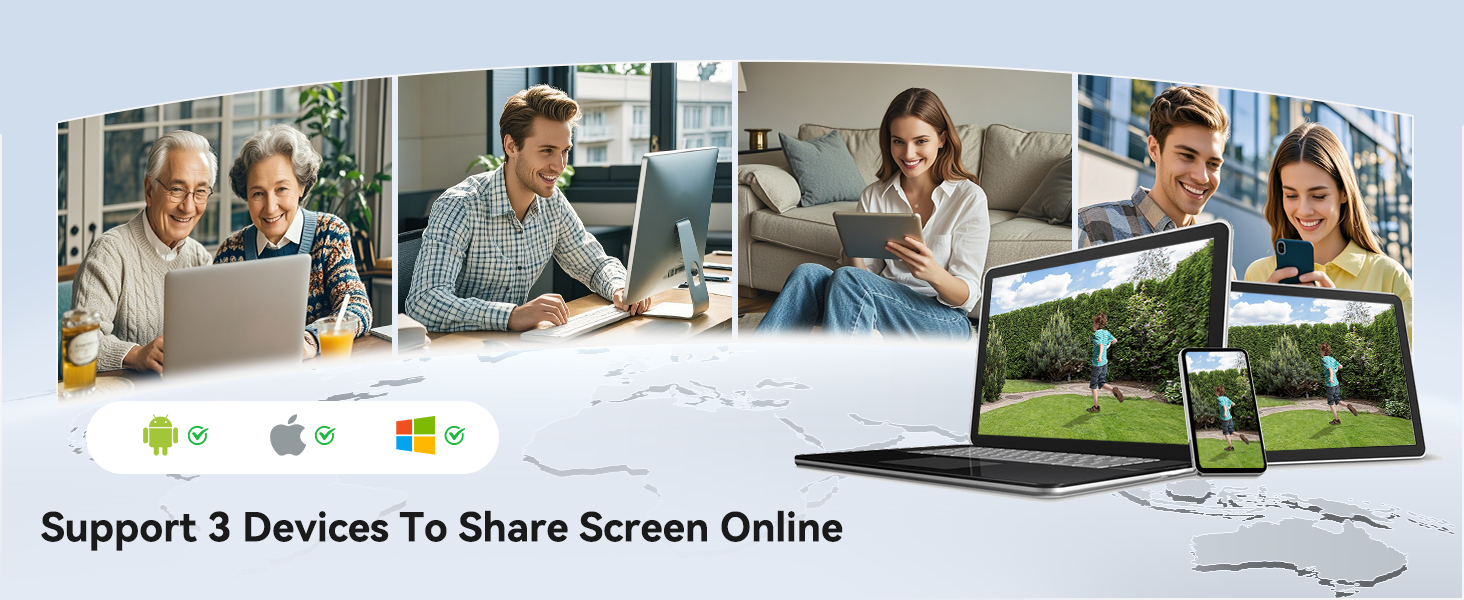
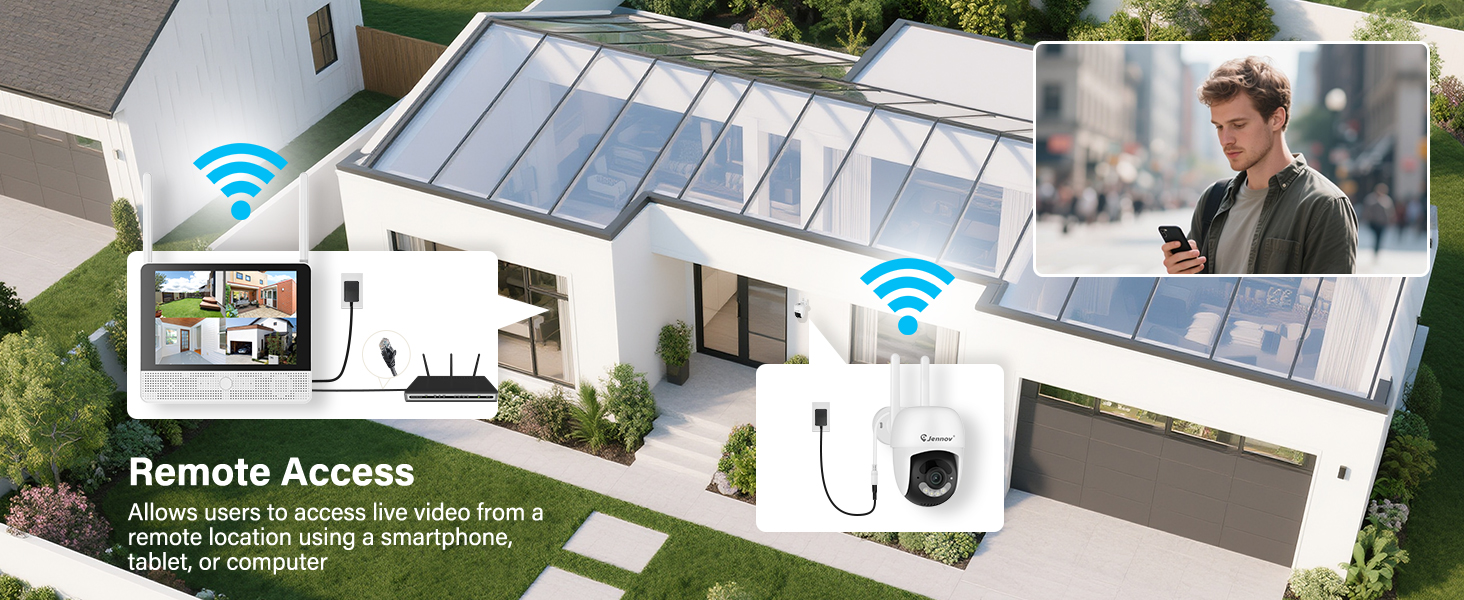
5.4 Remote Access (Jennov App)
К view your cameras remotely, download the Jennov app on your smartphone or tablet.
- Скачать приложение: Искать "Jennov" in your device's app store (iOS or Android).
- Регистрация Аккаунта: Создайте новую учетную запись пользователя в приложении.
- Добавить устройство: Follow the in-app instructions to add your NVR system. This typically involves scanning a QR code displayed on the NVR's monitor or entering the device ID manually.
- Жить View & Воспроизведение: После добавления вы можете view live feeds, play back recordings, and receive alerts directly on your mobile device.
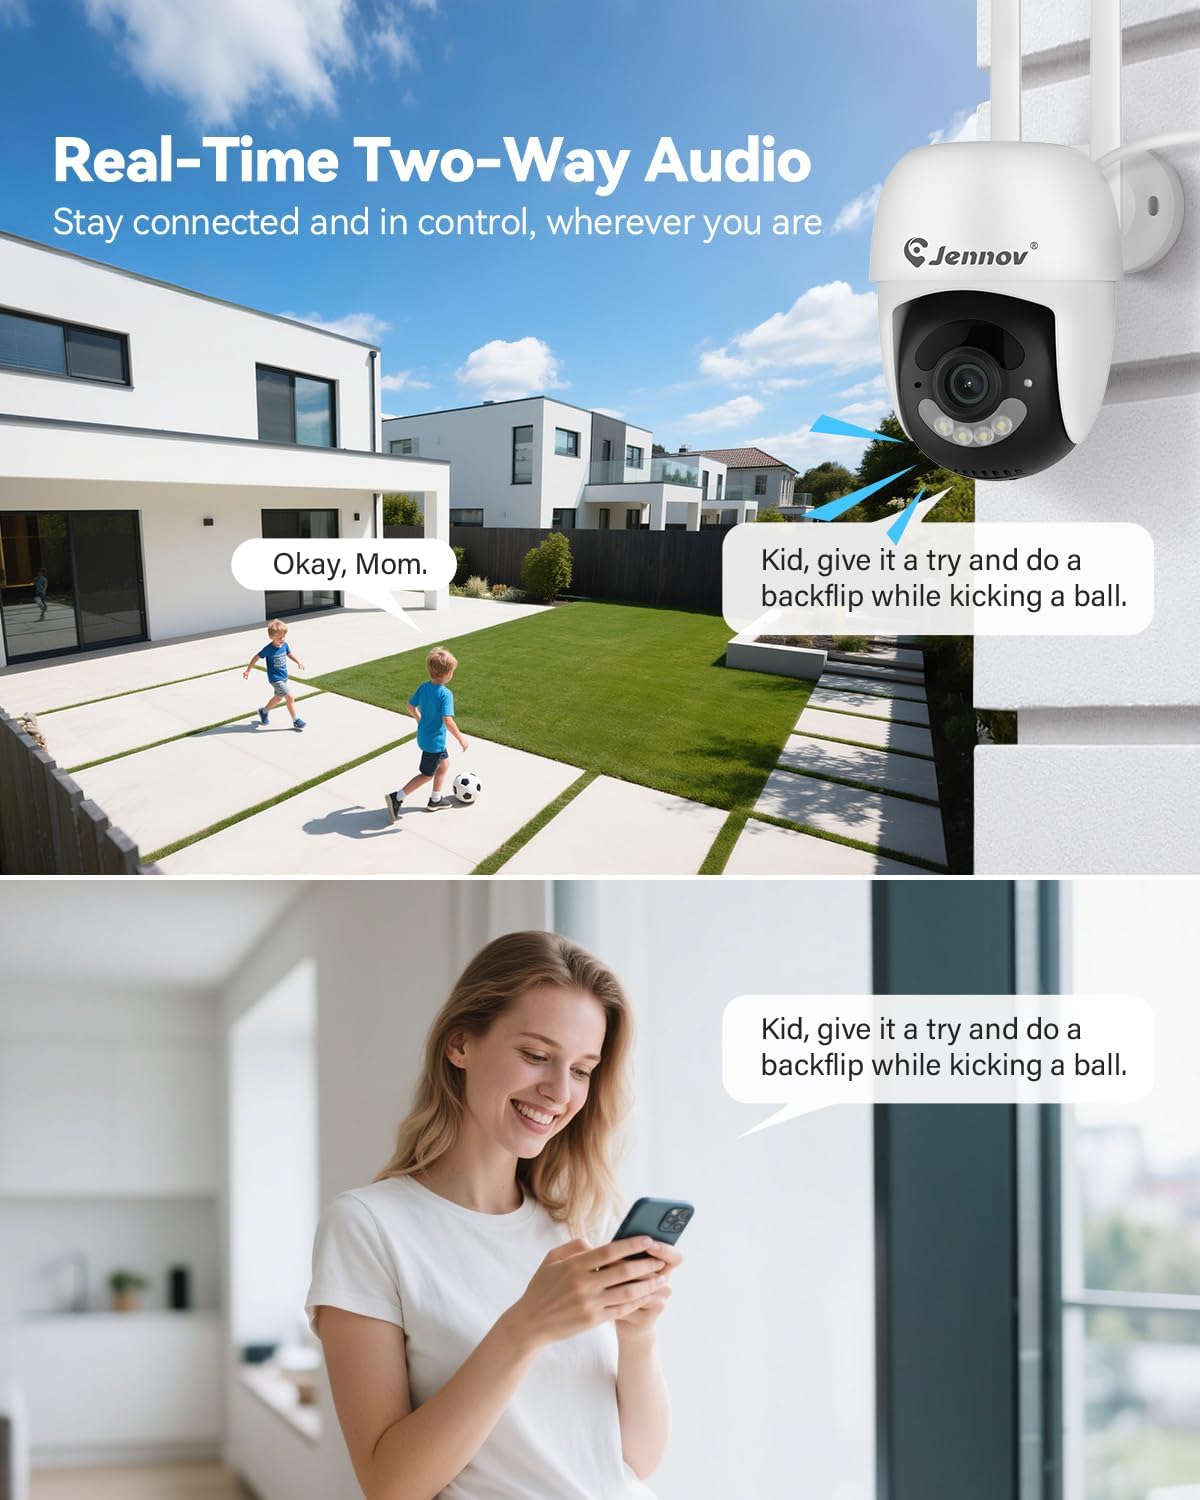
5.5 Двусторонняя аудиосвязь
Each camera is equipped with a microphone and speaker, enabling two-way communication through the Jennov app.
- Активировать: В прямом эфире view of a specific camera on the app, locate the microphone icon. Tap it to speak, and your voice will be transmitted through the camera's speaker.
- Слушать: The camera's microphone will pick up audio from its surroundings, which you can hear through the app.
5.6 Ночное видение
The cameras automatically switch to night vision mode in low-light conditions, providing clear surveillance even in darkness.

- Автоматическая активация: Infrared (IR) LEDs enable black-and-white night vision. Some models may also offer color night vision under certain conditions (e.g., with ambient light or activated spotlight).
- Диапазон: Night vision is effective up to 15 meters (50 feet).
6. Техническое обслуживание
6.1 Управление жестким диском
The 1TB HDD will automatically overwrite the oldest footage when full. No manual intervention is typically required for continuous recording.
- Резервное копирование Фуtage: If you need to save specific recordings, use the NVR's backup function (via USB port) or download from the mobile app.
- Проверка состояния жесткого диска: Periodically check the HDD status in the NVR's system settings to ensure proper functioning.
6.2 Очистка
- Камеры: Аккуратно протрите объективы фотоаппарата мягкой тряпкой.amp cloth to remove dust or smudges. Do not use harsh chemicals.
- Сетевой видеорегистратор: Keep the NVR monitor and unit free from dust. Use a dry, soft cloth for cleaning.
6.3 обновлений прошивки
Periodically check the Jennov website or contact customer support for available firmware updates. Updates can improve system performance, add new features, or address security vulnerabilities. Follow the provided instructions carefully when performing updates.
7. Поиск Неисправностей
| Проблема | Возможная причина | Решение |
|---|---|---|
| На мониторе видеорегистратора нет изображения. | NVR not powered on; Power adapter faulty; Monitor cable loose. | Ensure NVR power adapter is securely connected and plugged in. Check power outlet. If using external monitor, ensure HDMI cable is connected properly. |
| Camera not displaying live feed | Camera not powered; Out of wireless range; Not paired with NVR. | Ensure camera power adapter is connected and plugged in. Move camera closer to NVR. If still no feed, re-pair the camera: access NVR menu, go to "Camera Management" and follow instructions to add/re-pair cameras. |
| Cannot access system via mobile app | NVR not connected to internet; Incorrect app settings; Firewall issues. | Ensure NVR is connected to your router via Ethernet cable. Verify your phone has internet access. Double-check device ID/QR code in the app. Ensure router firewall is not blocking NVR access. |
| Низкое качество видео или задержка | Weak wireless signal; Obstructions; Interference. | Relocate camera or NVR to improve signal strength. Minimize obstructions (thick walls, metal objects). Avoid placing near other wireless devices that may cause interference. |
| Обнаружение движения не работает | Settings incorrect; Sensitivity too low; Detection zone not set. | Access NVR menu, go to "Motion Detection" settings. Adjust sensitivity, define detection zones, and ensure motion recording/alerts are enabled. |
8. Технические характеристики
| Особенность | Деталь |
|---|---|
| Бренд | Дженнов |
| Номер модели | K4-P48HC55AS-V2108-1F2 (P48 System) |
| Технология связи | Беспроводной |
| Разрешение видеозахвата | 5MP (Ultra-HD) |
| Количество каналов | 8 (System includes 4 cameras, expandable) |
| Емкость памяти | 1 TB HDD (pre-installed), supports up to 256GB TF card |
| Источник питания | Corded Electric (Outlet-Powered Cameras) |
| Размеры изделия (Д x Ш x В) | 13.39 x 7.48 x 11.42 дюйма |
| Рекомендуемое использование | Внутреннее и наружное видеонаблюдение |
| Диапазон ночного видения | 10-15 Meters (approx. 33-50 feet) |
| Герметичность | Степень защиты IP66 |
| Рабочая температура | -20°C до 60°C (-4°F до 140°F) |
9. Гарантия и поддержка
For warranty information, technical support, or any questions regarding your Jennov P48 Wireless Security Camera System, please refer to the warranty card included in your package or visit the official Jennov website. You can also contact Jennov customer service directly for assistance.
Jennov Official Webсайт: Visit Jennov Store on Amazon


