1. Введение
The xTool F1 is a versatile 2-in-1 dual laser engraver designed for high-speed and precision engraving and cutting across a wide range of materials. It integrates a 2W infrared laser for metals and a 10W diode laser for organic materials like wood and acrylic. This manual provides essential information for safe operation, setup, maintenance, and troubleshooting of your xTool F1 device.
2. Информация по технике безопасности
WARNING: The xTool F1 is a Class 4 laser product. Direct exposure to the laser beam can cause severe eye and skin damage. Always follow safety guidelines.
- Защита глаз: Always wear appropriate laser safety goggles when operating the device, even with the protective cover.
- Enclosed Operation: The xTool F1 features a fully enclosed cover to block smoke and filter the laser. Ensure the cover is properly closed during operation.
- Вентиляция: Operate the device in a well-ventilated area. Utilize the built-in fan and consider an external air purifier (sold separately) to manage smoke and odors.
- Безопасность материалов: Only engrave or cut materials approved for laser processing. Avoid materials that produce toxic fumes or are highly flammable.
- Надзор: Никогда не оставляйте машину без присмотра во время работы.
- Экстренная остановка: Ознакомьтесь с расположением и функциями кнопки аварийной остановки.
3. Компоненты продукта
The xTool F1 comes pre-assembled. Key components include:
- xTool F1 Main Unit (with integrated 2W Infrared and 10W Diode Lasers)
- Protective Enclosure/Cover
- Адаптер питания
- USB-кабель
- Material Pack (for testing)
- Панель для резки

Image: The xTool F1 unit shown with its pre-assembled design and included accessories such as a cutting panel and material sampлес.
4. Настройка
The xTool F1 is designed for quick setup due to its pre-assembled nature.
- Распаковка: Carefully remove the xTool F1 from its packaging.
- Размещение: Установите гравировальный станок на устойчивой, ровной поверхности в хорошо проветриваемом помещении.
- Подключение питания: Подключите адаптер питания к гравировальному станку, а затем к розетке.
- Подключение к компьютеру: Подключите гравировальный станок к компьютеру с помощью прилагаемого USB-кабеля.
- Установка программного обеспечения: Download and install the xTool Creative Space software from the official xTool website. Alternatively, LightBurn software is also supported.
5. Инструкция по эксплуатации
5.1 Перезагрузка программного обеспеченияview
The xTool F1 is compatible with:
- xTool Creative Space: User-friendly software supporting SVG, DXF, JPG, PNG, and BMP formats.
- Лайтберн: A mature engraving software for common laser cutters.

Image: The xTool F1 supports various devices including phones, iPads, and laptops, utilizing xTool Creative Space and Lightburn software for design and control.
5.2 Фокусировка
Accurate focusing is crucial for optimal engraving results.
- Автофокус: Enter the material thickness in the software, and the laser head will automatically adjust its height to maintain focus.
- Ручная фокусировка: Turn the knob on the device to adjust the laser head height. Ensure the two red dots projected by the laser overlap perfectly on the material surface for precise focus.
Image: Illustration of auto-focus, where material thickness is input, and manual focus, where a knob is turned to align two red laser dots.
5.3 Engraving Process (3 Steps)
Engraving with the xTool F1 is a straightforward process:
- Step 1: Design Creation: Create or import your design using xTool Creative Space or LightBurn.
- Шаг 2: Предварительноview and Positioning: Используйте предварительную запись в реальном времени.view function to ensure your design is correctly positioned on the material. The device can project a frame preview or a graph outline preview.
- Step 3: Start Engraving: Как только я остался доволен предварительным результатомview, press the button on the device to begin the engraving process.
Image: A visual guide to the three-step engraving process: designing on a tablet, previewing on the machine, and pressing the start button.
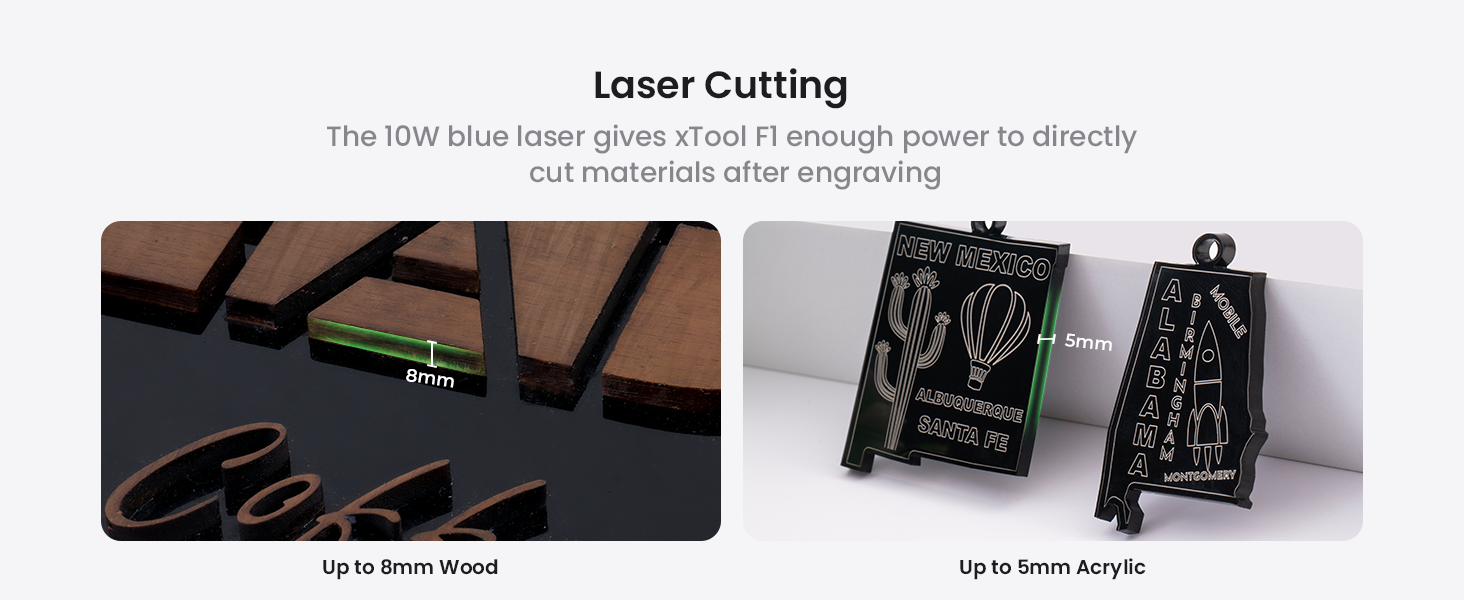
5.4 Material Compatibility and Dual Lasers
The xTool F1 features two distinct lasers for broad material compatibility:
- Инфракрасный лазер мощностью 2 Вт, длина волны 1064 нм: Ideal for engraving all metal materials and some plastics.
- 10-ваттный синий диодный лазер 455 нм: Suitable for cutting and engraving wood, acrylic, leather, paper, rubber, and other organic materials. It can cut up to 10mm wood and 6mm acrylic.
Изображение: Внутренний view of the xTool F1, highlighting the distinct paths of the 2W infrared laser (red) for metals and the 10W blue diode laser (blue) for other materials.
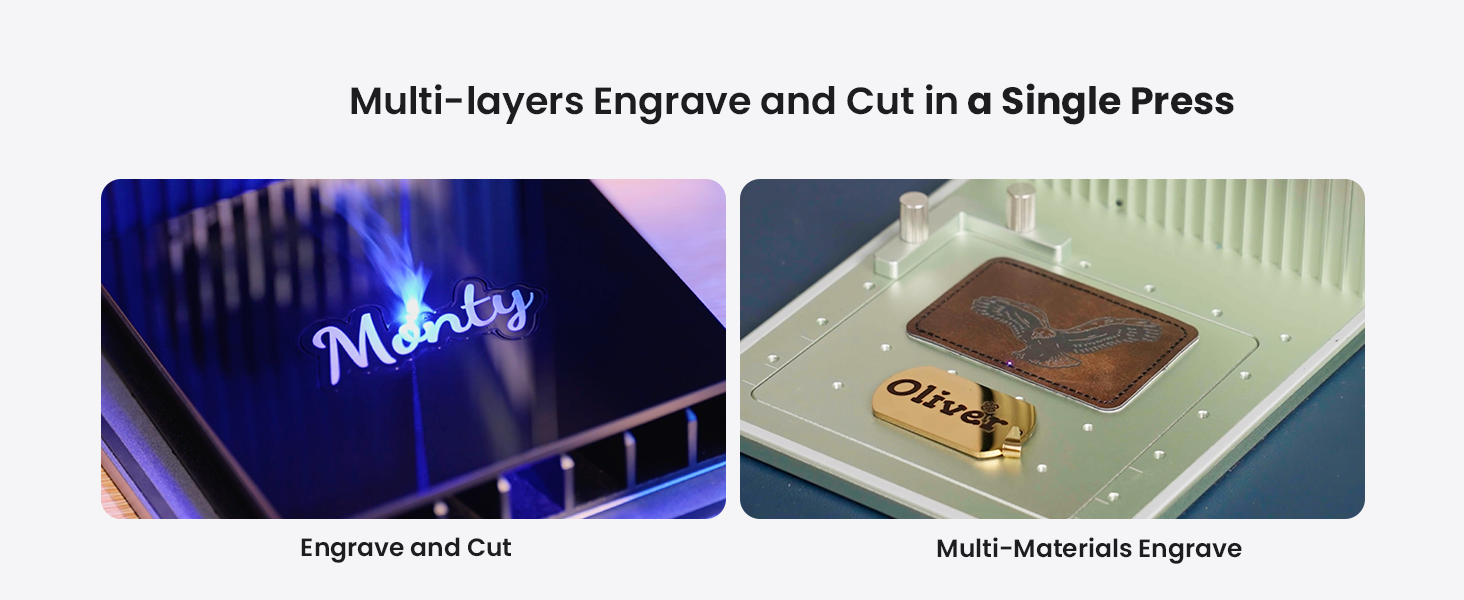
Image: A diverse collection of over 300 materials, including wood, acrylic, glass, aluminum, slate, and leather, demonstrating the xTool F1's engraving capabilities.
5.5 Expanding Working Area with Slide Extension
The xTool F1 can expand its working area for larger projects or batch processing.
- Standard Working Area: 115 мм х 115 мм.
- With Slide Extension: Expandable to 115mm x 400mm, allowing for 4 times the engraving area. This is ideal for batch processing multiple items simultaneously.

Image: The xTool F1 with its slide extension accessory, visually demonstrating the expansion of the engraving area from 115x115mm to 115x400mm.
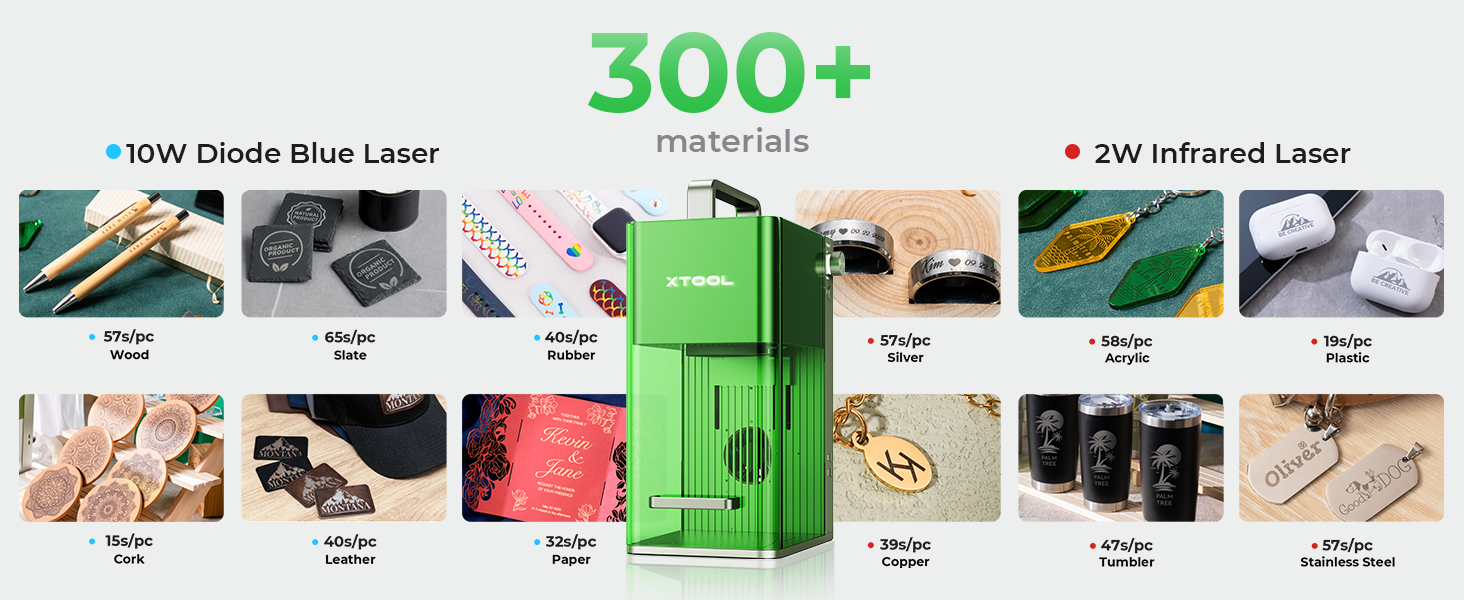
Image: The xTool F1 efficiently engraving multiple spoons in a single batch using the extended working area provided by the slide extension.
6. Техническое обслуживание
Regular maintenance ensures optimal performance and longevity of your xTool F1.
- Уборка: Regularly clean the interior of the machine, especially the lens and work area, to remove dust and debris. Use a soft, lint-free cloth and lens cleaning solution if necessary.
- Воздушный фильтр: If using an air purifier, regularly check and replace its filter as recommended by the manufacturer.
- Обновления прошивки: Keep the device firmware and software updated to the latest versions for improved features and stability.
7. Поиск Неисправностей
В этом разделе рассматриваются распространенные проблемы, с которыми вы можете столкнуться.
| Проблема | Возможная причина | Решение |
|---|---|---|
| Лазер не стреляет | Power cable loose; Emergency stop engaged; Software error; Laser module issue | Check power connections; Disengage emergency stop; Restart software/device; Contact support if issue persists. |
| Плохое качество гравировки | Incorrect focus; Wrong material settings; Dirty lens; Material not flat | Adjust focus (auto/manual); Verify material settings in software; Clean laser lens; Ensure material is flat and secured. |
| Device not connecting to computer | USB cable issue; Driver not installed; Software conflict | Try a different USB port/cable; Reinstall drivers; Restart computer and device. |
For more detailed troubleshooting or issues not listed here, please refer to the official xTool support resources.
8. Технические характеристики
| Особенность | Деталь |
|---|---|
| Модель | xTool F1 |
| Тип лазера | 2W 1064nm Infrared Laser & 10W 455nm Blue Diode Laser |
| Скорость гравировки | До 4000 мм / с |
| Точность движения | 0.00199 мм |
| Standard Working Area | 115мм х 115мм |
| Expanded Working Area (with Slide Extension) | 115мм х 400мм |
| Cutting Capacity (Diode Laser) | Up to 10mm wood, 6mm acrylic |
| Масса | 4.6кг |
| Связность | USB |
| Поддерживаемое программное обеспечение | xTool Creative Space, LightBurn |
9. Гарантия и поддержка
For detailed warranty information, product registration, and technical support, please visit the official xTool webсайт или свяжитесь со службой поддержки клиентов напрямую. Сохраните чек о покупке в качестве доказательства покупки для гарантийных претензий.
Интернет-ресурсы:
- Official xTool Webсайт: www.xtool.com
- Страница поддержки: см. website for FAQs, tutorials, and contact options.


