1. Введение
This manual provides detailed instructions for the installation, operation, and maintenance of the RAB Lighting B17 LED Bollard Light. This outdoor luminaire features field-adjustable wattage and selectable color temperature (CCT), designed for various outdoor applications.
Ключевые особенности включают в себя:
- Energy-efficient LED with a 50,000-hour lifespan.
- Регулируемый ватtage: 24 Вт, 19 Вт или 14 Вт.
- Selectable CCT: 3000K (Warm White), 4000K (Neutral White), or 5000K (Cool White).
- 0-10V dimming capability.
- Внесен в список UL для влажных помещений.
- Durable metal construction with a glass shade.
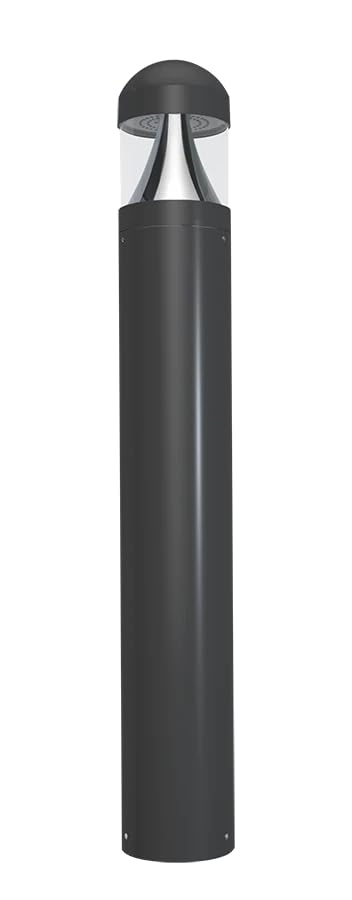
Figure 1: RAB Lighting B17 LED Bollard Light (Model B17D shown).
2. Информация по технике безопасности
ПРЕДУПРЕЖДЕНИЕ: Risk of electric shock. Disconnect power before installation or servicing. Installation should be performed by a qualified electrician in accordance with all applicable national and local electrical codes.
- Обеспечьте объем поставкиtage is correct for the fixture.
- Do not handle live components.
- Используйте соответствующие средства индивидуальной защиты (СИЗ).
- This fixture is suitable for wet locations. Ensure all connections are properly sealed to prevent water ingress.
- Не вносите никаких изменений в светильник. Любые модификации могут привести к аннулированию гарантии и создать угрозу безопасности.
3. Содержимое упаковки
Перед началом установки убедитесь, что все компоненты присутствуют:
- B17 LED Bollard Light Fixture
- On-Off Switch (Included Components)
- Installation Hardware (e.g., mounting bolts, gaskets) - (Assumed, not explicitly listed but typical for such products)
- Руководство по эксплуатации (данный документ)
4. Настройка и установка
Follow these steps for proper installation of the B17 LED Bollard Light:
- Подготовьте место установки: Ensure the mounting surface is stable and level. Run electrical conduit and wiring to the desired location according to local codes.
- Отключить питание: Перед началом любых электромонтажных работ отключите питание на автоматическом выключателе.
- Mount the Bollard: Secure the bollard base to the mounting surface using appropriate hardware. Ensure a watertight seal if required by local codes.
- Выполните электрические соединения: Connect the fixture's wires to the supply wires. Follow standard wiring practices:
- Black to Line (L)
- White to Neutral (N)
- Green/Ground to Ground (G)
- Purple to Dimming (+) (for 0-10V dimming)
- Gray to Dimming (-) (for 0-10V dimming)
- Выбрать Ватtagе и ЦКТ: Before closing the fixture, adjust the wattage and CCT switches located inside the fixture head. Refer to Section 5 for details.
- Secure the Fixture Head: Attach the fixture head to the bollard body, ensuring all seals are properly seated to maintain the wet location rating.
- Восстановить мощность: Turn on power at the circuit breaker and test the light.

Figure 2: The B17 Bollard Light is UL Listed and rated for wet locations, ensuring durability in outdoor environments.
5. Инструкция по эксплуатации
5.1. Field-Adjustable Wattage
The B17 bollard light allows you to select the desired wattage output to optimize brightness and energy consumption. A switch located inside the fixture head enables selection between 24W, 19W, and 14W.
- 24W: Максимальная яркость.
- 19W: Medium brightness, reduced energy use.
- 14W: Lower brightness, maximum energy savings.
Для настройки: Disconnect power. Open the fixture head. Locate the wattage selection switch and move it to the desired setting. Close the fixture head and restore power.
5.2. Выбираемая цветовая температура (ЦТ)
The fixture offers three color temperature options to suit different aesthetic preferences and applications. A separate switch inside the fixture head allows selection between 3000K, 4000K, and 5000K.
- 3000К: Warm White, ideal for creating a cozy and inviting atmosphere.
- 4000К: Neutral White, suitable for general illumination and task lighting.
- 5000К: Cool White, provides bright, crisp light, often used for security or modern aesthetics.
Для настройки: Disconnect power. Open the fixture head. Locate the CCT selection switch and move it to the desired setting. Close the fixture head and restore power.

Figure 3: Visual representation of adjustable wattage and selectable CCT settings.
5.3. 0-10V Dimming
The B17 bollard light is compatible with 0-10V dimming systems. Connect the purple and gray dimming wires to a compatible 0-10V dimmer control. This allows for smooth adjustment of light output from 100% down to 10% (or lower, depending on dimmer specifications).
Ensure the dimmer is rated for LED loads and is compatible with 0-10V dimming protocols.
6. Техническое обслуживание
The B17 LED Bollard Light is designed for minimal maintenance due to its long LED lifespan of 50,000 hours.
- Уборка: Периодически очищайте внешнюю поверхность прибора мягкой тряпкой.amp Для удаления грязи и мусора используйте тряпку. Не используйте абразивные чистящие средства или растворители. Перед началом уборки убедитесь, что питание отключено.
- Инспекция: Annually inspect the fixture for any signs of damage, loose connections, or wear. Ensure all seals remain intact to maintain weather resistance.
- Замена светодиодов: LEDs are integrated and not user-replaceable. The long lifespan minimizes the need for replacement.

Figure 4: The B17 LED Bollard Light offers a long 50,000-hour operational lifespan.
7. Поиск Неисправностей
| Проблема | Возможная причина | Решение |
|---|---|---|
| Свет не включается. | Нет электропитания. Неплотное соединение проводки. Неправильный ватtage/CCT setting. | Проверьте автоматический выключатель. Убедитесь, что питание включено. Убедитесь в надежности всех проводных соединений (предварительно выключите питание). Подтвердите, чтоtage/CCT switches are set correctly. |
| Свет неожиданно мерцает или тускнеет. | Несовместимый диммер. Loose dimming wire connection. Томtagе колебания. | Ensure 0-10V dimmer is compatible with LED loads. Check purple and gray dimming wire connections. Обратитесь к электрику для проверки стабильности электропитания. |
| Световой поток слишком низкий/высокий. | Неправильный ватtagнастройка e. | Отрегулируйте ватtage selection switch inside the fixture head (power off first). |
| Светлый цвет нежелателен. | Incorrect CCT setting. | Adjust the CCT selection switch inside the fixture head (power off first). |
8. Технические характеристики
| Особенность | Деталь |
|---|---|
| Название модели | Б17 |
| Бренд | RAB Освещение |
| Ватtage | Field-Adjustable: 24W / 19W / 14W |
| Цветовая температура (ЦТ) | Selectable: 3000K / 4000K / 5000K |
| Затемнение | 0–10 В с регулируемой яркостью |
| Продолжительность жизни | 50,000 часа |
| Материал | Metal body, Glass shade |
| Экологический рейтинг | UL Listed for Wet Locations |
| Включенные компоненты | Переключатель включения-выключения |
| СКП | 192552028424 |
| ASIN | B0DY2FPPNS |
9. Гарантия и поддержка
For warranty information and technical support, please contact RAB Lighting directly. Refer to the official RAB Lighting webКонкретные условия гарантии и контактную информацию см. на сайте или в документации о покупке.
RAB Lighting Contact: www.rablighting.com


