1. Введение
Спасибо за покупкуasing the VASAGLE Custos Collection LBC401K01 Bookcase. This manual provides detailed instructions for the safe assembly, operation, and maintenance of your new furniture. Please read all instructions carefully before beginning assembly and retain this manual for future reference.
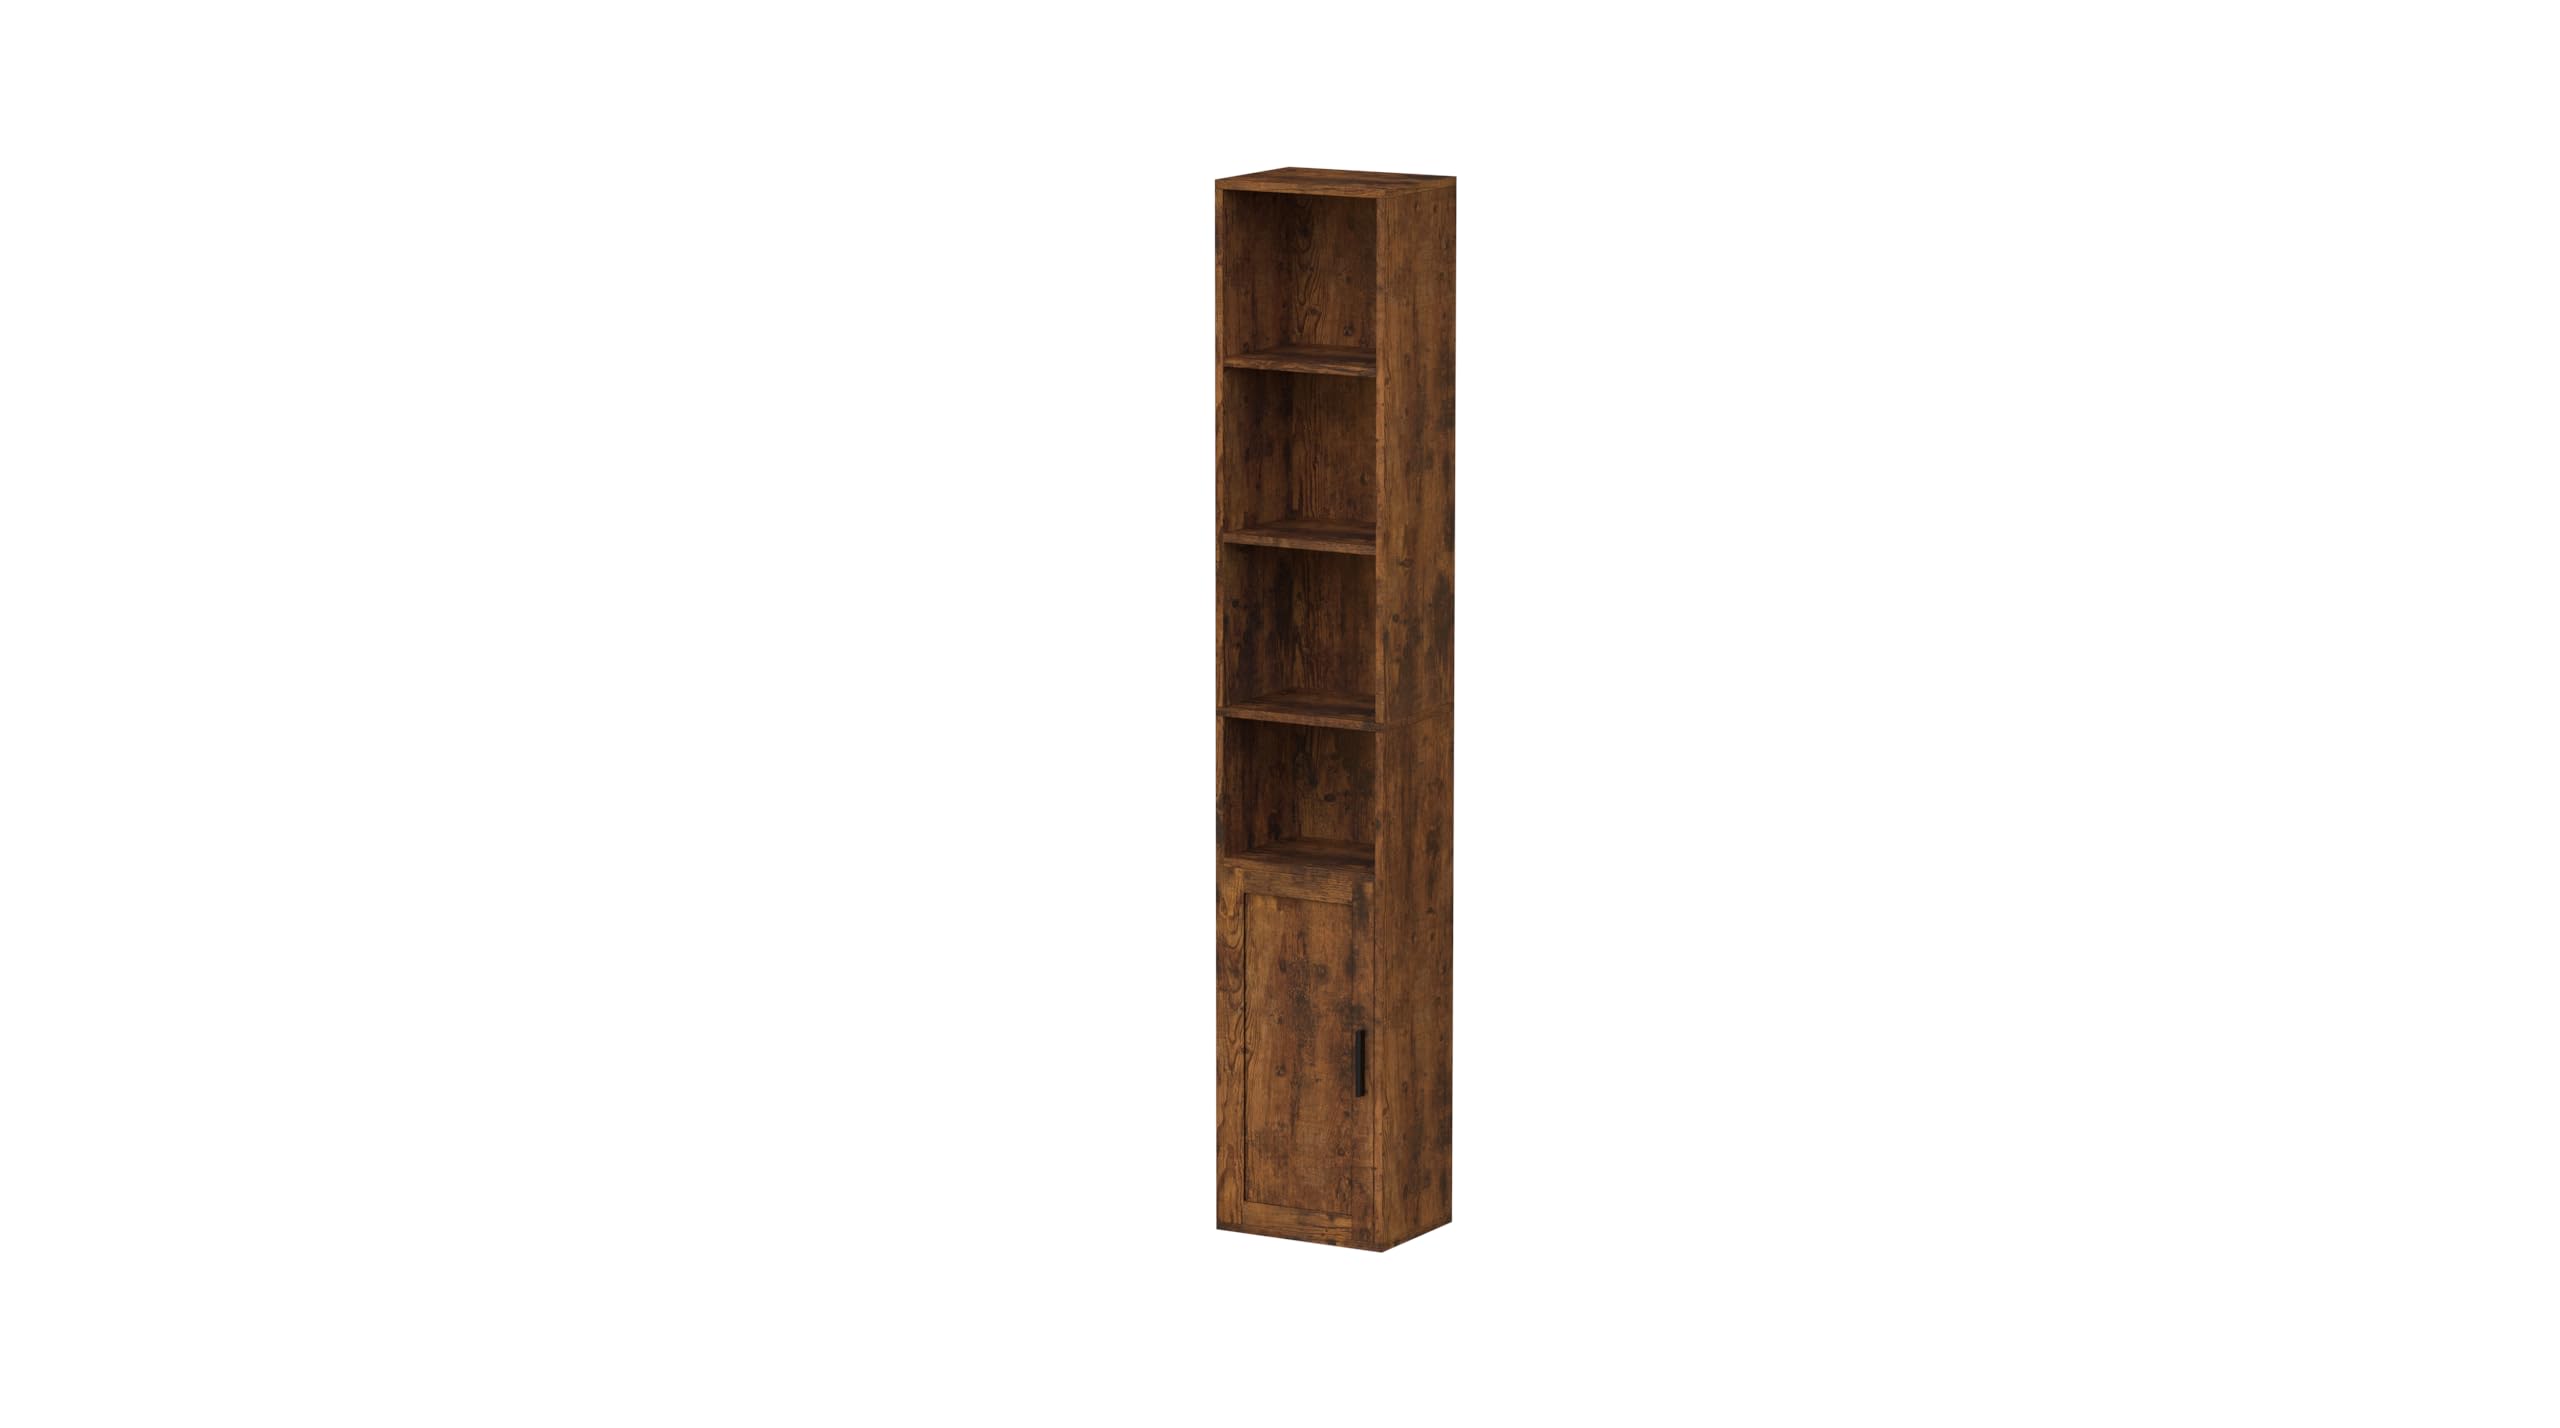
Image 1.1: The VASAGLE Custos Collection LBC401K01 Bookcase, featuring a rustic brown finish, six tiers, and a lower cabinet door.
2. Инструкции по технике безопасности
Для обеспечения безопасного использования данного продукта, пожалуйста, соблюдайте следующие правила:
- Прочтите все инструкции: Перед сборкой и использованием внимательно прочтите и усвойте все инструкции, приведенные в данном руководстве.
- Держите детей и домашних животных подальше: During assembly, keep children and pets away from the work area. Small parts can be a choking hazard.
- Assemble on a clean, flat surface: Assemble the unit on a soft, clean, and flat surface to prevent scratches and damage.
- Используйте правильные инструменты: Ensure you have all necessary tools as specified in the assembly section.
- Не затягивайте винты слишком сильно: Чрезмерное затягивание винтов может повредить материал. Затягивайте до плотного прилегания.
- Install anti-tip kit: Always install the included anti-tip kit to prevent the unit from tipping over, especially in households with children.
- Распределите вес равномерно: Не перегружайте полки. Равномерно распределяйте вес для обеспечения устойчивости.
- Do not climb or stand on the unit: This unit is not designed for climbing or standing.
- Регулярно проверяйте крепежные элементы: Периодически проверяйте все крепежные детали и убедитесь, что они надежно затянуты.
3. Содержимое упаковки
Перед сборкой убедитесь, что все перечисленные ниже детали присутствуют и не повреждены. Если какие-либо детали отсутствуют или повреждены, не продолжайте сборку. Обратитесь в службу поддержки клиентов за помощью.
- Боковые панели (левая и правая)
- Задние панели
- Стационарные полки
- Регулируемые полки
- Нижняя панель
- Верхняя панель
- Дверная панель
- Hardware Pack (screws, dowels, cam locks, hinges, shelf pins, anti-tip kit)
- Инструмент для сборки (например, шестигранный ключ)
Note: The exact number and type of fasteners are detailed in the included hardware pack diagram.
4. Инструкция по сборке (настройке)
Внимательно следуйте этим шагам для правильной сборки. Для выполнения некоторых этапов рекомендуется помощь двух человек.
- Шаг 1: Подготовьте компоненты
Unpack all components and lay them out on a clean, soft surface. Identify each part by its label (if provided) and cross-reference with the parts list. Separate all hardware into individual groups.
Image 4.1: Illustration showing all components laid out and identified.
- Шаг 2: Соберите базовую раму
Attach the bottom panel to the side panels using the specified fasteners (e.g., cam locks and dowels). Ensure the grooves for the back panel are facing the correct direction.
Image 4.2: Diagram illustrating the connection of the bottom panel to the side panels.
- Step 3: Install Fixed Shelves
Insert the fixed shelves into the pre-drilled holes in the side panels. Secure them with the appropriate fasteners. Ensure all connections are snug.
Image 4.3: Visual guide for installing fixed shelves into the main frame.
- Step 4: Attach Back Panels
Slide the back panels into the grooves on the rear of the unit. Secure them with small nails or screws as indicated in the hardware pack. Ensure the unit is square before securing.
Image 4.4: Step-by-step image showing how to slide and secure the back panels.
- Step 5: Install the Top Panel
Place the top panel onto the assembled frame and secure it using the designated fasteners. Ensure it aligns perfectly with the side panels.
Image 4.5: Illustration of attaching the top panel to complete the main structure.
- Шаг 6: Установите дверь
Attach the hinges to the door panel and then to the designated side panel of the bookcase. Adjust the hinges as needed to ensure the door opens and closes smoothly and aligns correctly.
Image 4.6: Detailed diagram for hinge and door installation, including adjustment points.
- Шаг 7: Установка регулируемых полок
Insert the shelf pins into the desired holes for the adjustable shelves. Place the adjustable shelves onto these pins. The 1st, 4th, and 5th shelves are adjustable up to 3cm up and down.
Image 4.7: Visual guide for placing shelf pins and adjustable shelves.
- Шаг 8: Установите комплект защиты от опрокидывания.
Secure the anti-tip kit to the top rear of the bookcase and to a wall stud using the provided hardware. This step is crucial for safety and must not be skipped.
Image 4.8: Diagram showing proper installation of the anti-tip kit to the wall.
5. Инструкция по эксплуатации
This bookcase is designed for storing books, decorative items, and other household goods. The lower cabinet provides discreet storage.
- Загрузка полок: Place items on shelves, distributing weight evenly. Avoid placing heavy items exclusively on one side or on the very edge of a shelf.
- Регулировка полок: To adjust the height of the adjustable shelves, carefully remove all items from the shelf, lift the shelf, remove the shelf pins, reposition the pins to the desired height, and then replace the shelf. Ensure all four pins are securely in place before reloading the shelf.
- Работа двери: The lower door opens and closes manually. Avoid forcing the door if it feels stiff; check hinges for alignment.
6. Техническое обслуживание
Proper maintenance will extend the life of your bookcase.
- Уборка: Протрите поверхности мягкой, damp Используйте ткань. Избегайте агрессивных химикатов или абразивных чистящих средств, которые могут повредить покрытие. Немедленно вытрите насухо чистой тканью.
- Удаление пыли: Регулярно протирайте пыль сухой мягкой тканью.
- Проверка крепежа: Periodically (e.g., every 6 months) check all screws, bolts, and cam locks to ensure they are tight. Retighten if necessary, but do not overtighten.
- Avoid Direct Sunlight and Moisture: Prolonged exposure to direct sunlight or excessive moisture can cause fading, warping, or damage to the material.
7. Поиск Неисправностей
If you encounter issues with your bookcase, refer to the following common problems and solutions:
| Проблема | Возможная причина | Решение |
|---|---|---|
| Bookcase is wobbly or unstable. | Ослабленные крепежные элементы; неровный пол; комплект защиты от опрокидывания не установлен. | Ensure all screws and cam locks are tightened. Place shims under legs if floor is uneven. Install the anti-tip kit securely to a wall stud. |
| Дверь не закрывается должным образом или смещена. | Петли ослаблены или неправильно отрегулированы. | Tighten hinge screws. Adjust hinge screws to align the door. Refer to hinge adjustment instructions if available. |
| Shelves sag or appear weak. | Перегруженная полка; неравномерное распределение веса. | Reduce weight on the shelf. Distribute items more evenly. Ensure shelf pins are fully inserted. |
8. Технические характеристики
- Модель: LBC401K01
- Бренд: ВАСАГЛ
- Размеры продукта: 9.45 x 12.52 x 68.9 дюйма (24 x 31.8 x 175 см)
- Вес товара: 35 фунта (15.9 килограмма)
- Материал: Chipboard and MDF board
- Цвет: Коричневый деревенский
- Количество ярусов: 6 (including lower cabinet)
- Регулируемые полки: 1st, 4th, and 5th shelves (adjustable up to 3cm up/down)
- Вес одной полки: До 10 кг (22 фунтов)
- Требуется сборка: Да
9. Гарантия и поддержка
For warranty information or technical support, please refer to the documentation included with your purchase or contact VASAGLE customer service. Ensure you have your model number (LBC401K01) and proof of purchase available when contacting support.