1. Введение
This manual provides detailed instructions for the installation, operation, and maintenance of your TOWODE 4CH 5MP Hybrid 5-in-1 DVR Security Camera System. Please read this manual thoroughly before using the product to ensure proper setup and functionality. This system is designed to provide comprehensive surveillance for your property.
2. Информация по технике безопасности
- Убедитесь, что все силовые соединения надежно закреплены и соответствуют номинальным параметрам устройства.
- Do not expose the DVR to liquids or extreme temperatures.
- Обращайтесь с жестким диском бережно, чтобы предотвратить потерю или повреждение данных.
- Если вы не уверены в своих знаниях об электропроводке, установку следует выполнять квалифицированным персоналом.
- Keep cameras and cables out of reach of children.
- Используйте только одобренные производителем аксессуары и адаптеры питания.
3. Содержимое упаковки
Убедитесь, что все перечисленные ниже предметы включены в ваш пакет:
- 1x 4-канальный видеорегистратор
- 2x 5MP HD Cameras
- 1 жесткий диск 1 ТБ (предустановлен)
- 2x 15 meters integrated line (Video/Power cables)
- 2x 12V2A power supply
4. Продукт закончилсяview
The TOWODE 4CH 5MP Hybrid 5-in-1 DVR Security Camera System provides robust surveillance capabilities with high-definition video recording and advanced features.
4.1 Компоненты системы

This image displays the main components of the security system: the 4-channel DVR unit, two 5MP bullet-style security cameras, and an icon representing the pre-installed 1TB hard drive. The DVR features various input/output ports on its rear panel, including video inputs, audio inputs/outputs, VGA, HDMI, USB, and network ports.
4.2 DVR Rear Panel and Camera Connections

Это изображение обеспечивает детальное представление view of the DVR's rear panel, highlighting various connection ports such as BNC video inputs (VIDEO IN), audio input/output (AUDIO IN/OUT), VGA, HD-port (HDMI), USB, network (NET), and DC 12V power input. The image also shows a 5MP camera with its power and video output cables, indicating its IP66 weatherproof rating, 3.6mm lens, and up to 80 ft IR night vision capability.
5. Настройка
5.1 физическое соединение
- Подключить камеры: Connect the BNC video cable from each 5MP camera to the 'VIDEO IN' ports on the rear of the DVR. Connect the camera's power cable to the provided 12V power supply.
- Подключить монитор: Connect a monitor to the DVR using either the 'HD-port' (HDMI) or 'VGA' port.
- Подключить мышь: Plug the USB mouse into one of the 'USB' ports on the DVR.
- Сетевое подключение (необязательно): Для удаленного viewing, connect an Ethernet cable from the 'NET' port on the DVR to your router.
- Включение питания: Connect the DVR's power adapter to the 'DC 12V' input and then to a power outlet. The system will power on automatically.
5.2 Начальная конфигурация
Upon first boot, the system will guide you through an initial setup wizard. This typically includes:
- Установка пароля администратора.
- Настройка параметров даты и времени.
- Настройки сети (DHCP или статический IP).
- Инициализация жесткого диска (при необходимости).
6. Инструкция по эксплуатации
6.1 Режимы записи
Видеорегистратор поддерживает различные режимы записи:
- Непрерывная запись 24/7: The system records continuously. This mode ensures no moment is missed.
- Запись при обнаружении движения: Recording starts only when motion is detected, saving storage space.
- Запланированная запись: Установите конкретное время для записи.

This image illustrates the 24/7 non-stop recording feature, showing a monitor displaying a 4-channel live view from various surveillance points, including a home, a warehouse, and a family playing. The DVR unit is visible below the monitor, emphasizing continuous security coverage.
6.2 Удаленный доступ
You can access your security system remotely via mobile app or PC software.
- Мобильное приложение: Download the recommended app (e.g., XMeye) from your smartphone's app store. Register an account, add your DVR by scanning the QR code or entering its ID, and view live feeds or playback.
- Программное обеспечение для ПК: Install the VMS software on your computer. Add the DVR using its IP address or cloud ID for remote monitoring.
6.3 Воспроизведение
Чтобы повторноview записано фуtage:
- Access the 'Playback' menu on the DVR interface.
- Select the desired date and camera channel.
- Use the timeline to navigate and play back recordings.

This image illustrates the 'Advanced Smart Playback' feature, showing a timeline at the bottom with markers indicating recorded events. Above the timeline, various snapshots from different times are displayed, such as a person entering a door, a family walking, and a delivery. This feature allows users to quickly review конкретные моменты.
6.4 Интеллектуальная система сигнализации
The system features intelligent human detection and alarm functions:

This image demonstrates the AI Motion Face Detection feature. It shows a smartphone displaying a live video feed with a 'Motion Detection Alarm' notification from the XMeye app. In the background, two individuals are highlighted with detection boxes, indicating that the system has identified human presence and triggered an alert, which can be pushed to the app or sent via email.
When human motion is detected, the system can:
- Запустить тревогу.
- Отправляйте push-уведомления на свой мобильный телефон.
- Отправлять уведомления по электронной почте.
7. Расширенные функции
7.1 5-in-1 Hybrid DVR Compatibility
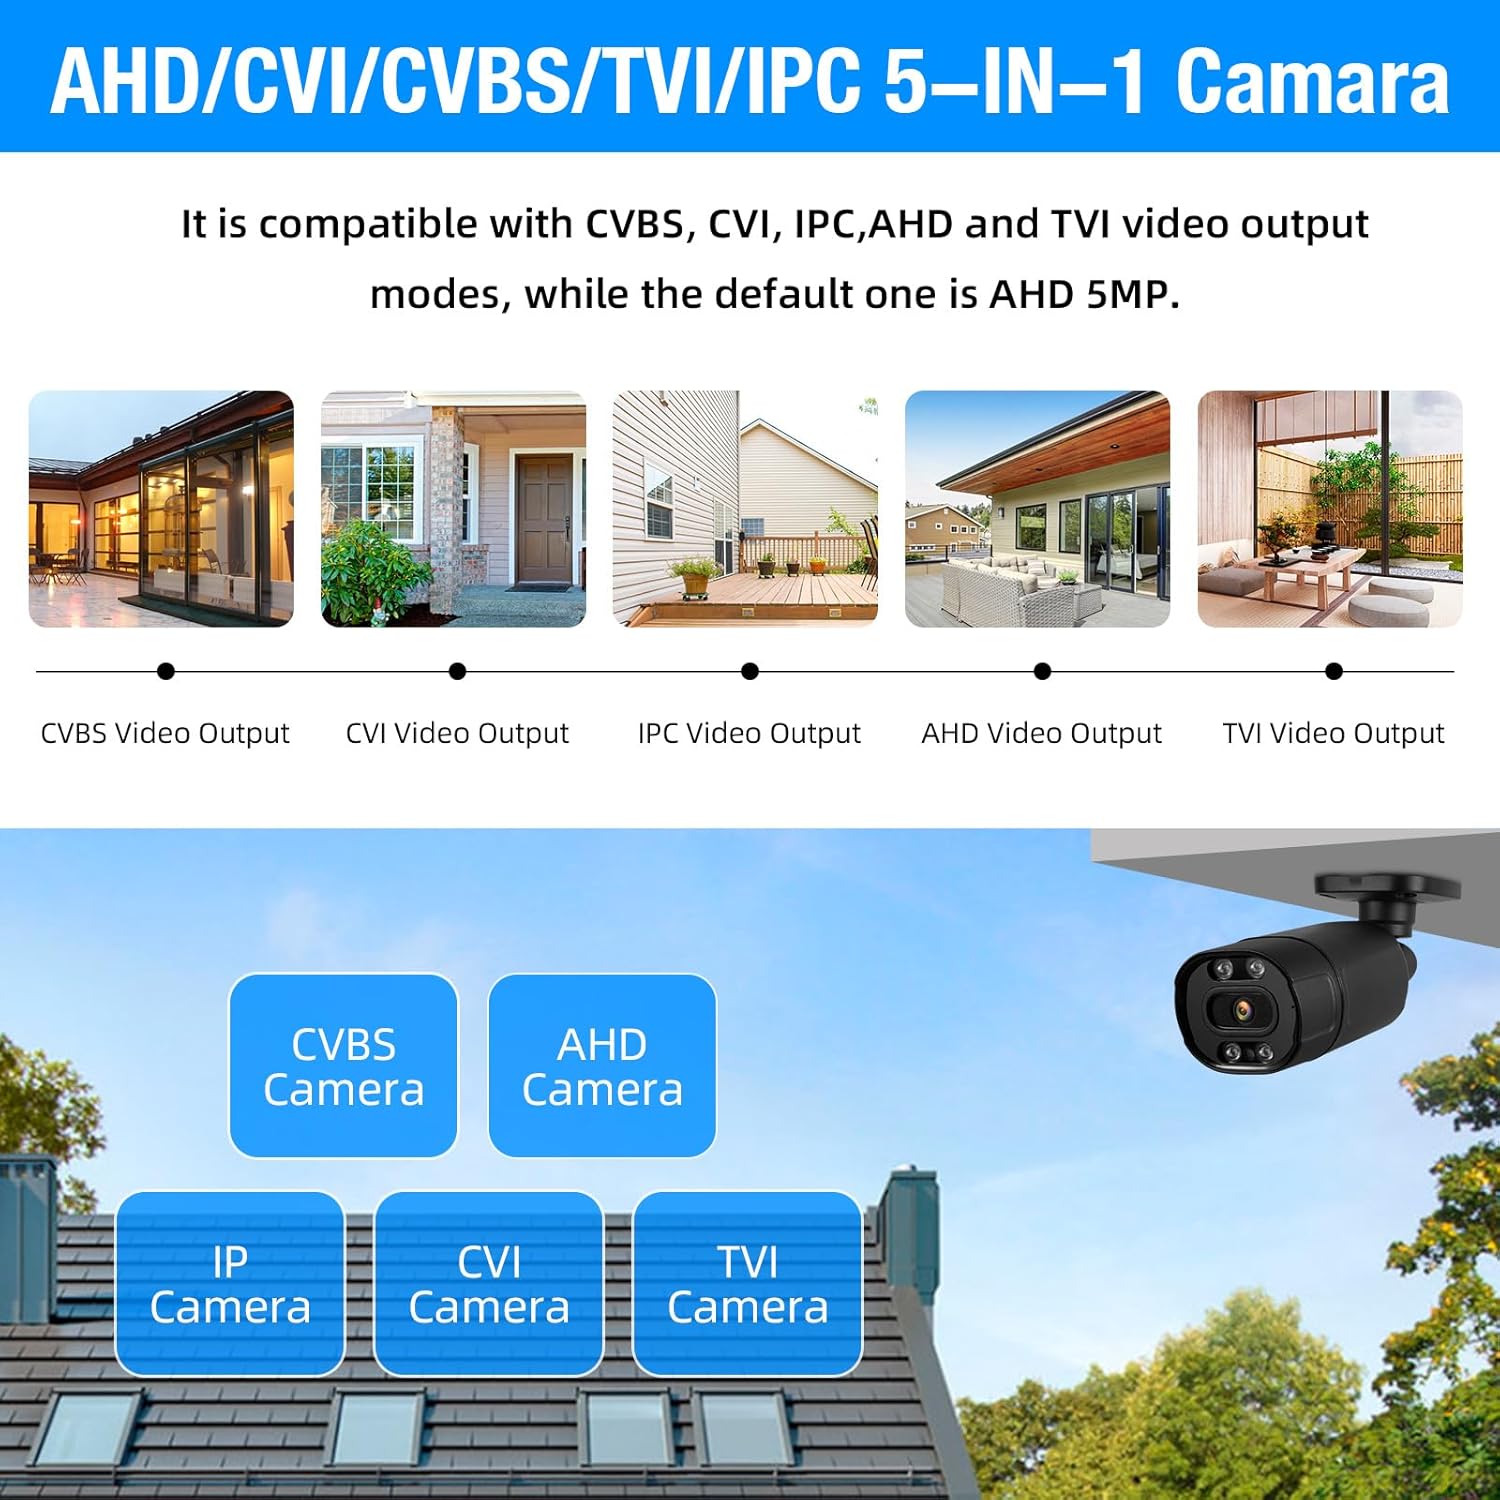
This image highlights the 5-in-1 Hybrid DVR's compatibility with multiple video output modes: CVBS, CVI, IPC (IP Camera), AHD, and TVI. It visually represents different camera types (CVBS, AHD, IP, CVI, TVI) that can be connected to the DVR, demonstrating its versatility. The default mode is AHD 5MP.
The DVR supports AHD/TVI/CVI/CVBS/IP camera 5-in-1 access mode, allowing flexibility in camera selection and integration with existing systems.
7.2 IP66 Weatherproof Cameras

This image showcases the IP66 Weatherproof and Dustproof rating of the security camera. It depicts a camera being hit by rain, with icons indicating its ability to withstand hot temperatures (up to 131°F/55°C) and cold temperatures (down to 14°F/-10°C), ensuring reliable outdoor performance in various weather conditions.
The included cameras are constructed from high-quality metal aluminum material with an IP66 rating, making them suitable for both indoor and outdoor use in various weather conditions.
7.3 H.265+ Efficient Video Compression

This image compares H.265+ and H.264 video compression technologies. It highlights that H.265+ offers smoother viewing and reduced memory space. Bar graphs illustrate that H.265+ provides 100% fluency and 100% storage space efficiency compared to H.264, which shows reduced fluency and higher storage consumption, demonstrating the superior efficiency of H.265+.
The DVR utilizes advanced H.265+ video compression technology, which significantly improves the compression ratio compared to H.264. This results in longer recording times and up to 80% storage savings, while maintaining high image quality and providing a smooth viewопыт.
7.4 Расширяемое хранилище

This image shows the DVR unit with a visual representation of a pre-installed 1TB HDD. Text overlays indicate 'Expandable Capacity' and 'Worry-Free Backup,' along with 'Up to 14TB External HDD,' signifying that the system's storage can be significantly expanded beyond the initial 1TB.
The system comes with a pre-installed 1TB hard drive. For extended recording needs, the DVR supports expandable storage up to 14TB via an external HDD.
8. Техническое обслуживание
8.1 Очистка
- Камеры: Periodically clean camera lenses with a soft, dry cloth to ensure clear image quality. For outdoor cameras, remove any dirt or debris from the housing.
- DVR: Keep the DVR free from dust. Use a soft brush or compressed air to clean ventilation openings. Do not use liquid cleaners directly on the unit.
8.2 Управление жестким диском
- The 1TB HDD is pre-installed and configured for continuous recording, overwriting the oldest footagе когда заполнено.
- Регулярно делайте резервные копии важных файлов.tage to an external storage device (e.g., USB drive) if needed.
- Check the hard drive status in the DVR's system settings periodically to ensure proper functioning.
9. Поиск Неисправностей
9.1 Отсутствие видеовыхода на мониторе
- Проверьте, включен ли видеорегистратор.
- Verify that the monitor is powered on and set to the correct input source (HDMI/VGA).
- Убедитесь, что кабель HDMI/VGA надежно подключен как к видеорегистратору, так и к монитору.
9.2 Cameras Not Displaying Image
- Check if the camera's power adapter is connected and receiving power.
- Ensure the BNC video cable is securely connected to both the camera and the DVR.
- Verify the camera type is compatible with the DVR's current channel settings (AHD, TVI, CVI, CVBS, IP).
9.3 Удаленный доступ не работает
- Убедитесь, что видеорегистратор подключен к интернету через кабель Ethernet.
- Проверьте подключение вашего роутера к Интернету.
- Verify network settings on the DVR (DHCP enabled or correct static IP).
- Confirm that the mobile app or PC software is correctly configured with the DVR's ID/IP address.
9.4 Жесткий диск не записывает
- Check the hard drive status in the DVR's system settings. It may need to be initialized or formatted.
- Ensure recording schedules are properly set up.
- Verify that motion detection settings are correctly configured if using that mode.
10. Технические характеристики
| Особенность | Деталь |
|---|---|
| Бренд | ТОУОД |
| Номер модели | А6504Л2 |
| Технология связи | Проводной |
| Разрешение видеозахвата | 1944p (5 МП) |
| Особые возможности | Управление через приложение, запись звука, обнаружение человека, датчик движения. |
| Количество каналов | 4 |
| Емкость памяти | 1 ТБ (предустановлено) |
| Источник питания | Проводной электрический |
| Размеры изделия (Д x Ш x В) | 9.84 x 7.87 x 1.96 дюйма |
| Совместимые устройства | Фотоаппараты, персональные компьютеры, смартфоны, планшеты |
| Диапазон ночного видения | 80 футов |
| Частота кадров | 25 кадров в секунду |
| Режим записи | Непрерывный, обнаружение движения |
| Тип объектива | Фиксированный (3.6 мм) |
| Видеовход | BNC (AHD/TVI/CVI/CVBS/IP 5-in-1) |
| Вес товара | 7.3 фунта |
| Всепогодный рейтинг | IP66 |
11. Гарантия и поддержка
For technical support, troubleshooting assistance, or warranty inquiries, please refer to the contact information provided with your product packaging or visit the official TOWODE webСохраните чек о покупке в качестве подтверждения покупки для предъявления гарантийных претензий.


