Введение
This manual provides detailed instructions for the assembly, operation, maintenance, and troubleshooting of your VASAGLE 7-Tier Vertical Shoe Rack, Model ULBS200L01. Please read this manual thoroughly before assembly and use to ensure safe and correct operation.
Правила техники безопасности
To prevent injury or damage to the product, please adhere to the following safety instructions:
- Комплект защиты от опрокидывания: Always secure the shoe rack to the wall using the provided anti-tip kit. This prevents accidental tipping, especially in households with children or pets.
- Ограничения по весу: Do not exceed the maximum static load of 22 lb (10 kg) per shelf. Each hook has a maximum static load of 11 lb (5 kg). Overloading can compromise stability and cause damage.
- Сборка: Ensure all components are correctly assembled and tightened according to the instructions. Do not use power tools at high torque settings, as this may damage the particleboard.
- Размещение: Place the shoe rack on a flat, stable surface. Avoid placing it in areas with high humidity or direct sunlight to prevent material degradation.
- Дети: Во время сборки держите мелкие детали и упаковочные материалы в недоступном для детей месте.
Содержимое упаковки
Перед началом сборки убедитесь, что все компоненты присутствуют:
- 1 x Shoe Rack (Disassembled components)
- 1 комплект аксессуаров (крепежные элементы, винты и т. д.)
- 1 комплект для предотвращения опрокидывания (настенные дюбели, ремни)
- 1 инструкции (данное руководство)
Инструкция по сборке
Follow these steps to assemble your 7-Tier Vertical Shoe Rack. It is recommended to assemble the unit on a soft, clean surface to prevent scratches.
- Определите компоненты: Lay out all parts and hardware. Refer to the included parts list to identify each piece.
- Соберите боковые панели: Attach the horizontal shelves to the main vertical side panels using the provided screws and cam locks. Ensure the shelves are oriented correctly, with the raised back edge facing upwards.
- Secure Back Panels: Install the small back panels to prevent shoes from falling backward.
- Прикрепить верхнюю панель: Secure the top shelf to the assembled structure.
- Установить хуки: The two accessory hooks can be installed on either the left or right side of the top section, as preferred. Use the designated pre-drilled holes.
- Установка комплекта защиты от опрокидывания: For safety, attach the anti-tip kit to the top rear of the shoe rack and secure it to a wall stud or appropriate wall anchor point.
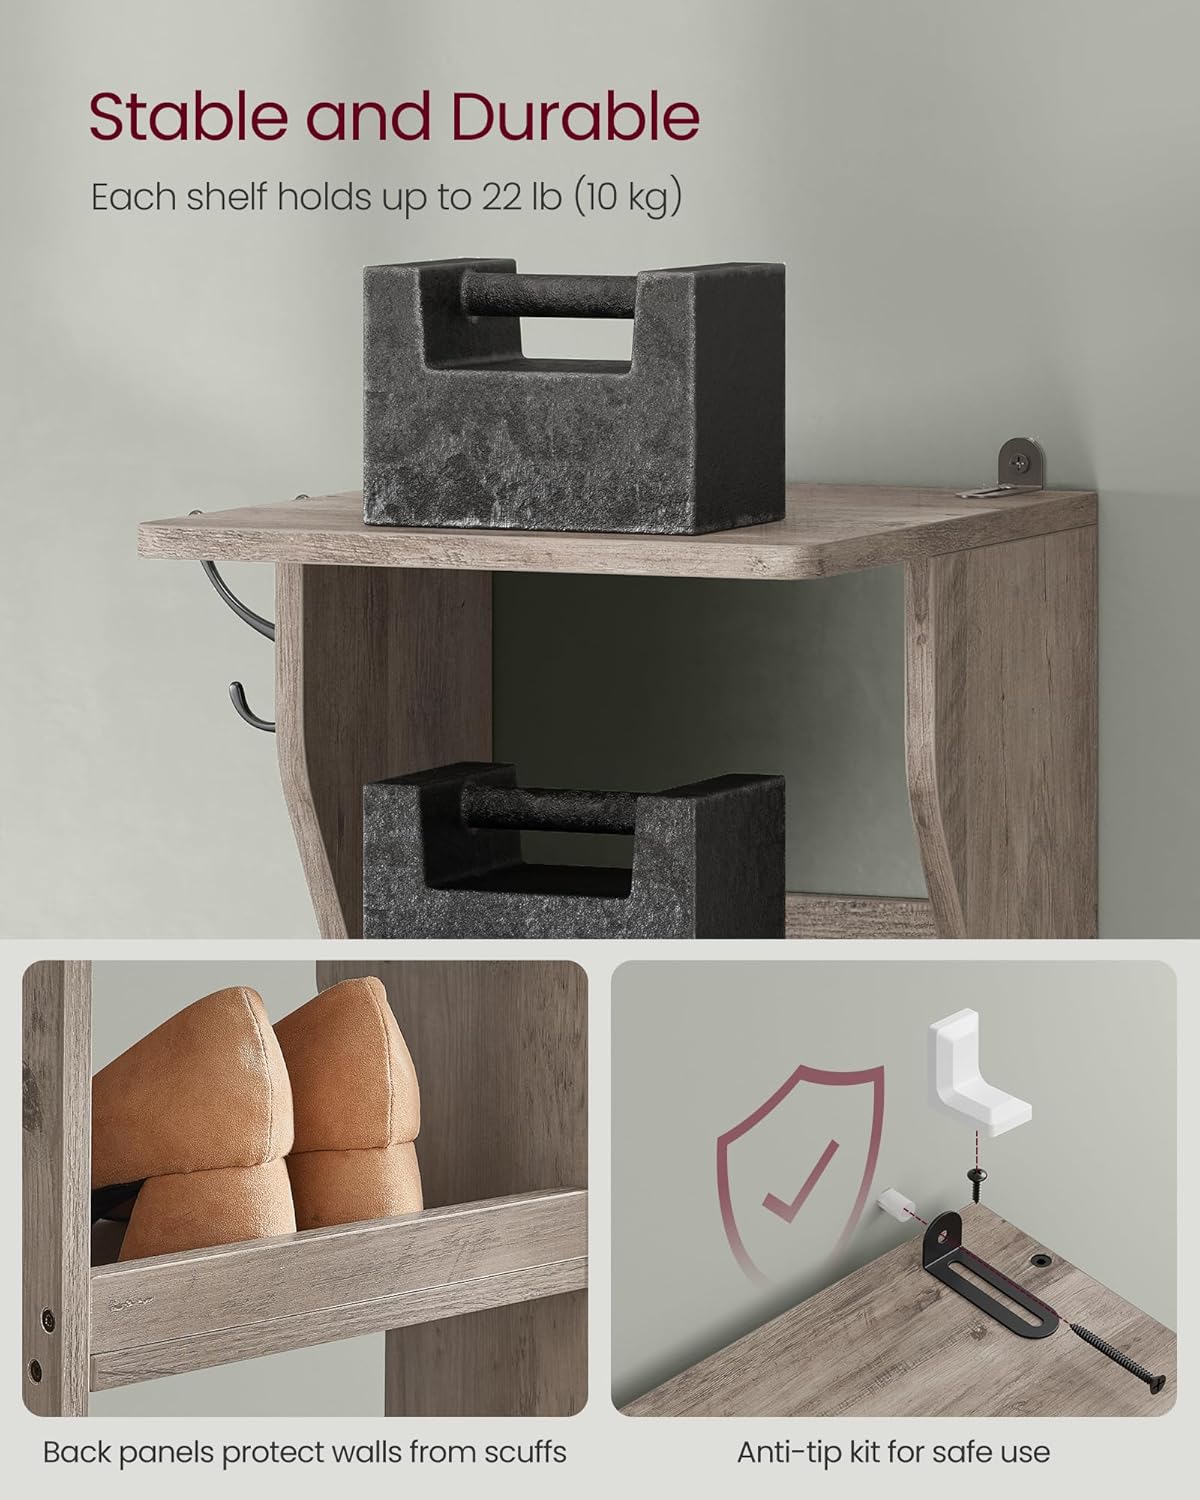
Image: Detail of the anti-tip kit and back panel design for stability.

Image: Close-up of the two extra hooks, which can be installed on either side for small accessories.
Инструкция по эксплуатации
Using your VASAGLE 7-Tier Vertical Shoe Rack is straightforward:
- Правильное расположение обуви: Place shoes on each of the seven tiers. The design allows for easy access and visibility of your footwear.
- Tall Footwear: The 6.7-inch (17 cm) distance between shelves accommodates various shoe types, including loafers, sneakers, and some boots.
- Крючки для аксессуаров: Utilize the side hooks for hanging items such as keys, small bags, scarves, or umbrellas.
- Использование пространства: The slim, vertical design is optimized for small spaces like entryways, bedrooms, or narrow corners.

Image: The VASAGLE 7-Tier Vertical Shoe Rack in an entryway setting, showcasing its storage capacity and design.

Image: The shoe rack efficiently placed in a small corner, highlighting its space-saving feature.

Image: Detail showing the ample 6.7-inch (17 cm) shelf height, suitable for various shoe types including high-tops.
Обслуживание
Правильный уход продлит срок службы вашей полки для обуви:
- Уборка: Протрите поверхности рекламойamp Ткань. Избегайте использования едких химикатов и абразивных чистящих средств, которые могут повредить покрытие.
- Разливы: Пролитую жидкость следует немедленно вытирать, чтобы предотвратить появление пятен или повреждение ДСП водой.
- Инспекция: Периодически проверяйте затяжку всех винтов и соединений. При необходимости подтяните.
- Условия окружающей среды: Avoid prolonged exposure to direct sunlight or extreme temperature changes, which can cause warping or fading.
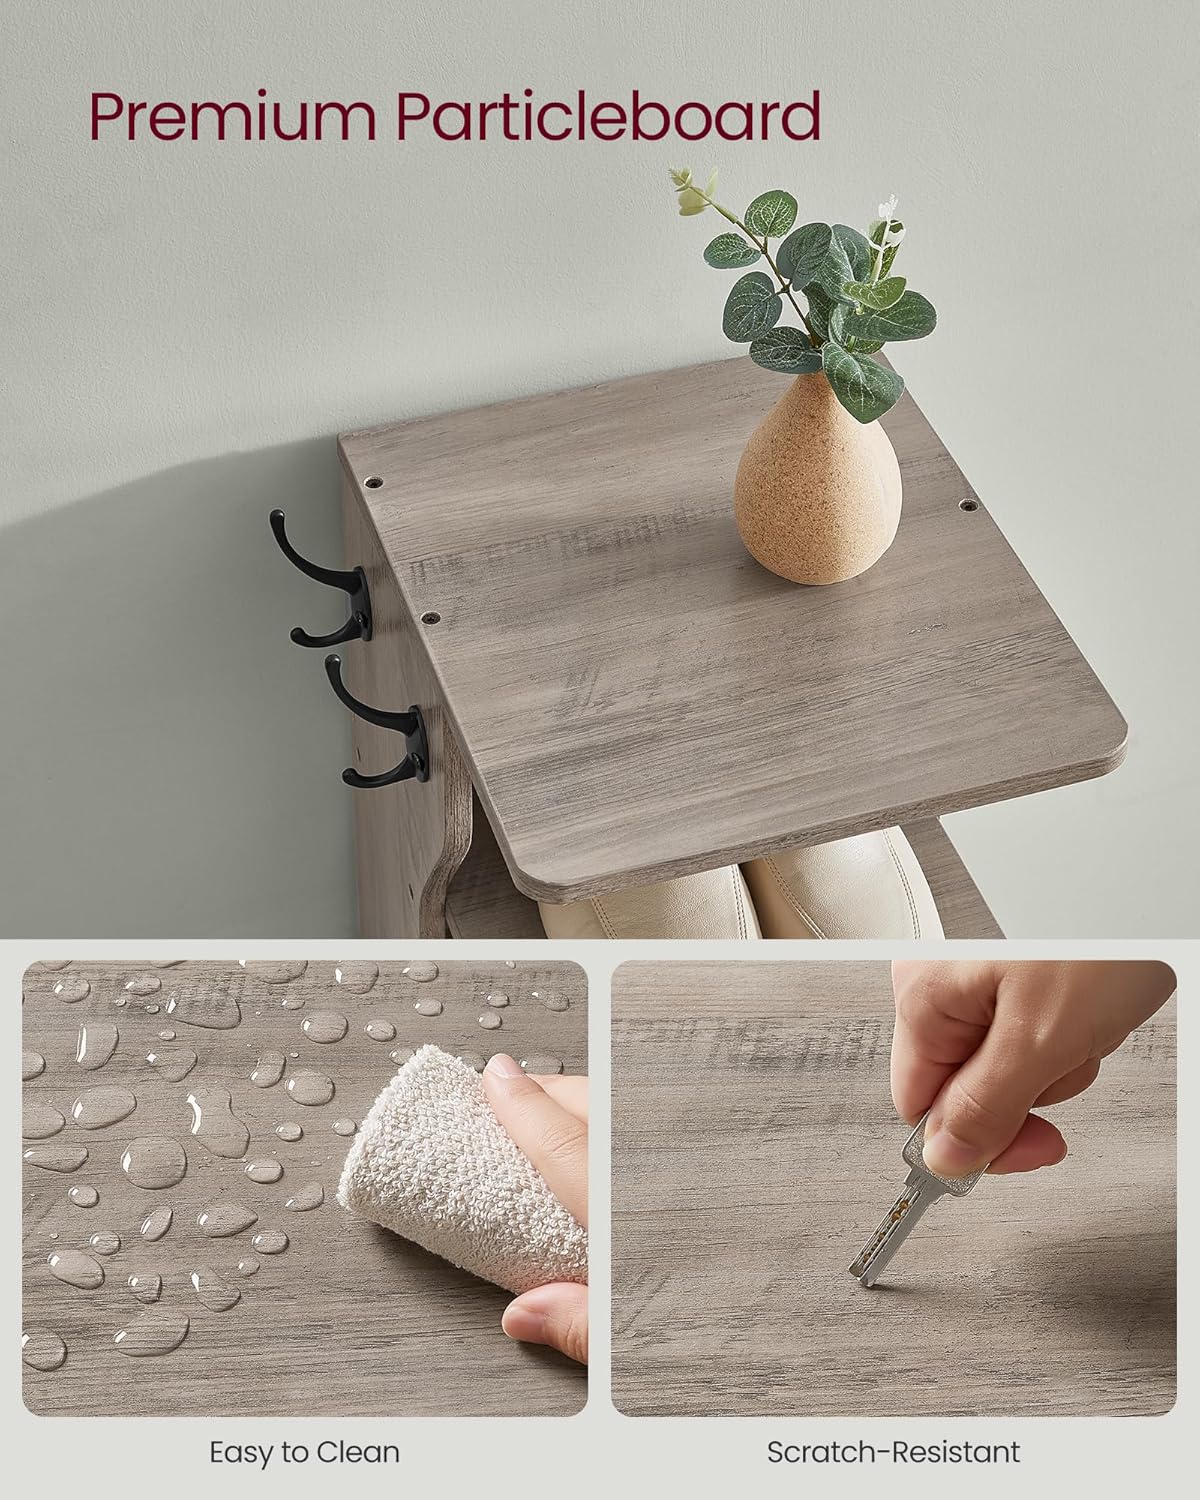
Image: Demonstrating the easy-to-clean and scratch-resistant surface of the premium particleboard.
Поиск неисправностей
Распространенные проблемы и их решения:
- Колебание/нестабильность:
- Убедитесь, что все винты полностью затянуты.
- Убедитесь, что устройство установлено на ровной поверхности.
- Confirm the anti-tip kit is correctly installed and secured to the wall.
- Shoes Sliding Off:
- Ensure the raised back edge of each shelf is facing upwards to act as a stopper.
- Отсутствующие детали:
- Double-check the packaging. If parts are still missing, contact customer support.
Технические характеристики
| Особенность | Деталь |
|---|---|
| Название модели | 7-Tier Vertical Shoe Rack |
| Номер модели | ULBS200L01 |
| Бренд | ВАСАГЛ |
| Размеры (Д x Ш x В) | 11.8"Г x 10.4"Ш x 43.5"В (30 см x 26.4 см x 110.4 см) |
| Количество полок | 7 |
| Shelf Thickness (Height between shelves) | 6.7 дюйма (17 см) |
| Материал | Древесностружечная плита (ДСП) |
| Цвет | Хизер Грейдж |
| Ограничение по весу на полке | 22 фунтов (10 кг) |
| Weight Limit per Hook | 11 фунтов (5 кг) |
| Вес товара | 17 фунтов (7.7 кг) |
| Требуется сборка | Да |
| Особые возможности | Durable, Easy Assembly, Space-Saving, Integrated Hooks, Anti-Tip Kit |

Image: Visual representation of the product dimensions and maximum weight capacities.
Гарантия и поддержка
For warranty information, product support, or to purchase replacement parts, please contact VASAGLE customer service. Refer to your purchase documentation for specific warranty terms and contact details.
Обслуживание клиентов: Please visit the official VASAGLE webсайт или обратитесь к контактной информации, предоставленной при покупке.