1. Введение
This manual provides detailed instructions for the assembly, operation, and maintenance of your Creality Ender 3 V3 SE 3D Printer. Please read this manual thoroughly before operating the printer to ensure proper usage and optimal performance.
1.1 Содержимое упаковки
The Creality Ender 3 V3 SE 3D Printer bundle includes:
- Creality Ender 3 V3 SE 3D Printer
- 2 Packs of 3D Printer Filament (Grey and Black)
- Necessary tools and accessories for assembly and operation
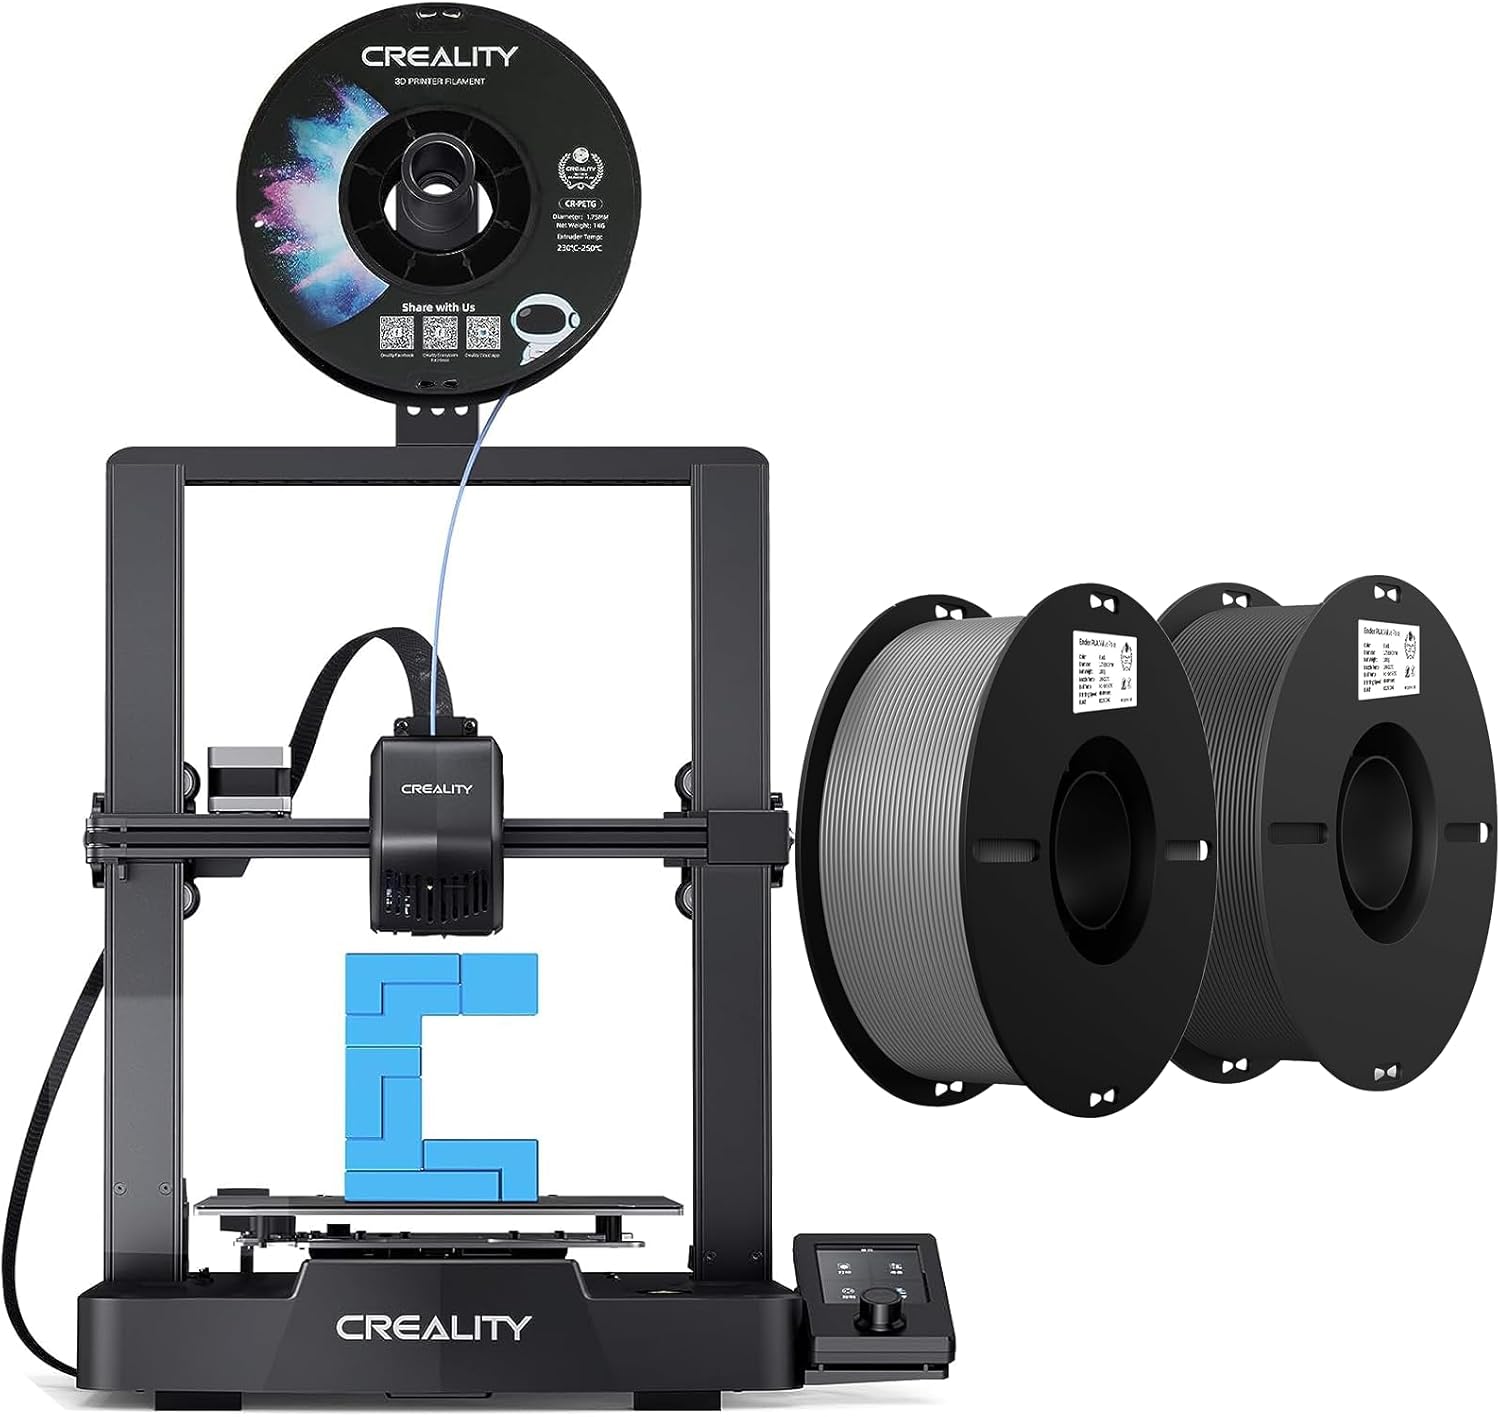
Рисунок 1.1: Creality Ender 3 V3 SE 3D Printer with included filament spools.
2. Настройка и сборка
The Ender 3 V3 SE 3D printer is designed for quick and straightforward assembly, typically completed in three main steps within approximately 20 minutes.
2.1 Первоначальная сборка
Follow the included quick start guide for the physical assembly of the printer components. This typically involves attaching the gantry to the base and connecting necessary cables.
2.2 Автоматическое выравнивание
The printer features an automatic leveling system using a CR Touch sensor for multi-point bed leveling and a strain sensor for auto Z-offset. This eliminates the need for manual calibration cards or knob adjustments, ensuring a precise first layer.
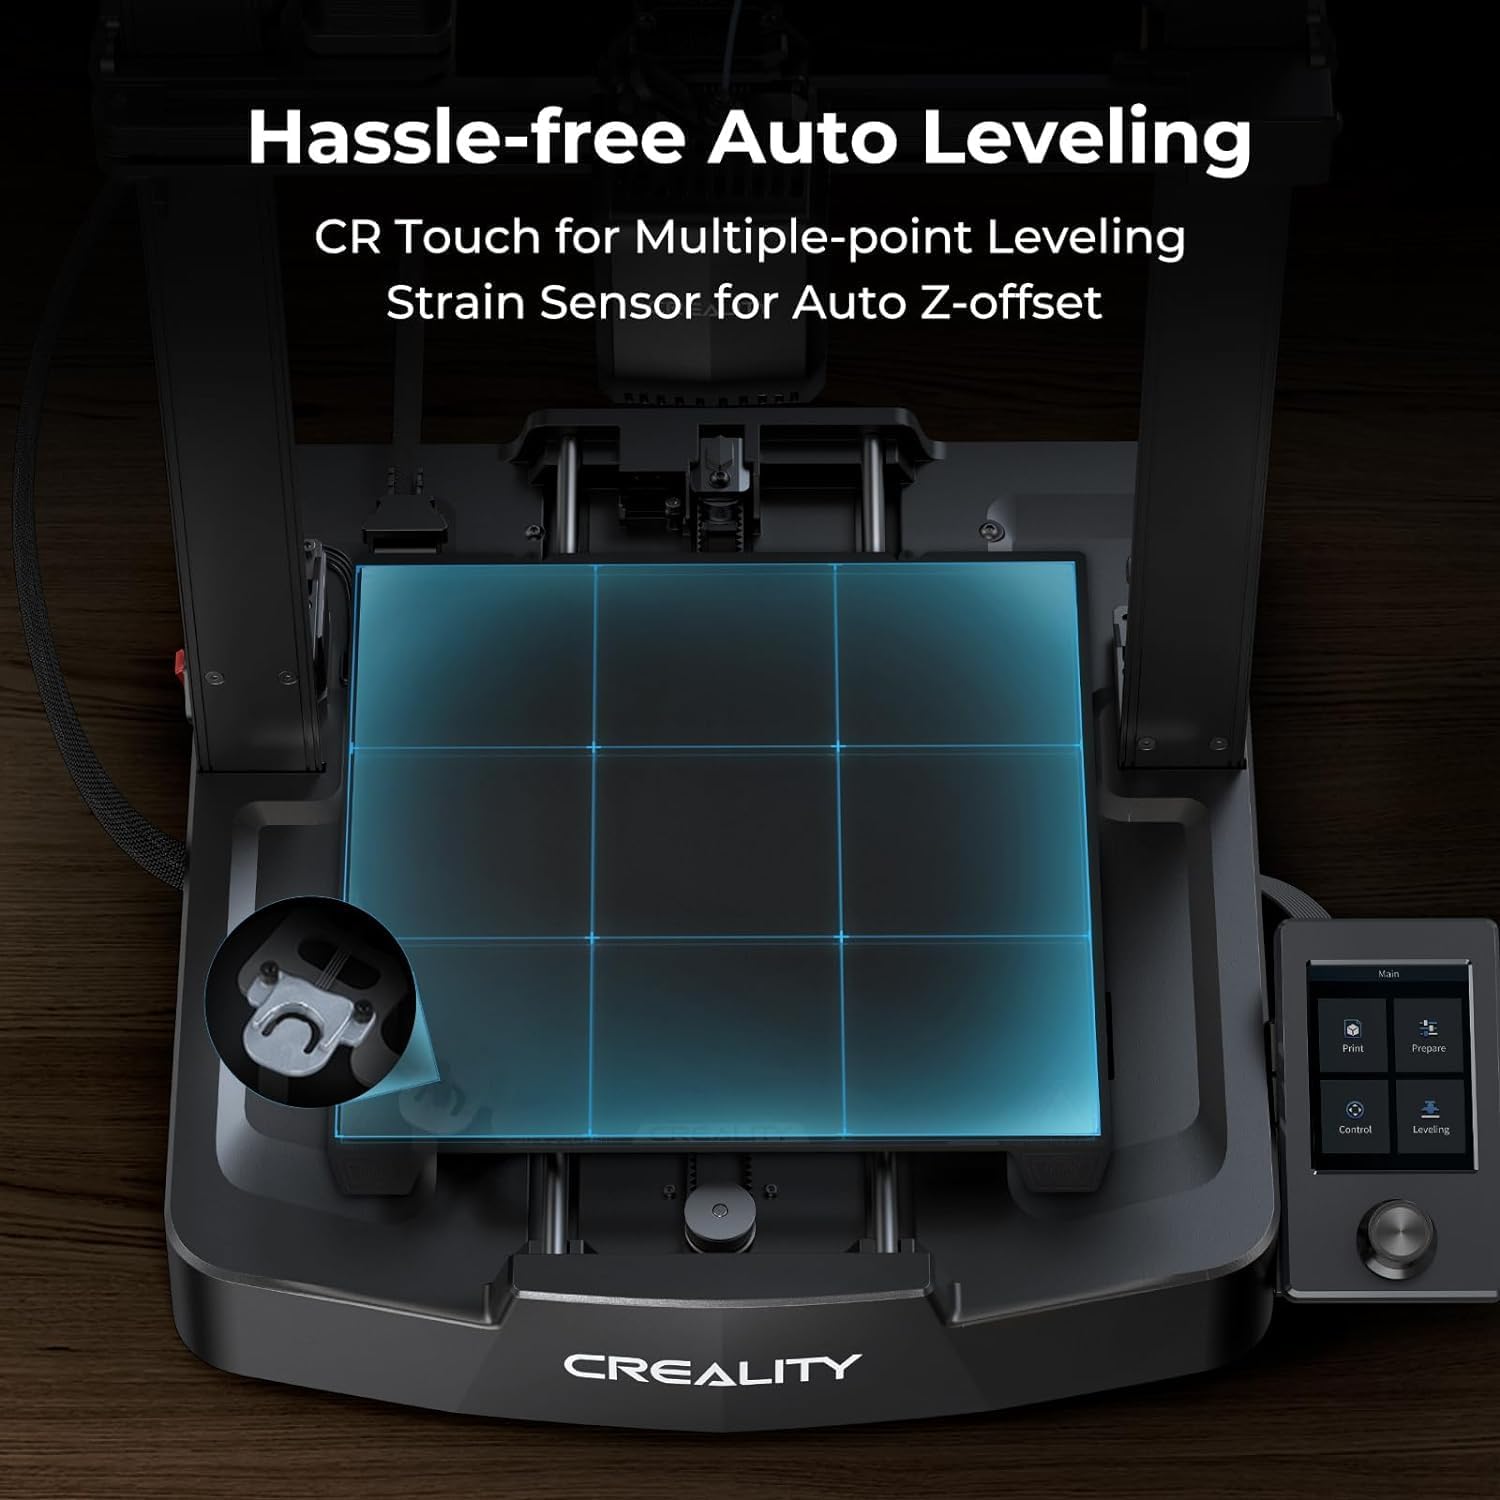
Рисунок 2.1: Automatic bed leveling in progress, highlighting the CR Touch sensor.
2.3 Загрузка нити
The printer allows for easy loading and unloading of filament with a single tap on the user interface. Ensure the filament is fed smoothly into the extruder.

Рисунок 2.2: Надview of the quick setup process, including assembly, auto-leveling, and filament loading.
3. Операция
3.1 Printing Speed and Efficiency
The Ender 3 V3 SE is capable of printing at speeds up to 250mm/s with an acceleration of 2500mm/s², facilitating efficient completion of print models.

Рисунок 3.1: Printing speed comparison demonstrating the efficiency of the Ender 3 V3 SE.
3.2 Sprite Direct Drive Extruder
The printer is equipped with a "Sprite" direct drive extruder, which ensures smooth and consistent feeding of various filament types, including PLA, PETG, and flexible TPU.

Рисунок 3.2: The "Sprite" direct drive extruder for versatile filament compatibility.
3.3 32-bit Silent Mainboard
The integrated 32-bit silent mainboard utilizes advanced stepper motor drives for precise control across all axes, resulting in reduced operational noise during printing.
3.4 Пользовательский интерфейс (UI)
The optimized user interface displays motion graphics for processes like leveling and other parameters, providing clear visual feedback on the printer's status.
3.5 Printer Stability
The printer's design incorporates dual Z-axis lead screws and Y-axis dual linear shafts to enhance stability and precision during printing, contributing to consistent print quality.

Рисунок 3.3: Structural components ensuring printer stability.
4. Filament Handling and Maintenance
4.1 Filament Quality and Storage
The included filament is manufactured with a clog-free design to ensure smooth and stable printing. It is dried for 24 hours before packaging and vacuum-sealed with desiccants in a PC bag to prevent moisture absorption and maintain quality.
4.2 Filament Winding and Toughness
Filament spools undergo mechanical winding and manual inspection to ensure tidy, less-tangled lines, minimizing the risk of snaps or breaks. The larger spool inner diameter facilitates smoother feeding. The raw material is designed for enhanced toughness, making it suitable for printing functional parts.

Рисунок 4.1: Filament diameter accuracy and consistency.
5. Технические характеристики
| Особенность | Деталь |
|---|---|
| Бренд | Креативность |
| Модель | Ender 3 V3 SE |
| Material (Filament) | Полимолочная кислота (PLA) |
| Color (Filament) | Черный, Серый |
| Совместимые устройства | Персональный компьютер |
| Поддерживается File Формат | ШАГ |
| Первая доступная дата | 4 сентября 2023 г. |
6. Поиск Неисправностей
If you encounter any issues with your Creality Ender 3 V3 SE 3D Printer, consider the following general troubleshooting steps:
- Проверьте соединения: Ensure all cables (power, data) are securely connected.
- Filament Issues: Verify that the filament is loaded correctly, not tangled, and free from clogs. Check for proper extrusion.
- Выравнивание кровати: Re-run the automatic bed leveling process if you experience first layer adhesion problems.
- Software/Slicer Settings: Confirm that your slicing software settings (temperature, speed, retraction) are appropriate for the filament type and model.
- Прошивка: Убедитесь, что прошивка вашего принтера обновлена до последней версии.
For more specific issues, refer to the official Creality support resources or community forums.
7. Гарантия и поддержка
For information regarding product warranty, technical support, and service, please refer to the official Creality webсайт или свяжитесь со службой поддержки клиентов напрямую. Сохраните чек о покупке в качестве доказательства покупки для гарантийных претензий.
Official Creality Store: Visit Creality Store on Amazon


