1. Введение
This manual provides comprehensive instructions for the cenmate 3 Bay Hard Drive Enclosure. This device is designed to expand your storage capacity by accommodating up to three 2.5-inch or 3.5-inch SATA HDDs/SSDs, offering high-speed data transfer and flexible expansion options. Please read this manual thoroughly before use to ensure proper installation and operation.

Изображение 1.1: Спереди view of the cenmate 3 Bay Hard Drive Enclosure.
2. Содержимое упаковки
Проверьте наличие всех предметов в посылке:
- 1 x cenmate 3 Bay Hard Drive Enclosure (NO RAID functionality)
- 1 x USB A/C 3.0 Cable
- 1 х Адаптер питания
- 1 x Руководство пользователя (этот документ)

Image 2.1: The included 2-in-1 USB A/C 3.0 cable for versatile connectivity.
3. Продукт закончилсяview
The cenmate 3 Bay Hard Drive Enclosure is constructed from durable aluminum alloy and features a built-in cooling fan to maintain optimal operating temperatures for your drives. It supports a total storage capacity of up to 60TB (20TB per drive).
3.1 Основные характеристики
- Высокая емкость: Supports up to three 2.5-inch or 3.5-inch SATA HDDs/SSDs, with a maximum capacity of 20TB per drive, totaling 60TB.
- Эффективное охлаждение: Integrated 2.7-inch cooling fan and aluminum alloy construction ensure effective heat dissipation.
- Быстрая передача данных: Equipped with USB 3.0 interface, providing data transfer speeds up to 5Gbps.
- Возможность горячей замены: Allows for drive replacement without powering down the enclosure.
- Установка без инструментов: Simplifies drive installation and removal.
- Daisy Chain Expansion: Expand storage by connecting up to three enclosures, supporting a total of 180TB.
- Широкая совместимость: Compatible with Windows 7 and above, Mac OS 9.1 and above, and Linux operating systems.
3.2 Идентификация компонентов
Refer to the images below for a visual guide to the enclosure's components and features.

Image 3.1: Rear panel with USB ports, power input, and cooling fan.
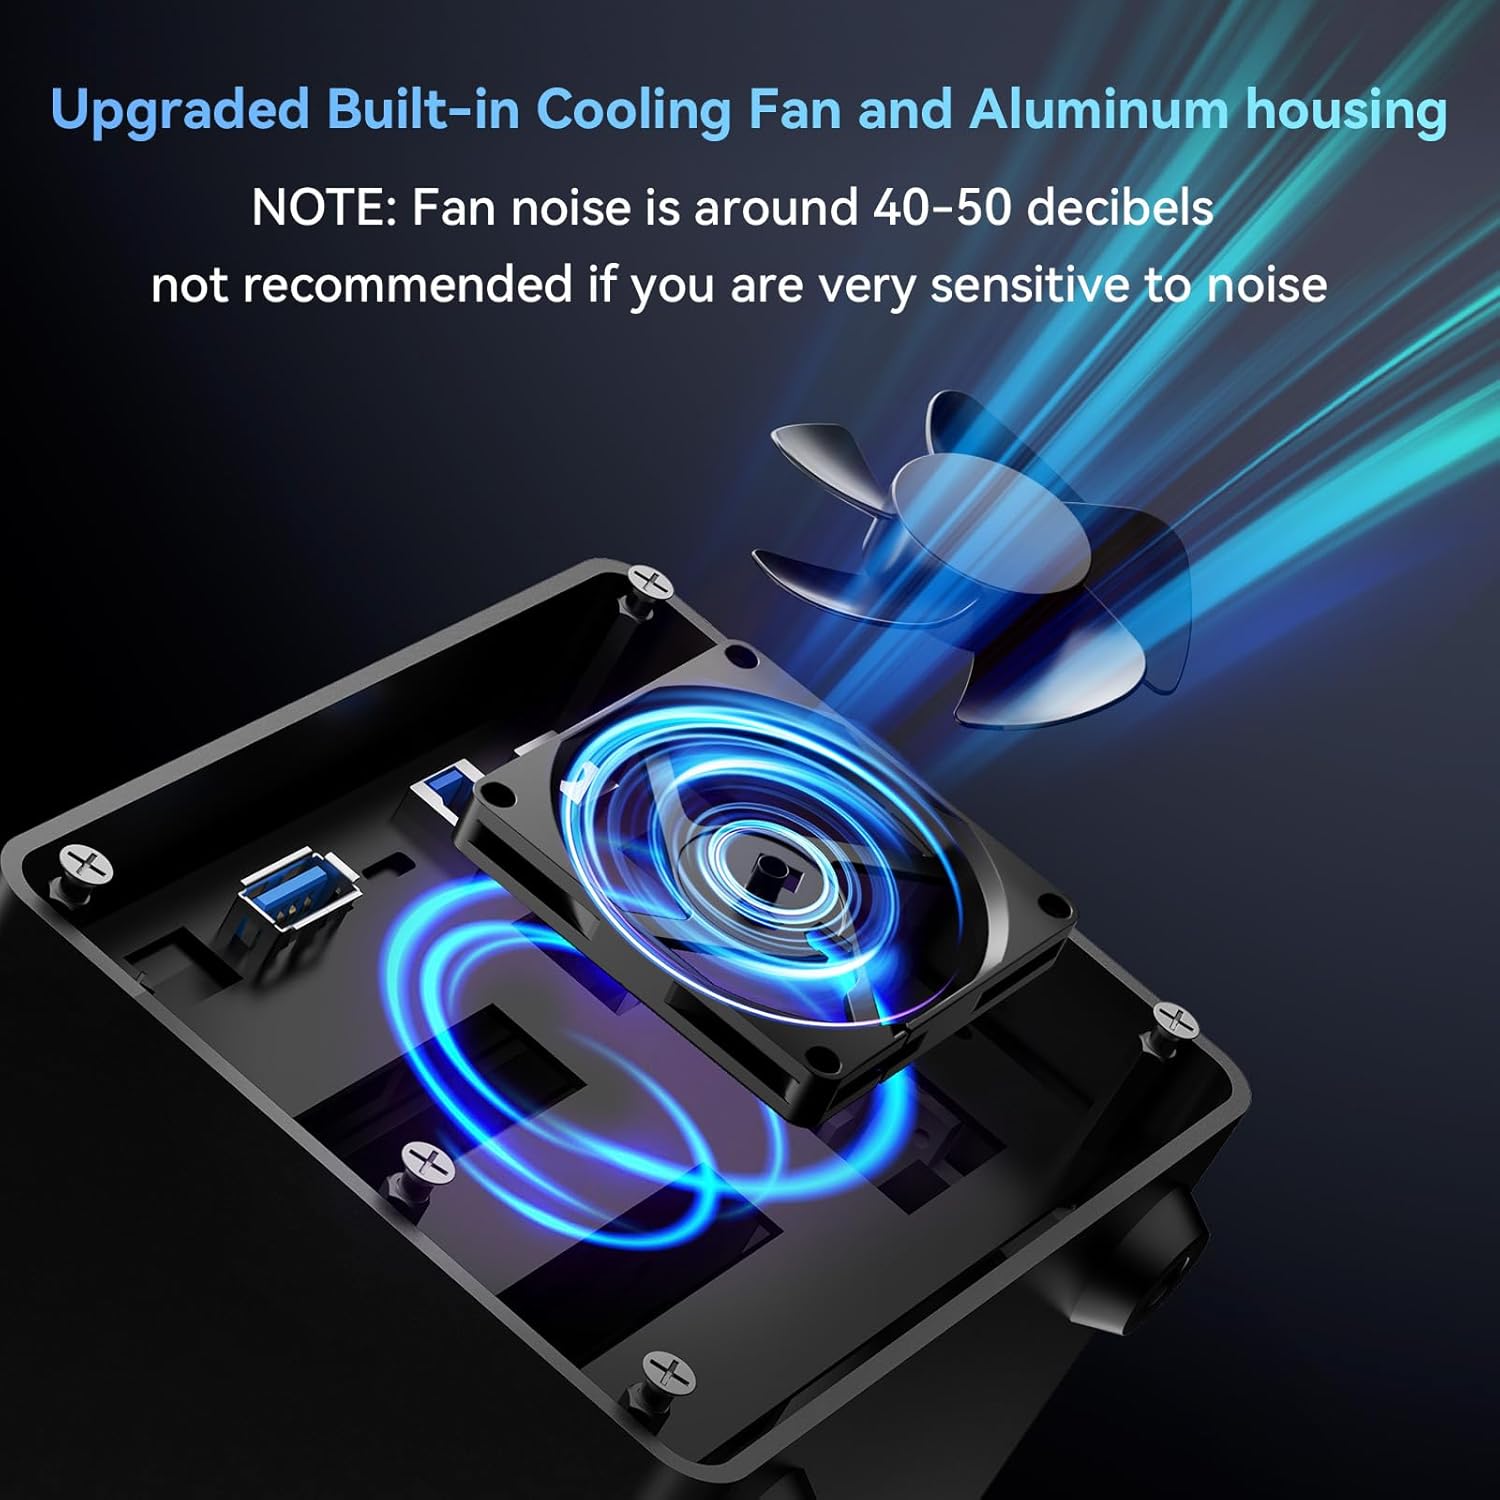
Image 3.2: Illustration of the internal cooling fan for heat management.

Image 3.3: LED indicators for drive status. Blue indicates standby, red flashing indicates read/write activity.
4. Инструкции по настройке
4.1 Установка жестких дисков
- Убедитесь, что корпус выключен и отсоединен от компьютера.
- Gently press the release button on the front of an empty drive bay and pull out the drive tray.
- For 3.5-inch drives: Align the drive with the tray and slide it in until it clicks into place. The tool-free design secures the drive.
- For 2.5-inch drives/SSDs: Place the 2.5-inch drive onto the tray and secure it using the provided screws through the bottom of the tray.
- Slide the loaded drive tray back into the enclosure until it locks securely.
- Повторите то же самое для остальных дисков.
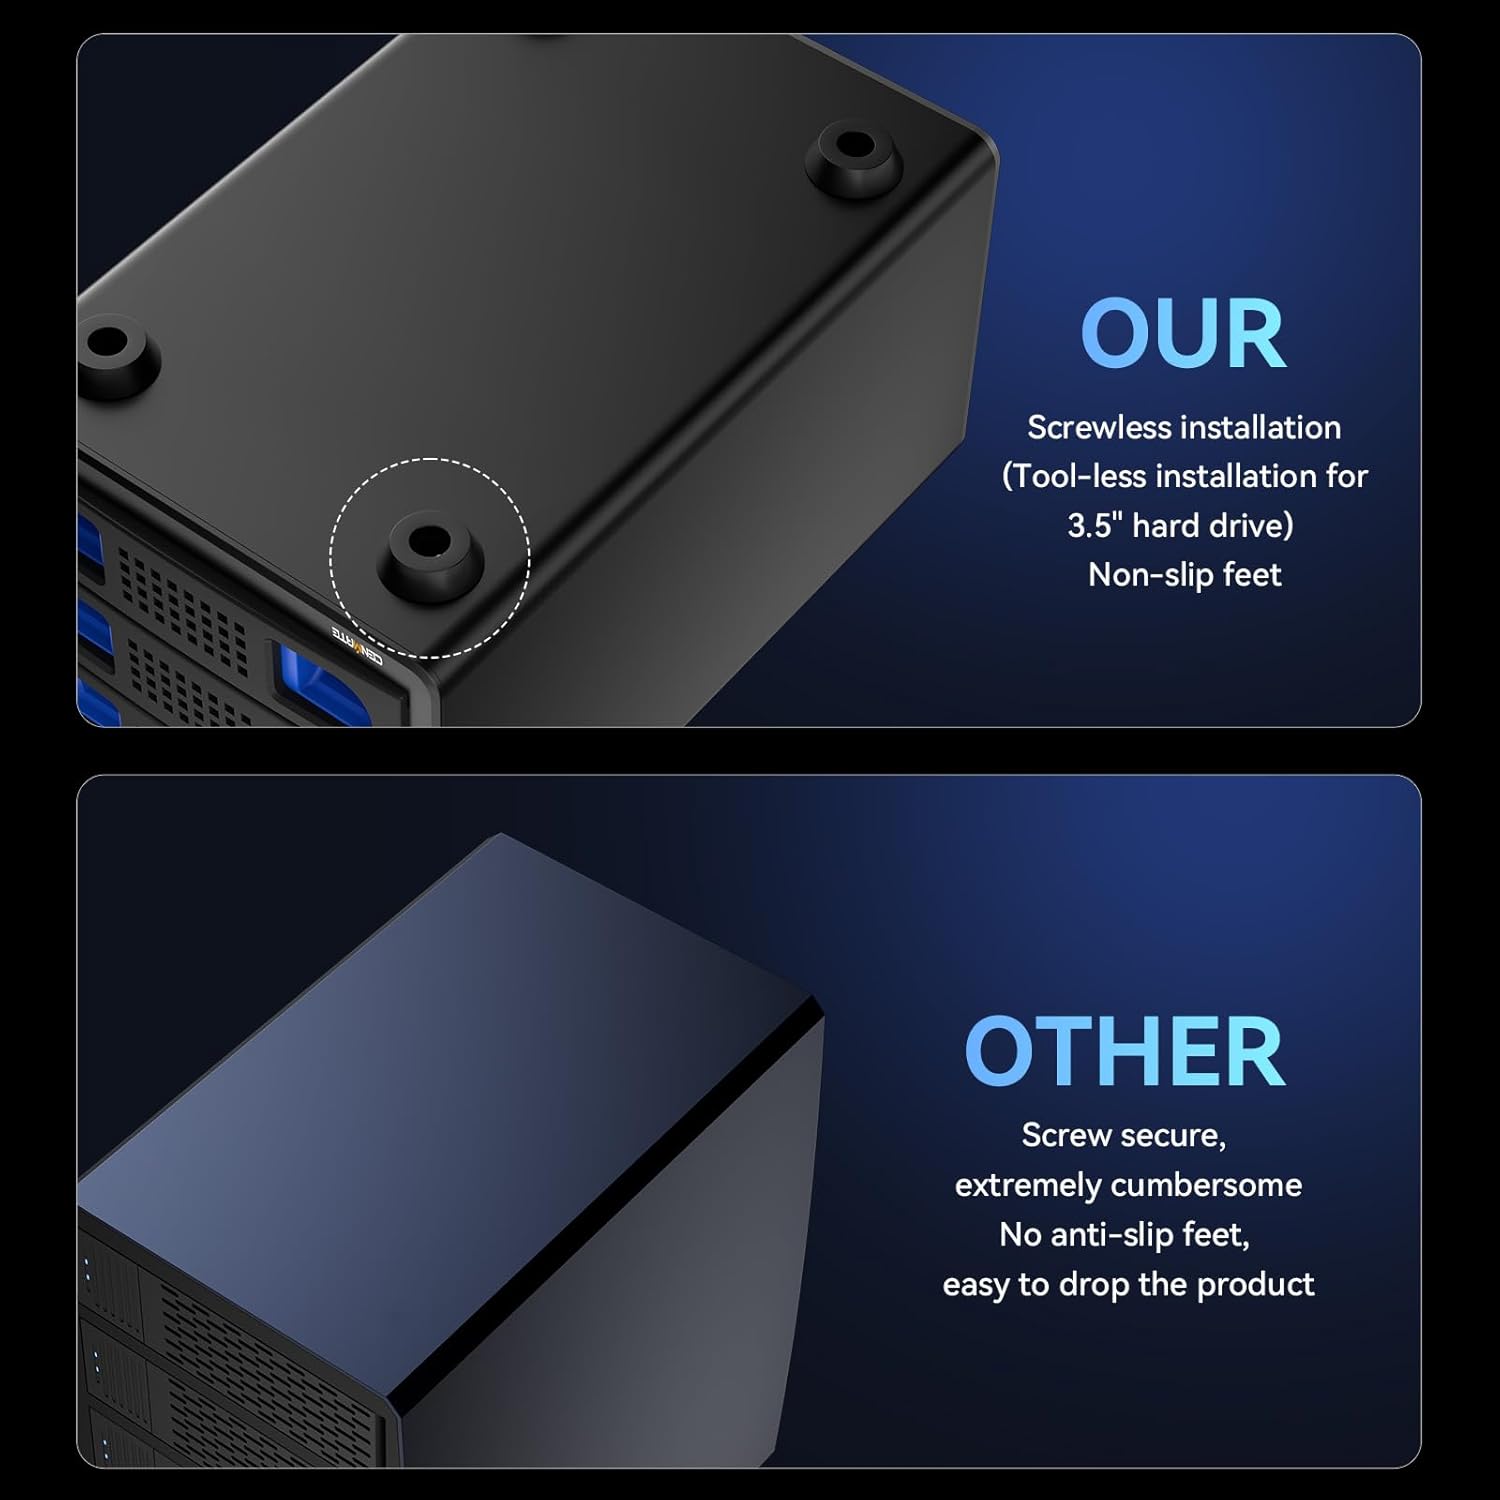
Image 4.1: Tool-free installation of a 3.5-inch hard drive into a tray.
4.2 Подключение к компьютеру
- Connect one end of the provided USB A/C 3.0 cable to the USB 3.0 port on the rear of the enclosure.
- Connect the other end of the USB cable to an available USB-A or USB-C port on your computer.
- Connect the power adapter to the DC 12V input port on the rear of the enclosure, then plug the adapter into a power outlet.
- Turn on the power switch located on the rear of the enclosure.
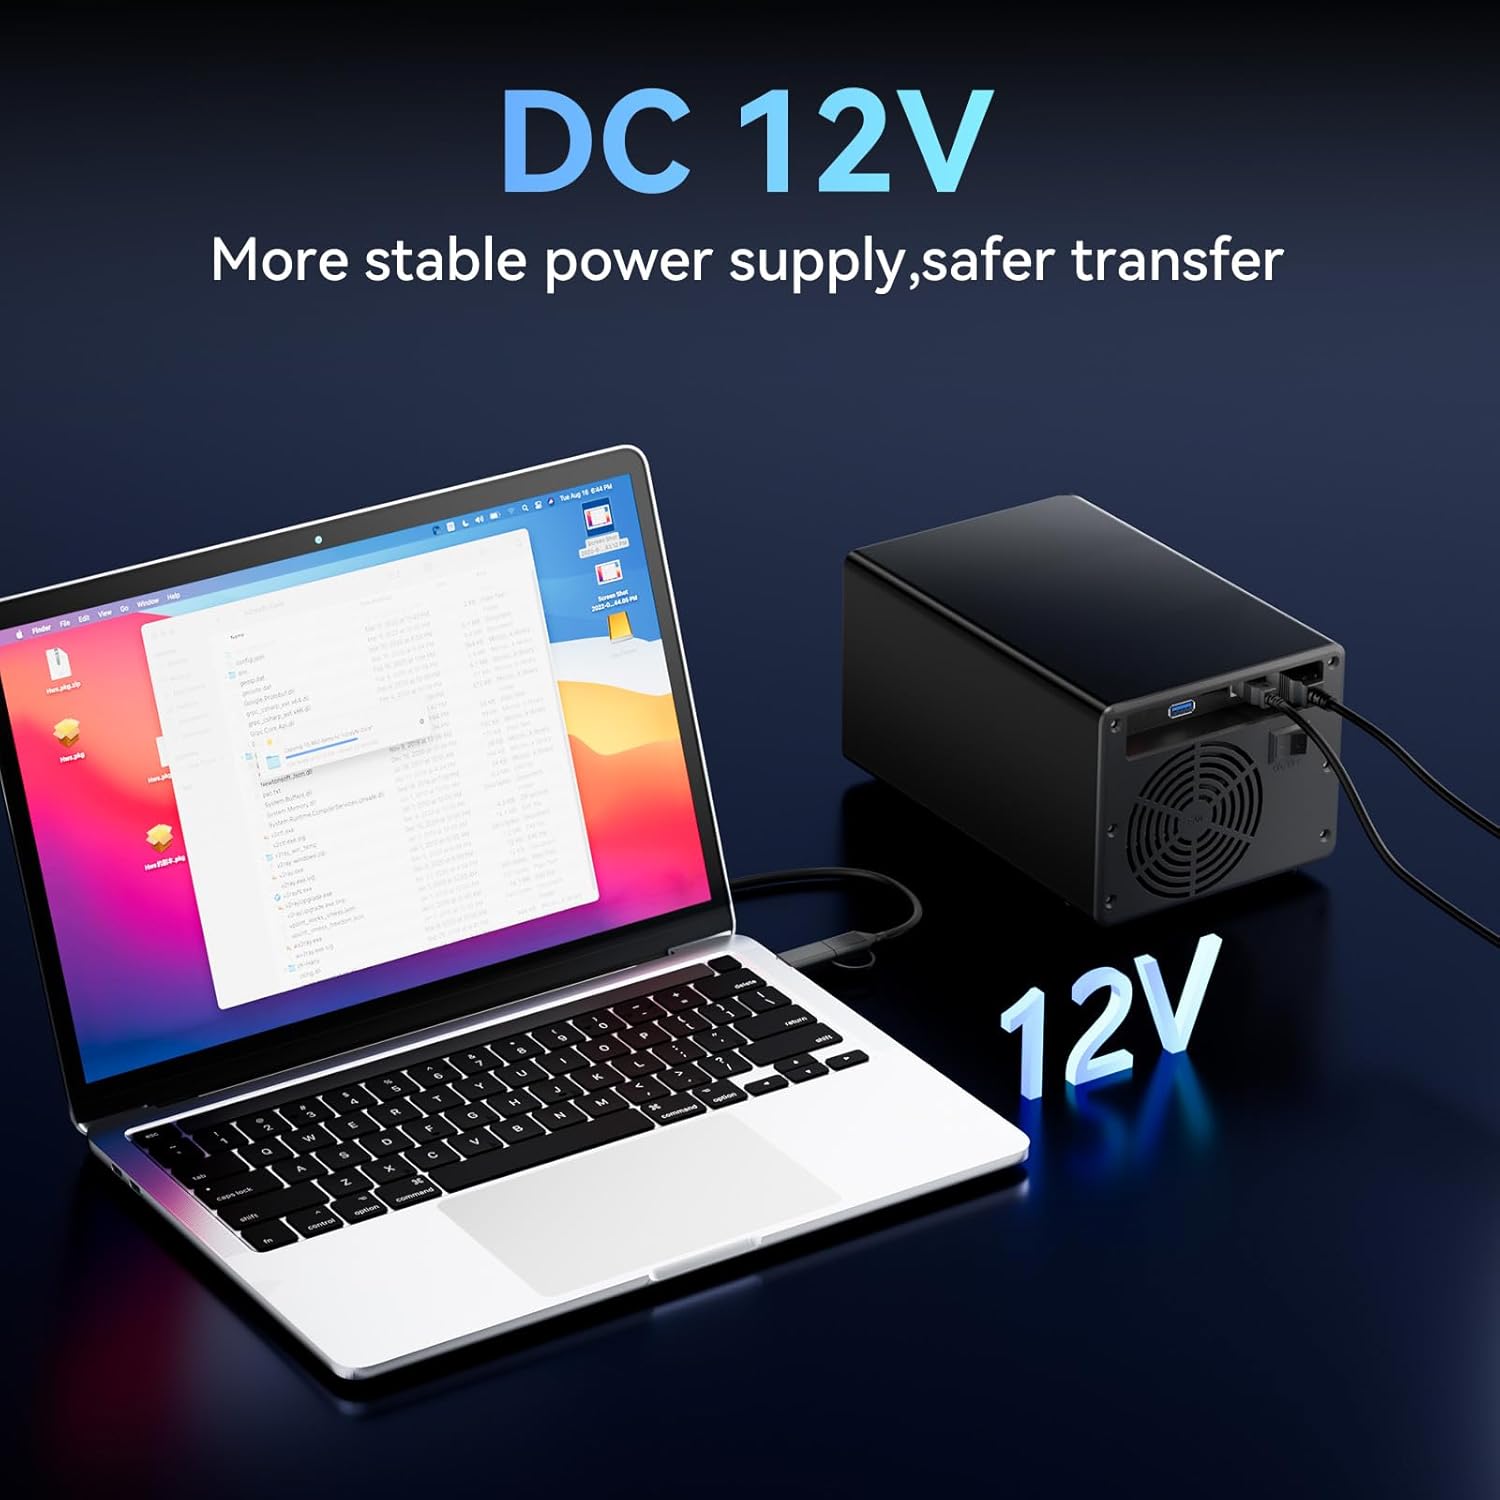
Image 4.2: Enclosure connected to a laptop, illustrating the DC 12V power supply connection.
4.3 Первоначальное распознавание привода
Once powered on and connected, your operating system (Windows, Mac, or Linux) should automatically detect the new drives. For new drives, you may need to initialize and format them through your operating system's disk management utility before they can be used.
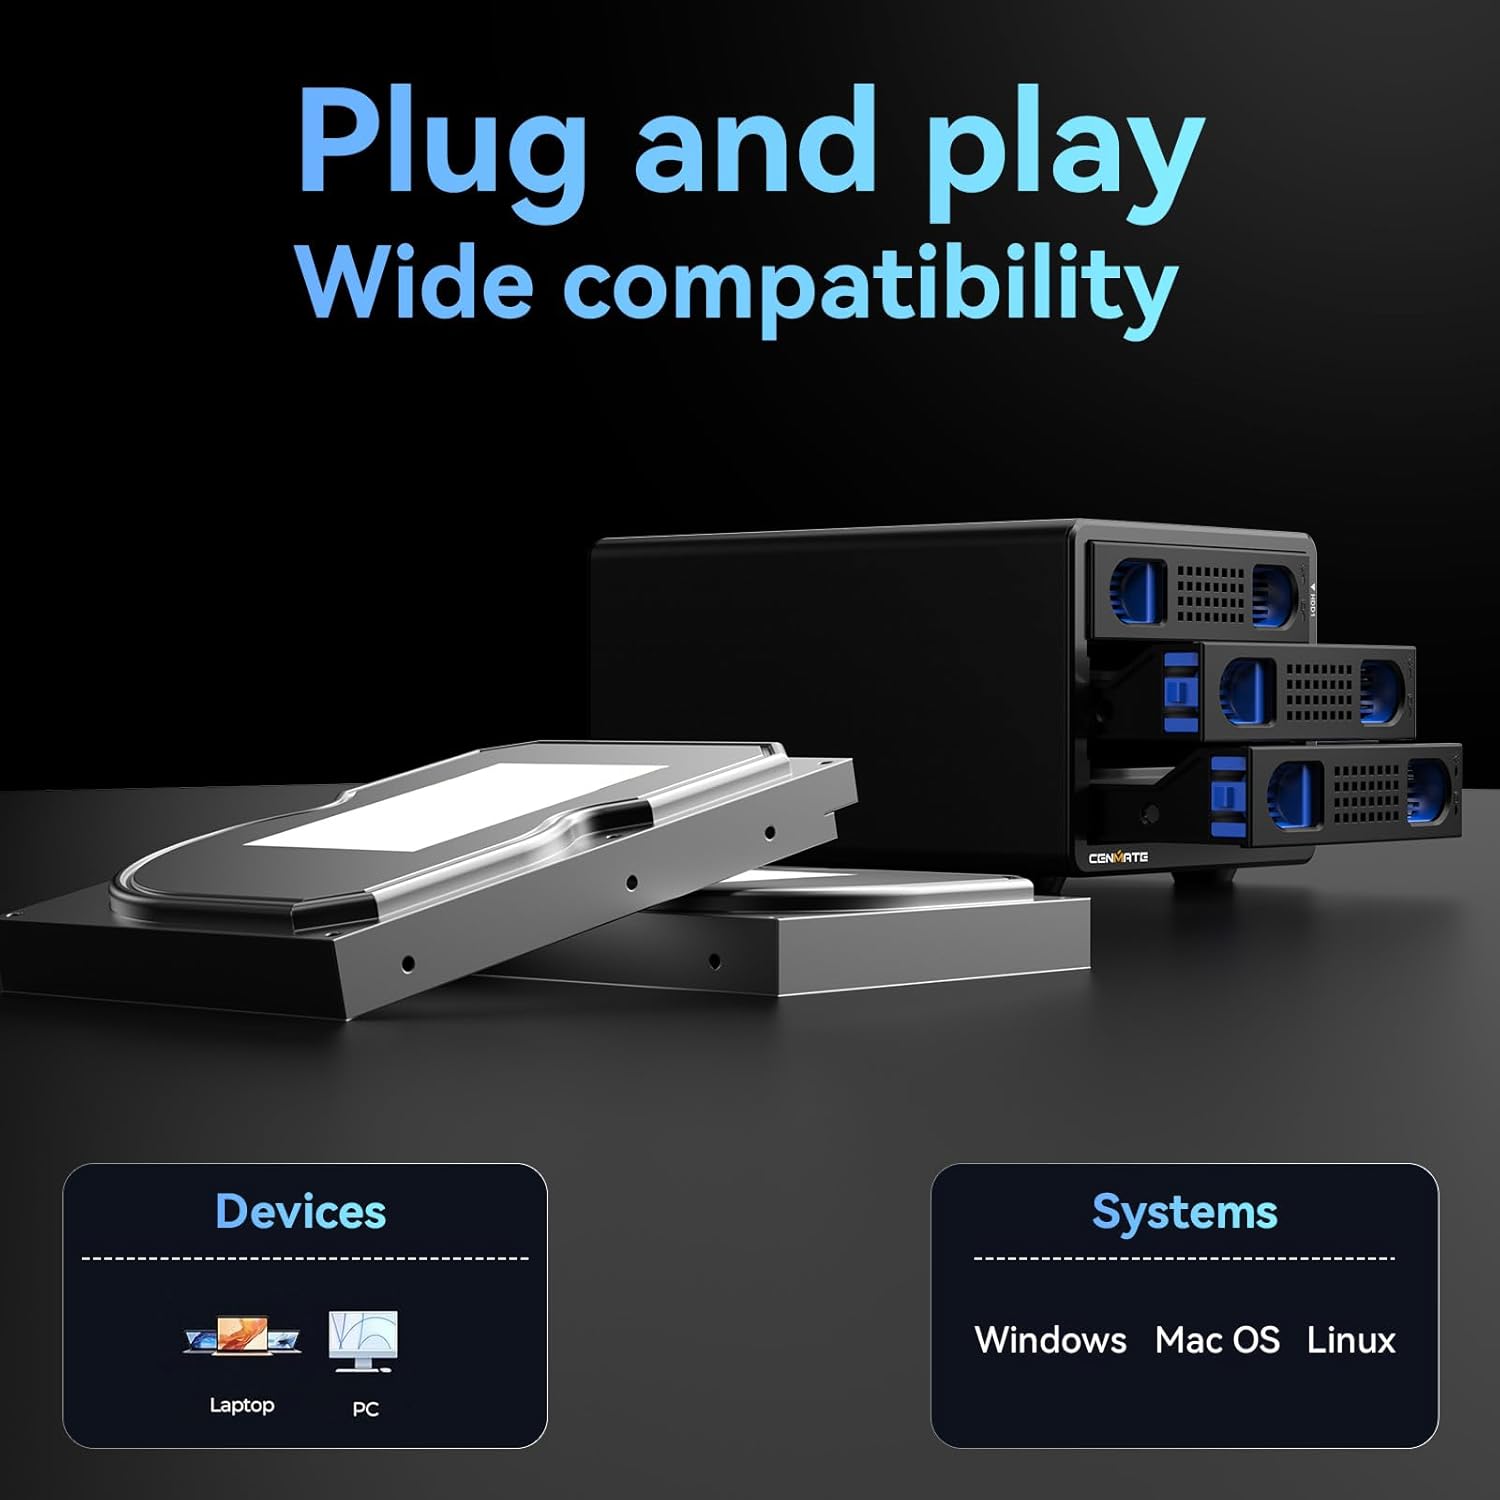
Image 4.3: The enclosure is compatible with laptops and PCs running Windows, Mac OS, and Linux.
5. Инструкция по эксплуатации
5.1 Hot Swapping Drives
The enclosure supports hot-swapping. This means you can remove and insert drives while the enclosure is powered on and connected to your computer, without needing to shut down the system. Ensure that no data transfer is actively occurring to or from the drive you intend to remove to prevent data loss.
5.2 Daisy Chain Expansion
To expand your storage beyond three drives, you can daisy chain multiple cenmate enclosures. Connect the USB HOST port of one enclosure to the USB 3.0 input of another. Up to three enclosures can be daisy-chained, providing a total storage capacity of 180TB. Each enclosure in the daisy chain requires its own power connection.
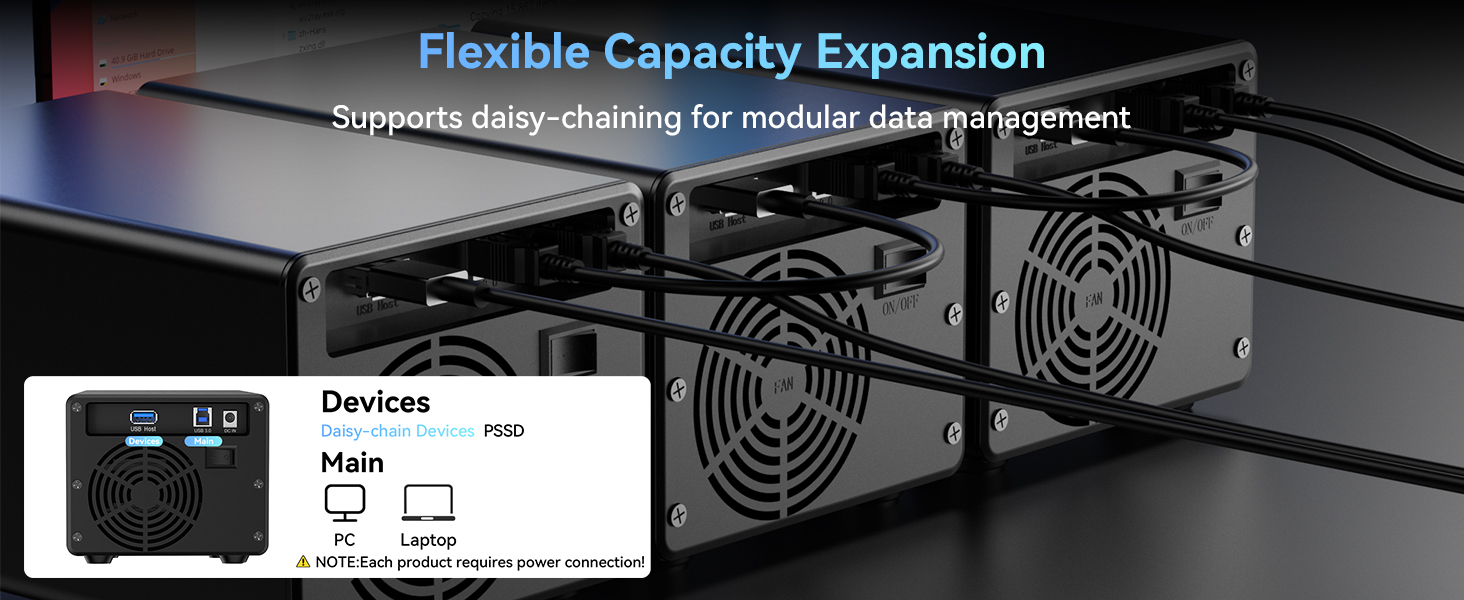
Image 5.1: Daisy chain setup for flexible capacity expansion.
6. Техническое обслуживание
6.1 Очистка
To ensure optimal performance and longevity, periodically clean the exterior of the enclosure with a soft, dry cloth. Ensure the cooling fan vents are free from dust accumulation. Do not use liquid cleaners or abrasive materials.
6.2 Шум вентилятора
The built-in cooling fan operates to maintain safe temperatures for your hard drives. The fan noise level is typically around 40-50 decibels. If you are particularly sensitive to noise, please consider this operational characteristic.
7. Поиск Неисправностей
7.1 Диск не распознан
- Ensure the drive is properly seated in its tray and the tray is fully inserted into the enclosure.
- Verify that the enclosure is powered on and the power adapter is securely connected.
- Проверьте соединение USB-кабеля между корпусом и компьютером. Попробуйте другой USB-порт или кабель.
- For new drives, ensure they are initialized and formatted through your operating system's disk management utility.
- Test the drive in another enclosure or directly connected to a computer (if possible) to rule out drive failure.
7.2 Низкая скорость передачи данных
- Убедитесь, что ваш компьютер использует порт USB 3.0. Подключение к порту USB 2.0 приведет к снижению скорости.
- Verify the USB cable is rated for USB 3.0 speeds.
- Check for other devices connected to the same USB controller that might be consuming bandwidth.
- Производительность самого жесткого диска может влиять на скорость передачи данных.
7.3 Enclosure Overheating
- Убедитесь, что вентиляционные отверстия вентилятора системы охлаждения не заблокированы.
- Operate the enclosure in a well-ventilated area.
- If using multiple drives, ensure they are not consistently under heavy load for extended periods without adequate airflow.
8. Технические характеристики
| Особенность | Спецификация |
|---|---|
| Бренд | cenmate |
| Номер модели | 3 Bay |
| Материал | Алюминий |
| Цвет | Черный |
| Совместимые накопители | 2.5-дюймовый / 3.5-дюймовый SATA HDD/SSD |
| Максимальная вместимость на один привод | 20 ТБ |
| Total Memory Storage Capacity | 60 ТБ |
| аппаратный интерфейс | USB 3.0 |
| Скорость передачи данных | До 5 гигабит в секунду |
| Совместимые устройства | Настольный компьютер, ноутбук |
| Аппаратная платформа | Windows, Mac, Linux |
| Max Number of Supported Devices (Daisy Chain) | 3 (for daisy chain expansion) |
| Размеры продукта | 7.95 x 5.2 x 4.41 дюйма |
| Вес товара | 2.33 фунта (1.06 килограмма) |
9. Гарантия и поддержка
cenmate is committed to providing high-quality products and excellent customer service.
9.1 Техническая поддержка
Should you encounter any issues or have questions regarding your cenmate 3 Bay Hard Drive Enclosure, please do not hesitate to contact our technical support team. We aim to reply and resolve your problem within 24 hours.
Contact information for support can typically be found on the cenmate official webсайт или через вашу платформу покупок.
9.2 Информация о гарантии
Specific warranty details may vary by region and retailer. Please refer to the warranty card included with your product or contact cenmate customer service for detailed warranty terms and conditions.


