1. Введение
This manual provides detailed instructions for the safe installation, operation, and maintenance of your PHORUS 48-inch Modern White Ceiling Fan with Lights and Remote/APP Control. Please read all instructions carefully before beginning installation and retain this manual for future reference.
2. Информация по технике безопасности
- Ensure the power is disconnected at the circuit breaker before installation or servicing.
- Вся электропроводка должна соответствовать национальным и местным электротехническим нормам. Если вы не знакомы с электромонтажными работами, обратитесь к квалифицированному электрику.
- Вентилятор должен быть установлен с минимальным зазором в 7 футов (2.1 метра) от пола до задней кромки лопастей.
- Конструкция крепления должна выдерживать вес вентилятора (приблизительно 13.4 фунтов).
- Не сгибайте держатели лезвий во время установки или чистки.
- Этот вентилятор предназначен для использования внутри помещений.
3. Содержимое упаковки
Перед началом установки убедитесь, что все компоненты присутствуют:
- Вентиляторный двигатель в сборе
- Подвесная доска
- Вентиляторы 5
- Светодиод Lampоттенок
- Пульт дистанционного управления (с 2 батарейками типа ААА)
- Винты и монтажные детали
- Руководство по эксплуатации

4. Технические характеристики
| Особенность | Спецификация |
|---|---|
| Бренд | ФОРУС |
| Название модели | #8907 |
| Размер | 48 дюймов |
| Цвет | Белый |
| Материал | Акрил, Пластик |
| Тип двигателя | Двигатель постоянного тока (30 Вт) |
| Источник света | светодиод (28 Вт) |
| Светлые цвета | 3 (White, Warm, Neutral) |
| Диммирование | Бесступенчатая регулировка (10%-100%) |
| Скорость ветра | 6 |
| Метод контроля | Пульт дистанционного управления, управление через приложение. |
| Особые возможности | Reversible Function, 2-Hour Timer, Memory Function |
| Уровень звука | Ниже 35 дБ |
| Размеры продукта | 48"Д x 48"Ш x 10.83"В |
| Вес товара | 13.4 фунта |
5. Настройка и установка
5.1 Контрольный список перед установкой
- Убедитесь, что электропитание отключено на главном автоматическом выключателе.
- Confirm you have all necessary tools (screwdriver, drill, wire strippers, etc.).
- Verify that the ceiling junction box is securely mounted and capable of supporting the fan.
5.2 Пошаговая установка
- Attach Blades to Motor Assembly: Secure each of the five fan blades to the motor assembly using the provided screws. Ensure the 'THIS SIDE UP' marking on the blade attachment is facing upwards.
- Install LED Light Board: Carefully place the LED light board into the designated area on the motor assembly and secure it with screws. Connect the LED wires.
- Attach LED Lampоттенок: Поместите светодиод lampshade over the light board and twist it clockwise until it is securely fastened.
- Mount Hanging Board: Secure the hanging board to your ceiling junction box using appropriate screws. Ensure it is firmly attached.
- Подключение проводки: Connect the fan's electrical wires to your household wiring. The typical connections are: Black (Live) to Black (Live), White (Neutral) to White (Neutral), and Yellow/Green (Ground) to Green (Ground). Use the provided wire connectors.
- Secure Fan to Hanging Board: Lift the fan assembly and attach it to the hanging board, ensuring all wires are tucked safely inside the canopy. Secure the fan with the provided screws.
6. Инструкция по эксплуатации
6.1 Функции дистанционного управления
The included remote control allows for convenient operation of your ceiling fan:
- Включение/выключение питания: Нажмите кнопку питания, чтобы включить или выключить вентилятор и освещение.
- Скорость вентилятора: Select from 6 wind speeds (1-6) to adjust airflow.
- Включение / выключение света: Control the light independently from the fan.
- Цветовая температура: Cycle through 3 light colors: White (6000K), Neutral (4500K), and Warm (3000K).
- Затемнение: Отрегулируйте яркость подсветки от 10% до 100%.
- Реверсивная функция: Press the F/R key to change the blade rotation direction for summer (downdraft) or winter (updraft) modes. The fan will stop briefly before reversing.
- Таймер: Set a 2-hour timer for automatic shutdown.
- Ночной режим: Activates a low-speed fan and dim light setting.

6.2 Remote Code Pairing
If the remote control is not responding, it may need to be paired:
- Turn off the main power supply to the fan for one minute.
- Turn on the main power supply and simultaneously long-press the 'Code Key' button on the remote control for 3-5 seconds.
- The fan light will blink 2-3 times, indicating successful code matching. The remote can now be operated normally.
6.3 Управление приложением
Control your fan using the 'Fan Lamp Pro' mobile application:
- Скачать приложение: Scan the QR code provided in the product images or search for "Fan Lamp Pro" in your app store.
- Подключиться через Bluetooth: Убедитесь, что Bluetooth на вашем телефоне включен.
- Пара устройств: Open the app, add a new device, and follow the on-screen instructions to connect to your fan. The fan light will blink twice upon successful connection.
- Функции: The app allows control over fan speeds, light colors, dimming, reverse function, and timer settings, similar to the remote control.
6.4 Fan Speed and Airflow
- Уровни 1-2: Low Comfortable Wind, suitable for sleep.
- Уровни 3-4: Medium Natural Wind, suitable for daily life.
- Уровни 5-6: High Cooling Wind, suitable for hot weather.

6.5 Настройки освещения
- The LED light source supports stepless dimming and memory function, retaining your last brightness and color temperature setting.
- Choose from 3 color temperatures: 3000K (Warm Light), 4500K (Natural Light), and 6000K (White Light).

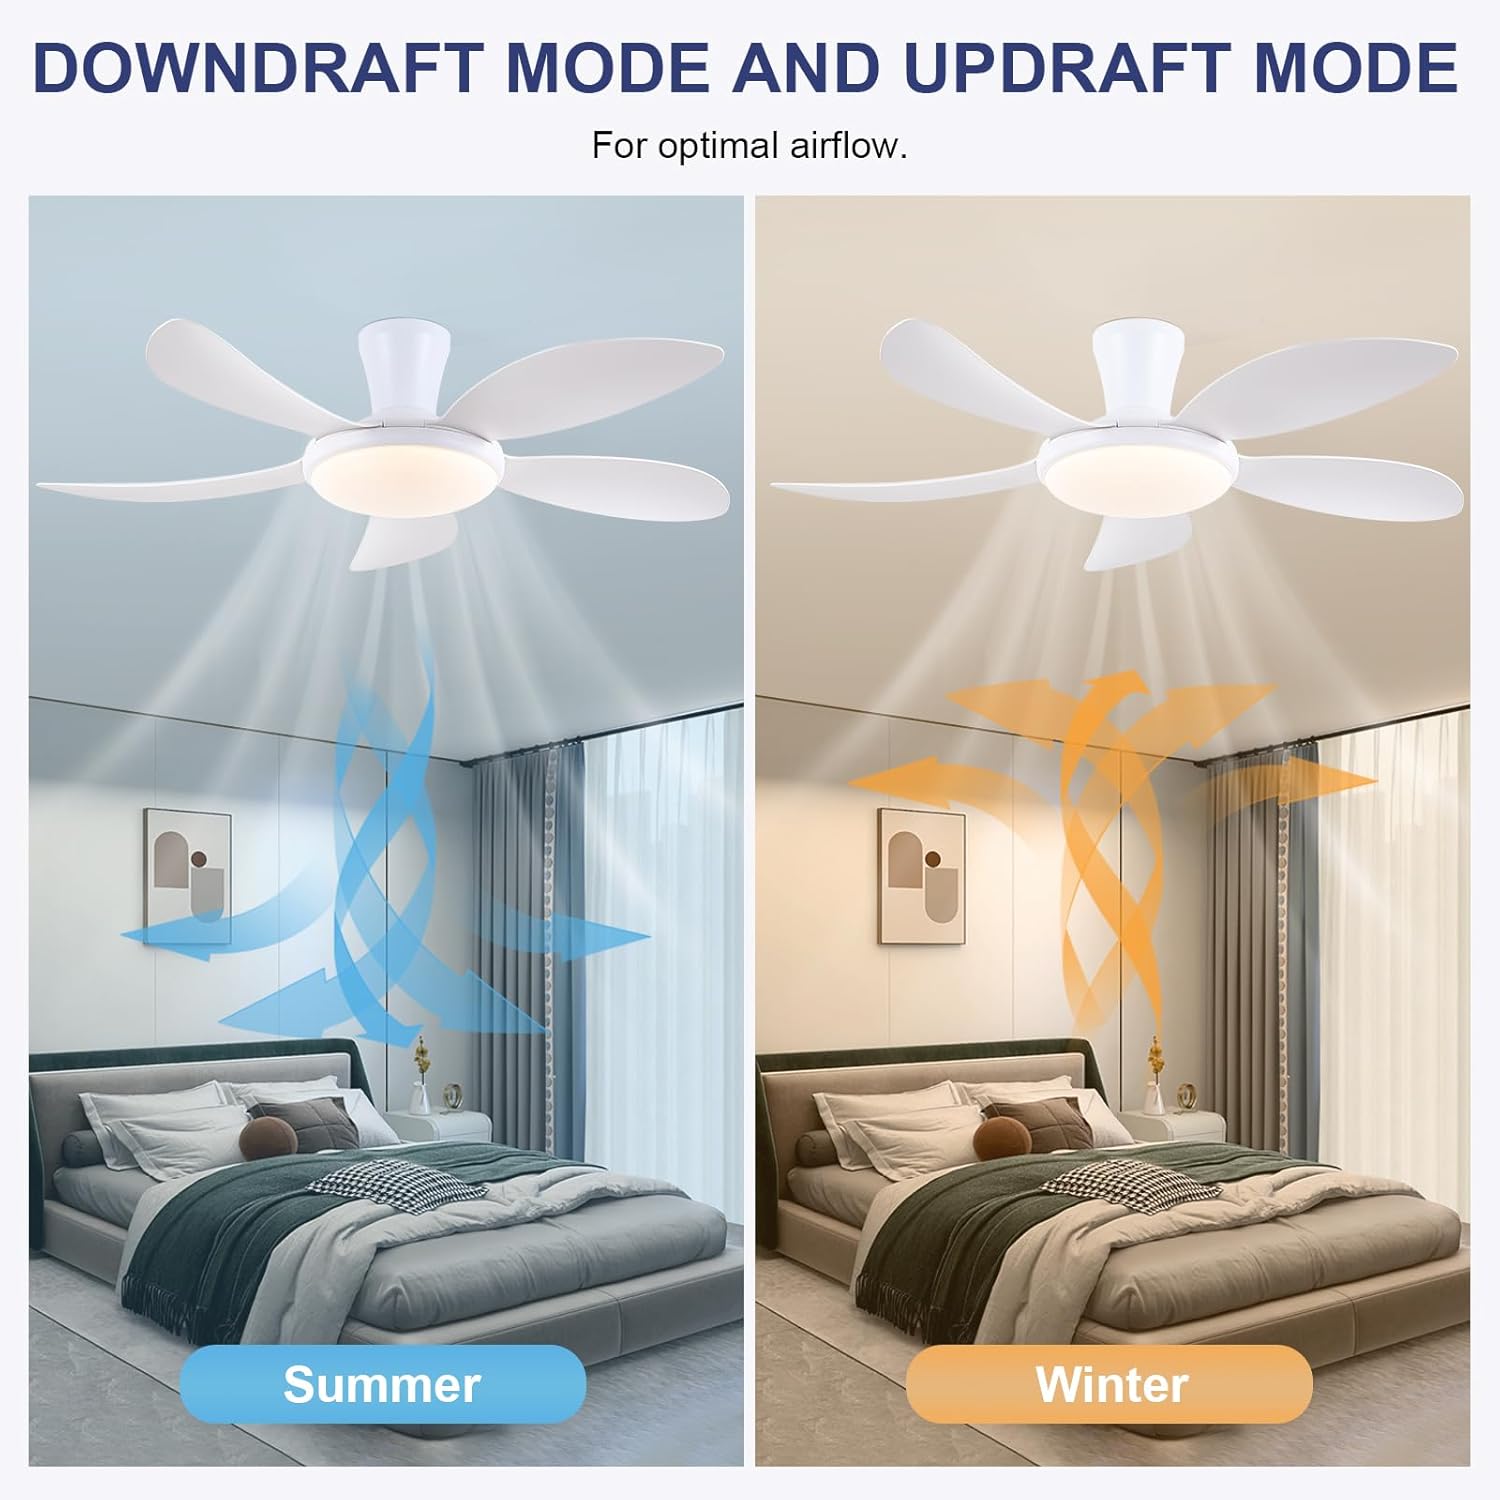
6.6 Реверсивная функция
The reversible DC motor allows you to change the direction of the fan seasonally:
- Летний режим (нисходящий поток): Blades rotate counter-clockwise, pushing cool air downwards.
- Зимний режим (восходящий поток): Лопасти вращаются по часовой стрелке, затягивая холодный воздух вверх и направляя теплый воздух вниз.
7. Техническое обслуживание
- Уборка: Для очистки вентилятора протрите его мягкой тряпкой.amp Ткань. Не используйте абразивные чистящие средства или растворители.
- Уход за лезвием: The ABS blades are designed to be easy to clean and resistant to deformation.
- Регулярные проверки: Periodically check all connections and screws to ensure they are secure.
8. Поиск Неисправностей
Если у вас возникли проблемы с вентилятором, ознакомьтесь со следующими распространенными проблемами и решениями:
- Вентилятор не работает: Check power supply, ensure all wiring connections are secure, and verify remote control pairing.
- Свет не работает: Check power supply, ensure light wires are connected, and verify remote control pairing.
- Вентилятор шумит: Ensure all screws are tightened, especially on the blades and mounting bracket. Check for any obstructions.
- Пульт не работает: Replace batteries, ensure line of sight to the fan, and re-pair the remote control as per section 6.2.
- Проблемы с подключением к приложению: Ensure Bluetooth is on, the app is updated, and try re-pairing the device.
9. Гарантия и поддержка
PHORUS provides a one-year quality warranty for this product. For any damage or quality problems, free replacement service is offered. If you have any questions or require assistance, please contact PHORUS customer service. You will receive a satisfactory answer within 24 hours.
For additional support and resources, please visit the official PHORUS webсайт или обратитесь к контактной информации, предоставленной при покупке.


