1. Введение
This manual provides detailed instructions for the assembly, operation, and maintenance of your PHI VILLA 6'x10'x7' Outdoor Portable Storage Shelter Shed Garage. Please read all instructions carefully before beginning assembly and retain this manual for future reference.
2. Инструкции по технике безопасности
- Накопление снега: Always keep the roof clear of snow. Heavy amounts of snow can damage the structure and make it unsafe.
- Ветровые условия: Ensure the shelter is properly anchored according to instructions, especially in windy areas. In severe weather conditions, consider disassembling the shelter to prevent damage.
- Установка: Manufacturer cannot be held responsible for any consequences due to buildings that are not installed per instructions, or for damage due to weather conditions or acts of God.
- Сборка: Assembly is recommended with at least two people.
- Выбор места: Choose a level, well-drained area for installation.
3. Содержимое упаковки
Verify all parts are present before beginning assembly. Each part is marked with a number or letter for easy identification.
- Поляки: Straight poles (1, 2, 3, 4), Curved poles (K), T-connectors (L), Peak connector (P)
- Connectors & Fasteners: Thick connectors (F), Galvanized Tee Pipe (I), Clamps (H), Screws (gg), Expansion screws (aa), 7-shaped ground nails (aa)
- Cover & Doors: Main cover (Q), End panels (N), Roll-up zipper doors (N)
- Аксессуары: Elastic ball straps (R), Ratchet straps (M), S-hooks (W), Gloves (S), Tools (T)

Figure 1: Key components including thick connectors, galvanized tee pipe, double zippers, and elastic balls.
4. Инструкция по сборке
Follow these steps for tool-free frame assembly. Refer to the provided video for visual guidance.
Video 1: PHI VILLA Outdoor Portable Storage Shed Assembly Guide.
- Сборка каркаса крыши: Connect straight poles (3) with curved poles (K) and T-connectors (L) to form the roof arches. Use the peak connector (P) at the top.
- Соедините горизонтальные перекладины: Attach horizontal poles (2) between the assembled roof arches to create the main roof structure.
- Attach Vertical Legs: Insert vertical poles (1) into the base of the roof arches. Secure the base plates (E) to the bottom of the vertical poles.
- Drape Main Cover: Carefully drape the main cover (Q) over the assembled frame, ensuring it is centered and aligned.
- Secure Side Bars: Attach side bars (4) to the vertical poles using clamps (H) and screws (gg) to tension the cover.
- Attach End Panels: Install the end panels (N) at both ends of the frame. Use elastic ball straps (R) to secure the cover to the frame.
- Install Ratchet Straps: Attach the ratchet straps (M) to the designated points on the cover and frame to provide additional tension and stability.
- Крепление к грунту: Use the provided expansion screws (aa) for cement floors or 7-shaped ground nails (aa) for grass to firmly anchor the shelter to the ground.
5. Операция
- Складные двери на молнии: The shelter features two roll-up zipper doors at the front and back. These doors can be fully opened and rolled up, then secured with buckles for easy entry, exit, and improved visibility.
- Вентиляция: Each door is equipped with a double-layer vent. These vents facilitate airflow, prevent moisture buildup, and reduce condensation caused by temperature differences or rain.
- Многоцелевое использование: This portable storage shelter is suitable for storing motorcycles, ATVs, bicycles, small cars, gardening tools, firewood, and other outdoor equipment.
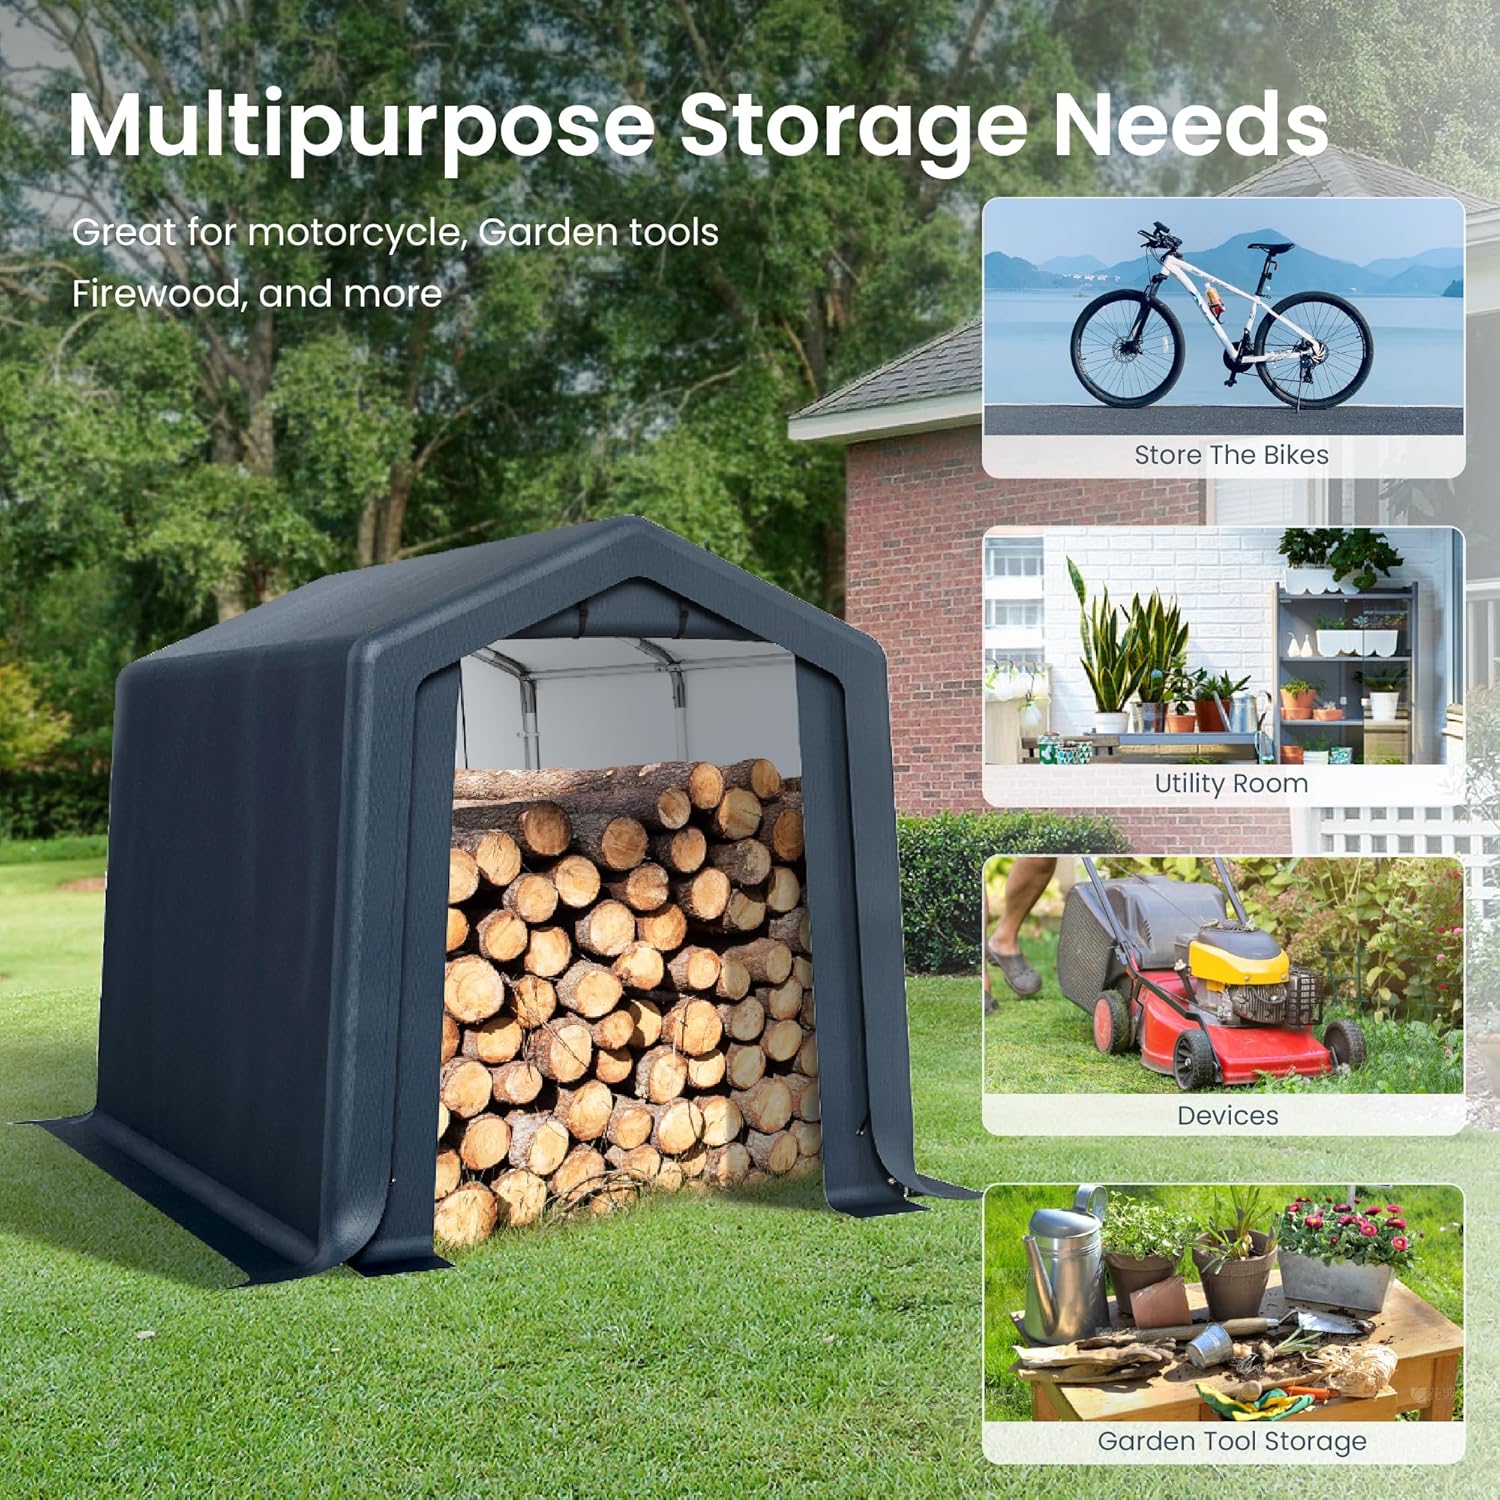
Рисунок 2: Examples of multipurpose storage applications.

Figure 3: Vents design for optimal airflow and moisture prevention.
6. Техническое обслуживание
- Уборка снега: Regularly clear any snow accumulation from the roof to prevent structural damage.
- Инспекция: Periodically inspect all connections, straps, and anchors to ensure they remain secure. Tighten any loose fasteners.
- Уборка: Clean the polyethylene cover with mild soap and water. Avoid harsh chemicals that could damage the material.
- Защита от непогоды: The cover is waterproof and UV resistant, designed to protect items from sun, rain, dust, and snow.
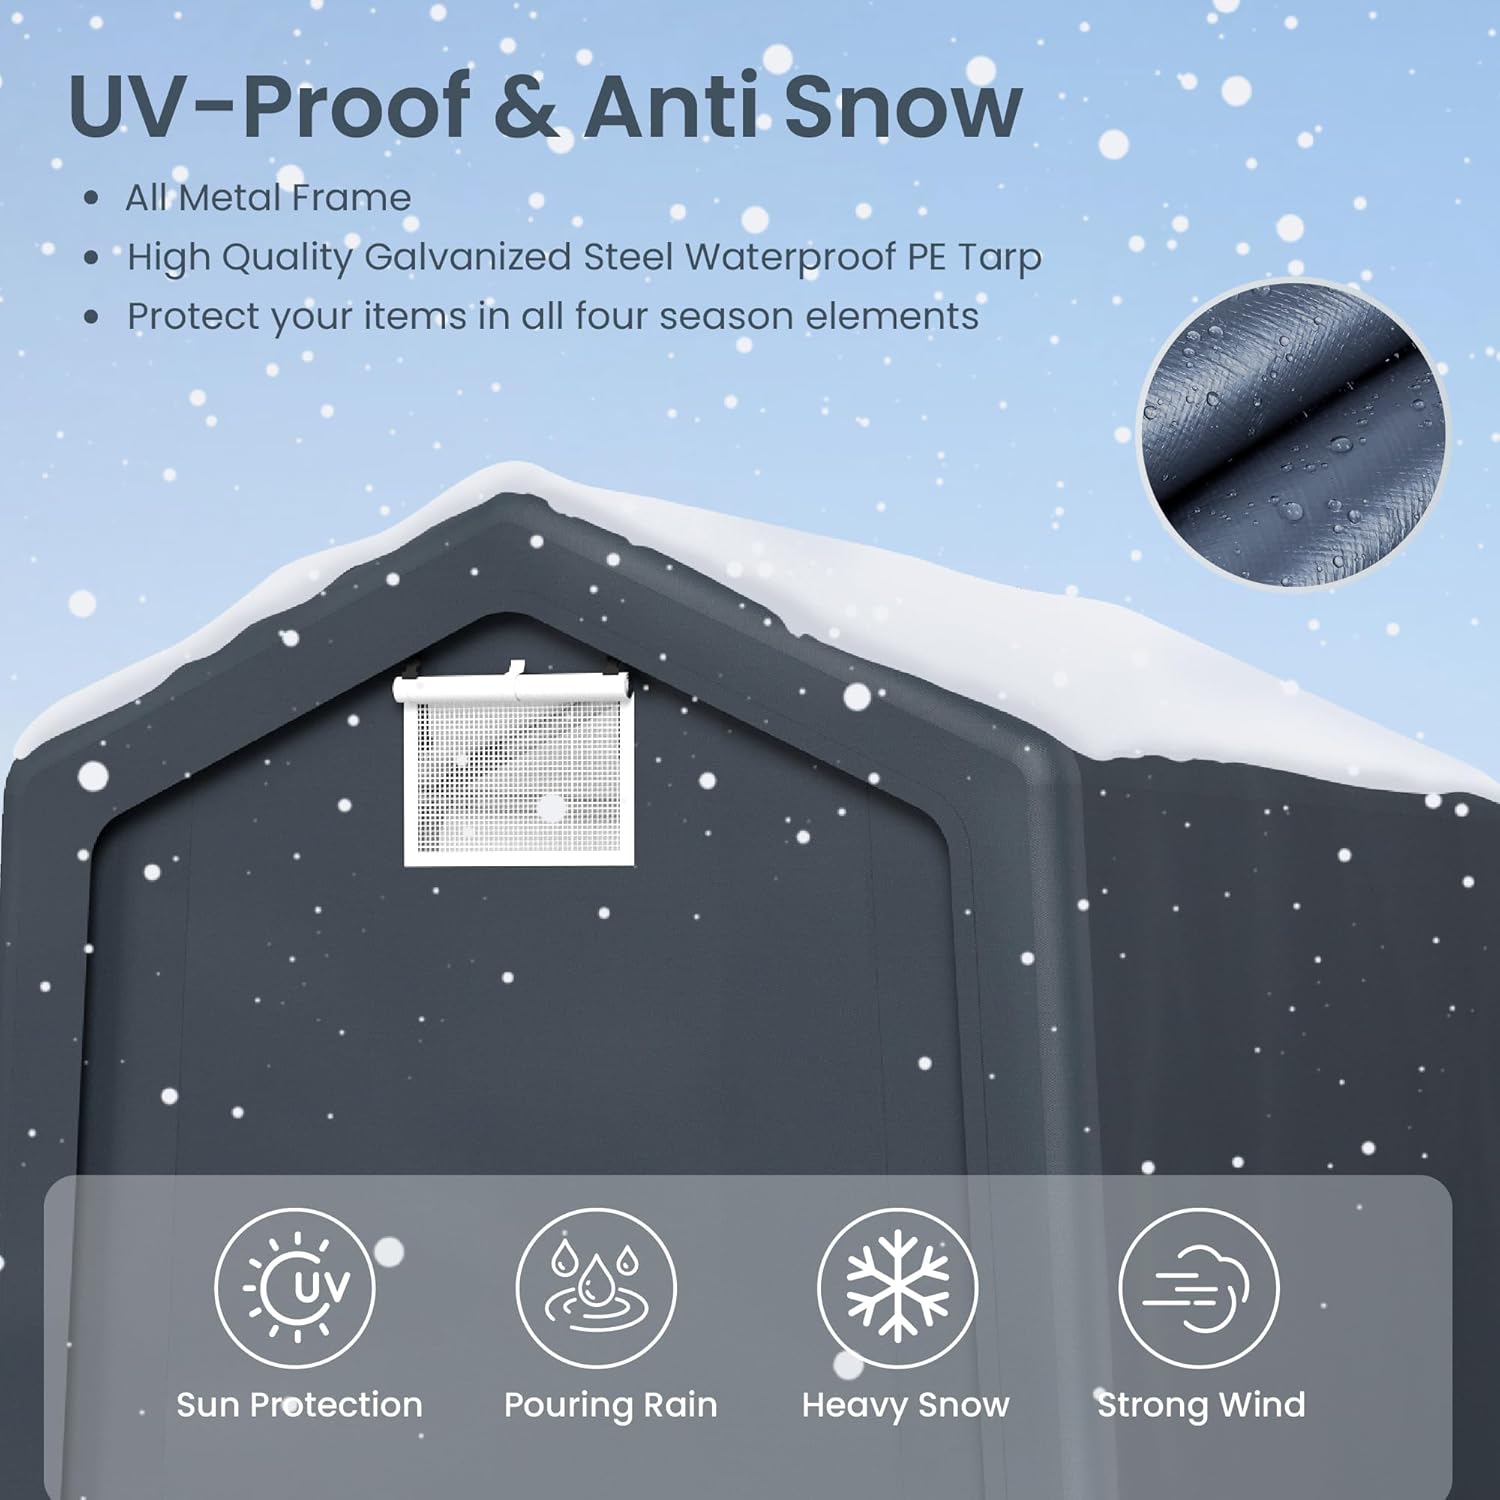
Figure 4: Weather resistance features of the shelter.
Video 2: Demonstration of the shelter's stability in various conditions.
7. Поиск Неисправностей
- Нестабильность: If the shelter feels unstable, re-check all ground anchors and tension straps. Ensure the frame is level and all connections are tight.
- Утечка воды: Verify the cover is properly draped and tensioned over the frame. Check for any tears or punctures in the cover and repair as needed.
- Трудности с молниями: Ensure zippers are clean and free of debris. Apply a silicone-based lubricant if they are stiff.
- Конденсация: Ensure vents are open to allow for proper air circulation, especially in humid conditions.
8. Технические характеристики
| Особенность | Деталь |
|---|---|
| Бренд | ФИ ВИЛЛА |
| Номер модели | ГА11 |
| Размеры продукта | 72 дюймов Д x 120 дюймов Ш x 84 дюйма В (6 футов Д x 10 футов Ш x 7 фута В) |
| Площадь пола | 60 квадратных футов |
| Материал | Легированная сталь (рама), полиэтилен (ПЭ) (крышка) |
| Цвет | Серый |
| Уровень водонепроницаемости | Водонепроницаемый |
| Защита от ультрафиолетового излучения | Да |
| Требуется сборка | Да |
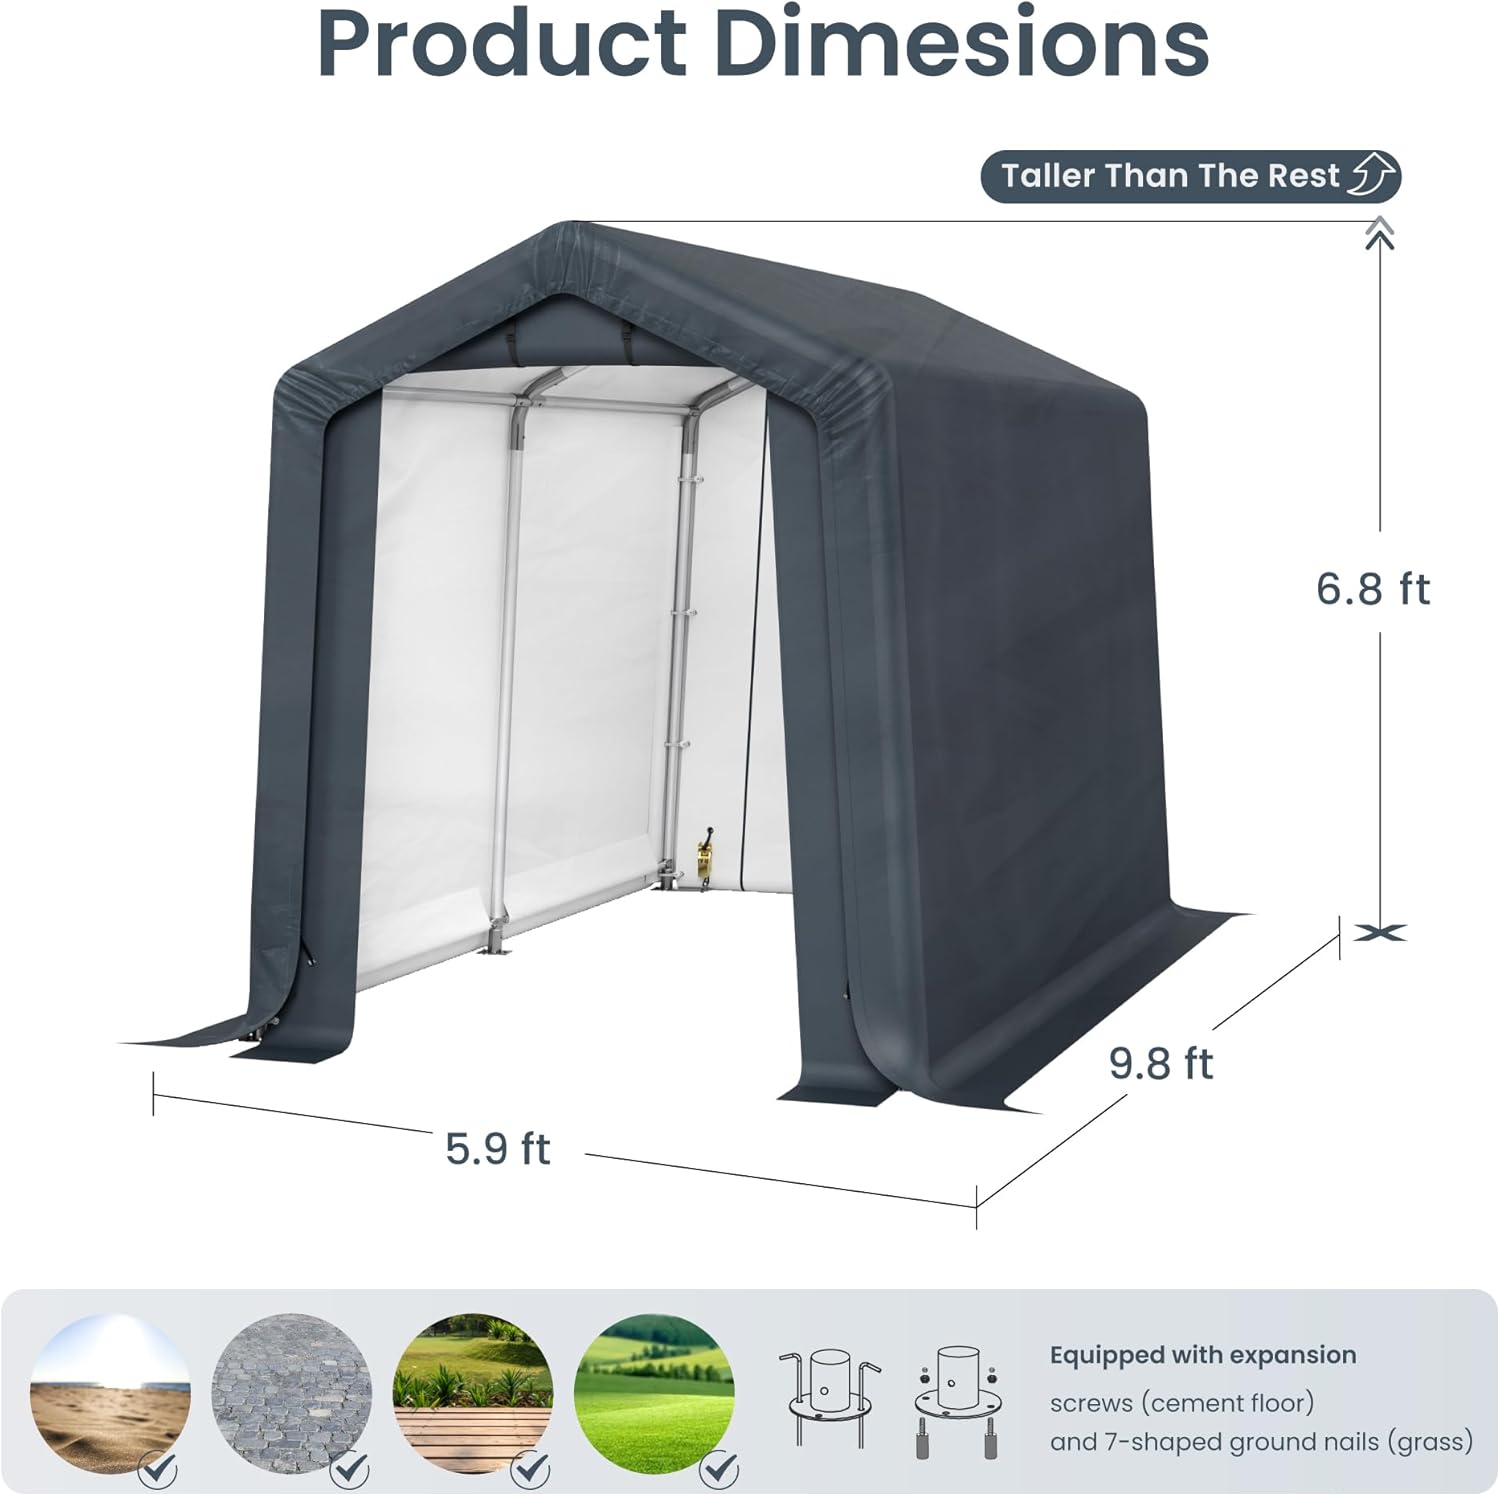
Figure 5: Product dimensions (5.9 ft width, 9.8 ft length, 6.8 ft height).
9. Гарантия и поддержка
For any questions, concerns, or support regarding your PHI VILLA Portable Storage Shelter, please contact the manufacturer directly. While specific warranty details are not provided in this manual, PHI VILLA is committed to customer satisfaction.
Для получения более подробной информации вы можете посетить официальный магазин PHI VILLA: Магазин PHI VILLA


