1. Введение
Thank you for choosing the CREWORKS 9" x 24" Mini Metal Lathe. This manual provides essential information for the safe operation, maintenance, and troubleshooting of your new machine. Please read this manual thoroughly before operating the lathe to ensure proper use and to prevent injury or damage.
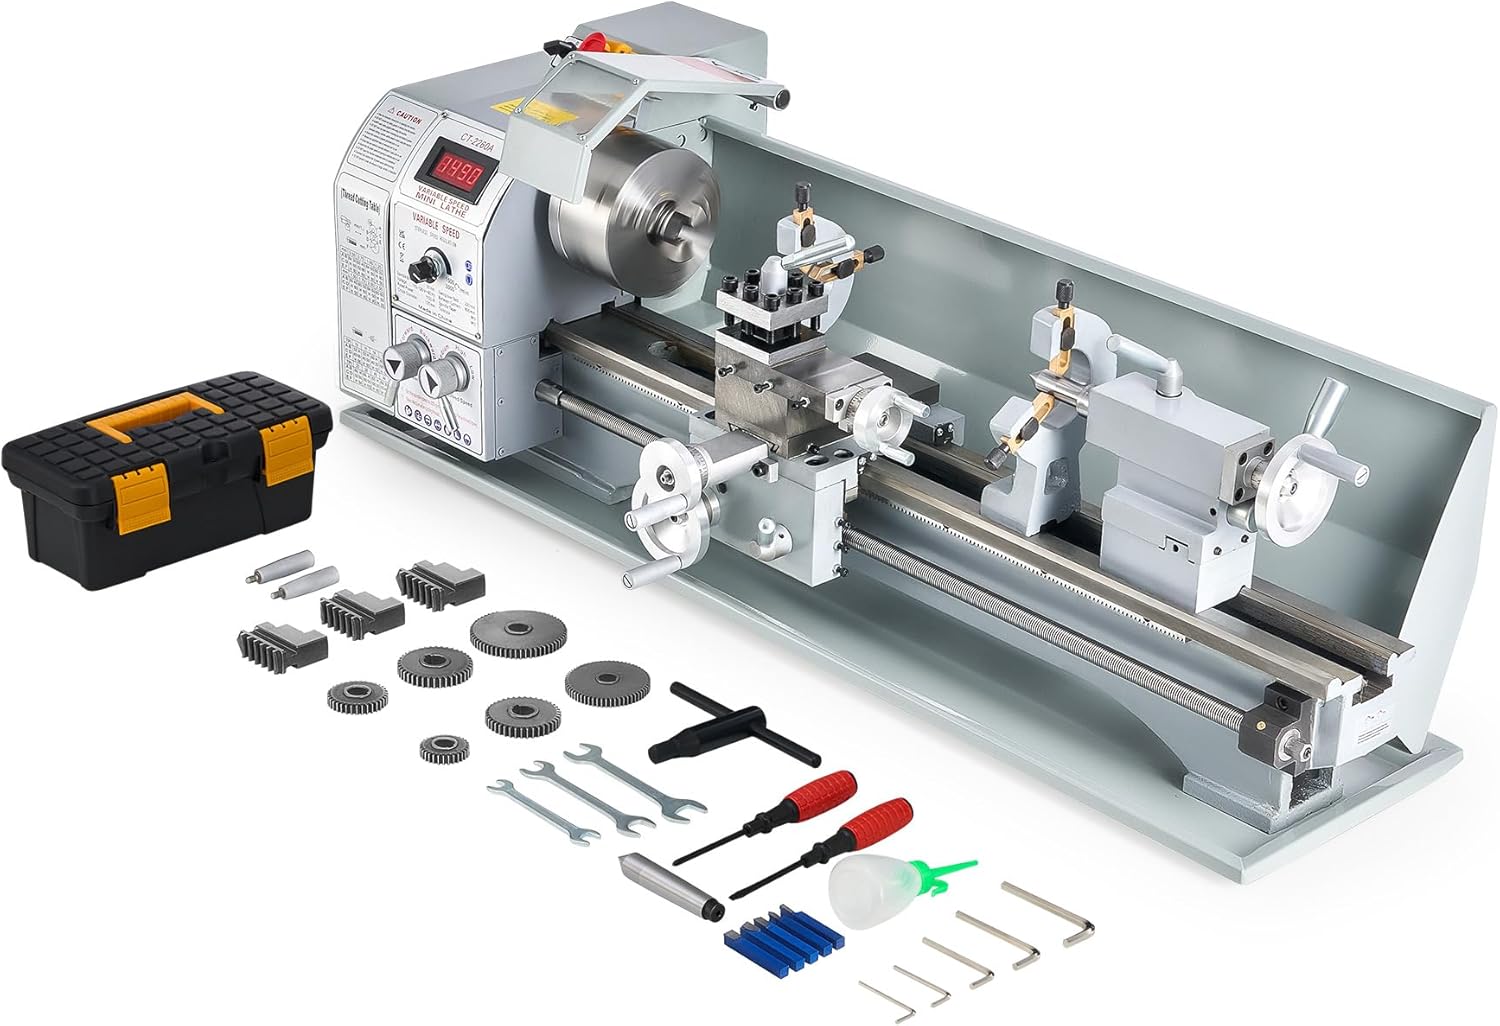
Figure 1.1: CREWORKS 9" x 24" Mini Metal Lathe with included accessories.
2. Инструкции по технике безопасности
Always prioritize safety when operating machinery. Failure to follow these instructions may result in serious injury or death.
- Прочитайте руководство: Перед началом эксплуатации ознакомьтесь со всеми инструкциями и предупреждениями.
- Средства индивидуальной защиты (СИЗ): Always wear safety glasses or a face shield. Use hearing protection. Do not wear loose clothing, gloves, ties, or jewelry that can get caught in moving parts. Tie back long hair.
- Рабочая зона: Поддерживайте рабочее место в чистоте, хорошем освещении и без беспорядка. Обеспечьте достаточное пространство вокруг станка.
- Состояние оборудования: Inspect the lathe for damage or loose parts before each use. Do not operate if damaged.
- Подключение питания: Ensure the machine is properly grounded. Disconnect power before making adjustments, changing tools, or performing maintenance.
- Безопасность заготовки: Всегда проверяйте, надежно ли закреплена заготовка.amped in the chuck or collet.
- Удаление стружки: Never remove chips by hand while the machine is running. Use a brush or hook.
- Экстренная остановка: Ознакомьтесь с расположением и принципом работы кнопки аварийной остановки.
- Надзор: Никогда не оставляйте работающую машину без присмотра.

Рисунок 2.1: Болееview of the lathe components, including the emergency stop button.
3. Компоненты и элементы управления
Understanding the various parts of your lathe is crucial for effective and safe operation.
3.1 Основные компоненты
- Головная бабка: Houses the main spindle, motor, and gear train.
- Чак: Holds the workpiece securely. The CREWORKS lathe features a 3-jaw chuck.
- Перевозка: Moves along the bed, carrying the cross slide and tool post.
- Перекрестный слайд: Moves perpendicular to the bed, allowing for facing operations.
- Compound Rest: Rotates and slides to allow for angled cuts and fine adjustments.
- Инструмент для создания сообщений: Holds the cutting tools.
- Задняя бабка: Supports the end of long workpieces or holds drilling/reaming tools.
- Кровать: The main frame of the lathe, providing precision guide rails for the carriage and tailstock.
- Ведущий винт: Used for automatic feeding and threading operations.
3.2 Элементы управления
- Power and Emergency Stop: Main power switch and immediate shutdown button.
- Переключатель «вперед/назад»: Controls spindle rotation direction.
- Ручка регулировки скорости: Varies the spindle speed.
- Цифровой дисплей скорости: Shows the current spindle RPM.
- Carriage Handwheel: Manual movement of the carriage along the bed.
- Cross Slide Handwheel: Manual movement of the cross slide.
- Compound Control Wheel: Manual movement of the compound rest.
- Tail Feed Handwheel: Advances the tailstock quill.
- Half Nut Lever: Engages the lead screw for threading.
Figure 3.1: Detailed diagram showing the main components and controls of the lathe.
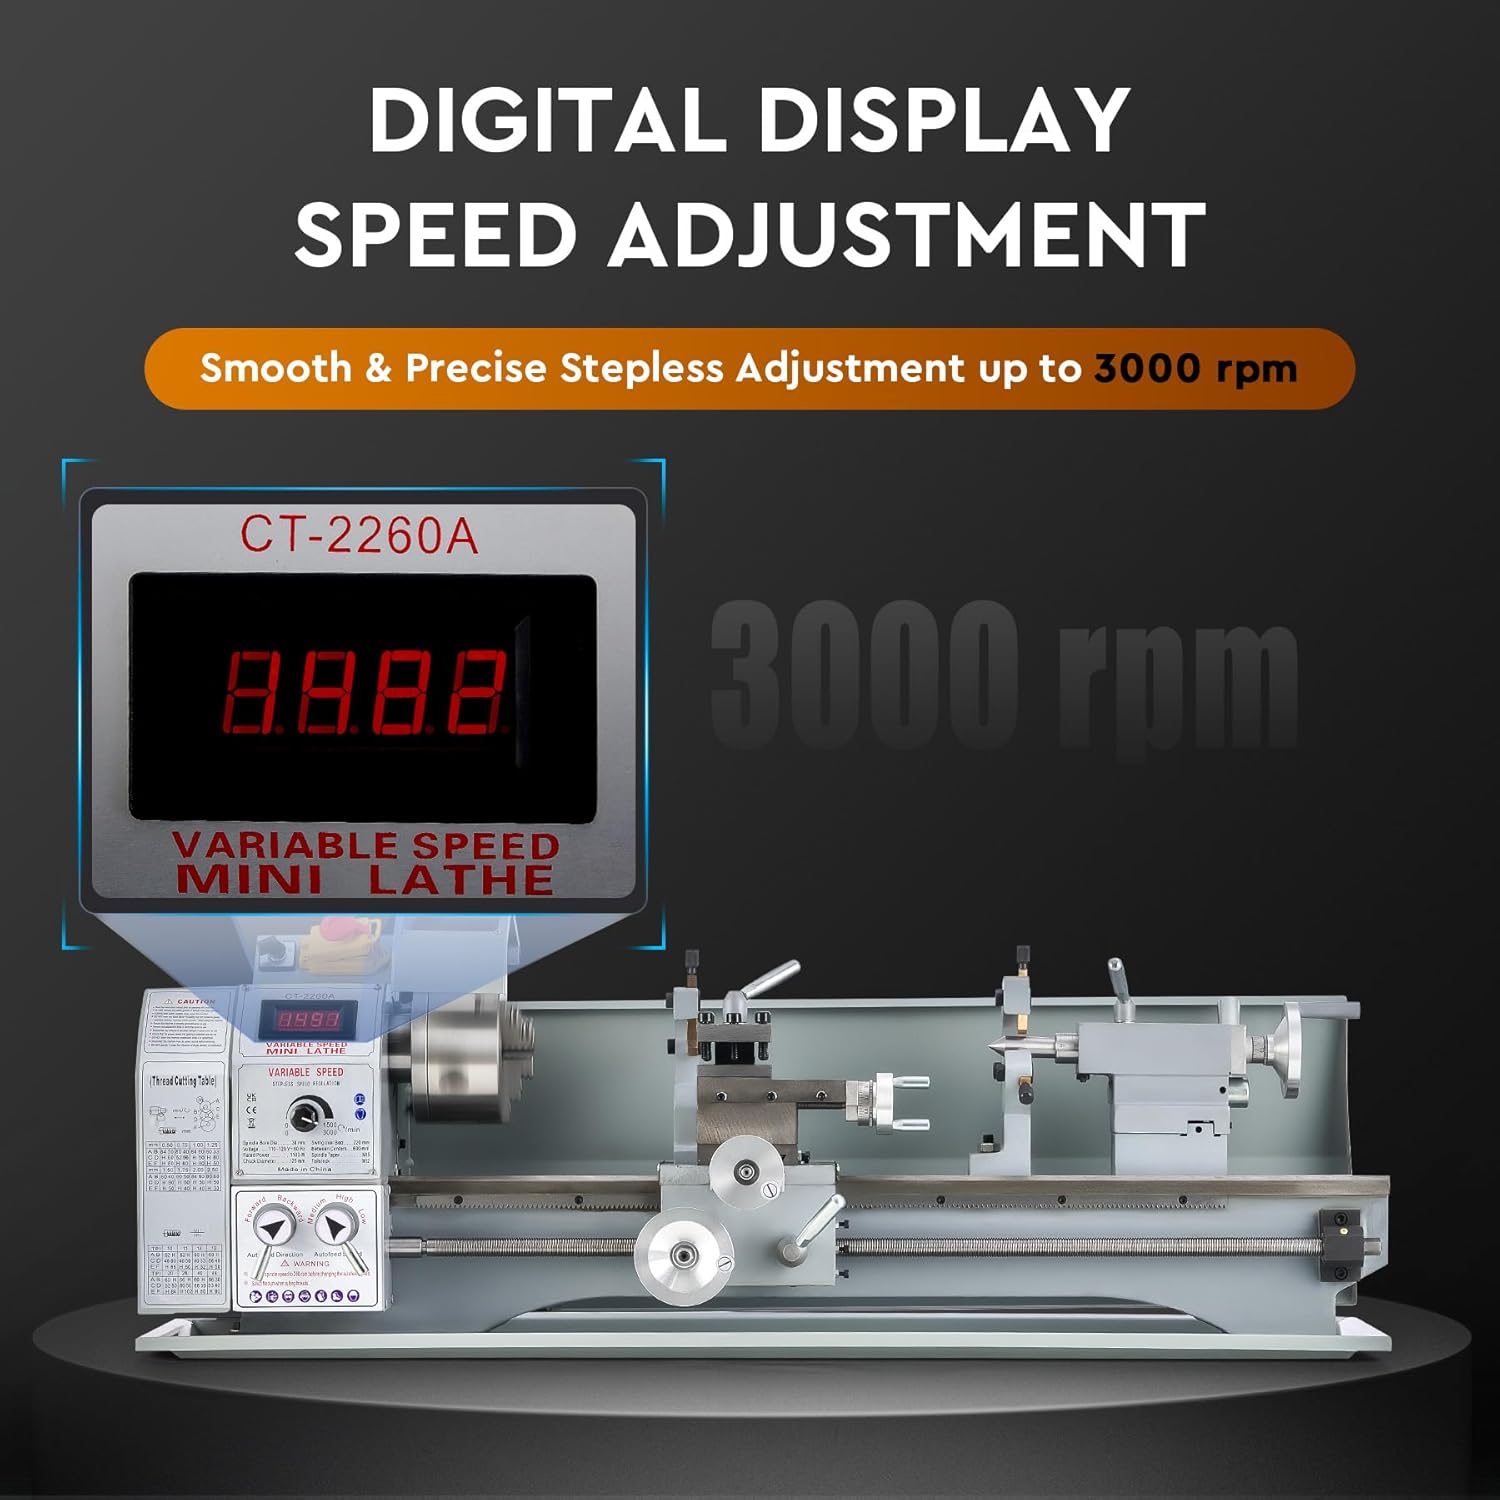
Figure 3.2: The digital display provides real-time spindle speed readings.
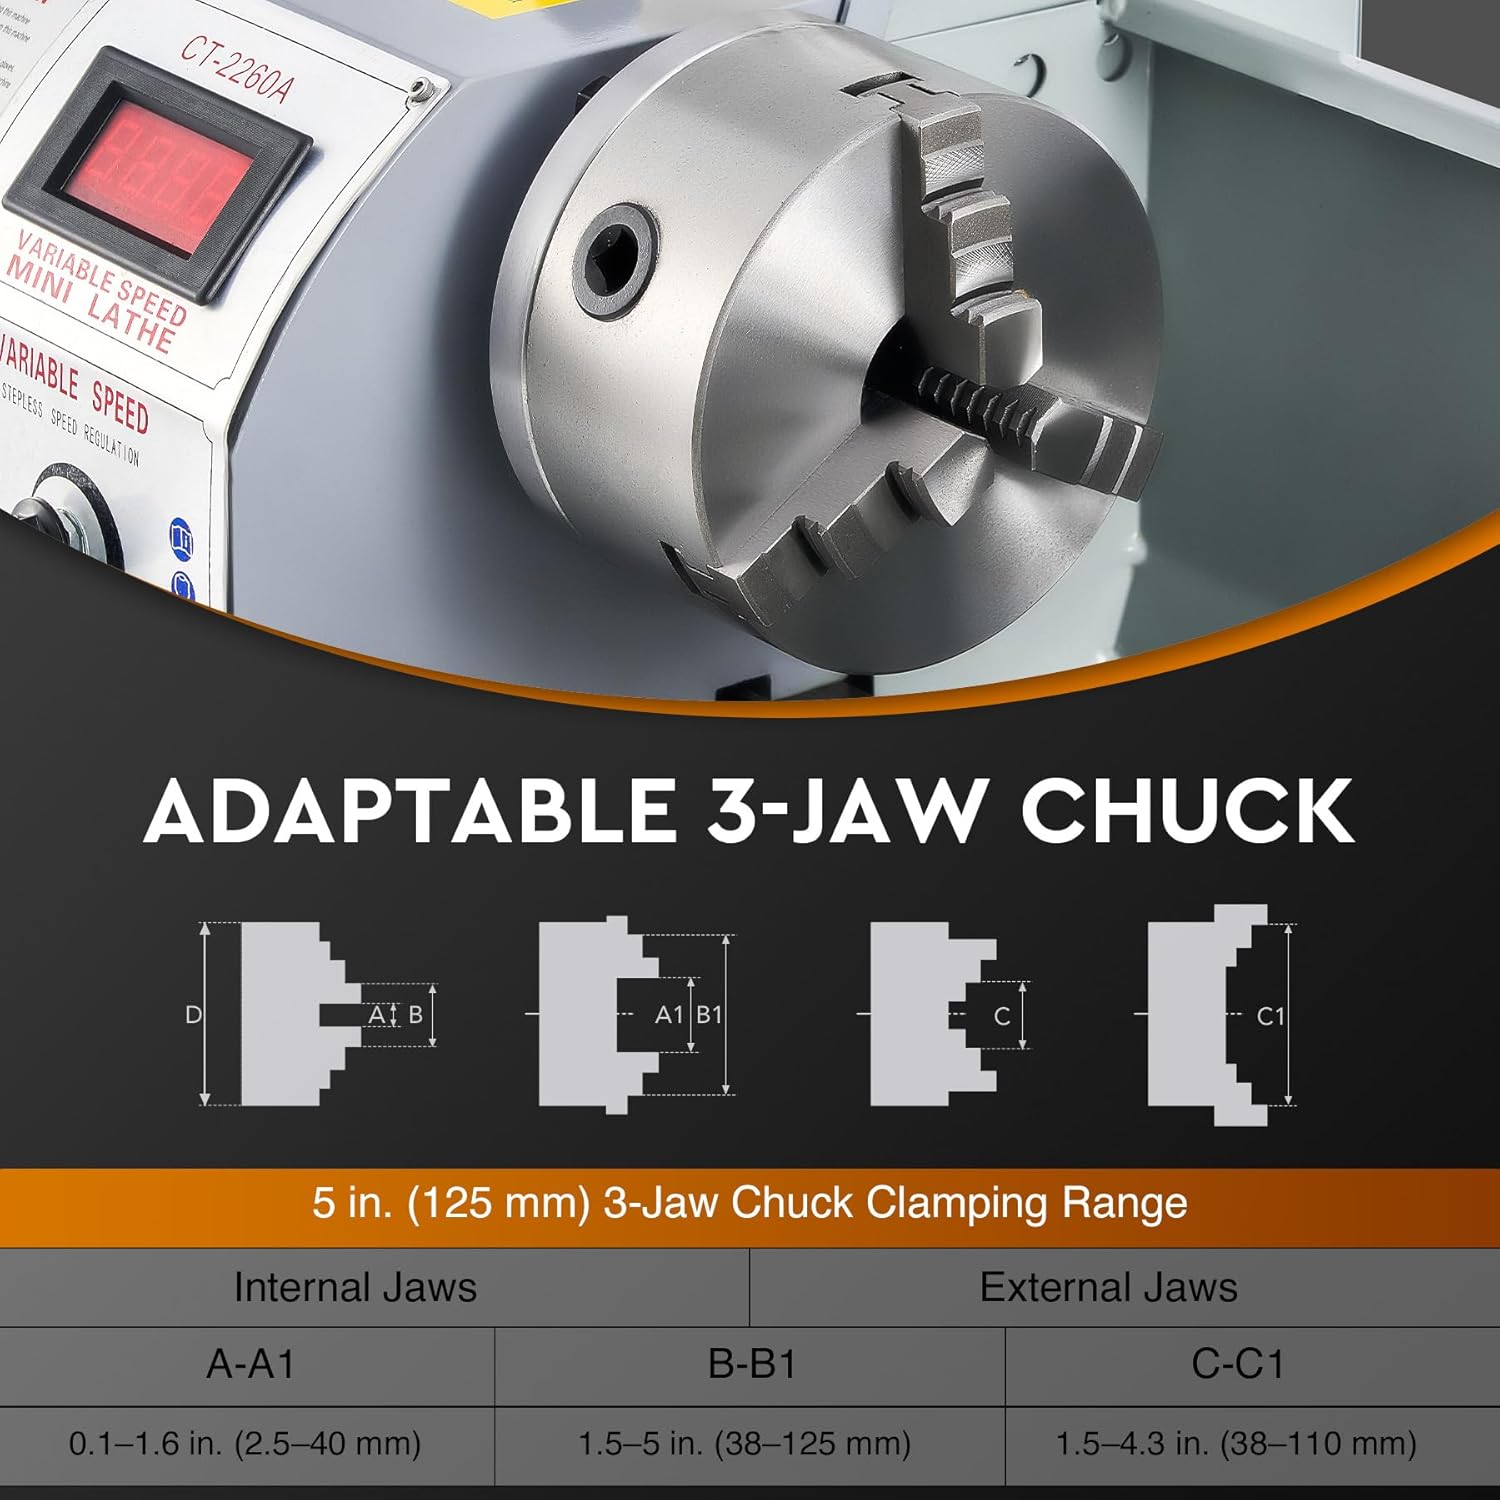
Figure 3.3: The 5-inch 3-jaw chuck is adaptable for various workpiece sizes.
4. Настройка
4.1 Распаковка и размещение
- Carefully remove the lathe and all accessories from the packaging. Retain packaging for future transport or storage.
- Clean off any protective grease or oil from the machine surfaces using a suitable degreaser.
- Place the lathe on a sturdy, level workbench capable of supporting its weight (approximately 159 lbs / 72 kg). Ensure the workbench is stable and does not wobble.
- Secure the lathe to the workbench using appropriate fasteners through the mounting holes in the base.
4.2 Первоначальные проверки
- Verify all moving parts move freely without excessive play or binding.
- Проверьте, чтобы все крепления были затянуты.
- Ensure the chuck guard is properly installed and functions correctly.
- Подсоедините шнур питания к заземленной электрической розетке.
5. Операция
5.1 Основные операции
- Включение питания: Включите главный выключатель питания. Должен загореться цифровой дисплей.
- Крепление заготовки: Open the chuck jaws using the chuck key. Insert the workpiece, ensuring it is securely centered and clamped. Remove the chuck key before starting the machine.
- Установка инструмента: Loosen the tool post locking screw. Insert the cutting tool, ensuring it is at the correct height relative to the workpiece center. Tighten the locking screw.
- Регулировка скорости: Use the speed adjustment knob to set the desired spindle RPM. The digital display will show the current speed. The lathe supports speeds from 0 to 3000 rpm.
- Spindle Direction: Select forward or reverse rotation using the direction switch.
- Engage Feed: For manual operation, use the carriage, cross slide, and compound handwheels. For automatic feed or threading, engage the half-nut lever (refer to threading charts for gear setup).
- Резка: Slowly advance the cutting tool into the workpiece. Monitor the cut and adjust feed rate as needed.
- Выключение: After completing the operation, turn off the spindle, then the main power switch.
5.2 Приложения
This mini metal lathe is versatile and can perform various operations on materials such as wood, plastics, brass, and aluminum.
- Поворот: Reducing the diameter of a workpiece.
- Облицовка: Creating a flat surface on the end of a workpiece.
- Бурение: Creating holes along the center axis using the tailstock.
- Поток: Нарезание наружной и внутренней резьбы.
- Резка: Parting off sections of material.

Figure 5.1: The lathe is suitable for a wide range of metalworking and other material applications.
6. Техническое обслуживание
Regular maintenance ensures the longevity and precision of your CREWORKS Mini Metal Lathe.
6.1 Очистка
- После каждого использования очищайте станок от стружки и мусора, особенно с направляющих станины, ходового винта и патрона. Используйте щетку или строительный пылесос.
- Wipe down all surfaces with a clean cloth.
6.2 Смазка
- Regularly apply a thin coat of machine oil to the bedways, lead screw, and other sliding surfaces to prevent rust and ensure smooth operation.
- Consult the lubrication points diagram (if available in a more detailed manual) for specific oiling requirements.
6.3 Adjustments and Inspections
- Periodically check the tension of the drive belts.
- Осмотрите кулачки патрона на предмет износа и повреждений.
- Ensure the tailstock is aligned correctly.
- Check the condition of the metal gear set for any signs of wear or damage.
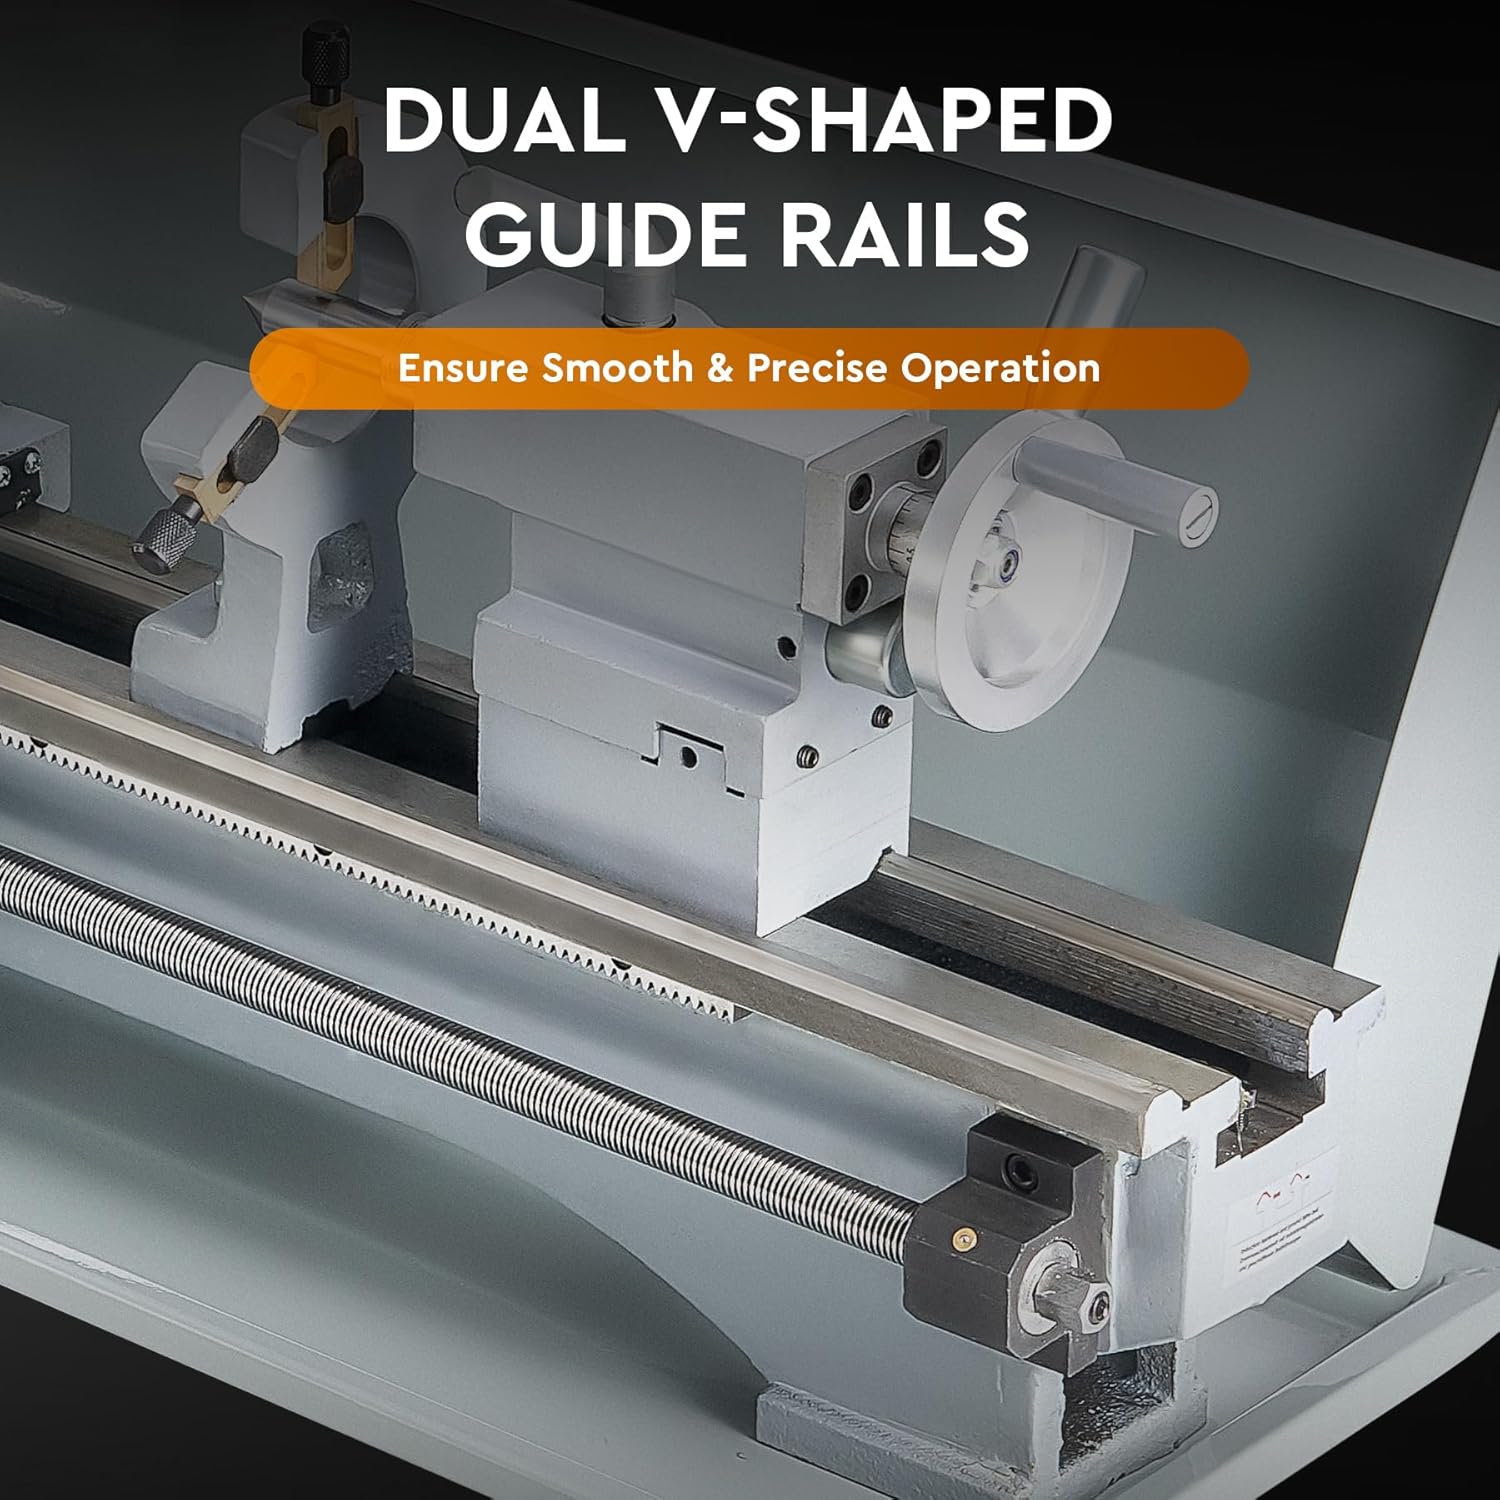
Figure 6.1: The dual V-shaped guide rails require regular cleaning and lubrication for smooth and precise operation.

Figure 6.2: The metal gear set ensures strong and efficient power transmission and should be inspected periodically.
7. Поиск Неисправностей
В этом разделе рассматриваются распространенные проблемы, с которыми вы можете столкнуться при работе на токарном станке.
| Проблема | Возможная причина | Решение |
|---|---|---|
| Токарный станок не включается. | Отсутствие электропитания; Сработала аварийная остановка; Ненадежная проводка. | Check power cord and outlet; Disengage emergency stop; Inspect wiring (if qualified). |
| Шпиндель не вращается. | Speed knob set to zero; Direction switch not engaged; Motor fault. | Increase speed; Select forward/reverse; Contact support if motor fault suspected. |
| Чрезмерная вибрация или шум. | Unbalanced workpiece; Loose components; Worn bearings; Insufficient lubrication. | Ensure workpiece is balanced and secure; Tighten all fasteners; Lubricate moving parts; Contact support for bearing issues. |
| Плохое качество обработки поверхности заготовки. | Dull cutting tool; Incorrect speed/feed rate; Workpiece not rigid; Lathe not level. | Sharpen/replace tool; Adjust speed/feed; Ensure workpiece is secure; Level the lathe. |
8. Технические характеристики
Technical specifications for the CREWORKS 9" x 24" Mini Metal Lathe.
| Особенность | Спецификация |
|---|---|
| Модель | 9" x 24" |
| Номинальная мощность | 1.5 л.с. (1100 Вт) |
| Качели над кроватью | 8.7 дюйма (220 мм) |
| Расстояние между центрами | 23.6 дюйма (600 мм) |
| Отверстие шпинделя | 1.5 дюйма (38 мм) |
| Диаметр патрона | 5 дюйма (125 мм) |
| Максимальная скорость вращения шпинделя | 3000 об/мин |
| Конус задней бабки | МТ#2 |
| Конус шпинделя | МТ#5 |
| Диапазон метрической резьбы | 0.3–3 мм |
| Диапазон резьбы в дюймах | 8–44 tpi |
| Размеры продукта (Д x Ш x В) | 39.57 x 13.78 x 16.93 дюйма |
| Вес нетто | 158.7 фунта (72 кг) |
| Материал | Cast Iron, Stainless Steel, ABS |

Рисунок 8.1: Визуальное представление основных характеристик и размеров.
9. Гарантия и поддержка
For warranty information or technical support, please refer to the contact details provided at the point of purchase or visit the official CREWORKS webсайт.
- Служба поддержки клиентов: For assistance with product issues, setup, or operation, please contact CREWORKS customer service.
- Возврат: На этот товар обычно распространяется 30-дневная политика простого возврата. Пожалуйста, ознакомьтесь с подробностями вашей покупки для получения информации о конкретных условиях.
Примечание: Any unauthorized modifications or repairs to the machine may void the warranty.


