Введение
The Happymodel ExpressLRS ES900TX and ES900RX modules offer an ultra-long range, stable operation, and low latency radio control link for FPV drones. This combo kit is designed for compatibility with most OpenTX remote controllers, including Radiomaster TX16S and Jumper T12/T16/T18 series transmitters, providing a plug-and-play experience. The ES900TX module features a customized heat sink and a 2006 fan for stable high-power operation, activating automatically at 250mW TX power. Regular firmware updates via the ExpressLRS configurator are recommended for optimal performance.
Информация по безопасности
This product is intended for adults only. Always ensure proper installation and operation to prevent damage or injury. The working voltage of the ELRS module is 5-12V. Ensure the power supply voltage of your transmitter does not exceed 12V; otherwise, the ELRS module may be damaged. Always install the antenna before powering on the module.
Содержимое упаковки
- ES900TX Module x1
- TX Antenna x1
- Molding JR Bay Mounted Case for TX Module x1
- Heat Sink x1
- Adapter Wire x1
- 2006 Fan x1
- ES900RX Module x1
- RX Antenna x2
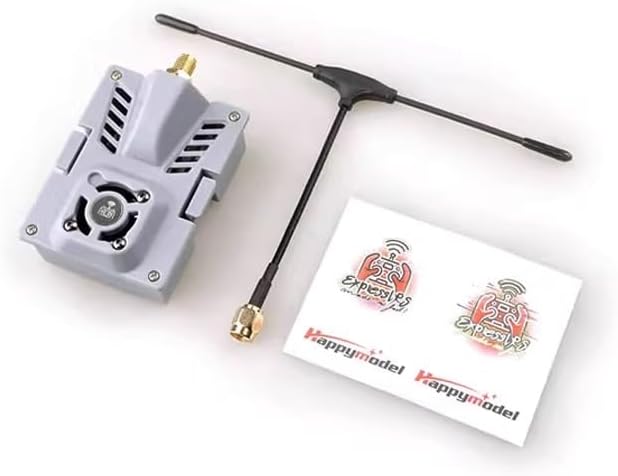
Image: Happymodel ExpressLRS ES900TX and ES900RX Combo Kit components, including the TX module with antenna, RX module with antennas, and various accessories.
Технические характеристики
| Особенность | Деталь |
|---|---|
| МК | ESP32+ESP8285 |
| Измерение | 55*39*11 мм |
| Масса | 9.2g (only the TX module) |
| Разъем антенны | СМА |
| Вход VCC | 5~13V (Recommend 5V~9V) |
| Максимальная выходная мощность | <33dBm (For >27dBm operation, fan recommended) |
| Особенность | Деталь |
|---|---|
| МК | ESP8285 |
| Вход VCC | 5V |
| Операция Текущая | ~100мА |
| Протокол Rx To FC | CRSF |
| Измерение | 12*12*3 мм |
| Масса | 0.60 г (без антенны) |
| Разъем антенны | IPEX1 |
| Выходная мощность телеметрии | <17 дБм |

Image: Happymodel ExpressLRS ES900TX module with an attached 2006 cooling fan, highlighting the internal components and fan connection.

Image: Happymodel ExpressLRS ES900RX receiver module, showing the compact size and IPEX1 antenna connector.
Настройка и установка
1. Mounting the ES900TX Module on Your Transmitter
The ES900TX module is compatible with transmitters featuring Nano interfaces (also known as Lite interfaces) that support CRSF signal output. For transmitters like the Radiomaster TX16S or Jumper T12/T16/T18, the module is designed for a plug-and-play experience.
Примечание: Рабочий томtage of this ELRS module is 5-12V. Ensure your transmitter's power supply voltage does not exceed 12V to prevent damage to the module. Always install the TX antenna before powering on the module.
Video: Demonstrates how to connect a 2.4G ELRS module to a T12D transmitter. This includes preparing the transmitter by removing the back cover, creating a hole for the module bay, installing the module bay, connecting internal cables, and then mounting the ES900TX module. It also covers setting up the transmitter's RF settings for external module use.
Video: Illustrates the process of connecting a 2.4G ELRS module to a T16D transmitter. The steps involve mounting the module, configuring transmitter parameters, connecting the receiver to the flight controller, binding the receiver, and setting parameters in Mission Planner.
2. Connecting the ES900RX Receiver to the Flight Controller
The ES900RX receiver needs to be connected to the telemetry port of your flight controller. For example, when using a RadioLink CrossFlight flight controller, you will need to modify the provided cable to connect the ES900RX to the telemetry port. Ensure the TX of the ES900RX is connected to the RX of the CrossFlight, and the RX of the ES900RX is connected to the TX of the CrossFlight.

Image: Detailed wiring diagram for connecting the ES900RX receiver to a flight controller, showing connections for GND, 5V, TX, and RX.
Процедура обязательного исполнения
Follow these steps to bind your ES900RX receiver to the ES900TX module:
- Supply power to the ES900RX. Wait until the red LED on the ES900RX turns off. Immediately turn off the power.
- Повторите вышеуказанный шаг.
- When the ES900RX is powered on for the third time, the red LED light will start to double flash quickly, indicating that the ES900RX has entered binding mode.
- Insert the ES900TX module into your radio transmitter. Choose "External RF" mode and set the protocol to "CRSF".
- Navigate to the ELRS menu within your radio system and press "[Bind]".
- The red LED on the ES900RX module will turn off, then start blinking slowly, and finally become solid. This indicates successful binding.
If binding fails, repeat the steps above.
Операционная
1. Setting Parameters on the Transmitter
After mounting the ES900TX module, power on your transmitter. Access the RF settings menu. Select "External" for module selection and choose the appropriate protocol (ELRS or CRSFV2) and baud rate (400K, 921K, or 1.87M) based on your ELRS module's parameters. The transmitter should then be able to read the module's parameters.
2. Setting Parameters in Mission Planner
To ensure your flight controller correctly interprets signals from the ELRS receiver, you may need to configure specific parameters in Mission Planner. Connect your flight controller (with the ELRS receiver connected) to your computer via USB.
In Mission Planner, navigate to the "Full Parameter List" under the "Config" tab. Adjust the following settings:
- Набор СЕРИЙНЫЙ2_БАУД к 115.
- Набор SERIAL2_ПРОТОКОЛ к 23.
- Набор RSSI_TYPE к 3.
- In RC_OPTIONS, check the option: suppress CRSF mode/rate message for ELRS systems.
- For ELRS receiver, check the option: Use 420kbaud for ELRS protocol.
Примечание: If your ELRS receiver is connected to TELEM1 of the flight controller, please set the parameters of SERIAL1 instead of SERIAL2.
After making these changes, click "Write Params" and then power cycle your flight controller to save the parameters. Once saved, you can proceed to radio calibration within Mission Planner.
Обслуживание
To ensure optimal performance and access to the latest features, it is highly recommended to regularly update the firmware of your Happymodel ExpressLRS modules. Use the official ExpressLRS Configurator for this process. The configurator can be found on the ExpressLRS GitHub releases page.
Always ensure the TX antenna is installed before powering on the module to prevent damage.
Поиск неисправностей
- Вопросы обязательности: If the binding procedure fails, ensure you follow the power cycling steps precisely (power on/off three times consecutively for the receiver). Also, verify that the transmitter's external module settings (protocol and baud rate) match the ELRS module's parameters.
- No Signal on Transmitter: Check that the ES900TX module is correctly seated in the module bay and that the external module option is selected in your transmitter's RF settings.
- Модуль не включается: Убедитесь, что источник питания имеет напряжениеtage to the transmitter is within the 5-12V range for the ELRS module. Ensure the TX antenna is connected.
- Flight Controller Not Recognizing Receiver: Double-check all wiring connections between the ES900RX and the flight controller's telemetry port. Confirm that the Mission Planner SERIAL parameters (BAUD, PROTOCOL, RSSI_TYPE, RC_OPTIONS) are correctly configured as described in the Operating section.
Гарантия и поддержка
For warranty claims, technical support, or further assistance, please contact the seller, LIBOQIAO, or refer to the official Happymodel and ExpressLRS community resources. The ExpressLRS community offers extensive documentation and support forums.
- ExpressLRS GitHub: https://github.com/ExpressLRS/ExpressLRS
- ExpressLRS Configurator: https://github.com/ExpressLRS/ExpressLRS-Configurator/releases
- ExpressLRS Firmware: https://github.com/ExpressLRS/ExpressLRS/releases


