Введение
This manual provides detailed instructions for the setup, operation, and maintenance of your ClocTeck Transparent Digital Alarm Clock. Please read this manual thoroughly before using the product to ensure proper function and longevity.
Информация по безопасности
- Не подвергайте устройство воздействию экстремальных температур, прямых солнечных лучей или высокой влажности.
- Не роняйте устройство и не подвергайте его сильным ударам.
- Держите устройство вдали от воды и других жидкостей.
- Не пытайтесь разбирать или ремонтировать устройство самостоятельно. Обратитесь к квалифицированному специалисту для обслуживания.
- Use only the specified Type-C charging cable for power.
Содержимое упаковки
Пожалуйста, проверьте комплектность после распаковки:
- ClocTeck Transparent Digital Alarm Clock (Gold)
- USB-кабель для зарядки Type-C
- Руководство пользователя (этот документ)
Продукт болееview
The ClocTeck Transparent Digital Alarm Clock features a clear LCD display that shows time, date, day of the week, temperature, humidity, and a weather icon. It is designed with a sleek aluminum alloy case.
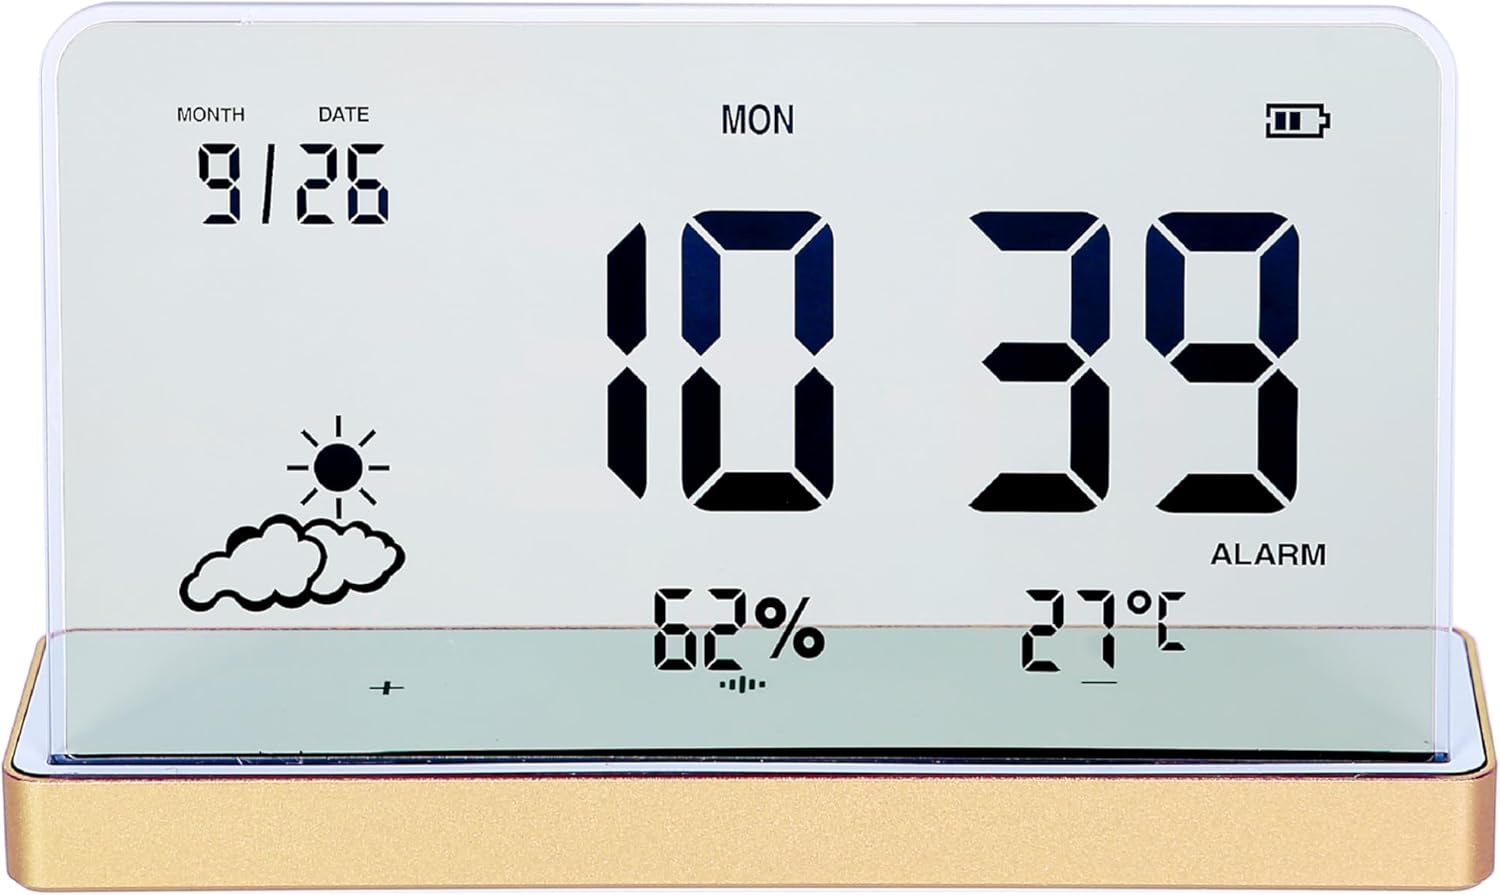
Рисунок 1: Передняя часть view of the ClocTeck Transparent Digital Alarm Clock. The display shows the current time (10:39), date (9/26), day (MON), humidity (62%), temperature (27°C), and a partly cloudy weather icon. A battery indicator is visible in the top right corner.
Основные характеристики:
- Transparent LCD Display
- Time, Date, and Day Display
- Мониторинг температуры и влажности в помещении
- Up to 3 Programmable Alarms
- Rechargeable Battery with long standby time
- Durable Aluminum Alloy Case
Настраивать
1. Включение и зарядка
The clock is powered by a built-in rechargeable battery. Before first use, or if the battery indicator is low, connect the provided Type-C USB charging cable to the charging port on the back or side of the clock and plug the other end into a standard USB power adapter (not included).
- A full charge provides approximately 75 days of operation.
- Индикатор заряда батареи на дисплее покажет состояние зарядки.
2 Первоначальное размещение
Place the clock on a stable, flat surface. For accurate temperature and humidity readings, avoid placing it near heat sources, direct sunlight, or in areas with extreme drafts.
Инструкция по эксплуатации
The clock features several buttons, typically located on the back or bottom, for setting time, alarms, and other functions. Refer to the specific button labels on your device.
1. Установка времени и даты
- Нажмите НАБОР кнопку для входа в режим установки времени.
- Используйте UP и ВНИЗ Кнопки для настройки часа. Нажмите НАБОР Для подтверждения и перехода к отсчету минут.
- Повторите для минут, года, месяца и даты.
- Нажимать НАБОР еще раз, чтобы выйти из режима настройки.
2. Установка будильника
The clock supports up to 3 independent alarms.
- Нажмите ТРЕВОГА button to cycle through Alarm 1, Alarm 2, Alarm 3, and alarm off modes.
- When an alarm is selected, press and hold the ТРЕВОГА button to enter alarm setting mode for that specific alarm.
- Используйте UP и ВНИЗ buttons to set the alarm hour and minutes. Press ТРЕВОГА для подтверждения каждого шага.
- After setting the time, you may be prompted to set the alarm's activation days (e.g., weekdays, weekends, daily). Use UP/ВНИЗ и ТРЕВОГА для выбора.
- To activate or deactivate an alarm, short press the ТРЕВОГА button until the alarm icon appears or disappears next to the corresponding alarm number on the display.
3. Отображение температуры и влажности
The clock continuously displays indoor temperature and humidity. The temperature range is -20°C to 65°C, and the humidity range is 10% to 99%.
- Temperature is displayed in Celsius (°C).
- Humidity is displayed as a percentagе (%).
4. Функция повтора сигнала
When an alarm sounds, press any button (other than the alarm off button, if present) to activate the snooze function. The alarm will sound again after a short interval (typically 5-10 minutes).
5. Регулировка яркости дисплея
The clock may feature automatic brightness adjustment or manual control. Consult the device's physical buttons for a dedicated brightness control button or a combination of buttons to adjust display intensity.
Обслуживание
- To clean the display and casing, use a soft, dry cloth. Do not use abrasive cleaners or solvents.
- Убедитесь, что порт зарядки свободен от пыли и мусора.
- Если часы не используются в течение длительного времени, храните их в прохладном, сухом месте.
Поиск неисправностей
| Проблема | Возможная причина | Решение |
|---|---|---|
| Дисплей пустой или тусклый. | Low battery or power saving mode. | Charge the device using the Type-C cable. Check brightness settings. |
| Сигнализация не срабатывает. | Сигнализация не сработала или громкость слишком низкая. | Ensure the alarm is set and activated (alarm icon visible). Check if there's a volume setting. |
| Неверные показания температуры/влажности. | Устройство размещено в неподходящих условиях. | Relocate the clock away from direct heat, cold, or high drafts. Allow time for readings to stabilize. |
| Кнопки не реагируют. | Временный сбой программного обеспечения или низкий заряд батареи. | Recharge the device. If issue persists, try a soft reset (refer to manual for reset procedure, if available, or let battery drain and recharge). |
Технические характеристики
- Модель: ClocTeck-CL01
- Размеры: Approximately 12.5 cm (Width) × 3.2 cm (Depth) × 8 cm (Height)
- Масса тела: Примерно 0.13 кг
- Материал корпуса: Алюминиевый сплав
- Тип дисплея: Transparent LCD Digital Display
- Диапазон температур: -20°С до 65°С
- Диапазон влажности: 10% до 99%
- Источник питания: Аккумуляторная батарея (зарядка через USB-порт Type-C)
- Срок службы батареи: Approximately 75 days on a full charge
- Сигнализация: 3 программируемых будильников

Figure 2: Dimensions of the ClocTeck Transparent Digital Alarm Clock. The image shows the clock with labels indicating a height of 8cm and a width of 12.5cm.
Гарантия и поддержка
ClocTeck provides a 12-month refund and exchange guarantee с даты покупки. Данная гарантия распространяется на производственные дефекты и проблемы, возникшие при нормальном использовании.
If you encounter any problems or have questions regarding your ClocTeck Transparent Digital Alarm Clock, please do not hesitate to contact our customer support team. We are committed to providing assistance and ensuring your satisfaction.
For support, please refer to the contact information provided on the product packaging or the seller's page where you purchased the item.


