1. Введение
This manual provides detailed instructions for the installation, operation, and maintenance of your Edge Audio Xtreme Series EDX5000.1FD-E0 Monoblock Amplifier. The EDX5000.1FD-E0 is a high-performance Class D full-bridge amplifier designed for powerful audio output. Please read this manual thoroughly before attempting installation or operation to ensure proper use and to prevent damage.
1.1 Меры предосторожности
- Перед выполнением любых электрических соединений всегда отсоединяйте отрицательную клемму аккумуляторной батареи автомобиля.
- Убедитесь, что вся проводка правильно проложена и закреплена, чтобы предотвратить повреждения или короткие замыкания.
- Для силовых и заземляющих соединений используйте провода соответствующего сечения, как указано в данном руководстве.
- Избегайте монтажа amplifier in locations exposed to moisture or excessive heat.
- Если вы не уверены в каком-либо этапе процесса установки, проконсультируйтесь с профессиональным установщиком.
2. Содержимое упаковки
Перед началом установки убедитесь, что в упаковке присутствуют все предметы.
- Edge Audio EDX5000.1FD-E0 Monoblock Ampпожизненнее
- Блок дистанционного управления басами
- Wiring for Remote Bass Control
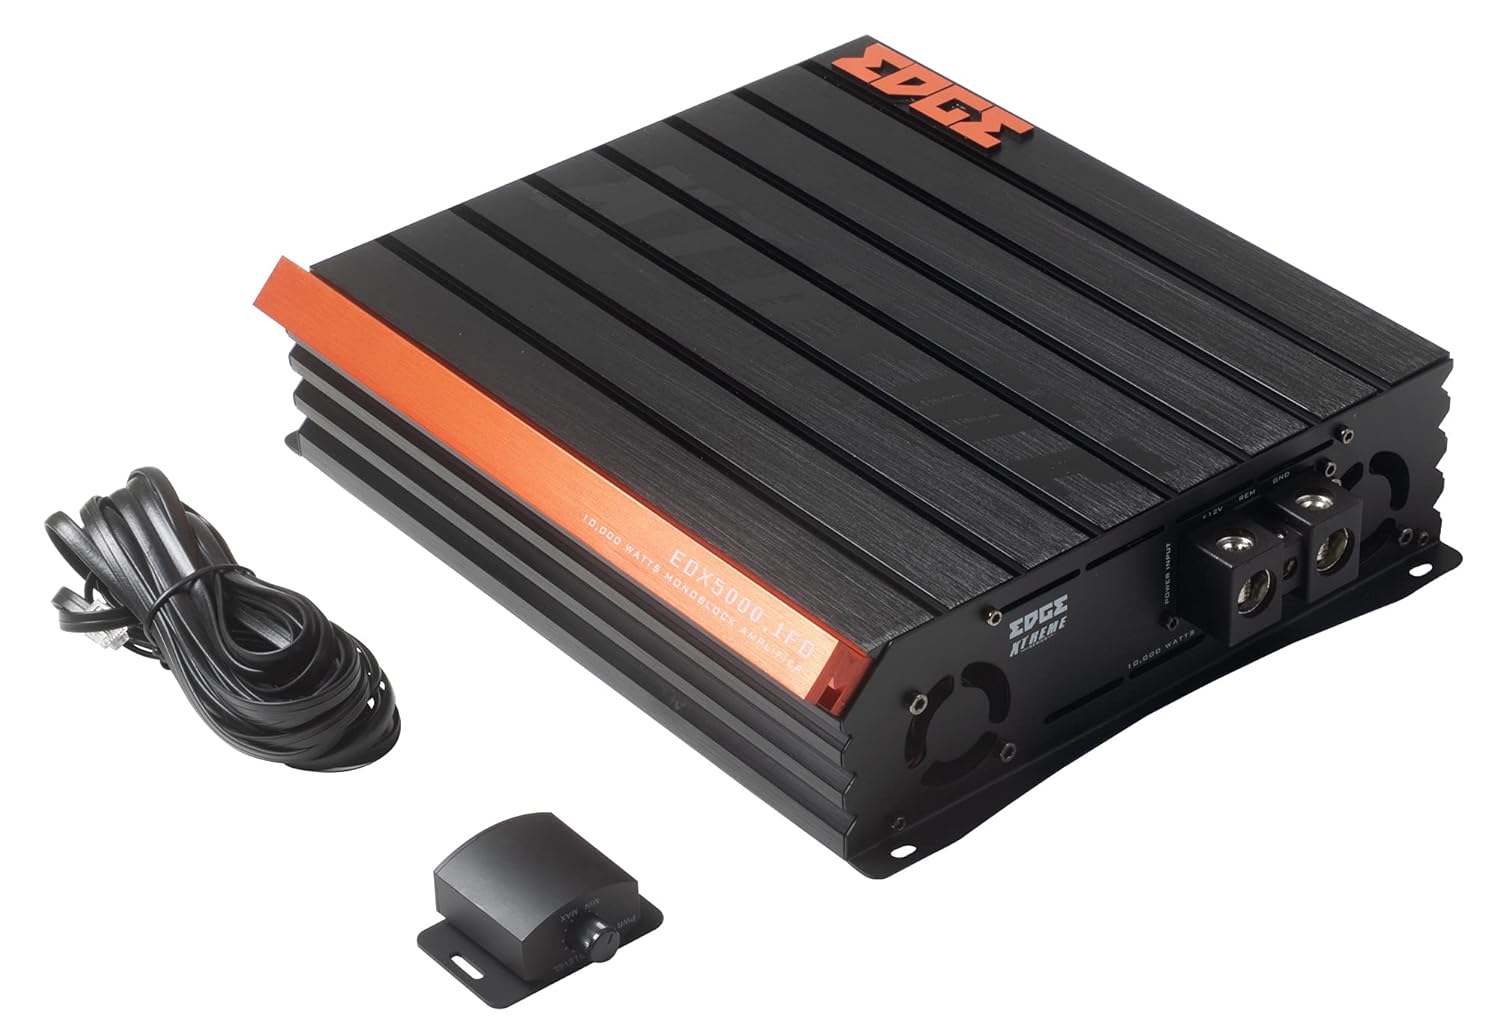
Image 2.1: Contents of the EDX5000.1FD-E0 package, including the amplifier, remote bass control, and connecting cable.

Image 2.2: The retail packaging for the Edge Audio EDX5000.1FD-E0 Monoblock Ampпожизненнее.
3. Особенности
The Edge Audio Xtreme Series EDX5000.1FD-E0 amplifier incorporates advanced features for optimal audio performance:
- Monoblock power amplifier design for dedicated subwoofer applications.
- Max Power: 10,000 watts.
- Built-in active crossovers (High-Pass Filter and Low-Pass Filter) for precise sound shaping.
- Adjustable Bass Boost circuit for enhanced low-frequency response.
- Ultra-efficient Class D topology for high power output with minimal heat generation.
- Wideband frequency response up to 20kHz.
- Full bridge technology for efficient power delivery.
- Compact footprint for versatile installation options.
- Dimensions (H x W x D): 2.5 x 10.4 x 9.1 inches (64 x 264 x 230mm).

Изображение 3.1: Верх view of the EDX5000.1FD-E0 amplifier, showcasing its compact design and heatsink fins.
4. Настройка и установка
Правильная установка имеет решающее значение для производительности и долговечности вашего ampЛицензиат. Внимательно следуйте этим рекомендациям.
4.1 Место установки
Смонтируйте amplifier in a dry, well-ventilated area, away from direct sunlight or heat sources. Ensure sufficient airflow around the amplifier's heatsink. The amplifier is designed for surface mounting.
4.2 Подключение проводки
All wiring should be securely connected and insulated to prevent short circuits. Use high-quality, appropriate gauge wiring.
4.2.1 Подключение питания
Подключите amplifier to the vehicle's electrical system as follows:
- +12 В (питание): Connect a heavy-gauge power cable (e.g., 4 AWG or larger for 10,000W max power) directly from the positive terminal of the vehicle's battery to the +12V terminal on the amplifier. Install an appropriate fuse (not supplied) within 18 inches of the battery.
- GND (земля): Подсоедините к клемме GND толстый заземляющий кабель того же сечения, что и силовой кабель. ampПрикрепите изолятор к чистой, неокрашенной металлической поверхности шасси автомобиля. Обеспечьте надежное электрическое соединение.
- REM (дистанционное включение): Подключите провод меньшего сечения (например, 18 AWG) к клемме REM на ampЭтот провод подключается к выходу дистанционного включения головного устройства. ampВключайте и выключайте усилитель вместе с вашей аудиосистемой.

Image 4.1: Power input terminals (+12V, REM, GND) on the EDX5000.1FD-E0 ampпожизненнее.
4.2.2 Разъемы аудиовхода
Connect your head unit's RCA outputs to the 'LOW INPUT' RCA jacks on the ampпожизненнее.
4.2.3 Разъемы для подключения динамиков
Connect your subwoofer(s) to the speaker output terminals on the amplifier. Ensure correct polarity (+ to + and - to -) for optimal performance. Refer to your subwoofer's specifications for impedance matching.

Image 4.2: Rear panel of the EDX5000.1FD-E0 amplifier, showing low-level inputs, crossover controls, gain, bass boost, and speaker output terminals.
5. Инструкция по эксплуатации
После установки отрегулируйте ampНастройки усилителя для оптимального качества звука.
5.1 Панель управления оконченаview
Refer to Image 4.2 for the location of the following controls:
- HPF (фильтр верхних частот): Adjusts the high-pass crossover frequency. For subwoofer applications, this should typically be set to its minimum or off, as a low-pass filter is usually preferred.
- ФНЧ (фильтр нижних частот): Adjusts the low-pass crossover frequency (15Hz - 200Hz). This filters out frequencies above the set point, sending only low frequencies to the subwoofer. Set this according to your subwoofer and system requirements, typically between 60Hz and 100Hz.
- ПРИРОСТ: Соответствует ampЧувствительность усилителя к входному уровню вашего головного устройства. Начните с минимального усиления, затем медленно увеличивайте его, пока не услышите искажения, после чего немного уменьшите. Не используйте регулятор усиления как регулятор громкости.
- УСИЛЕНИЕ БАСОВ: Adjusts the level of bass enhancement (0dB - 12dB). Use sparingly to avoid distortion.
- FREQ (Частота усиления басов): Selects the center frequency for the bass boost (35Hz - 70Hz).
- УДАЛЕННЫЙ: Port for connecting the wired remote bass control unit.
5.2 Дистанционное управление басами
The included remote bass control allows for convenient adjustment of the subwoofer output level from the driver's seat. Connect it to the 'REMOTE' port on the ampпожизненнее.
6. Техническое обслуживание
Регулярное техническое обслуживание помогает обеспечить долговечность и производительность вашего ampпожизненнее.
- Уборка: Периодически очищайте ampПротрите внешнюю поверхность усилителя мягкой сухой тканью. Не используйте агрессивные химикаты или абразивные чистящие средства. Убедитесь, что вентиляционные ребра очищены от пыли и мусора.
- Проверка связи: Annually inspect all power, ground, remote, and speaker connections for tightness and corrosion. Loose connections can cause performance issues or damage.
- Среда: Обеспечить amplifier remains in a dry, stable environment, protected from extreme temperatures.
7. Поиск Неисправностей
Если у вас возникли проблемы с вашим ampПрежде чем обращаться в службу поддержки, ознакомьтесь со следующими распространенными проблемами и их решениями.
- Нет питания:
- Проверьте предохранитель, расположенный рядом с аккумулятором.
- Verify +12V, GND, and REM connections are secure and receiving power.
- Ensure the remote turn-on wire is connected to a switched 12V source.
- Нет звука:
- Check all RCA input and speaker output connections.
- Verify head unit is powered on and outputting audio.
- Adjust the GAIN control.
- Искаженный звук:
- Reduce the GAIN setting.
- Проверьте проводку динамиков на наличие короткого замыкания или неправильной полярности.
- Убедитесь, что импеданс динамиков соответствует требуемому. ampхарактеристики лифтера.
- Reduce BASS BOOST if active.
- AmpПерегрев усилителя:
- Обеспечьте достаточную вентиляцию вокруг ampпожизненнее.
- Проверьте сопротивление динамиков; слишком низкое сопротивление может привести к перегреву.
- Verify power and ground wire gauge is sufficient.
8. Технические характеристики
Technical specifications for the Edge Audio Xtreme Series EDX5000.1FD-E0 Monoblock Ampпожизненнее:
| Особенность | Спецификация |
|---|---|
| Номер модели | EDX5000.1FD-E0 |
| Бренд | КРАЙ |
| AmpТип лифтера | Monoblock, Class D, Full Bridge |
| Максимальная мощность | 10,000 Вт |
| Частотная характеристика | До 20 кГц |
| Built-in Crossovers | Active (HPF, LPF) |
| Усиление басов | Adjustable (0-12dB) |
| Частота усиления басов | Adjustable (35Hz-70Hz) |
| Томtage | 230 Вольт (рабочее напряжение)tage Range typically 12-14.4V DC for car audio) |
| Тип крепления | Поверхностный монтаж |
| Размеры продукта (В x Ш x Г) | 2.5 x 10.4 x 9.1 дюйма (64 x 264 x 230 мм) |
| Вес продукта | 6.61 фунта |
9. Гарантия и поддержка
For warranty information or technical support, please refer to the documentation provided at the time of purchase or contact your authorized Edge Audio dealer. Keep your proof of purchase for warranty claims.