1. Введение
This manual provides instructions for the Arducam IMX477 HQ Camera Board, designed for use with Nvidia Jetson boards and Raspberry Pi Compute Modules 3/3+ and 4. The IMX477 camera offers enhanced image quality and lens flexibility compared to previous models.
It is important to note that this camera board is intended for use with Jetson Developer Kits and Raspberry Pi Compute Modules. It is not compatible with standard Raspberry Pi models (e.g., Raspberry Pi 3/3B+/4) and support for other third-party boards is not guaranteed.
2. Содержимое упаковки
Проверьте наличие всех предметов в посылке:
- 1 x Arducam 12.3MP IMX477 Camera Board with dust cap
- 1 x 11.8" (300mm) 15pin-22pin FPC Flexible Camera Cable
3. Особенности
- Датчик высокого разрешения: Features a 12.3MP IMX477 sensor with a maximum still resolution of 4056 × 3040 pixels.
- Улучшенное качество изображения: Offers improved picture quality and larger pixel size compared to the IMX219.
- CS-Mount Compatibility: Provides lens flexibility through its CS-Mount design.
- Jetson Hardware ISP Engine Support: Utilizes the NVIDIA Argus Camera plugin for H264 encoding, JPEG snapshots, and control over gain, exposure, framerate, and group hold.
- Plug-and-Play with Jetson: Designed for native operation with Jetson platforms, requiring only a driver installation without hardware modifications.
- 4-Lane Camera Interface: Routes all four data lanes to the camera connector, supporting customized carrier boards with 4-lane CSI connectors and future driver updates.
4. Инструкции по настройке
Follow these steps to set up your Arducam IMX477 HQ Camera Board:
4.1. Camera Board Overview
Familiarize yourself with the camera board components.

Figure 1: Arducam IMX477 HQ Camera Board with dust cap removed, revealing the sensor and the threaded lens mount.

Рисунок 2: Крупный план view of the metal threads within the lens mount, indicating where a CS-mount lens would be attached.
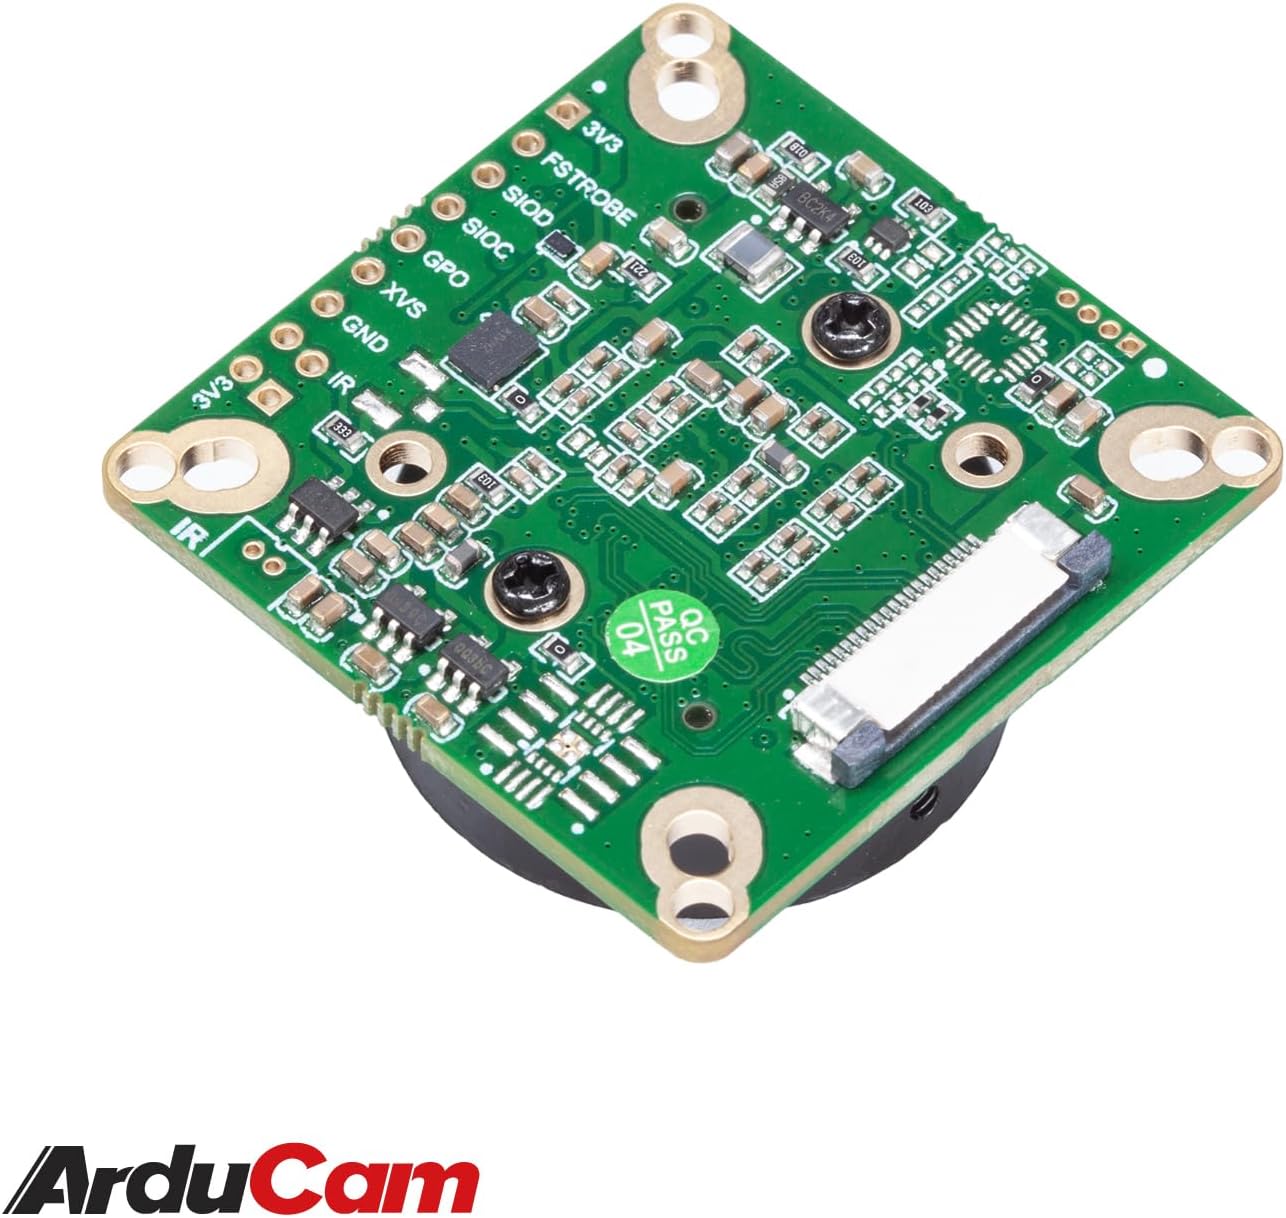
Рисунок 3: Сзади view of the camera board, highlighting the FPC connector for connecting to the host board and other surface-mount components.
4.2. Установка объектива
The IMX477 camera board supports CS-mount lenses. Carefully screw your desired lens into the threaded mount on the camera board.

Figure 4: The Arducam IMX477 HQ Camera Board with a 6mm IR CCTV lens securely attached to the CS-mount.
4.3. Connecting to Host Board
Use the provided FPC cable to connect the camera board to your Nvidia Jetson or Raspberry Pi Compute Module.
- Ensure the host board is powered off.
- Gently open the FPC connector latch on both the camera board and the host board.
- Insert the FPC cable with the metallic contacts facing the correct direction (usually towards the PCB).
- Close the latches to secure the cable.

Figure 5: The Arducam IMX477 HQ Camera Board connected to a Jetson Developer Kit using the flexible flat cable.

Figure 6: The 11.8-inch (300mm) 15pin-22pin FPC Flexible Camera Cable.
4.4. Установка драйвера
The camera requires specific kernel drivers to function. Driver installation is crucial and platform-dependent.
- Jetson Boards: This camera relies on kernel drivers. One kernel version typically requires a matching camera driver. Versions older than JetPack 4.3 (L4T 32.3.1) are not supported.
- If you upgrade or downgrade your operating system, which often involves a kernel update, you will need to reinstall a compatible driver.
- For future JetPack/kernel updates, new drivers may be required. Arducam typically provides these updates.
- Refer to the official Arducam documentation or support resources for the latest driver installation guides specific to your Jetson or Raspberry Pi Compute Module version.
5. Инструкция по эксплуатации
Once the camera board is physically connected and the drivers are correctly installed, you can begin using it with your host platform.
- Jetson Platform: Utilize the NVIDIA Argus Camera plugin. This allows for functionalities such as H264 video encoding and JPEG still image capture.
- Управление камерой: The Argus plugin provides control over various camera parameters, including gain, exposure, framerate, and group hold. Consult NVIDIA's Argus documentation for detailed API usage.
- Регулировка объектива: If using a manual lens, adjust the focus and aperture as needed for your application.
6. Поиск Неисправностей
If you encounter issues with your Arducam IMX477 HQ Camera Board, consider the following troubleshooting steps:
- Камера не обнаружена:
- Verify the FPC cable connection is secure and correctly oriented on both the camera and host board.
- Ensure the correct kernel driver is installed for your specific JetPack/OS version. Driver mismatches are a common cause of detection failures.
- Check if your Jetson Developer Kit requires specific hardware modifications (e.g., resistor changes for some Xavier NX dev kits) as documented by Arducam support for certain configurations.
- Плохое качество изображения:
- Adjust lens focus and aperture.
- Check lighting conditions.
- Review camera settings (gain, exposure, white balance) through the Argus API or other control software.
- Specific Resolution/Framerate Issues:
- Some Jetson models may have limitations on certain resolutions and framerates (e.g., 1920x1080@60fps might not work on all models, while 4032x3040@30fps might). Consult Arducam support or community forums for known compatibility issues.
- Driver Compilation Errors:
- If you are compiling drivers from source, ensure all dependencies are met and follow the instructions precisely. Kernel updates often necessitate recompilation.
If problems persist, refer to the Arducam support website or contact their technical support for assistance.
7. Технические характеристики
| Особенность | Спецификация |
|---|---|
| Бренд | Ардукам |
| Номер модели | Б0279 |
| Датчик | Сони IMX477 |
| Разрешение | 12.3 мегапикселей |
| Тем не менее разрешение | 4056 х 3040 |
| Разрешение видеозахвата | 4032x3040 |
| Крепление объектива | CS-крепление |
| Интерфейс | 4-Lane CSI |
| Совместимость | Nvidia Jetson Developer Kit, Raspberry Pi Compute Module 3/3+, CM 4 |
| Вес товара | 1.06 унций (приблизительно 30 граммов) |
| Размеры упаковки | 2.17 x 1.65 x 1.57 дюйма |
8 Поддержка
For further assistance, technical documentation, driver updates, or to report issues, please visit the official Arducam webсайте или обратитесь в их службу поддержки клиентов.
Ардукам Webсайт: www.arducam.com


