1. Введение
Thank you for choosing the Strex 12 LED Universal RCA Reversing Camera. This manual provides essential information for the proper installation, operation, and maintenance of your new reversing camera. Please read this manual thoroughly before use to ensure optimal performance and safety.
2. Информация по технике безопасности
- Always ensure your vehicle is turned off and the parking brake is engaged before attempting any installation or maintenance.
- Disconnect the vehicle's battery before connecting any electrical components to prevent short circuits or damage.
- Ensure all wiring is properly insulated and secured to prevent damage from vibration, heat, or moisture.
- Do not obstruct the camera's view with dirt, snow, or ice. Regularly clean the lens for clear visibility.
- This camera is designed as an aid for reversing and parking. Always check your surroundings visually and use your mirrors.
3. Содержимое упаковки
Проверьте наличие всех предметов в упаковке:
- 1x Strex 12 LED Reversing Camera
- 1x Mounting material with 6M RCA cable
- 1x Руководство пользователя

Рисунок 3.1: Содержимое упаковки. The image displays the Strex 12 LED reversing camera, the included 6-meter RCA cable and power cable, and the product packaging.
4. Технические характеристики
| Особенность | Спецификация |
|---|---|
| Бренд | Стрекс |
| Номер модели | СП97 |
| Томtage | 12 В постоянного тока |
| Разрешение видеозаписи | 720p |
| Действительный Viewугол наклона | 140 градусов |
| Тип объектива | Широкоугольный |
| Технология оптических датчиков | КМОП |
| Размер оптического датчика | 1/4 дюйма |
| Тип разъема | РКА |
| Тип установки | Заднийview устанавливать |
| Совместимые устройства | Монитор |
| Размеры продукта | 40Д x 23Ш x 23В миллиметров |

Рисунок 4.1: Габариты камеры. This image illustrates the physical dimensions of the Strex reversing camera, including its mounting bracket.
5. Настройка и установка
The Strex 12 LED Reversing Camera is designed for a plug-and-play installation. Follow these general steps:
- Выберите место установки: Select a suitable location at the rear of your vehicle, typically above the license plate, ensuring a clear view and that the camera does not obstruct any vehicle lights or features.
- Установите камеру: Use the provided mounting hardware to securely attach the camera. Ensure it is firmly fixed to prevent movement from vibrations.
- Подключите питание: Connect the camera's power cable to your vehicle's DC 12V system. It is recommended to connect it to the reverse light circuit so the camera activates automatically when the vehicle is put into reverse.
- Подключите видеокабель: Route the 6-meter RCA video cable from the camera to your in-car monitor or head unit. Ensure the cable is routed safely, avoiding moving parts, sharp edges, and excessive heat.
- Тестовая функциональность: Once all connections are made, turn on your vehicle and engage reverse gear to test the camera's functionality. Adjust the camera angle if necessary for optimal viewинж.
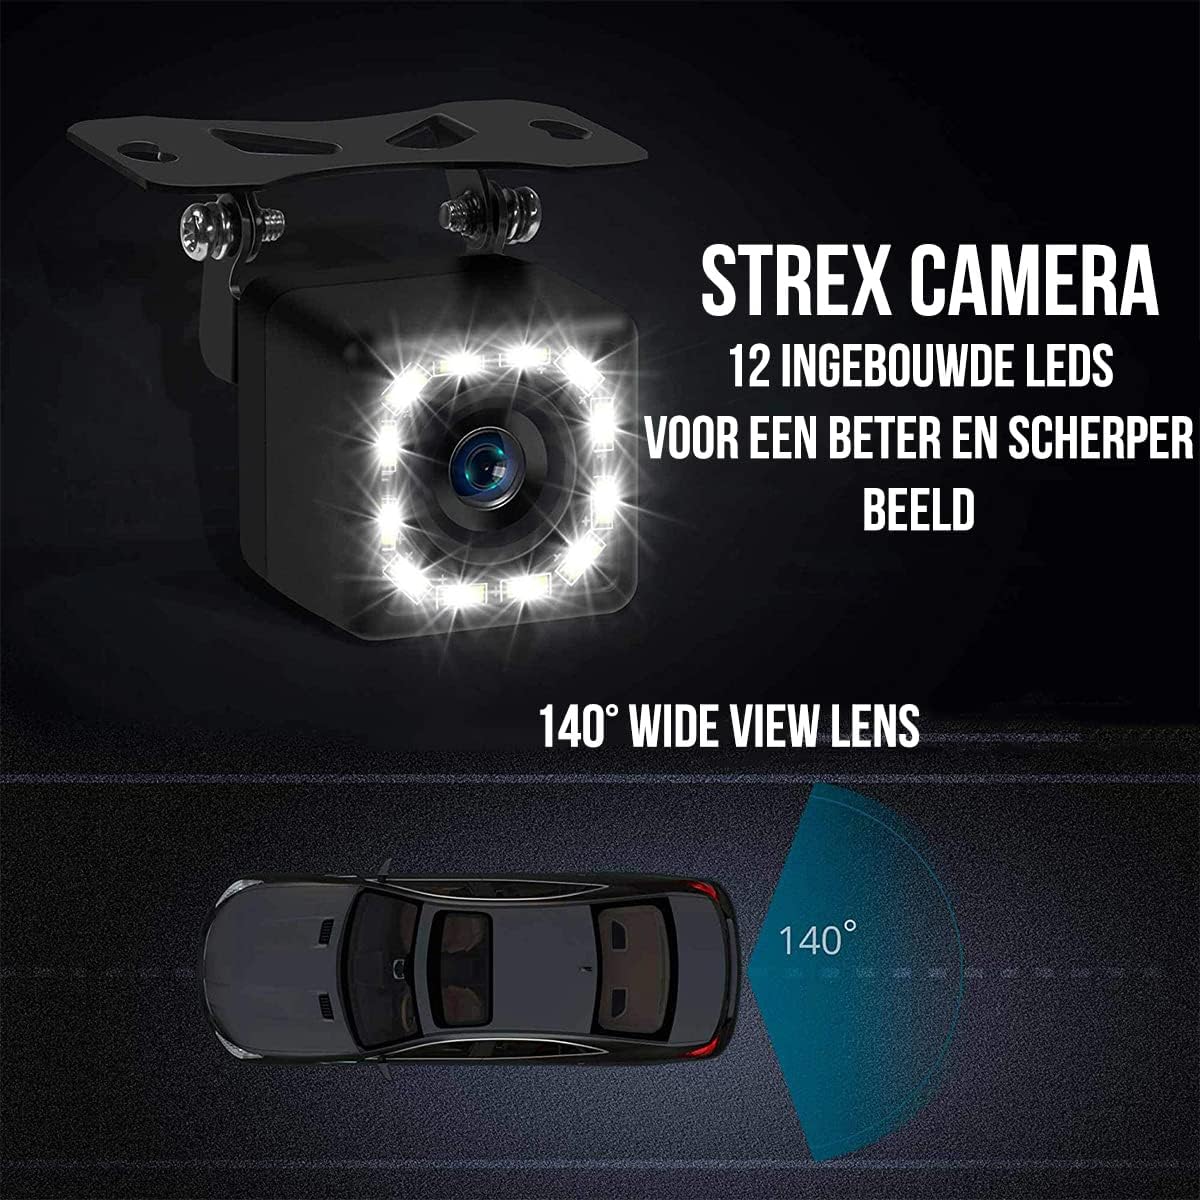
Figure 5.1: Camera Features. This image highlights the 12 built-in LEDs and the 140-degree wide-angle lens of the Strex camera, crucial for installation and operation.
6. Инструкция по эксплуатации
The Strex 12 LED Reversing Camera provides clear visibility to assist with parking and reversing maneuvers.
- Автоматическая активация: When properly installed, the camera will automatically activate and display the rear view on your connected monitor when you shift your vehicle into reverse gear.
- Прозрачный View: The camera features a 140° wide-angle lens, providing an expansive field of view to detect obstacles and other vehicles.
- Улучшенное ночное видение: Equipped with 12 powerful LED lights and 720P resolution, the camera ensures a clear image even in low-light or completely dark conditions.

Figure 6.1: Ultra Clear Image. The camera's advanced lens and chip technology ensure a clear image both during the day and at night.

Figure 6.2: Improved Night Vision. This comparison demonstrates the superior clarity and brightness provided by the Strex camera's night vision capabilities.
7. Техническое обслуживание
To ensure the longevity and optimal performance of your Strex Reversing Camera, follow these maintenance guidelines:
- Регулярная уборка: Периодически прочищайте объектив камеры мягкой тряпкой.amp cloth to remove dirt, dust, and water spots. Avoid abrasive cleaners that could scratch the lens.
- Проверьте соединения: Occasionally inspect all cable connections to ensure they are secure and free from corrosion or damage.
- Устойчивость к атмосферным воздействиям: The camera features an IP68 waterproof rating, making it resistant to rain, snow, and other extreme weather conditions. However, avoid direct high-pressure water jets on the camera.

Figure 7.1: Robust and Waterproof Design. The image emphasizes the camera's durable construction and IP68 waterproof rating, ensuring reliable performance in all weather conditions.
8. Поиск Неисправностей
If you encounter issues with your Strex Reversing Camera, refer to the following common problems and solutions:
- Нет изображения на мониторе:
- Check all power connections to ensure the camera is receiving 12V power.
- Verify the RCA video cable is securely connected to both the camera and the monitor.
- Ensure your monitor is set to the correct input source for the camera.
- Check the vehicle's reverse light circuit for proper function if the camera is wired to it.
- Плохое качество изображения:
- Очистите объектив камеры от грязи, пыли и влаги.
- Убедитесь, что в поле зрения камеры нет никаких препятствий. view.
- Check for any kinks or damage in the video cable.
- Verify the monitor's display settings (brightness, contrast) are correctly adjusted.
- Прерывистый сигнал:
- Проверьте все кабельные соединения на наличие ослабления или коррозии.
- Ensure the power supply to the camera is stable.
Если эти действия не помогли решить проблему, обратитесь в службу поддержки клиентов.
9. Гарантия и поддержка
This Strex product comes with a standard manufacturer's warranty. Please refer to the warranty card included in your package or contact your retailer for specific warranty terms and conditions.
For technical support, troubleshooting assistance, or warranty claims, please contact Strex customer service through the retailer where you purchased the product or visit the official Strex webсайт для контактной информации.


