1. Введение
This user manual provides comprehensive instructions for the installation, operation, and maintenance of your Immergas CARV2 Wireless Chronothermostat. Please read this manual thoroughly before using the device to ensure proper functionality and safety. This device is designed for precise temperature control in HVAC systems.
2. Информация по технике безопасности
Всегда соблюдайте следующие меры предосторожности:
- Монтаж должен выполняться только квалифицированным персоналом в соответствии с местными электротехническими нормами.
- Перед выполнением любых работ по установке или техническому обслуживанию отключите питание.
- Не подвергайте устройство воздействию воды или чрезмерной влажности.
- Не пытайтесь ремонтировать устройство самостоятельно. По всем вопросам обслуживания обращайтесь к квалифицированному специалисту.
- Ensure the power supply matches the device's specifications (230 Volts).
3. Продукт закончилсяview
The Immergas CARV2 is a wireless digital chronothermostat designed for efficient heating and cooling management. It features a clear display and intuitive controls for setting desired temperatures and programming schedules.
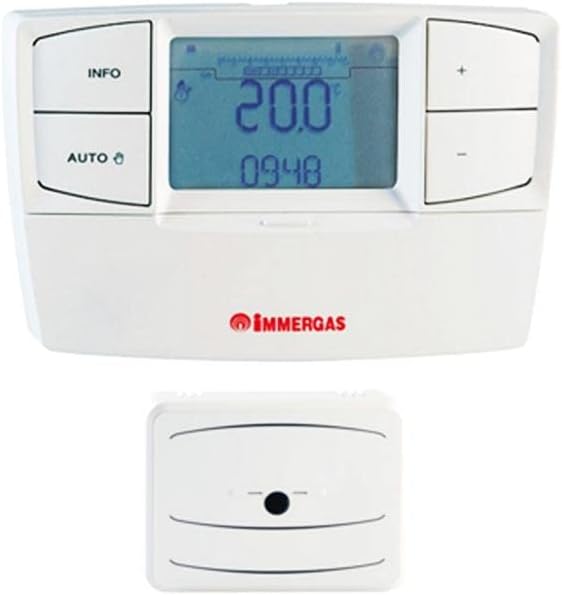
Figure 3.1: Immergas CARV2 Wireless Chronothermostat (top) showing the display with temperature and time, and control buttons (INFO, AUTO, +, -). Below it is the wireless receiver unit (bottom) with a small indicator light.
3.1 Компоненты
- Блок термостата: The main control unit with display and buttons.
- Беспроводной приемник: Connects to the HVAC system and communicates wirelessly with the thermostat unit.
3.2 Дисплей и кнопки
The thermostat unit features a digital display showing current temperature, set temperature, time, and operating mode. Control buttons include:
- Кнопка ИНФОРМАЦИЯ: Accesses information screens.
- Кнопка АВТО: Toggles between automatic and manual operating modes.
- + Кнопка: Increases temperature setting or navigates menus.
- - Кнопка: Decreases temperature setting or navigates menus.
4. Настройка и установка
Proper installation is crucial for optimal performance. Refer to the detailed wiring diagrams provided with the product packaging for specific connections.
4.1 Установка приемного блока
- Ensure power to the HVAC system is turned off at the main breaker.
- Mount the receiver unit near your boiler or heating system, ensuring it is within wireless range of the thermostat unit.
- Connect the receiver unit to your HVAC system's control wiring according to the provided wiring diagram. This typically involves connecting to the boiler's thermostat terminals.
- Secure the receiver unit to the wall or mounting surface.
4.2 Thermostat Unit Placement
- Place the thermostat unit in a central location within the heated area, away from direct sunlight, drafts, or heat sources (e.g., lampс, бытовая техника).
- Ensure the location allows for accurate room temperature sensing.
- The thermostat unit is battery-powered (batteries not included, typically AA or AAA). Insert fresh batteries before initial use.
4.3 Первоначальное сопряжение (при необходимости)
Some units may require initial pairing between the thermostat and receiver. Refer to the quick start guide for specific pairing instructions. Generally, this involves pressing a pairing button on both units within a short timeframe.
5. Инструкция по эксплуатации
5.1 Включение питания и первое отображение
Once batteries are inserted and the receiver is powered, the thermostat display will illuminate, showing the current room temperature and time.
5.2 Установка времени и даты
Access the settings menu (often by holding the INFO button) to set the correct time and date. Use the + and - buttons to adjust values and the INFO or AUTO button to confirm and move to the next setting.
Режимы работы 5.3
- Автоматический режим (AUTO): The thermostat follows the programmed weekly schedule. Press the AUTO button to activate this mode.
- Ручной режим: Allows you to set a constant desired temperature that overrides the schedule. Press the AUTO button until the manual mode indicator appears. Use + and - to adjust the temperature.
- Выключенный режим: Turns off heating/cooling. Consult the manual for specific steps to enter this mode, often by setting a very low temperature or a dedicated off setting.
5.4 Регулировка температуры
In manual mode, or during a temporary override in auto mode, use the + и - buttons to increase or decrease the desired temperature. The new setpoint will be displayed.
5.5 Еженедельное расписание программирования
The CARV2 allows for a detailed weekly programming schedule. This typically involves setting different temperatures for various times of the day across each day of the week.
- Enter programming mode (refer to your specific model's manual, often by holding INFO or AUTO for several seconds).
- Выберите день недели, который вы хотите запрограммировать.
- Set the desired temperature for specific time intervals (e.g., 6:00 AM - 8:00 AM, 8:00 AM - 5:00 PM, etc.).
- Repeat for all desired time intervals and days.
- Save and exit programming mode.
6. Техническое обслуживание
6.1 Очистка
Clean the thermostat unit with a soft, dry cloth. Do not use abrasive cleaners, solvents, or spray directly onto the unit. Ensure no moisture enters the device.
6.2. Замена батареи
When the low battery indicator appears on the display, replace the batteries immediately. Use high-quality alkaline batteries (e.g., AA or AAA, depending on model). Open the battery compartment on the back of the thermostat unit, remove old batteries, and insert new ones, observing polarity.
7. Поиск Неисправностей
| Проблема | Возможная причина | Решение |
|---|---|---|
| Дисплей пуст. | No power to thermostat unit (dead batteries). | Замените батареи. |
| Термостат не регулирует отопление/охлаждение. | Receiver unit not powered or not paired. Incorrect wiring. | Check power to receiver. Re-pair thermostat and receiver. Verify wiring connections. |
| Показания температуры кажутся неточными. | Thermostat placed in an unsuitable location (direct sunlight, draft). | Relocate thermostat to a more central and stable temperature area. |
| Scheduled program not running. | Thermostat is in manual mode. Program not saved correctly. | Switch to AUTO mode. Re-enter and save the program. |
8. Технические характеристики
| Особенность | Деталь |
|---|---|
| Бренд | Иммергаз |
| Номер модели | 7Т.81.0.000.2301 |
| Цвет | Белый |
| Вес товара | 1 Килограмм |
| Томtage | 230 Вольт |
| Технология связи | Беспроводной |
| Источник питания | Electric Cable (for receiver), Battery (for thermostat unit) |
| Тип контроллера | Кнопка нажатия |
| Тип контроля температуры | Manual / Programmable |
| Конкретные области применения продукта | ОВиК |
9. Гарантия и поддержка
For warranty information and technical support, please refer to the documentation included with your product or contact Immergas customer service directly. Spare parts availability information is not provided at this time.
Примечание: Технические характеристики и функции продукта могут быть изменены без предварительного уведомления.


