1. Введение
The Ooni Pro Pellet Burner is an optional accessory designed to provide an additional fuel option for your Ooni Pro Multi-Fuel Oven. This burner allows you to use wood pellets as a fuel source, offering a consistent heat for cooking. It is engineered for easy attachment and operation, integrating seamlessly with the Ooni Pro oven structure.
Важный: The Ooni Pro Pellet Burner is exclusively for use with the Ooni Pro Multi-Fuel Oven. Do not attempt to use it with any other oven model.
2. Информация по технике безопасности
Please read and understand all safety instructions before operating the Ooni Pro Pellet Burner. Failure to follow these instructions may result in property damage, personal injury, or death.
- Только для наружного использования: This appliance is designed for outdoor use in a well-ventilated area. Never operate indoors or in enclosed spaces.
- Держитесь подальше: Maintain a safe distance from combustible materials (e.g., wooden decks, fences, overhanging branches).
- Горячие поверхности: The burner and oven surfaces will become extremely hot during operation and remain hot for a period after use. Always use heat-resistant gloves when handling components.
- Топливо: Use only food-grade hardwood pellets specifically designed for pizza ovens or grills. Do not use charcoal, lighter fluid, gasoline, or other flammable liquids.
- Надзор: Never leave the burner unattended while in operation. Keep children and pets away from the hot appliance.
- Ветровые условия: Strong winds can affect burner performance and heat distribution. Position the oven in a sheltered area if possible.
- Тушение: Allow the burner to cool completely before cleaning or storing. Do not use water to extinguish pellets; allow them to burn out naturally or use a fire extinguisher if necessary.
3. Что в коробке
Аккуратно распакуйте все компоненты и убедитесь, что вы получили следующие предметы:
- Ooni Pro Pellet Burner unit (includes burner tray, burner grate, hopper, hopper lid with handle, and pellet slide)
- Винты 2 х 10 мм
- Шестигранный ключ

4. Настройка и установка
Follow these steps to attach the Ooni Pro Pellet Burner to your Ooni Pro Multi-Fuel Oven:
- Ensure your Ooni Pro oven is cool and not in operation.
- Locate the fuel inlet at the rear of your Ooni Pro oven.
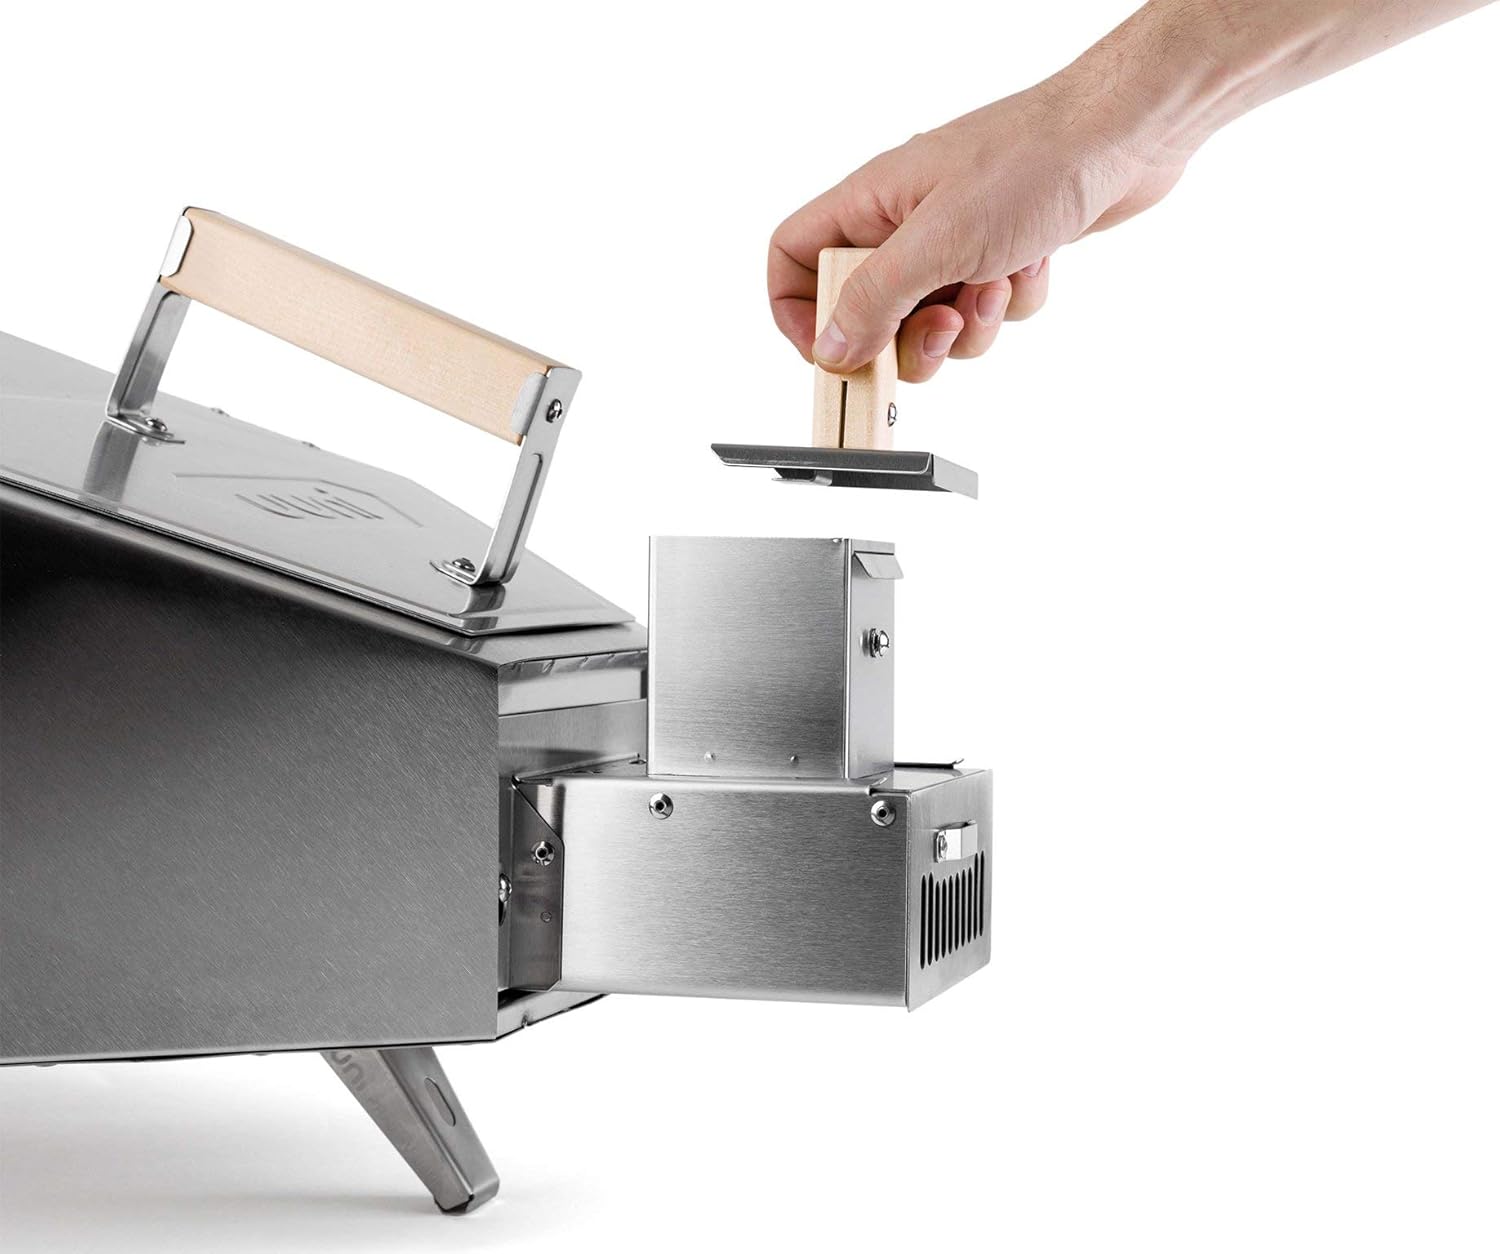
- Slide the Ooni Pro Pellet Burner unit into the fuel inlet at the back of the oven. Ensure it is fully seated and aligned.
- Insert the two 10 mm screws into the designated holes on the burner unit and tighten them using the provided Allen key. This secures the burner to the oven.
- Once secured, the Ooni Pro Pellet Burner is ready for operation.


5. Инструкция по эксплуатации
Operating the Ooni Pro Pellet Burner requires attention to fuel management and temperature control.
5.1. Loading Pellets
- Ensure the pellet slide is fully inserted into the burner.
- Open the hopper lid and fill the hopper with food-grade hardwood pellets. Do not overfill.
5.2. Зажигание
- Once pellets are loaded, use a natural firelighter or a small amount of kindling placed on top of the pellets in the burner tray.
- Ignite the firelighter/kindling. The flame will gradually ignite the pellets.
- Allow the pellets to establish a strong flame and begin to glow before cooking. This may take 10-15 minutes.
5.3. Temperature Management and Refueling
The Ooni Pro Pellet Burner provides a consistent heat source, but temperature management requires practice, especially considering external factors like wind. Pellets burn at a relatively fast rate, and heat can dissipate quickly if not actively burning.
- Мониторинг: Regularly check the flame and the amount of pellets in the burner.
- Заправка: To add more pellets, carefully pull out the pellet slide.
- Add a small amount of pellets to the burner tray, then reinsert the slide. Avoid adding too many pellets at once, as this can smother the flame.
- Сроки: For optimal cooking, time your pellet additions to maintain a consistent high temperature, especially when cooking multiple items.
- Wind Impact: Be aware that wind can significantly impact the burner's performance and pellet consumption rate. Adjust your pellet feeding strategy accordingly.


6. Техническое обслуживание
Regular cleaning and maintenance will ensure the longevity and optimal performance of your Ooni Pro Pellet Burner.
- Остывать: Always allow the burner to cool completely before attempting any cleaning or maintenance.
- Удаление пепла: After each use, remove the pellet slide and carefully empty any ash from the burner tray. A small brush or vacuum cleaner can be used once cooled.
- Очистка поверхности: Протрите поверхности из нержавеющей стали с помощью рекламного средства.amp cloth. For stubborn stains, use a mild stainless steel cleaner. Avoid abrasive cleaners or scouring pads.
- Хранилище: When not in use, store the Ooni Pro Pellet Burner in a dry, sheltered location to protect it from the elements.
7. Поиск Неисправностей
If you encounter issues with your Ooni Pro Pellet Burner, refer to the following common problems and solutions:
- Pellets Not Lighting or Staying Lit:
- Ensure pellets are dry and of good quality. Damp pellets will not ignite properly.
- Verify sufficient airflow. Check for any blockages in the burner or oven's ventilation.
- Use an adequate amount of firelighter or kindling to establish a strong initial flame.
- Avoid overfilling the burner tray, which can smother the flame.
- Духовка не достигает желаемой температуры:
- Check pellet supply. Ensure there is a continuous feed of pellets.
- Assess environmental conditions. Strong winds can significantly reduce oven temperature. Consider a more sheltered location.
- Allow sufficient preheating time. The oven and stone need time to absorb heat.
- Ensure the oven door is closed when not inserting/removing food to retain heat.
- Limited Flame Control:
- Pellet burners offer less direct flame control compared to gas burners. Temperature is primarily managed by pellet feed rate and airflow.
- Practice is key to understanding how the burner reacts to pellet additions and environmental factors.
8. Технические характеристики
| Особенность | Спецификация |
|---|---|
| Материалы | 430 Нержавеющая сталь |
| Weight (Burner Unit) | 1.6 кг (3.5 фунта) |
| Вес (в упаковке) | 2 кг (4.4 фунта) |
| Размеры изделия (приблизительные) | 12.2 x 14.57 x 5.51 дюйма (31 x 37 x 14 см) |
9. Гарантия и поддержка
For warranty information, product registration, or technical support, please refer to the official Ooni website or contact Ooni customer service directly. Keep your proof of purchase for warranty claims.
Оони Webсайт: www.ooni.com


