1. Введение
This manual provides essential information for the proper use and maintenance of your WiMiUS Q4 4K Action Camera. Please read it thoroughly before operating the device to ensure optimal performance and longevity. Keep this manual for future reference.
Меры предосторожности
- Не подвергайте камеру длительному воздействию экстремальных температур или прямых солнечных лучей.
- Избегайте падений и сильных ударов, которым подвергается камера.
- Держите камеру вдали от сильных магнитных полей.
- Перед погружением камеры в воду убедитесь, что водонепроницаемый чехол плотно закрыт.
- Используйте только одобренные аксессуары и зарядные устройства.
2. Продукт закончилсяview
Компоненты камеры
Familiarize yourself with the main components of your WiMiUS Q4 Action Camera:
- Объектив: Captures video and photo footage.
- Кнопка питания / режима: Powers the camera on/off and switches between modes.
- Кнопка спуска затвора/ОК: Starts/stops recording, takes photos, or confirms selections.
- Кнопки вверх / вниз: Осуществляет навигацию по пунктам меню.
- Main LCD Screen (2.0 inches): Дисплеи в прямом эфире view, воспроизведение и интерфейс меню.
- Status Screen (0.66 inches): Shows current mode, battery status, and recording time.
- Порт Micro USB: Для зарядки и передачи данных.
- Порт Micro HDMI: Для подключения к внешнему дисплею.
- Слот для карты MicroSD: Для установки карты памяти.
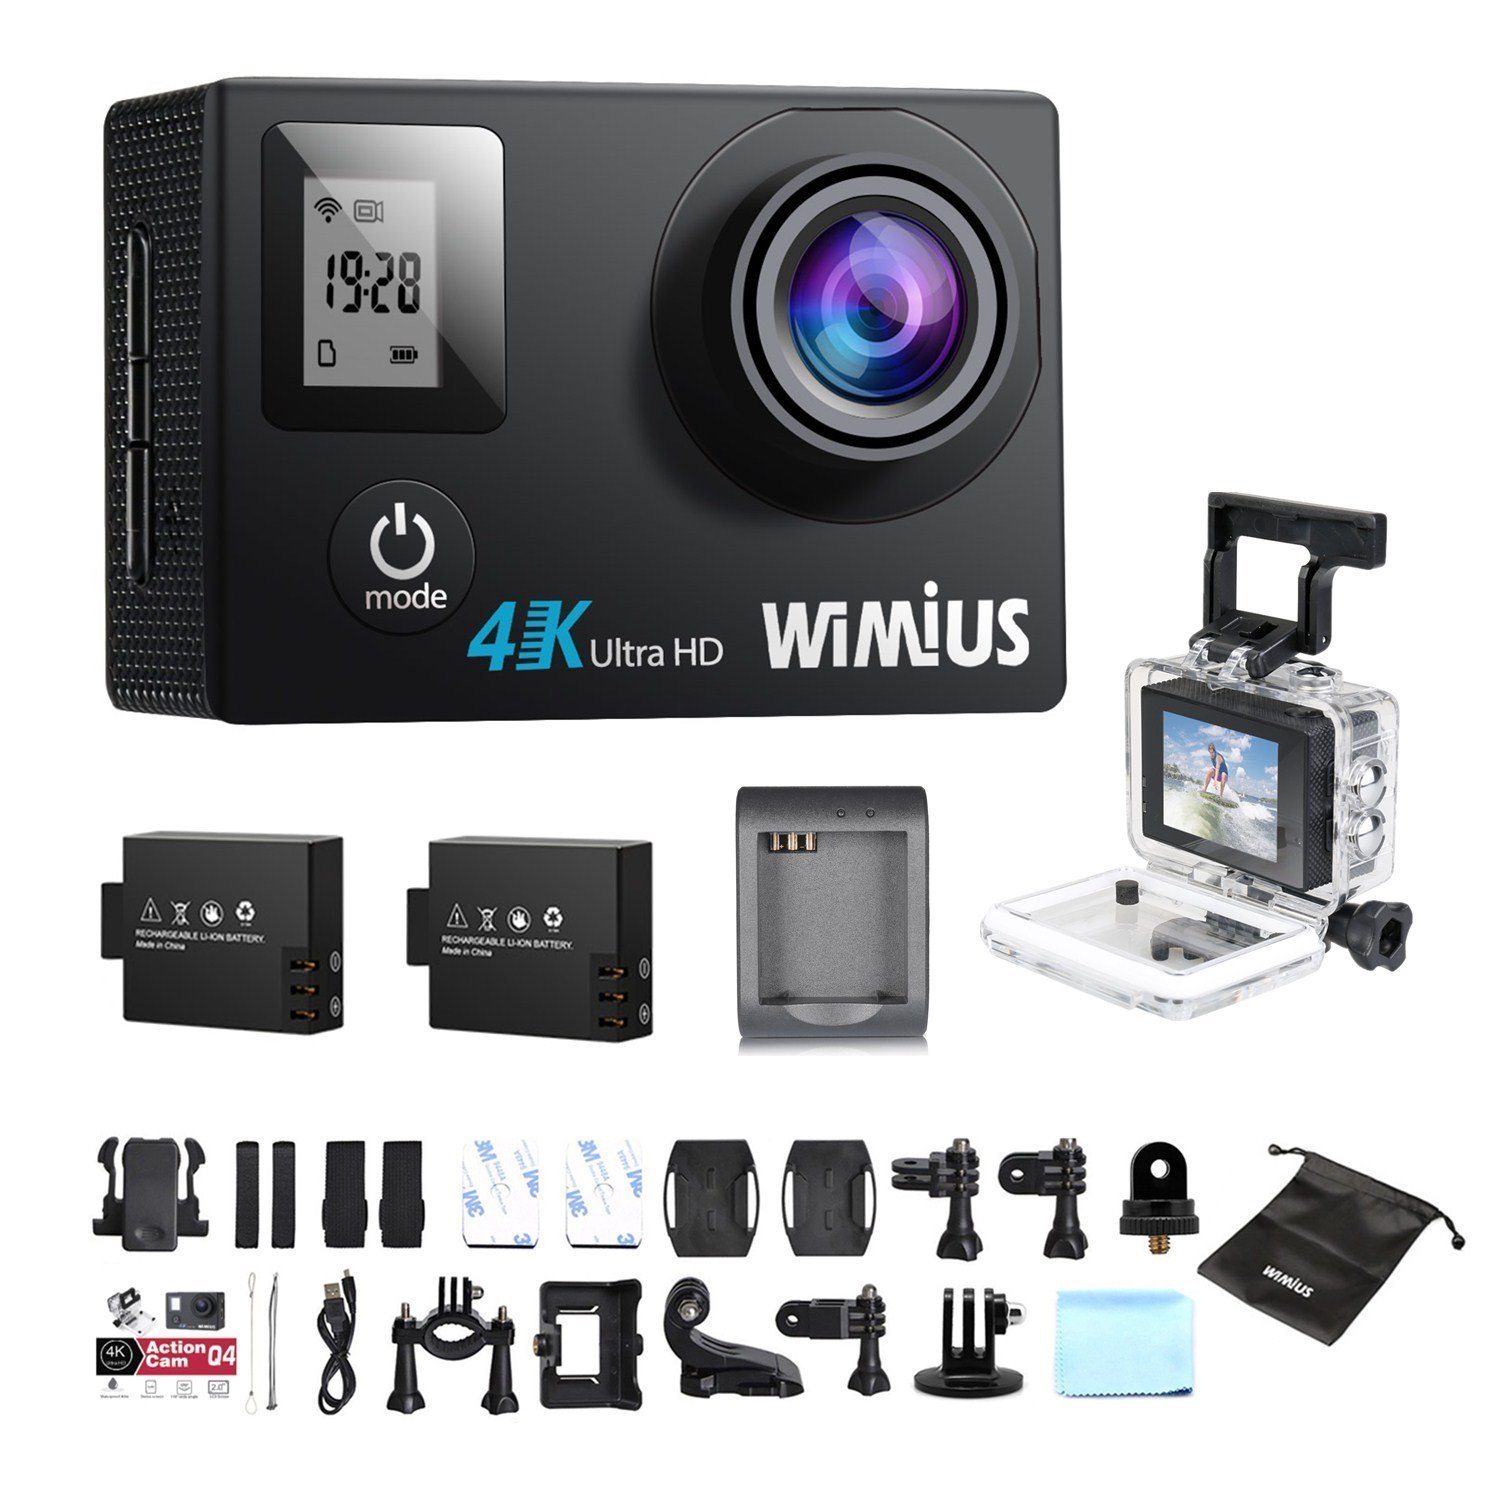
Включенные аксессуары
Your camera comes with a comprehensive kit of accessories:

- Waterproof Case (up to 40M)
- Rechargeable Li-ion Batteries (x2)
- USB-кабель
- Various Mounts and Adapters (e.g., helmet mount, bicycle mount)
- Клейкие подушечки
- Чистящая салфетка
- Bands and Straps
3. Настройка
3.1 Установка и зарядка аккумулятора
- Откройте крышку батарейного отсека в нижней части камеры.
- Insert a fully charged Li-ion battery, ensuring the correct orientation.
- Плотно закройте крышку батарейного отсека.
- To charge, connect the camera to a USB power source (e.g., computer, USB wall adapter) using the provided USB cable. The charging indicator light will illuminate.
- Charging typically takes 2-3 hours. The indicator light will turn off or change color when fully charged.

3.2 Установка карты MicroSD
A MicroSD card (not included) is required for recording. The camera supports up to 64GB Class 10 or UHS-I MicroSD cards.
- Найдите слот для карты MicroSD на боковой панели камеры.
- Вставьте карту MicroSD золотыми контактами к задней части камеры до щелчка.
- Чтобы вынуть карту, аккуратно нажмите на нее, пока она не выскочит.
- It is recommended to format the MicroSD card in the camera before first use and periodically thereafter to ensure stable recording.
3.3 Использование водонепроницаемого чехла
The waterproof case allows the camera to be used up to 40 meters underwater.
- Перед тем как поместить камеру в водонепроницаемый чехол, убедитесь, что она полностью сухая.
- Close the case firmly, ensuring the rubber seal is clean and free of debris.
- Perform a dry test by submerging the empty case in water for a few minutes to check for leaks before inserting the camera.
Крепежные приспособления 3.4
Utilize the various mounts and adapters to attach your camera to helmets, bicycles, or other surfaces. Refer to the accessory diagram for specific attachment methods.
4. Инструкция по эксплуатации
4.1 Включение/выключение питания
- Включение питания: Нажмите и удерживайте кнопку питания/режима в течение 3–5 секунд.
- Выключение: Нажмите и удерживайте кнопку питания/режима в течение 3–5 секунд.
4.2 Выбор режима
Press the Power/Mode button repeatedly to cycle through the main modes:
- Режим записи видео: Обозначается значком видеокамеры.
- Режим фото: Обозначается значком камеры.
- Режим воспроизведения: Обозначается значком воспроизведения.
- Меню настроек: Обозначается значком шестеренки.
4.3 Видеозапись
- Переключитесь в режим видеозаписи.
- Press the Shutter/OK button to start recording. A red indicator light will flash, and the recording time will appear on the screen.
- Нажмите кнопку спуска затвора/ОК еще раз, чтобы остановить запись.
Video Settings (via Settings Menu)
- Разрешение: Select from 4K 30fps, 2.7K 30fps, 1080p 60/30fps, 720p 120/60/30fps.
- Циклическая запись: Set to 2min, 3min, 5min, or Off. When enabled, the camera will continuously record, overwriting the oldest files когда карта памяти заполнена.
- Покадровое видео: Set intervals (0.5s, 1s, 5s, 10s, 30s, 60s) or Off. The camera will capture frames at set intervals and compile them into a video.
- Замедленная съемка: Available at 1080p/60fps and 720p/120fps.
4.4 Фотосъемка
- Переключитесь в режим фотосъемки.
- Нажмите кнопку «Затвор/ОК», чтобы сделать снимок.
Photo Settings (via Settings Menu)
- Разрешение: До 16 мегапикселей.
- Серия фотографий: Capture multiple photos in quick succession (e.g., 3P/1S, 5P/1S, 10P/1S).
4.5 Подключение к Wi-Fi и использование приложения
The camera features Wi-Fi connectivity for remote control via a smartphone app.
- Enable Wi-Fi on the camera via the Settings Menu. The Wi-Fi name (SSID) and password will be displayed.
- Download the compatible WiMiUS app from your smartphone's app store (e.g., App Store for iOS, Google Play for Android).
- Подключитесь к сети Wi-Fi камеры с помощью предоставленного пароля на своем смартфоне.
- Open the WiMiUS app to control the camera, view жить фуtagе, и передача files.
4.6 Menu Navigation and General Settings
Access the Settings Menu by cycling through modes. Use the Up/Down buttons to navigate and the Shutter/OK button to select.
- Язык: Select your preferred language (French is available).
- Дата/Время: Установите правильную дату и время. Note: The date/time setting may reset to 2016/09/01 00:00:00 when batteries are changed. This is a known behavior; reset manually after each battery change.
- Режим транспортного средства: (OUI/NON - Yes/No) This mode typically enables automatic recording when the camera detects power, useful for dashcam functionality.
- Форматировать карту: Erases all data on the MicroSD card.
- Сброс к заводским настройкам: Восстанавливает все настройки до значений по умолчанию.
5. Техническое обслуживание
5.1 Чистка камеры и объектива
- Для очистки корпуса камеры используйте мягкую безворсовую ткань.
- For the lens, use a specialized lens cleaning cloth or pen to avoid scratches. Do not use abrasive materials.
- Ensure the camera is off and dry before cleaning.
5.2 Уход за водонепроницаемым чехлом
- После каждого использования в воде промывайте водонепроницаемый чехол чистой водой и дайте ему высохнуть на воздухе.
- Inspect the rubber seal for any dirt, sand, or damage. Clean or replace if necessary to maintain waterproofing.
5.3 Уход за аккумулятором
- Когда батарейки не используются, храните их в прохладном сухом месте.
- Do not expose batteries to high temperatures or direct flame.
- При длительном хранении зарядите аккумуляторы примерно до 50% емкости.
5.4 Хранение
When not in use, store the camera and accessories in a protective case to prevent damage from dust and impacts.
6. Поиск Неисправностей
This section addresses common issues you might encounter with your WiMiUS Q4 camera.
| Проблема | Возможная причина | Решение |
|---|---|---|
| Камера не включается. | Низкий или разряженный аккумулятор. | Полностью зарядите аккумулятор. Убедитесь, что аккумулятор правильно вставлен. |
| Невозможно записать видео/сделать фотографии. | No MicroSD card, card full, or card error. | Вставьте карту MicroSD. Удалите старую карту. files or replace card. Format the card in the camera. |
| Date/Time resets after battery change. | Standard behavior for this model. | Manually reset the date and time in the settings menu after each battery change. |
| Плохое качество изображения при слабом освещении. | Limitations of the camera sensor in low light conditions. | Ensure adequate lighting. Adjust exposure settings if available. |
| Sound is muffled in waterproof case. | Waterproof case seals the microphone. | This is normal. For better audio, use the camera without the waterproof case in dry conditions. |
| Проблемы с подключением к Wi-Fi. | Incorrect password, app issues, or signal interference. | Verify Wi-Fi password. Restart camera and smartphone. Ensure app is updated. Try resetting camera Wi-Fi settings. |
| Accessories breaking easily. | Material quality or improper use. | Handle accessories with care. Consider purchasing higher quality third-party mounts if needed for demanding activities. |
Общие шаги по устранению неполадок
- Перезагрузите камеру: Power off and then on again.
- Проверьте карту MicroSD: Ensure it's correctly inserted and formatted. Try a different card if issues persist.
- Сброс к заводским настройкам: If problems continue, perform a factory reset via the settings menu. Note that this will erase all custom settings.
7. Технические характеристики
Key technical specifications for the WiMiUS Q4 Action Camera:
- Бренд: WiMiUS
- Модель: Q4
- Эффективное разрешение неподвижного изображения: 16 мегапикселей
- Разрешение видео: 4K (30fps), 2.7K (30fps), 1080p (60/30fps), 720p (120/60/30fps)
- Размер экрана: 2.0 inches (main LCD), 0.66 inches (status screen)
- Технологии подключения: Wi-Fi
- Глубина водонепроницаемости: До 40 метров (с водонепроницаемым футляром)
- Стабилизация изображения: Нет
- Сенсорная технология: КМОП
- Тип объектива: Широкий угол
- Цвет: Gold (Note: Product title indicates 'Noir' (Black), but specifications list 'or' (Gold). This manual refers to the Q4 model generally.)
- Хранилище: Supports MicroSD cards up to 64GB (Class 10 or UHS-I recommended)
8. Гарантия и поддержка
For warranty information and customer support, please refer to the documentation provided at the time of purchase or contact your retailer. Specific details regarding warranty duration and terms are typically included with your product packaging.
Software updates and spare parts availability information are not provided in the product specifications. Please check the manufacturer's official website or contact customer service for the most current information.


