Введение
This manual provides detailed instructions for the installation, operation, and maintenance of your Venstar T1900 Residential Slimline Platinum Thermostat. Please read this manual thoroughly before attempting to install or operate the thermostat to ensure proper function and to avoid potential damage.
Важная информация по безопасности
- Always turn off power to the heating/cooling system at the main circuit breaker or fuse box before installing or servicing the thermostat.
- Этот термостат работает от сети переменного тока напряжением 24 В. Не подключайте его к сети переменного тока.tagе (120 В или 240 В).
- Если вы не знакомы с электропроводкой, установку должен выполнять квалифицированный специалист.
- Do not short circuit the terminals on the gas valve or at the system control to test the thermostat. This will damage the thermostat and void the warranty.
- Ensure all wiring connections are secure and insulated to prevent short circuits.
Содержимое упаковки
Убедитесь, что ваш пакет содержит следующие предметы:
- Venstar T1900 Thermostat Unit
- Крепежные элементы (винты и дюбели)
- Руководство пользователя (этот документ)
Продукт болееview
The Venstar T1900 is a 7-day programmable digital thermostat designed for residential use. It offers precise temperature control and energy-saving scheduling capabilities. This thermostat is compatible with heat/cool, heat pump, and dual-fuel systems, controlling up to three heat stagэс и два крутых сtagес.
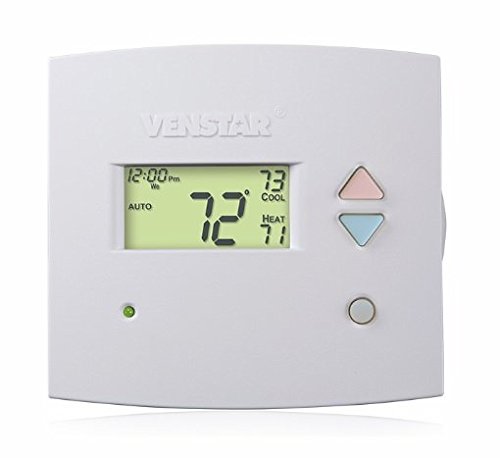
Рисунок 1: Передний view of the Venstar T1900 Thermostat. This image displays the thermostat's LCD screen and control buttons, indicating its slimline design.
Основные характеристики:
- Программируемость на 7 дней: Позволяет настраивать графики отопления и охлаждения на каждый день недели.
- Совместимость системы: Works with heat/cool, dual-fuel, and heat pump systems.
- Мульти-Stagе Управление: Manages up to three heat stagэс и два крутых сtagес.
- Возможность дистанционного управления: Controllable by phone using an optional add-on (sold separately).
- Automatic or Manual Operation: Provides flexibility for scheduled or on-demand temperature adjustments.
Руководство по установке
Необходимые инструменты:
- Отвертка (крестовая и/или плоская)
- Drill with appropriate drill bit (if installing new wall anchors)
- Устройства для зачистки проводов
- Карандаш
- Уровень (необязательно)
1. Выключите питание.
Locate the circuit breaker or fuse box that controls your heating and cooling system. Turn off the power completely before proceeding with any wiring.
2. Снимите старый термостат (если имеется).
- Осторожно снимите крышку старого термостата.
- Сфотографируйте существующие электрические соединения для наглядности.
- Label each wire with the terminal designation it was connected to (e.g., R, G, Y, W).
- Disconnect the wires and remove the old thermostat's mounting plate from the wall.
3. Mount the New Thermostat Base
- Separate the front cover of the T1900 thermostat from its base plate.
- Position the base plate on the wall where you want to install the thermostat. Ensure it is level.
- Отметьте монтажные отверстия карандашом.
- При необходимости просверлите направляющие отверстия и вставьте дюбели.
- Secure the thermostat base plate to the wall using the provided screws.
4. Электропроводка
Connect the wires from your HVAC system to the corresponding terminals on the T1900 thermostat base. Refer to the wiring diagram provided with your specific HVAC system for precise connections. Ensure wires are stripped approximately 3/8 inch and securely fastened under the terminal screws.
Common Terminal Designations:
- R/Rc/Rh: Питание 24 В (обогрев/охлаждение)
- C: Common (24V return)
- G: Вентилятор
- Г/Г1: Компрессор Stage 1 (охлаждение)
- Y2: Компрессор Stage 2 (охлаждение)
- В/В1: Тепло Stage 1 (Отопление)
- W2: Тепло Stage 2 (Отопление)
- O / B: Реверсивный клапан (тепловые насосы)
Note: The T1900 supports various system types. Consult the detailed wiring diagrams in the full installation manual for specific configurations (e.g., heat pump with auxiliary heat, conventional multi-stage systems).
5. Attach Thermostat to Base
Once wiring is complete and verified, carefully align the thermostat front cover with the mounted base plate and snap it into place.
6. Восстановить питание
Return to your circuit breaker or fuse box and restore power to your heating and cooling system.
Начальная настройка
Upon initial power-up, the thermostat may prompt you to configure basic settings. Follow the on-screen instructions to set the current date, time, and system type (e.g., Conventional, Heat Pump).
Конфигурация типа системы:
It is crucial to correctly configure the thermostat for your specific HVAC system. Incorrect settings can lead to improper operation or damage. Access the installer settings menu (refer to the full installation guide for specific button sequences) to select:
- Тип системы: Heat/Cool, Heat Pump, Dual Fuel
- Количество тепла Stages
- Количество крутых Stages
- Reversing Valve Operation: O (Cooling) or B (Heating)
Инструкция по эксплуатации
Понимание дисплея:
The LCD screen displays the current temperature, set temperature, system mode, fan mode, time, and programming status. Refer to the icons and indicators on the screen for current operational status.
Setting System Mode:
Нажмите РЕЖИМ кнопка для переключения между доступными режимами системы:
- НАГРЕВАТЬ: The system will operate to maintain the heating setpoint.
- ПРОХЛАДНЫЙ: The system will operate to maintain the cooling setpoint.
- АВТО: The thermostat automatically switches between heating and cooling as needed to maintain the set temperature range.
- OFF: Система отопления и кондиционирования отключена.
Setting Fan Mode:
Нажмите FAN button to cycle through fan modes:
- АВТО: Вентилятор работает только во время активной работы системы отопления или охлаждения.
- НА: Вентилятор работает непрерывно, независимо от включения отопления или охлаждения.
Регулировка температуры:
Используйте UP и ВНИЗ arrow buttons to adjust the desired temperature setpoint. In programmable modes, this will temporarily override the schedule until the next scheduled change.
Programming Schedules (7-Day):
The T1900 allows for 7-day programming, enabling different schedules for each day of the week. This feature helps save energy by adjusting temperatures when you are away or asleep.
- Нажмите ПРОГРАММА Кнопка входа в режим программирования.
- Используйте ДЕНЬ button to select the day or group of days you wish to program (e.g., Mon-Fri, Sat-Sun, or individual days).
- Используйте ВРЕМЯ button to cycle through the four available periods: Wake, Leave, Return, Sleep.
- Используйте UP и ВНИЗ arrow buttons to set the desired temperature for each period.
- Используйте ДЕРЖАТЬ button to exit programming mode or save changes.
Refer to the detailed programming section in the full user guide for advanced options and specific button sequences.
Remote Control (Optional Add-on):
The Venstar T1900 thermostat can be controlled remotely via a phone using an optional add-on module (sold separately). This module connects to the thermostat and allows for remote access and control through a dedicated application. Installation and setup instructions for the remote control module are provided with the module itself.
Обслуживание
Cleaning the Thermostat:
Для поддержания внешнего вида и работоспособности термостата периодически протирайте его внешнюю поверхность мягкой тряпкой.amp Не используйте абразивные чистящие средства, растворители или химические спреи, так как они могут повредить пластиковые и электронные компоненты.
Замена батареи:
The Venstar T1900 thermostat does not require batteries for operation as it is powered by the 24V AC system.
Поиск неисправностей
If you experience issues with your Venstar T1900 thermostat, consult the following common problems and solutions:
| Проблема | Возможная причина | Решение |
|---|---|---|
| Дисплей термостата пуст | Термостат не получает питания. | Проверьте автоматический выключатель вашей системы отопления, вентиляции и кондиционирования. Убедитесь, что все проводные соединения надежно закреплены. |
| Heating/Cooling system does not respond | Выбран неверный режим работы системы; проблема с проводкой; блокировка системы. | Verify the system mode (HEAT/COOL/AUTO). Check wiring connections. Wait 5 minutes for system lockout to reset. |
| Показания температуры, по-видимому, неточны. | Расположение термостата; засорение датчика. | Ensure the thermostat is not exposed to direct sunlight, drafts, or heat sources. Clean any dust from the thermostat vents. |
| Programming schedule is not working | Program not saved; temporary override active; incorrect time/day setting. | Ensure programs are saved. Check if a temporary override is active and cancel it. Verify current time and day settings. |
| Вентилятор работает непрерывно в автоматическом режиме. | Fan mode set to ON; wiring issue. | Press the FAN button to ensure it is set to AUTO. Check fan wiring. |
If these solutions do not resolve the issue, please contact customer support or a qualified HVAC technician.
Технические характеристики
| Особенность | Спецификация |
|---|---|
| Бренд | Venstar |
| Название модели | Венстар Т1900 |
| Тип контроллера | Кнопка нажатия |
| Специальная характеристика | Программируемый |
| Цвет | Белый |
| Конкретные области применения продукта | Heat Pump, Heater |
| Тип контроля температуры | Programmable, Smart/Remote (with add-on) |
| Томtage | 24 В переменного тока |
| Тип дисплея | ЖК-дисплей или светодиод |
| Метод контроля | Remote (with add-on) |
| Подсветка | Да |
| Размеры продукта | 5.3 x 2 x 2 дюйма |
| Вес товара | 0.01 унции |
| Нужны ли батареи? | Нет |
Информация о гарантии
Venstar products are manufactured to high-quality standards. This product is covered by a limited warranty against defects in materials and workmanship. The specific terms and duration of the warranty may vary. Please refer to the warranty card included with your product or visit the official Venstar webСайт содержит подробную информацию о гарантии и процедурах регистрации.
Поддержка клиентов
For technical assistance, troubleshooting, or warranty inquiries, please contact Venstar customer support. You can typically find contact information, including phone numbers and email addresses, on the official Venstar webсайт (www.venstar.com) or on the product packaging.
When contacting support, please have your thermostat model number (T1900) and any relevant purchase information ready.


