1. Заview
The GIGABYTE GA-X99-Phoenix SLI is an ATX motherboard designed for high-performance computing. It supports Intel Core i7 Broadwell-E processors on the LGA2011-3 socket and features the Intel X99 chipset. This motherboard is equipped with Quad Channel DDR4 memory support, multiple PCIe slots for 3-Way/2-Way SLI and CrossFire configurations, and advanced storage options including NVMe PCIe Gen3 x4 M.2 and U.2 interfaces. It also integrates Intel USB 3.1 with Type-C, dual Intel Gigabit Ethernet, and Intel 802.11ac wireless connectivity.
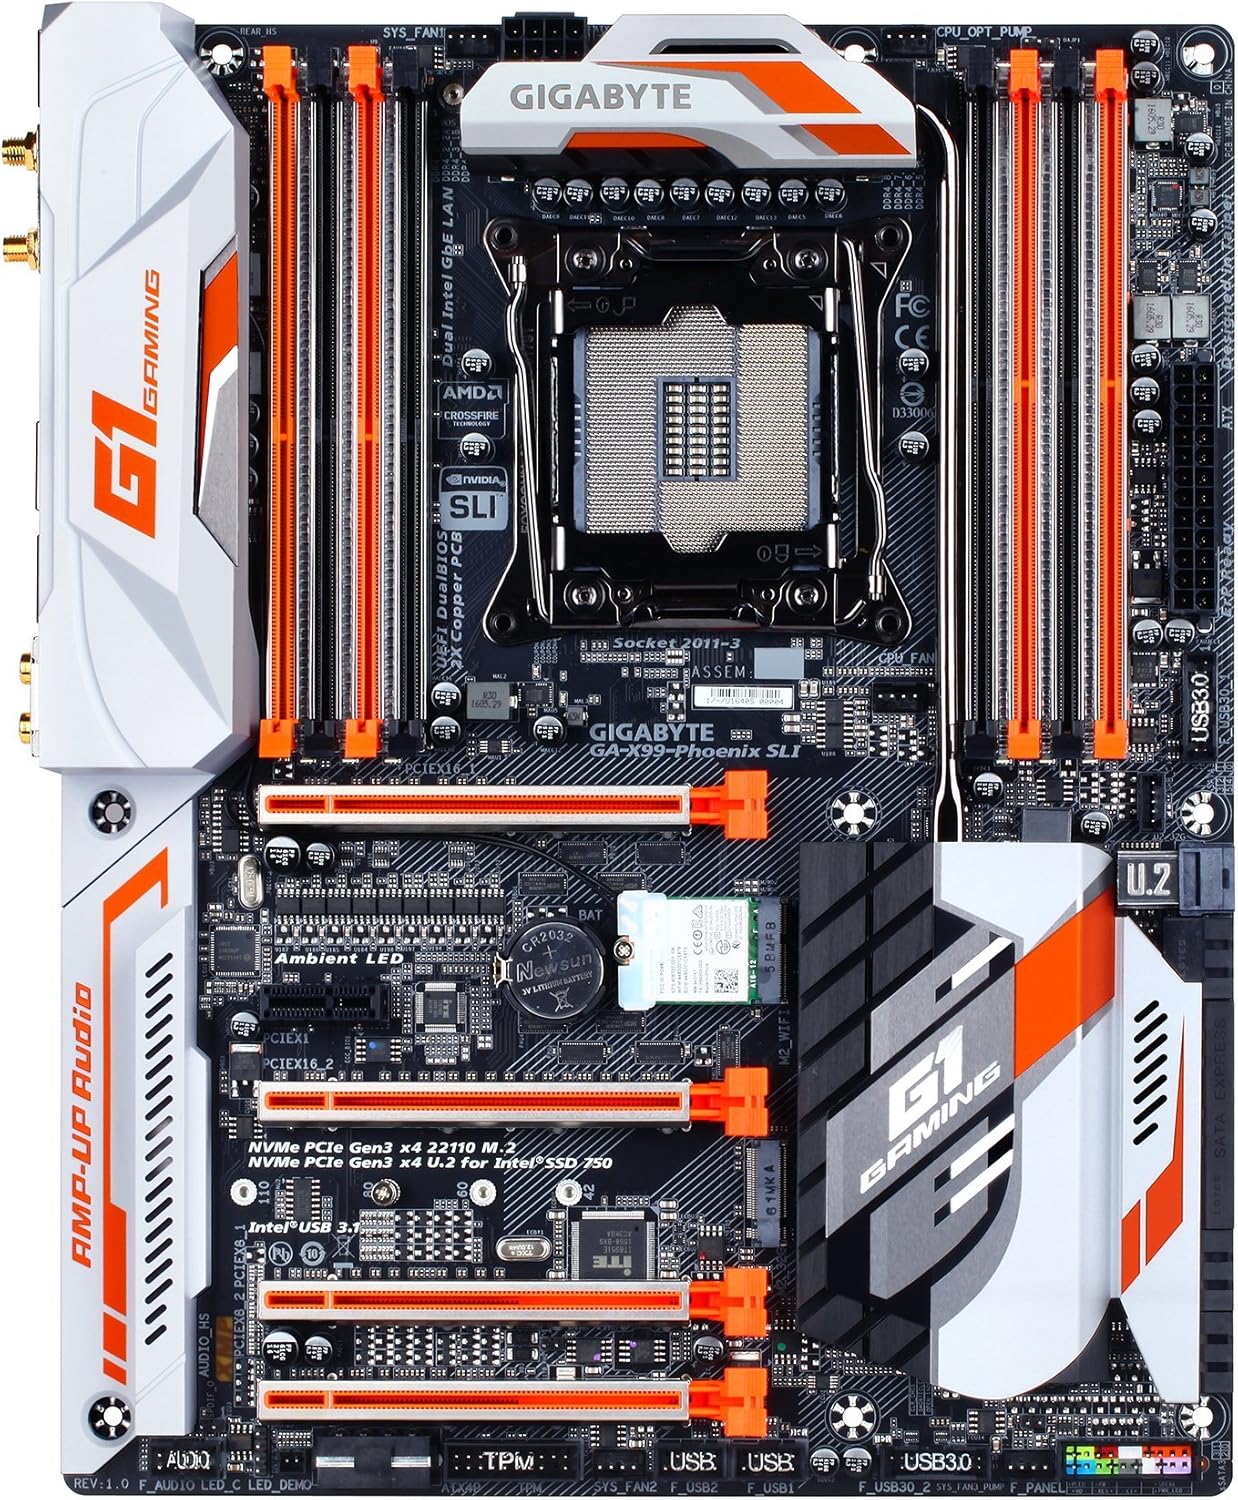
Рисунок 1: Сверху вниз view of the GIGABYTE GA-X99-Phoenix SLI motherboard, showcasing its layout including the CPU socket, RAM slots, PCIe slots, and various connectors.
2. Настройка и установка
2.1 Контрольный список перед установкой
- Совместимость с корпусом: Ensure your PC case supports the E-ATX form factor. Standard ATX cases may not accommodate this motherboard.
- Процессор: Verify you have an Intel Core i7 processor compatible with the LGA 2011-3 socket.
- Память: Use DDR4 DIMMs. The motherboard supports Quad Channel, Registered / Non-ECC Unbuffered DDR4.
- Источник питания: Стабильный блок питания (БП) с достаточной мощностьюtage is crucial for system stability.
2.2 Установка материнской платы
- Подготовьте дело: Установите заглушку для разъемов ввода/вывода в заднее отверстие корпуса вашего ПК.
- Установите материнскую плату: Carefully align the motherboard with the standoffs in your case and secure it with screws.
- Установить процессор: Open the CPU socket lever, align the CPU with the socket (matching the golden triangle on the CPU to the mark on the socket), gently place the CPU, and close the lever.
- Установка кулера для процессора: Установите выбранный вами кулер для процессора в соответствии с инструкциями производителя.
- Установка памяти (ОЗУ): Open the clips on the DDR4 DIMM slots. Align the memory modules with the slots, ensuring the notch on the module matches the key in the slot. Press down firmly until the clips snap into place. For optimal performance, populate memory in a quad-channel configuration as recommended by the motherboard manual.
- Подключите питание: Connect the 24-pin ATX main power connector and the 8-pin CPU power connector from your PSU to the motherboard.
- Подключите устройства хранения данных: Connect SATA, M.2, or U.2 drives to the appropriate ports.
- Подключите периферийные устройства: Connect front panel headers (power, reset, USB, audio), USB devices, and other peripherals.

Рисунок 2: Наклонный view of the motherboard, highlighting the rear I/O panel and the layout of the PCIe and RAM slots.
2.3 Первоначальная загрузка и доступ к BIOS
After connecting all necessary components, power on your system. During the Power-On Self-Test (POST), press the ДЕЛ key repeatedly to enter the UEFI BIOS setup. You may also press the Конец key during POST to access Q-Flash for BIOS updates.
3. Эксплуатация материнской платы
3.1 UEFI BIOS Navigation
The GIGABYTE UEFI BIOS provides a graphical interface for system configuration. While mouse navigation is available, some users may find the keyboard more responsive for precise control due to potential mouse lag within the BIOS environment.
3.2 Функции разгона
This motherboard offers robust overclocking capabilities. For users new to overclocking, GIGABYTE's EasyTune utility (part of the APP Center) provides one-click overclocking options (e.g., 3.8GHz, 4.0GHz, 4.2GHz) for compatible CPUs. Memory overclocking can be adjusted directly in the BIOS by selecting desired speeds from a dropdown menu, allowing the motherboard to manage voltage settings automatically.
3.3 Программные утилиты
The GIGABYTE APP Center provides access to various utilities, including:
- EasyTune: For system tuning, monitoring, and overclocking.
- Облачная станция: For cloud-based data management and sharing.
- Other utilities for fan control, system information, and more.
3.4 Audio and Network
The motherboard features 115dB SNR HD Audio with a built-in rear audio amplifier for enhanced sound quality. Network connectivity is provided by Dual Intel Gigabit Ethernet LAN ports, which can be optimized with cFosSpeed Internet Accelerator Software, and integrated Intel 802.11ac Dual Band Wireless with Bluetooth 4.2.

Figure 3: Close-up of the rear I/O panel, showing various ports including USB, Ethernet, audio jacks, and wireless antenna connectors.
4. Техническое обслуживание
4.1 КМОП-батарея
The motherboard uses a Lithium Metal battery (CR2032) to retain BIOS settings and the system clock when the computer is powered off. If you experience issues with incorrect time/date or lost BIOS settings, the CMOS battery may need replacement. Refer to the motherboard diagram for its location.
4.2 Обновления BIOS
GIGABYTE's Q-Флэш Плюс utility allows you to update the BIOS without installing a CPU, memory, or graphics card. Simply download the latest BIOS version from the GIGABYTE website, place it on a USB flash drive, and follow the instructions for Q-Flash Plus. Regular BIOS updates can improve system stability, compatibility, and performance.
5. Поиск Неисправностей
5.1 Общие проблемы
- System Fails to POST (Power-On Self-Test):
- Проверьте все силовые разъемы (24-контактный ATX, 8-контактный разъем для процессора).
- Убедитесь, что процессор и оперативная память установлены правильно.
- Verify the CPU cooler is properly installed.
- Попробуйте загрузиться только с необходимыми компонентами (процессор, одна планка оперативной памяти, видеокарта, если нет встроенной графики).
- System Freezes or is Unstable:
- Ensure the BIOS is updated to the latest stable version. Early BIOS versions may have compatibility issues.
- Проверьте температуру процессора и видеокарты, чтобы исключить перегрев.
- В случае разгона верните настройки по умолчанию, чтобы проверить стабильность.
- Запустите средства диагностики памяти, чтобы проверить целостность ОЗУ.
- No Debug Code LED: This motherboard does not feature a debug code LED. Troubleshooting will rely on beep codes (if enabled) or visual inspection of components.
- Mouse Lag in BIOS: This is a known characteristic for some users. Use keyboard navigation for a more responsive experience.
6. Технические характеристики
| Особенность | Спецификация |
|---|---|
| Бренд | ГИГАБАЙТ |
| Название модели | GA-X99-Phoenix SLI |
| Сокет ЦП | LGA 2011-3 |
| Совместимые процессоры | Intel Core i7 (Broadwell-E) |
| Тип чипсета | Intel X99 |
| Технология оперативной памяти | DDR4 SDRAM |
| Каналы памяти | Четырехканальный |
| Максимальный объем памяти | Up to 256 GB (8 DIMMs) |
| Графический интерфейс | PCIe Gen3 x16 slots (Supports 3-Way/2-Way SLI & CrossFire) |
| Интерфейсы хранения | NVMe PCIe Gen3 x4 22110 M.2, U.2, SATA Express, SATA 6Gb/s |
| USB-порты | Intel USB 3.1 (Type-A & Type-C), USB 3.0, USB 2.0 |
| Локальная сеть | Dual Intel Gigabit Ethernet |
| Беспроводное подключение | Intel 802.11ac Dual Band Wireless, Bluetooth 4.2 |
| Аудио | HD-аудио с соотношением сигнал/шум 115 дБ и встроенным задним аудиовходом. Ampпожизненнее |
| Форм-фактор | E-ATX (14.48 x 12.2 x 3.85 inches) |
| Особые возможности | Ambient Surround LED, Ultra Durable Metal Shielding, Anti-Sulfur Resistors, Anti-Rust Rear I/O, Dual Hybrid Fan Headers, GIGABYTE UEFI Dual BIOS with Q-Flash Plus |
| Батарея КМОП | Требуется 1 литий-металлическая батарея |


