1. Введение
This manual provides comprehensive instructions for the installation, operation, and maintenance of your Thermaltake WATER 3.0 Dual Riing RGB 240 All-In-One (AIO) Liquid CPU Cooler. This high-performance cooling system is designed to efficiently dissipate heat from your CPU, ensuring stable and optimal performance for your desktop computer.
Перед установкой внимательно прочтите данное руководство и сохраните его для дальнейшего использования.
2. Продукт закончилсяview и компоненты
The Thermaltake WATER 3.0 Dual Riing RGB 240 AIO cooler consists of a radiator, two 120mm Riing RGB fans, a pump/cold plate assembly, and various mounting hardware. Below are the main components:
- Радиатор: A 240mm aluminum radiator designed for efficient heat exchange.
- Riing RGB Fans: Two 120mm high static pressure fans with customizable RGB lighting.
- Насос/Охлаждающая пластина: An integrated unit that circulates coolant and transfers heat from the CPU. Features a copper base for optimal thermal conductivity.
- НКТ: Durable, low-evaporation tubing connecting the pump to the radiator.
- Контроллер: A dedicated controller for managing fan speed and RGB lighting effects.
- Монтажное оборудование: Brackets, screws, and backplates for various CPU sockets.

Figure 2.1: Complete Thermaltake WATER 3.0 Dual Riing RGB 240 AIO Liquid CPU Cooler system, showing the radiator with two RGB fans, the pump/cold plate unit, and the fan/RGB controller.
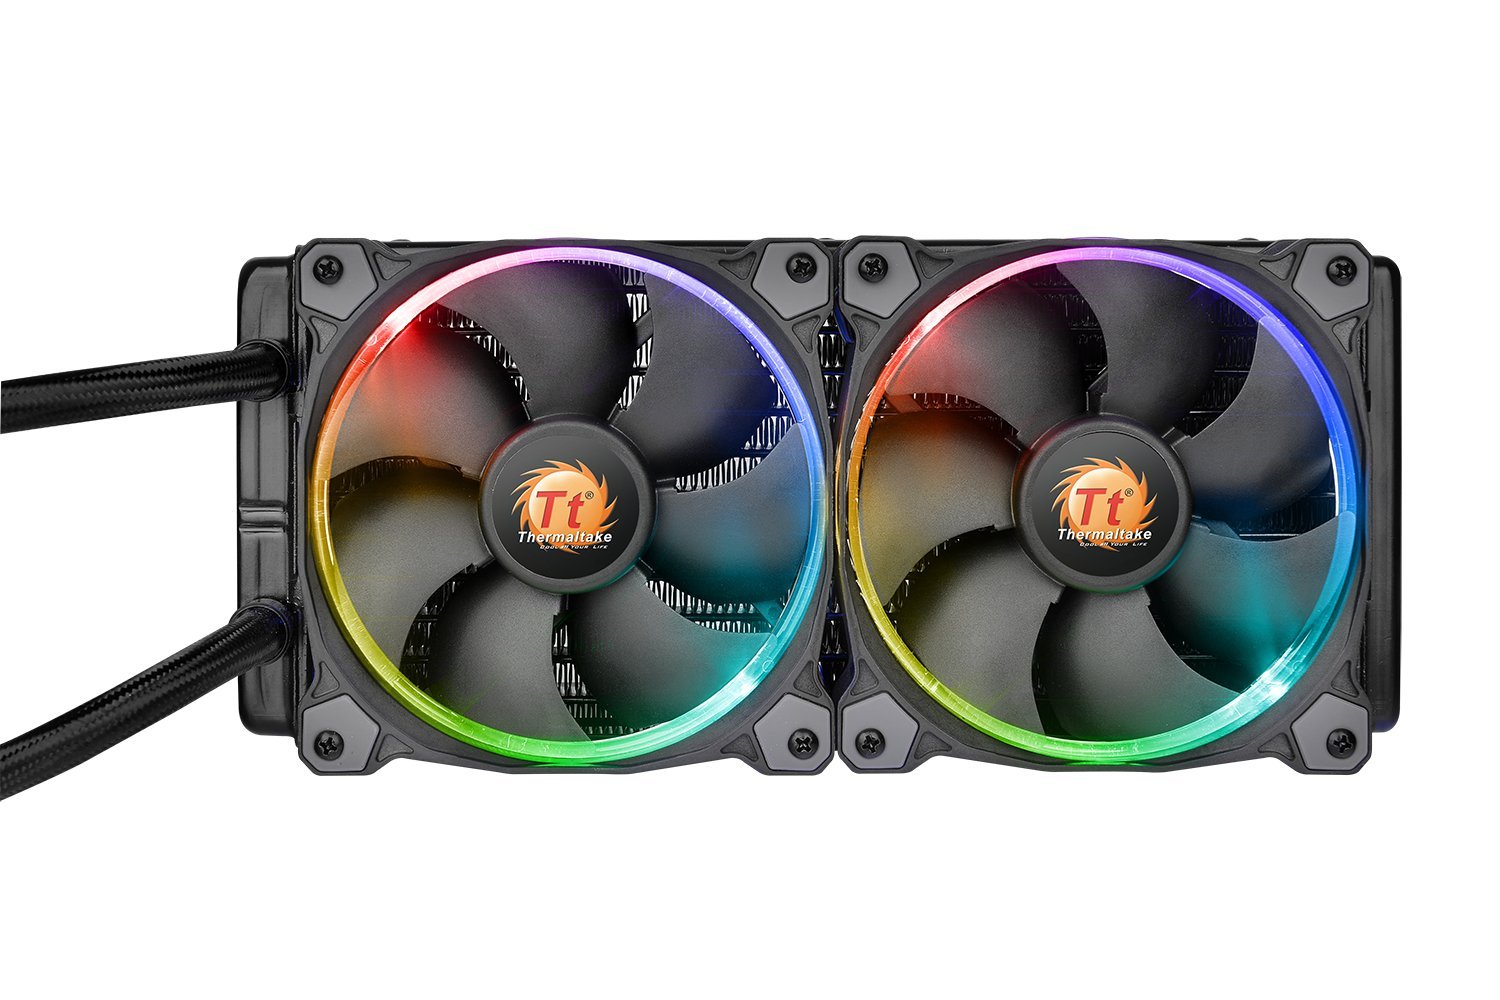
Рисунок 2.2: Подробная информация view of the two 120mm Riing RGB fans attached to the radiator, highlighting their design and lighting capabilities.

Рисунок 2.3: View of the 240mm aluminum radiator's fin array, designed for efficient heat dissipation.

Рисунок 2.4: Вверху view of the integrated pump and cold plate unit, featuring the Thermaltake Water 3.0 logo.
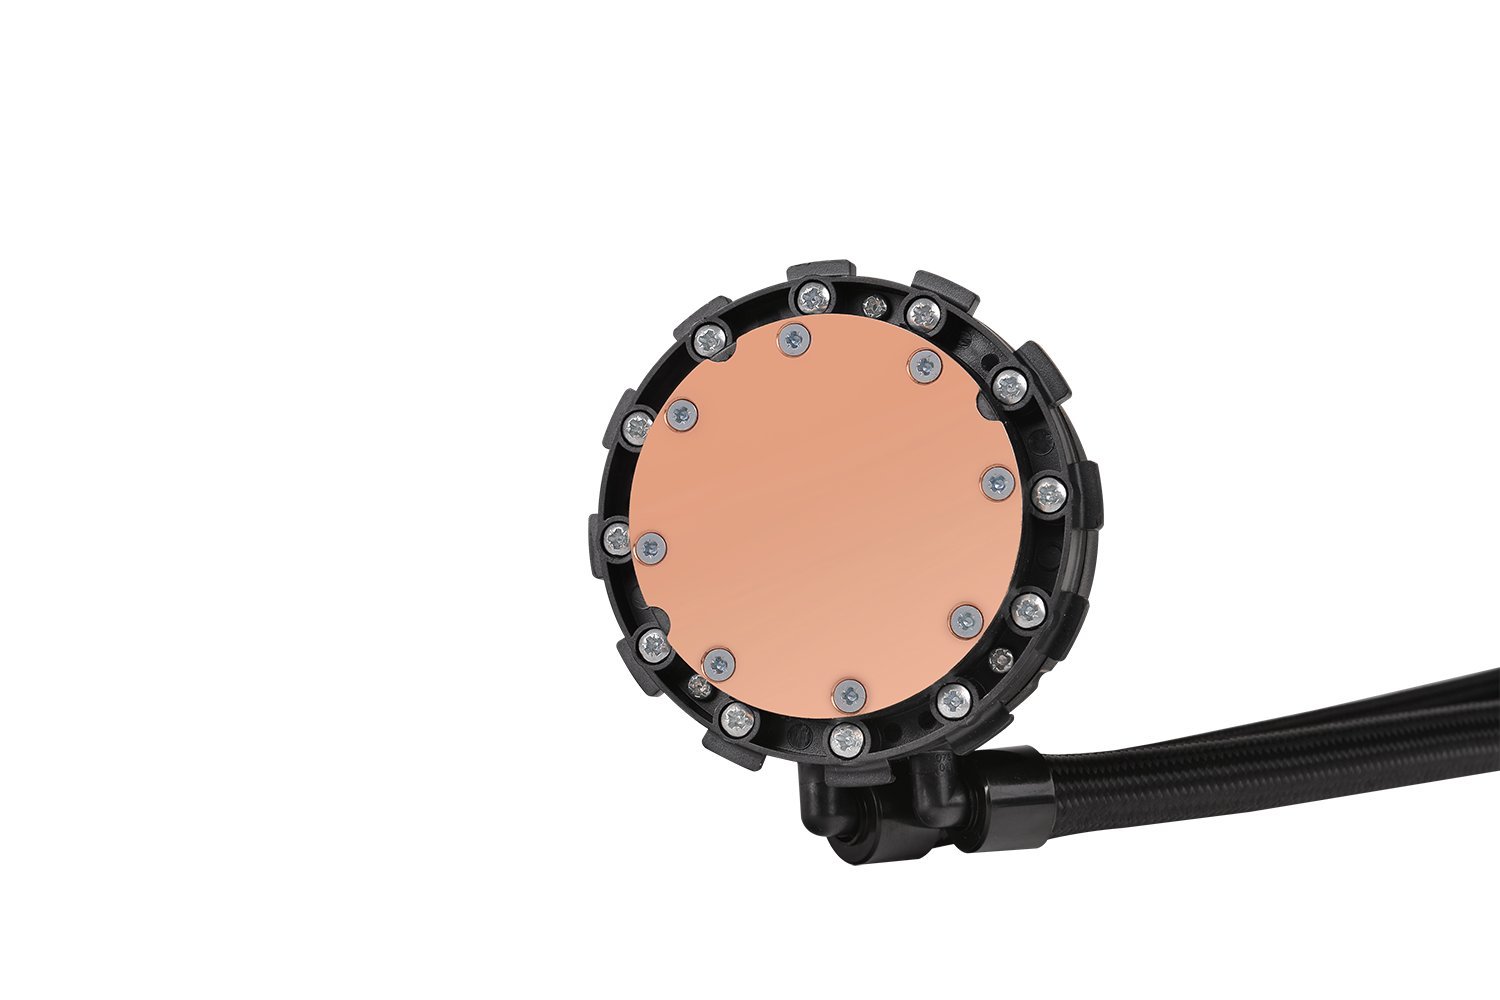
Рисунок 2.5: Внизу view of the pump/cold plate unit, revealing the highly conductive copper base that makes direct contact with the CPU.

Figure 2.6: The dedicated RGB fan controller, featuring buttons for adjusting fan speed, pausing lighting effects, and changing lighting modes.

Figure 2.7: Included mounting hardware, comprising various brackets, screws, and standoffs necessary for installation on different CPU sockets.
3. Настройка и установка
Перед началом установки убедитесь, что ваша система выключена и отсоединена от сети. Для получения информации о конкретном процессорном разъеме обратитесь к руководству пользователя вашей материнской платы.
3.1. Подготовка радиатора и вентиляторов
- Attach the two 120mm Riing RGB fans to the 240mm radiator using the provided long screws. Ensure the fan airflow direction is appropriate for your case (typically exhausting air out of the case or drawing air in).
- Connect the fan cables to the fan controller.
3.2. Установите радиатор.
- Mount the radiator assembly to an available 240mm fan mount location in your PC case (e.g., top, front, or rear). Use the short screws provided for this step.
- Ensure there is sufficient clearance for the radiator and tubing.
3.3. Подготовьте разъем для процессора.
- For Intel sockets (LGA 115x/1200/2011/2066): Install the appropriate backplate behind your motherboard. Secure the standoffs onto the motherboard through the CPU mounting holes.
- For AMD sockets (AM4/AM3+/AM3/AM2+/AM2/FM2+/FM2/FM1): Use the stock AMD backplate if available, or install the provided AMD backplate. Attach the correct AMD mounting clips to the pump/cold plate unit.
- Очистите поверхность процессора изопропиловым спиртом, чтобы удалить остатки старой термопасты или другие загрязнения.
- Apply a small amount of thermal paste (pea-sized dot) to the center of your CPU's Integrated Heat Spreader (IHS).
3.4. Установите насос/охлаждающую пластину.
- Carefully align the pump/cold plate unit over the CPU, ensuring the mounting holes align with the standoffs/clips.
- Gently lower the pump onto the CPU, applying even pressure.
- Secure the pump/cold plate unit using the provided thumb screws or nuts, tightening them in a diagonal pattern until snug. Do not overtighten.
- Connect the pump's 3-pin power cable to an available CPU_FAN or AIO_PUMP header on your motherboard.
3.5. Connect the Controller
- Connect the fan cables from the radiator to the fan controller.
- Connect the controller's power cable to a SATA power connector from your power supply.
- If desired, connect the controller to an available USB 2.0 header on your motherboard for software control (check product specifications for software compatibility).

Figure 3.1: The Thermaltake AIO cooler fully installed within a desktop PC chassis, demonstrating proper placement of the radiator, fans, and pump unit.
4. Инструкция по эксплуатации
Once installed, the Thermaltake WATER 3.0 Dual Riing RGB 240 AIO cooler will automatically begin cooling your CPU upon system startup. The Riing RGB fans and pump are powered via the connected cables.
4.1. Fan and RGB Control
The included controller allows for manual adjustment of fan speed and RGB lighting effects. Refer to Figure 2.6 for button layout.
- Кнопка СКОРОСТЬ: Press to cycle through different fan speed profiles (e.g., Silent, Performance, Max).
- Кнопка ВОСПРОИЗВЕДЕНИЕ / ПАУЗА: Press to pause or resume the current RGB lighting effect.
- Кнопка РЕЖИМ: Press to cycle through various RGB lighting modes (e.g., Static, Pulse, Rainbow, Wave).
For advanced control and customization, if your controller supports it, install the Thermaltake software (available from the official Thermaltake website) and connect the controller to your motherboard's USB 2.0 header. This software allows for fine-tuning of fan curves, custom RGB effects, and monitoring of system temperatures.
5. Техническое обслуживание
Regular maintenance ensures optimal performance and longevity of your AIO liquid cooler.
- Удаление пыли: Periodically clean dust from the radiator fins and fan blades using compressed air. Ensure the fans are not spinning rapidly during cleaning to prevent damage to bearings.
- Проверка труб: Visually inspect the tubing for any signs of kinks, leaks, or damage. While AIOs are sealed systems, regular checks are recommended.
- Термопаста: Re-applying thermal paste is generally not required unless the cooler is removed from the CPU. If you re-install the cooler, clean the old thermal paste and apply new paste.
- Шум насоса: A slight hum from the pump is normal. If you notice unusual grinding or gurgling noises, it may indicate air bubbles. Gently tilt your PC case while running to help dislodge air bubbles. If the noise persists or performance degrades, consult troubleshooting.
6. Поиск Неисправностей
| Проблема | Возможная причина | Решение |
|---|---|---|
| Высокие температуры процессора |
|
|
| Fans/RGB not lighting up |
|
|
| Unusual Pump Noise (Gurgling/Grinding) |
|
|
7. Технические характеристики
| Особенность | Деталь |
|---|---|
| Бренд | Thermaltake |
| Номер модели | CL-W107-PL12SW-А |
| Метод охлаждения | Вода |
| Размер радиатора | 240 мм |
| Тип вентилятора | Riing RGB High Static Pressure Fans |
| Уровень шума | 17 дБ (номинал) |
| Тип разъема питания | 3-Pin (Pump), SATA (Controller) |
| Томtage | 12 Вольт |
| Ватtage | 3 Вт |
| Материал | Aluminum, Rubber, Copper |
| Совместимые устройства | Настольный компьютер (различные сокеты Intel/AMD) |
| Размеры продукта (ДxШxВ) | 34.29 х 24.77 х 13.34 см |
| Вес товара | 1.68 кг |
| Включенные компоненты | Water cooling system, radiator, cables, mounting hardware |
8. Гарантия и поддержка
Thermaltake products are manufactured to the highest quality standards. For warranty information, please refer to the warranty card included with your product or visit the official Thermaltake webсайт.
For technical support, troubleshooting assistance, or to inquire about replacement parts, please visit the Thermaltake support portal or contact their customer service directly. Keep your proof of purchase handy when contacting support.
Официальный представитель Thermaltake Webсайт: www.thermaltake.com