1. Введение
This manual provides instructions for the installation, operation, and maintenance of the Westek In-Wall Programmable Digital Timer, Model ATW-T24. This device is designed to add automated programming functionality to various electrical devices such as lights, heaters, and fans. It features an LCD display for easy programming and a rechargeable battery backup to retain settings during power interruptions.
The timer supports up to 7 weekly programs and includes a random option for enhanced security.
2. Информация по технике безопасности
ПРЕДУПРЕЖДЕНИЕ: To avoid fire, shock, or death; turn off power at the circuit breaker or fuse box and test that the power is off before wiring. All wiring should be performed by a qualified electrician or in accordance with local electrical codes. This device is for indoor use only. Do not exceed the specified electrical ratings.
- Всегда отключайте питание перед установкой или обслуживанием.
- Убедитесь, что все соединения надежны и надлежащим образом изолированы.
- Не используйте во влажном или damp локации.
- Хранить в недоступном для детей месте.
3. Содержимое упаковки
The package for the Westek In-Wall Programmable Digital Timer (Model ATW-T24) includes:
- One (1) Westek In-Wall Programmable Digital Timer, 120 V, 1 HP
- One (1) Lithium Ion battery (pre-installed)
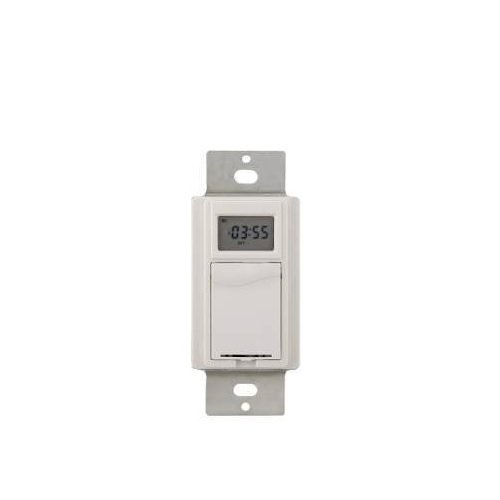
Изображение 1: Спереди view of the Westek In-Wall Programmable Digital Timer. The timer features a white faceplate with a digital display and control buttons.
4. Установка
Installation of this in-wall timer requires electrical wiring knowledge. If you are unsure about any part of the installation process, consult a qualified electrician.
- Выключите питание: Locate the circuit breaker or fuse that supplies power to the switch box where the timer will be installed. Turn off the power completely. Verify power is off using a voltagе тестер.
- Удалить существующий коммутатор: Осторожно снимите настенную панель и открутите имеющийся выключатель от монтажной коробки. Отсоедините провода от старого выключателя.
- Подключите таймер: Connect the wires to the Westek timer according to the wiring diagram provided with the product packaging. Typically, this involves connecting line (hot), load, and ground wires. Ensure all connections are tight and secure.
- Установите таймер: Аккуратно вставьте проводной таймер в монтажную коробку. Закрепите его прилагаемыми винтами.
- Установите настенную пластину: Attach the new or existing wall plate over the timer.
- Восстановить мощность: Снова включите питание с помощью автоматического выключателя или блока предохранителей.

Image 2: The Westek In-Wall Programmable Digital Timer shown with its internal components and wiring connections. This image illustrates the back of the timer where electrical connections are made.
5. Инструкция по эксплуатации
The Westek In-Wall Programmable Digital Timer allows for flexible scheduling of connected devices. The LCD display and control buttons facilitate programming.
5.1 Первоначальная настройка и установка времени
- При первом включении питания или после длительного отключения электроэнергии.tagНапример, на дисплее может отображаться время по умолчанию или требоваться его настройка.
- Use the designated buttons (e.g., "SET," "HOUR," "MINUTE," "DAY") to adjust the current time and day of the week. Refer to the specific button labels on your device for precise controls.
- Confirm the settings to save the current time.
5.2 Программирование циклов включения/выключения
The timer supports up to 7 custom weekly programs.
- Press the "PROG" or "PROGRAM" button to enter programming mode.
- The display will typically show "PROG 1 ON" or similar. Use the "HOUR," "MINUTE," and "DAY" buttons to set the desired ON time and days for the first program.
- Press "PROG" again to set the "PROG 1 OFF" time and days.
- Repeat for up to 7 programs as needed.
- Exit programming mode by pressing a dedicated "RUN" or "CLOCK" button, or by allowing the timer to time out.
5.3 Random Option
To deter intruders, the timer includes a random ON/OFF feature. When activated, the timer will randomly vary the programmed ON/OFF times by a small interval (e.g., +/- 30 minutes) to simulate occupancy.
- Locate the "RANDOM" or "RND" button.
- Press it to activate or deactivate the random function. An indicator on the LCD may confirm its status.
5.4 Ручное управление
Most digital timers allow for a temporary manual override of the current program without erasing это.
- Press the "MANUAL" or "ON/OFF" button to toggle the connected device on or off, overriding the current program until the next programmed event.
5.5 Резервное питание от аккумулятора
The integrated rechargeable Lithium Ion battery maintains the time and programmed settings during power outages. The battery recharges automatically when main power is restored.
6. Техническое обслуживание
The Westek In-Wall Programmable Digital Timer requires minimal maintenance.
- Уборка: To clean the timer, wipe the surface with a soft, dry cloth. Do not use abrasive cleaners, solvents, or spray directly onto the unit.
- Аккумулятор: The internal rechargeable battery is designed for long-term use and typically does not require replacement. If the timer consistently loses settings during power outagДа, возможно, потребуется обслуживание аккумулятора квалифицированным специалистом.
7. Поиск Неисправностей
| Проблема | Возможная причина | Решение |
|---|---|---|
| Таймер не включается. | No power to the switch box; incorrect wiring. | Check circuit breaker/fuse. Verify wiring connections are correct and secure. |
| Устройство не включается/выключается, как запрограммировано. | Incorrect program settings; manual override active. | Review and re-enter program settings. Check if manual override is active and deactivate if necessary. |
| LCD display is difficult to read. | Poor lighting conditions; display angle. | Ensure adequate ambient lighting. Adjust viewing angle if possible. |
| Таймер теряет настройки после отключения питанияtage. | Rechargeable battery backup not functioning. | Allow time for the battery to recharge. If problem persists, contact customer support. |
| Возникли трудности с программированием таймера. | Unfamiliarity with programming steps. | Carefully follow the operating instructions in Section 5. Practice programming without a connected load if possible. |
8. Технические характеристики
- Бренд: Вестек
- Номер модели: ATW-T24
- Номер детали: TMDW30CC
- Томtage: 120 В
- Мощность (л.с.): 1 л.с.
- Материал: Пластик
- Цвет: Белый
- Вес товара: 5.9 унции
- Размеры продукта: 1.25 x 1.75 x 3 дюйма
- Аккумуляторы: 1 литий-ионный аккумулятор (входит в комплект)
- Стиль переключения: Переключать
- СКП: 700814916251, 889932723870, 070686506066, 696746170994
- Первая доступная версия: 26 июля 2005 г.
9. Гарантия и поддержка
Описание гарантии: The manufacturer states "Not applicable" for warranty information. Please refer to your retailer's return policy for details on returns or exchanges.
For technical assistance or further inquiries, please contact Westek customer support through their official webсайт или розничный продавец, где был приобретен товар.


