Введение
The Cuddeback CuddeLink Cell Home (Model LLC-H) serves as the central hub for your CuddeLink camera network. This innovative system utilizes patented wireless network technology, enabling the Home unit to transmit images from up to 23 connected remote cameras via a single cellular network connection. This manual provides comprehensive instructions for setting up, operating, maintaining, and troubleshooting your CuddeLink Cell Home unit.
Настраивать
Что в коробке?
- CuddeLink Cell Home Unit (Model C21-007)
- 2 Paddle Cell Antennas
- Монтажные ремни
- Монтажные кронштейны
- Руководства

Рисунок 1: Included components of the CuddeLink Cell Home kit, showing the main unit, two paddle antennas, mounting straps, and mounting brackets.
Установка аккумулятора
The CuddeLink Cell Home requires 4 D-Cell batteries for operation. For extended usage, external battery packs are available and can be connected via the dedicated port.
- Найдите батарейный отсек на задней панели устройства.
- Open the back door to access the battery slots.
- Insert 4 D-Cell batteries, ensuring correct polarity.
- Close the back door securely.
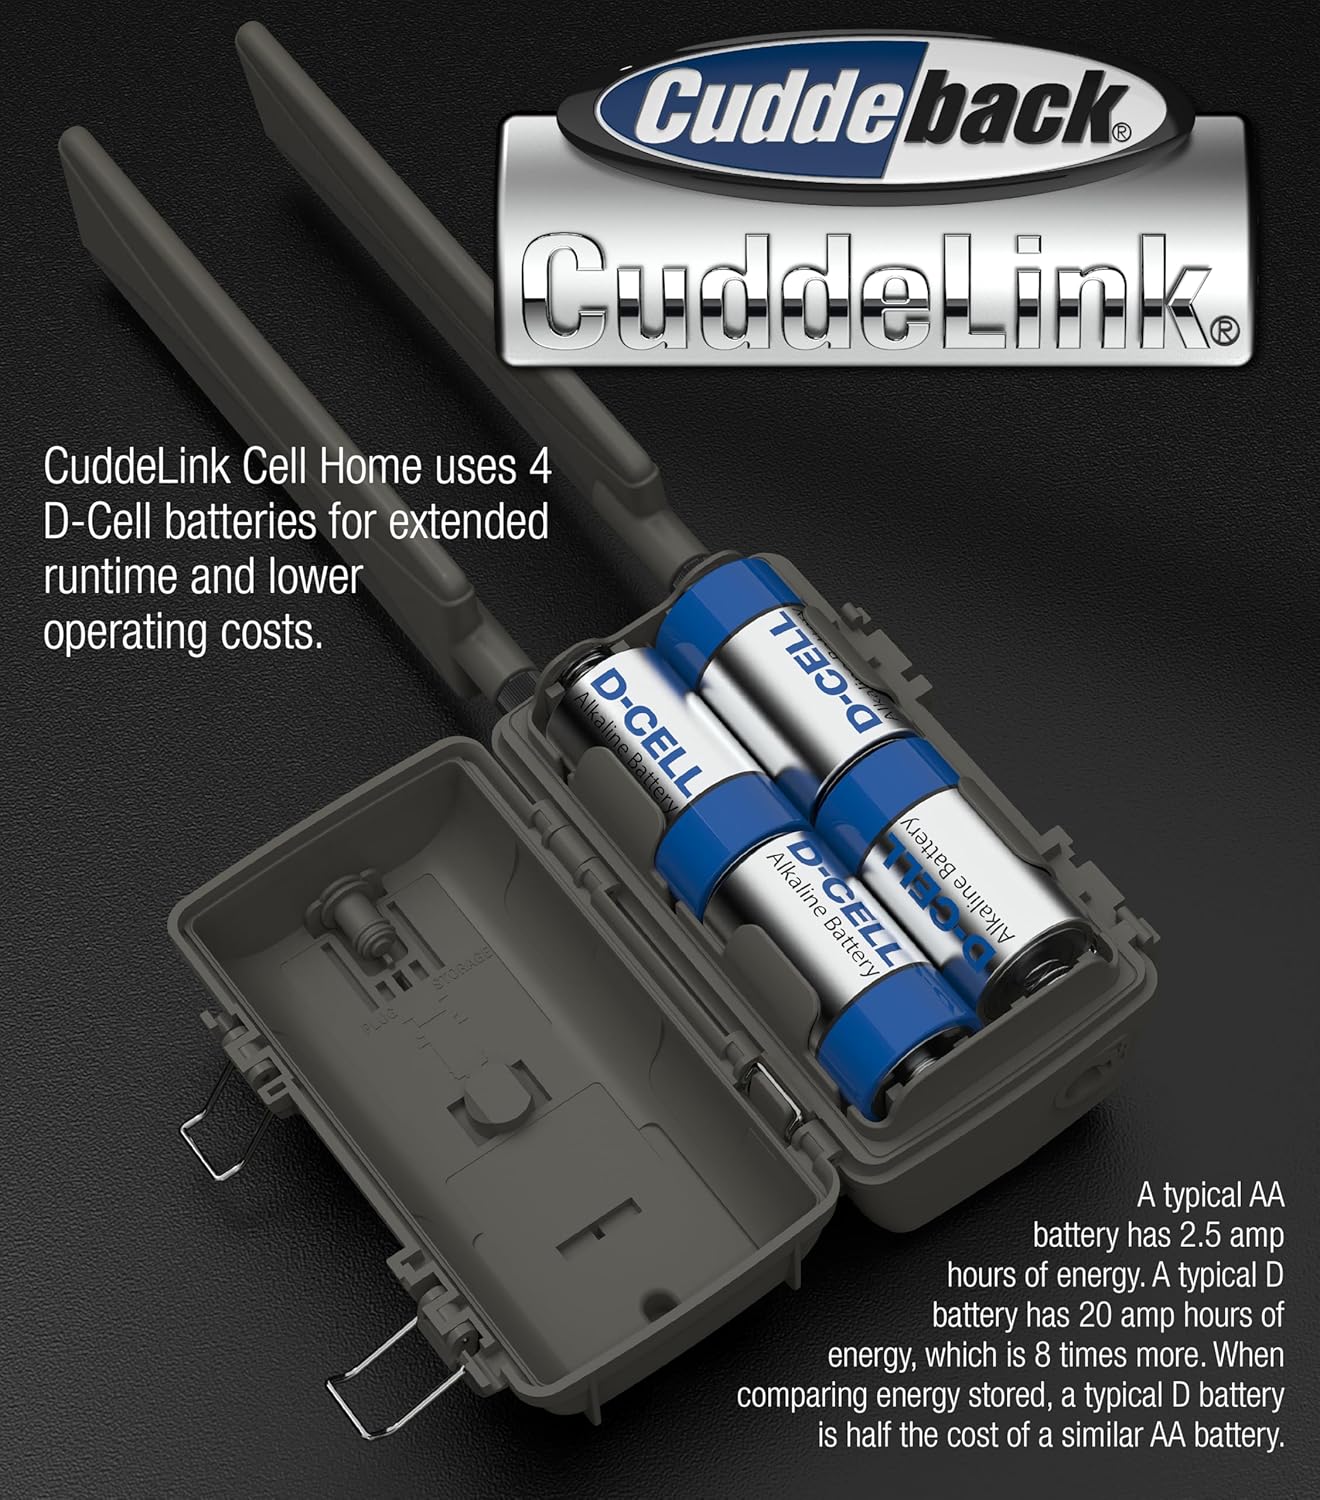
Рисунок 2: The battery compartment of the CuddeLink Cell Home, illustrating the placement of four D-Cell batteries for power.
Antenna and SD Card Installation
- Screw the two paddle cell antennas into the designated ports on the top of the unit.
- Open the front latching door to reveal the control panel and SD card slot.
- Insert a compatible SD card into the SD card slot. The unit supports SD cards up to 256 GB.
- Close the SD card slot cover and the front latching door to ensure weather sealing.

Рисунок 3: The CuddeLink Cell Home with its front panel open, displaying the control panel and the slot for inserting an SD card.
Монтаж устройства
The CuddeLink Cell Home is designed for outdoor usage and can be mounted using the provided mounting bracket and strap.
- Attach the mounting bracket to a tree or pole at the desired height.
- Secure the unit to the mounting bracket using the provided strap.
- Ensure the unit is stable and positioned to maximize cellular signal reception.

Рисунок 4: Сторона view of the CuddeLink Cell Home, illustrating its compact design and suitability for tree mounting.
Operating the CuddeLink Cell Home
Включение и начальная настройка
Once batteries and SD card are installed, the unit will power on. Use the control panel behind the front latching door to navigate menus and configure settings.
- Select your preferred cellular service (Verizon or AT&T) based on local coverage.
- Establish a data plan for sending photos.
- Configure basic settings such as date, time, and unit name.
Connecting Remote Cameras
The CuddeLink Cell Home acts as the central receiver for up to 23 CuddeLink Remote cameras. Remote cameras send their images back to the Home unit for transmission.
- Ensure remote cameras are set to communicate with a Home unit.
- Assign a unique channel and number to each remote camera for proper communication within the network.
- The Home unit will automatically receive reduced-size images from connected remote cameras, saving them to its SD card.

Рисунок 5: Передний view of the CuddeLink Cell Home unit, ready for deployment as the central hub of a camera network.
Remote Settings Adjustment
Cuddeback allows for remote adjustment of camera settings via an online platform. This feature minimizes the need for physical interaction with deployed cameras.
- Adjust delay times between captures.
- Modify flash distance settings.
- Rename cameras within your network.
- Manage SD card content remotely.
Обслуживание
Срок службы батареи и ее замена
Battery life for the 4 D-Cell batteries typically ranges from 1 to 3 months, depending on camera activity and environmental conditions. For extended periods, consider using Cuddeback's external battery packs.
- Regularly check battery levels via the unit's display or the online platform.
- Replace all 4 D-Cell batteries simultaneously to ensure consistent power.
- When using external battery packs, monitor their charge and replace/recharge as needed.
Управление SD-картой
The SD card stores images received from remote cameras. Regular management is crucial to prevent storage issues.
- Periodically download images from the SD card to a computer or cloud storage.
- Format the SD card regularly (after backing up images) to maintain optimal performance and prevent data corruption.
- Use high-speed SanDisk SD cards for best performance.
Чистка и уход
To ensure longevity and optimal performance, keep the unit clean and free from debris.
- Протрите внешнюю поверхность устройства мягкой тряпкой.amp ткань.
- Ensure the lens and sensors are clear of dirt, dust, or spiderwebs.
- Verify that all latches and seals are secure to maintain water resistance.
Поиск неисправностей
No Images Received
- Проверьте наличие сигнала сотовой связи: Ensure the Home unit has adequate cellular signal strength. Relocate if necessary.
- Verify Data Plan: Убедитесь, что ваш тарифный план мобильной связи активен и содержит достаточно данных.
- Remote Camera Connection: Check that remote cameras are properly linked to the Home unit and are transmitting. Verify their battery levels and SD card status.
- Проблемы с SD-картой: Ensure the SD card is correctly inserted, not full, and not corrupted. Try formatting the card (after backing up data) or using a different compatible SD card.
Короткий срок службы батареи
- Тип батареи: Ensure you are using fresh, high-quality D-Cell batteries.
- Уровень активности: High activity in the camera's detection zone will consume more power. Adjust delay settings if frequent captures are not needed.
- Внешняя сила: Consider connecting an external battery pack for extended operation, especially in high-traffic areas.
Remote Settings Not Applying
- Сетевое подключение: Ensure the Home unit has a stable cellular connection to receive remote commands.
- Sync Cycle: Allow time for the unit to sync with the online platform and apply new settings.
- Прошивка: Check for and install any available firmware updates for the unit.
Технические характеристики
| Особенность | Деталь |
|---|---|
| Модель | LLC-H (C21-007) |
| Бренд | Каддебек |
| Связность | Cellular (Verizon & AT&T built-in) |
| Совместимые устройства | Laptop, Desktop, Tablet, Smartphone (for app/online control) |
| Источник питания | 4 D-Cell Batteries (external battery pack compatible) |
| Использование внутри и снаружи помещений | На открытом воздухе |
| Тип крепления | Гора на дереве |
| Размеры (Д x Ш x В) | 3.5 x 3.5 x 6 дюйма (прибл. 8.9 x 8.9 x 15.2 см) |
| Масса | 1.62 фунта (приблизительно 0.73 кг) |
| Уровень водонепроницаемости | Водостойкий |
| Max Remote Cameras | До 23 |
| Поддержка SD-карты | До 256 ГБ |
Информация о гарантии
Cuddeback products typically come with a manufacturer's warranty. For specific details regarding your CuddeLink Cell Home (Model LLC-H) warranty period, coverage, and claims process, please refer to the warranty card included with your product or visit the official Cuddeback webСохраните чек о покупке для предъявления гарантийных претензий.
Note: The product's return policy from the retailer may differ from the manufacturer's warranty. For example, Amazon's return policy for this product is 30 days for refund/replacement.
Поддерживать
For technical assistance, product inquiries, or further support, please contact Cuddeback customer service. You may find additional resources, FAQs, and firmware updates on the official Cuddeback webсайт.
- Официально Webсайт: www.cuddeback.com
- Обслуживание клиентов: Refer to the contact information provided in your product manual or on the official webсайт.


