1. Введение
Спасибо за покупкуasing the Sharp XL-HF201P Micro Hi-Fi System. This system is designed to provide high-quality audio playback from various sources, including CDs, USB devices, and iPods. This manual provides essential information for the safe and efficient operation of your new audio system. Please read it thoroughly before use and retain it for future reference.
2 Важная информация по безопасности
- Источник питания: Подключайте устройство только к розетке переменного тока вольтажаtage specified on the unit's rear panel.
- Вентиляция: Обеспечьте надлежащую вентиляцию. Не закрывайте вентиляционные отверстия. Избегайте размещения устройства на мягких поверхностях, которые могут блокировать вентиляционные отверстия.
- Вода и влага: Не подвергайте устройство воздействию дождя, влаги, капель/брызг жидкостей. Не ставьте на устройство предметы, наполненные жидкостью, например, вазы.
- Нагревать: Держите устройство вдали от источников тепла, таких как радиаторы, обогреватели, печи или другие приборы (включая amp(жирообразующие вещества), которые вырабатывают тепло.
- Уборка: Перед чисткой отключите устройство от розетки. Используйте только сухую ткань.
- Обслуживание: Не пытайтесь ремонтировать этот продукт самостоятельно. Поручите все обслуживание квалифицированному обслуживающему персоналу.
3. Содержимое упаковки
Пожалуйста, проверьте, что все перечисленные ниже предметы включены в ваш пакет:
- Main Unit (CD Player/Receiver)
- Left Speaker (x1)
- Right Speaker (x1)
- Пульт дистанционного управления (с 2 батарейками типа АА)
- FM-антенна
- Рамочная AM-антенна
- Шнур питания
- Руководство по эксплуатации (данный документ)
4. Настройка
4.1 Распаковка и размещение
Carefully remove all components from the packaging. Place the main unit and speakers on a stable, flat surface. Ensure there is sufficient space around the unit for proper ventilation.
4.2 Подключение динамиков
Connect the speaker wires to the corresponding terminals on the main unit and speakers. Match the positive (+) and negative (-) terminals. For optimal sound, ensure the wires are securely connected. If the speaker wires do not insert directly into the screw-knobs, wrap the bare wire ends around the terminal posts and then tighten the screw-knobs to secure them.
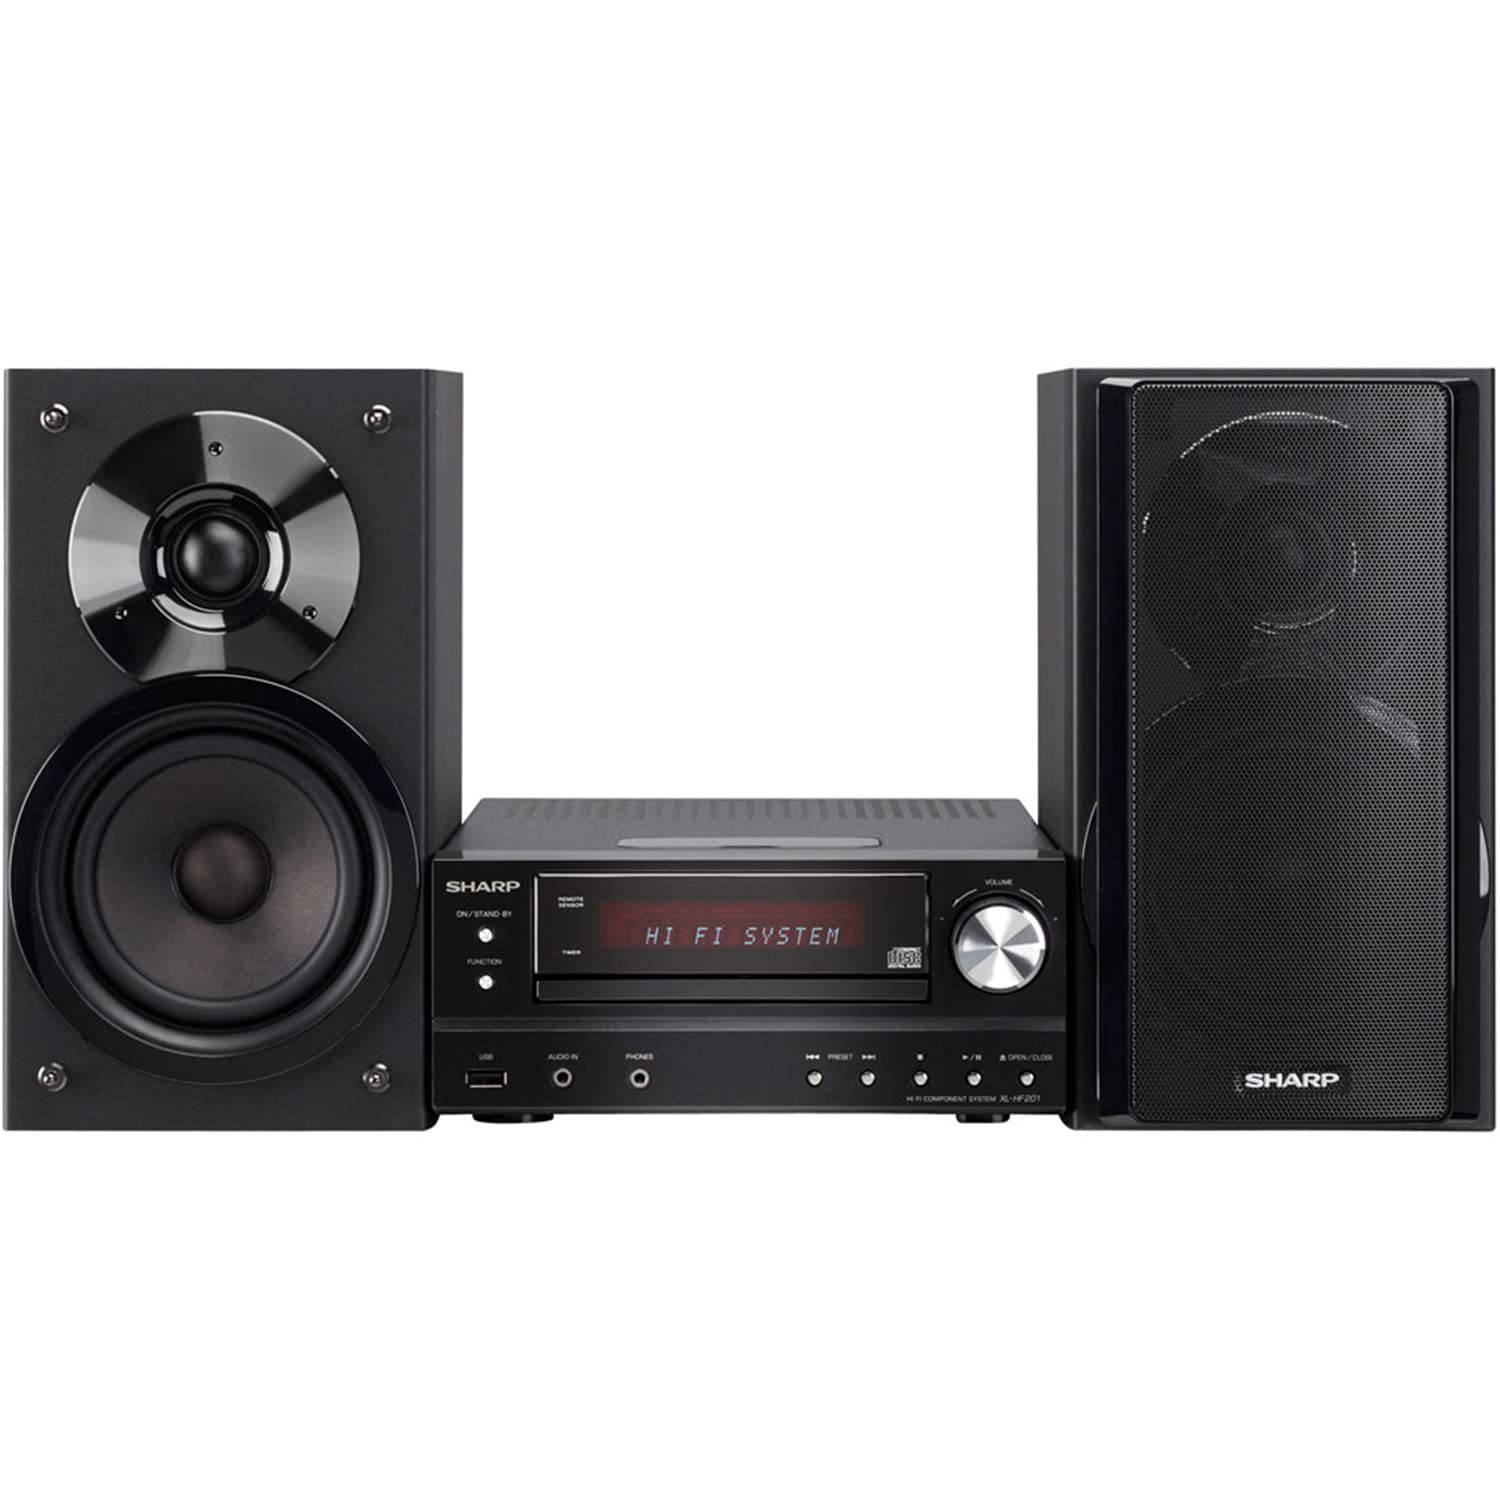
Image 4.2.1: The Sharp XL-HF201P Micro Hi-Fi System, showing the main unit and two speakers. This image illustrates the overall appearance of the system, which includes a central receiver with a CD tray and an iPod dock on top, flanked by two dark-colored speakers.
4.3 Connecting the Antennas
- FM-антенна: Connect the supplied FM wire antenna to the FM antenna terminal on the rear of the main unit. Extend the wire for better reception.
- АМ-антенна: Assemble the AM loop antenna and connect it to the AM antenna terminals. Position the antenna for optimal AM reception.
4.4 Подключение питания
After all other connections are made, plug the power cord into the AC inlet on the rear of the main unit, then plug the other end into a wall outlet.
5. Инструкция по эксплуатации
5.1 Включение/выключение питания
Нажмите ВЛАСТЬ button on the front panel or the remote control to turn the unit on or off (standby mode).
5.2 Выбор источника
Нажмите ФУНКЦИЯ button on the front panel or the remote control repeatedly to cycle through available sources: CD, USB, iPod, FM, AM, AUX.
5.3 Воспроизведение компакт-дисков
- Выберите CD функция.
- Нажмите ОТКРЫТЬ/ЗАКРЫТЬ кнопку, чтобы открыть лоток для компакт-дисков.
- Place a CD (CD-DA, MP3, WMA) with the label side up on the tray.
- Нажимать ОТКРЫТЬ/ЗАКРЫТЬ Нажмите ещё раз, чтобы закрыть лоток. Воспроизведение начнётся автоматически.
- Использовать ВОСПРОИЗВЕДЕНИЕ/ПАУЗА, ОСТАНАВЛИВАТЬСЯ, ПРОПУСКАТЬ Кнопки (вперед/назад) для управления.
5.4 Воспроизведение через USB
- Insert a USB device (containing MP3 or WMA files) into the USB port on the front panel.
- Выберите USB функция.
- Playback will begin automatically or you may need to select a track.
- Использовать ВОСПРОИЗВЕДЕНИЕ/ПАУЗА, ОСТАНАВЛИВАТЬСЯ, ПРОПУСКАТЬ кнопки управления.
5.5 Док-станция для iPod / iPhone
- Carefully place your compatible iPod or iPhone onto the dock connector on top of the main unit.
- Выберите айпод функция.
- Your device will begin charging and you can control playback using the system's remote or your device's controls.
5.6 Настройка радио
- Выберите FM or AM функция.
- Используйте ТЮНИНГ buttons (or knob on the unit) to manually tune to a station.
- Нажмите и удерживайте ТЮНИНГ buttons for automatic station scanning.
- Для предварительной настройки станций настройтесь на нужную станцию, затем нажмите ПАМЯТЬ затем кнопка с предварительно установленным номером.
5.7 Регулятор громкости
Отрегулируйте громкость с помощью ГРОМКОСТЬ +/- buttons on the remote control or the volume knob on the main unit.
6. Техническое обслуживание
6.1 Чистка устройства
Wipe the exterior of the unit with a soft, dry cloth. Do not use abrasive cleaners, waxes, or solvents as they may damage the finish. For stubborn stains, lightly dampen the cloth with water and mild detergent, then wipe dry.
6.2 Уход за линзами CD
Avoid touching the CD lens. If the lens becomes dirty, use a commercially available CD lens cleaner. Do not use compressed air or liquid cleaners directly on the lens.
7. Поиск Неисправностей
| Проблема | Возможная причина | Решение |
|---|---|---|
| Нет электричества | Шнур питания подключен ненадежно. | Проверьте подключение шнура питания к устройству и розетке. |
| Нет звука | Громкость слишком низкая или звук приглушен. Провода динамиков подключены неправильно. | Increase volume. Check speaker wire connections, ensuring correct polarity (+/-). |
| CD не воспроизводится | CD is dirty, scratched, or inserted incorrectly. Incorrect function selected. | Clean or replace CD. Insert CD with label side up. Select CD function. |
| USB-устройство не распознано | USB-устройство неправильно отформатировано или содержит неподдерживаемые данные. files. | Ensure USB device is FAT16/FAT32 formatted and contains MP3/WMA files. Try another USB device. |
| Плохой прием радиосигнала | Antenna not properly positioned or connected. Interference. | Отрегулируйте положение антенны. Отодвиньте устройство от других электронных устройств. |
| Пульт дистанционного управления не работает | Батарейки разряжены или вставлены неправильно. Засорение между пультом дистанционного управления и устройством. | Replace batteries (2 AA). Ensure clear line of sight to the unit's remote sensor. |
8. Технические характеристики
- Бренд: Острый
- Модель: XL-HF201P
- Выходная мощность: 100 Вт RMS
- Поддерживаемые носители: CD-DA, MP3, WMA (CD, USB)
- Связь: USB, iPod Dock, AUX Input, FM/AM Tuner
- Тип динамика: Subwoofers (integrated into speaker design)
- Источник питания: Проводной электрический
- Габариты изделия (основной блок): Приблизительно 13 х 15.09 х 20.15 дюйма
- Вес товара: Примерно 20.3 фунтов
- Батарейки (пульт): 2 батарейки типа АА (в комплекте)
9. Гарантия и поддержка
Для получения информации о гарантии и технической поддержке, пожалуйста, обратитесь к гарантийному талону, прилагаемому к вашему изделию, или посетите официальный сайт Sharp. website. You may also contact Sharp customer service directly for assistance with product registration, technical support, or service inquiries.
Онлайн поддержка: www.sharpusa.com