1. Введение
This manual provides detailed instructions for the installation, operation, and maintenance of your Gewiss GW10701 Programmable Thermostat. This device is designed to control heating and air conditioning systems, allowing you to manage room temperature efficiently and comfortably. Please read this manual thoroughly before installation and use to ensure proper functionality and safety.
2. Информация по технике безопасности
Во избежание травм или повреждения устройства всегда соблюдайте следующие меры предосторожности:
- Монтаж должен выполняться только квалифицированным персоналом в соответствии с местными электротехническими нормами и правилами.
- Перед установкой или обслуживанием термостата отключите питание системы отопления/кондиционирования от главного автоматического выключателя.
- Не подвергайте термостат воздействию воды или чрезмерной влажности.
- Используйте только указанный тип батареи и соблюдайте правильную полярность при установке.
- Keep batteries out of reach of children. Do not dispose of batteries in fire.
- Do not attempt to open or repair the thermostat yourself. Contact qualified service personnel.
3. Продукт закончилсяview
The Gewiss GW10701 is a wall-mounted programmable thermostat featuring an LCD display and intuitive controls for temperature management.
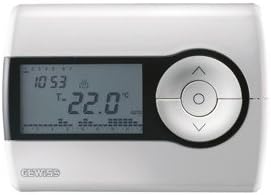
Рисунок 1: Передний view of the Gewiss GW10701 Thermostat. It features a clear LCD screen displaying time and temperature, alongside a circular control panel with directional buttons and a central confirmation button for easy navigation and setting adjustments.
3.1. Компоненты
- ЖК-дисплей: Shows current time, temperature, operating mode, and programming settings.
- Кнопки управления: Typically include UP/DOWN arrows for temperature adjustment, MODE button for selecting operating modes (e.g., Heat, Cool, Auto, Off), and a SET/PROG button for accessing programming menus. (Note: Specific button functions may vary slightly; refer to on-screen prompts.)
- Отсек для батареи: Located on the rear or side, houses the power supply batteries.
- Монтажная пластина: Для надежной установки на стену.
4. Установка
4.1. Выбор места
Select a central location on an interior wall, approximately 1.5 meters (5 feet) above the floor. Avoid locations near heat sources (lamp(например, прямые солнечные лучи, камины), сквозняки (из окон, дверей) или места с плохой циркуляцией воздуха.
4.2. Установка термостата
- Отключить питание: Turn off the power to your heating/cooling system at the main circuit breaker.
- Отдельная опорная пластина: Carefully detach the front cover of the thermostat from its base plate.
- Разметка и сверление: Hold the base plate against the wall at your chosen location. Mark the drilling points. Drill holes and insert wall anchors if necessary.
- Secure Base Plate: Fasten the base plate to the wall using the provided screws.
- Проводка (если применимо): Connect the system wires to the appropriate terminals on the base plate. Refer to the wiring diagram provided with your heating/cooling system or consult a qualified electrician. Note: While the thermostat is battery-powered, it controls a 230V system. Ensure correct wiring.
- Установите батареи: Insert the required batteries into the battery compartment, observing correct polarity (+/-).
- Прикрепить термостат: Carefully reattach the thermostat front cover to the base plate, ensuring it clicks securely into place.
- Восстановить мощность: Turn on the power to your heating/cooling system at the main circuit breaker.
5. Операция
5.1. Начальная настройка
Upon first power-up or after battery replacement, you may need to set the current time and date. Follow the on-screen prompts or refer to the programming section.
5.2. Установка температуры
Используйте UP и ВНИЗ arrow buttons to adjust the desired temperature. The display will show the set temperature temporarily, then revert to the current room temperature.
5.3. Режимы работы
Нажмите РЕЖИМ button (or similar) to cycle through available operating modes:
- НАГРЕВАТЬ: Термостат включит систему отопления, когда температура в помещении опустится ниже заданной.
- ПРОХЛАДНЫЙ: The thermostat will activate the air conditioning system when the room temperature rises above the set temperature.
- АВТО: Термостат автоматически переключается между режимами обогрева и охлаждения для поддержания заданного температурного диапазона.
- OFF: Системы отопления и кондиционирования отключены.
6. Программирование
The Gewiss GW10701 allows you to create custom heating/cooling schedules for different times of the day and days of the week. This feature helps optimize energy consumption and comfort.
6.1. Установка времени и даты
- Нажмите НАБОР or ПРОГ кнопку для входа в меню настроек.
- Navigate using the arrow buttons to find "Time" or "Date" settings.
- Use the arrow buttons to adjust the values (hour, minute, day, month, year).
- Подтвердите каждую настройку с помощью НАБОР or central button.
6.2. Creating a Program Schedule
The thermostat typically offers daily or weekly programming options. You can set different temperatures for various periods (e.g., Wake, Day, Evening, Sleep).
- Нажмите ПРОГ Кнопка входа в режим программирования.
- Выберите день или группу дней, которые вы хотите запрограммировать (например, пн-пт, сб-вс или отдельные дни).
- For each period (e.g., "Wake"), set the desired start time and temperature using the arrow buttons.
- Advance to the next period and repeat the process.
- Save your program and exit programming mode.
Consult the on-screen menu and specific button labels on your device for precise programming steps, as interfaces can vary.
7. Техническое обслуживание
7.1. Замена батареи
The thermostat is powered by batteries. When the battery indicator appears on the display, replace the batteries promptly to ensure continuous operation. Typically, 2x AA or AAA alkaline batteries are required.
- Осторожно снимите переднюю крышку термостата.
- Извлеките старые батареи и утилизируйте их ответственно.
- Вставьте новые батарейки, соблюдая полярность.
- Установите переднюю крышку.
7.2. Уборка
Clean the thermostat's exterior with a soft, dry cloth. Do not use abrasive cleaners, solvents, or spray cleaners directly onto the device, as this can damage the display or internal components.
8. Поиск Неисправностей
| Проблема | Возможная причина | Решение |
|---|---|---|
| Дисплей пустой или тусклый. | Низкий заряд или полная разрядка батарей. | Замените батареи новыми. |
| Система отопления/кондиционирования не реагирует. |
|
|
| Показания температуры кажутся неточными. | Расположение термостата зависит от сквозняков или источников тепла. | Убедитесь, что термостат не подвергается воздействию прямых солнечных лучей, сквозняков или теплоизлучающих приборов. |
9. Технические характеристики
- Производитель: Gewiss
- Номер модели: GW10701 (Chorus)
- Размеры (Д x Ш x В): 13 х 2.3 х 9.2 см
- Масса: 9.07 г
- Цвет: Белый
- Материал: Пластик
- Источник питания: Питание от батареи
- Переключение громкостиtage: 230 Volt (for controlled system)
- Тип дисплея: ЖК-дисплей или светодиод
- Тип крепления: Настенный
- Особенности управления: Programmable, Button control
- Использование: Heating systems, Air conditioning systems
10. Гарантия и поддержка
For warranty information, technical support, or service inquiries regarding your Gewiss GW10701 Thermostat, please refer to the warranty card included with your product or visit the official Gewiss website. You may also contact your local Gewiss distributor or retailer for assistance.
Gewiss Official Webсайт: www.gewiss.com


