GenMachine Ren4000
GenMachine Mini PC AMD Ryzen 3 4300U (Ren4000) Instruction Manual
Model: Ren4000
1. Введение
Thank you for choosing the GenMachine Mini PC AMD Ryzen 3 4300U. This compact and high-performance mini computer is designed for both home and office use, offering efficient multitasking, 4K visuals, and advanced connectivity. This manual provides essential information for setting up, operating, and maintaining your device.
2. Что в коробке
Проверьте наличие всех предметов в посылке:
- GenMachine Mini PC (R3 4300U 8G 256G)
- Руководство пользователя
- Адаптер питания
- HDMI-кабель
- Монтажный кронштейн (для крепления VESA)

3. Продукт закончилсяview (Hardware)
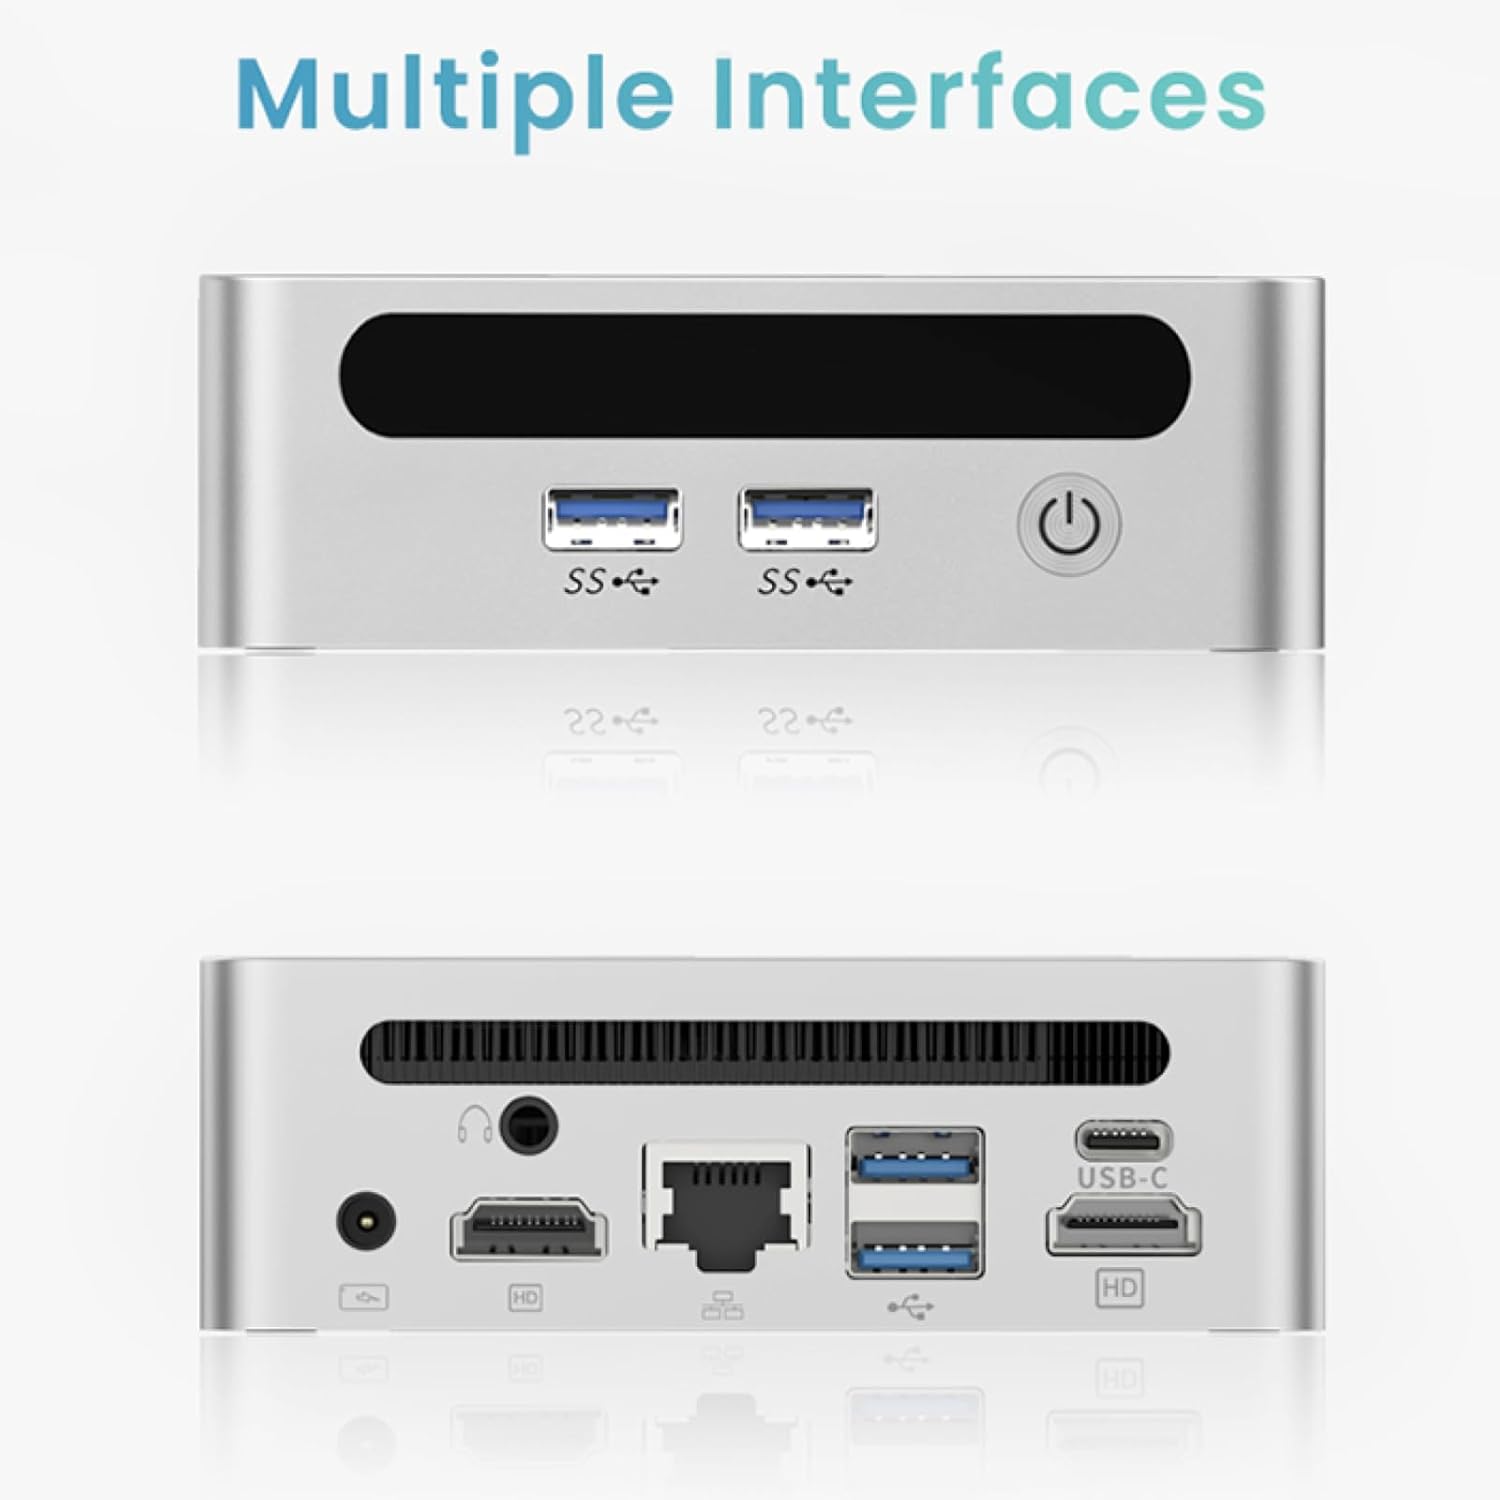
The GenMachine Mini PC features a compact design with various ports for connectivity and expansion.
Передняя панель
- Кнопка питания: Для включения/выключения устройства.
- Порты USB 3.0 (x2): For high-speed data transfer and peripheral connections.
- Порт USB 2.0 (1 шт.): Для стандартных периферийных подключений.
Задняя панель
- Вход питания постоянного тока: Подключите здесь прилагаемый адаптер питания.
- Порт USB 2.0 (1 шт.): Для стандартных периферийных подключений.
- Порты HDMI (x2): For connecting displays, supporting up to 4K resolution.
- Порт Ethernet (LAN): Для проводного сетевого подключения.
- Аудиоразъем 3.5 мм: Для наушников или динамиков.
- Слот для замка Кенсингтона: Для обеспечения безопасности устройства.
4. Руководство по установке
Первоначальное подключение
- Выключите мини-ПК и отсоедините все кабели.
- Connect your monitor(s) to the HDMI port(s) on the rear panel.
- Подключите клавиатуру и мышь к доступным портам USB.
- (Optional) For a wired network connection, plug an Ethernet cable into the LAN port.
- Подключите адаптер питания к входному порту постоянного тока, а затем к розетке.
- Нажмите кнопку питания на передней панели, чтобы включить мини-ПК.
Operating System Setup (Windows 11)
Your GenMachine Mini PC comes with Windows 11 pre-installed. Upon first boot, you will be guided through the initial Windows setup process, including:
- Region and keyboard layout selection.
- Network connection (Wi-Fi 6 or Ethernet).
- Microsoft account sign-in or local account creation.
- Privacy settings configuration.
Для завершения настройки следуйте инструкциям на экране.
5. Производительность и использование
The AMD Ryzen 3 4300U processor, combined with 8GB DDR4 RAM and a 256GB SSD, provides robust performance for various tasks.
Основные характеристики:
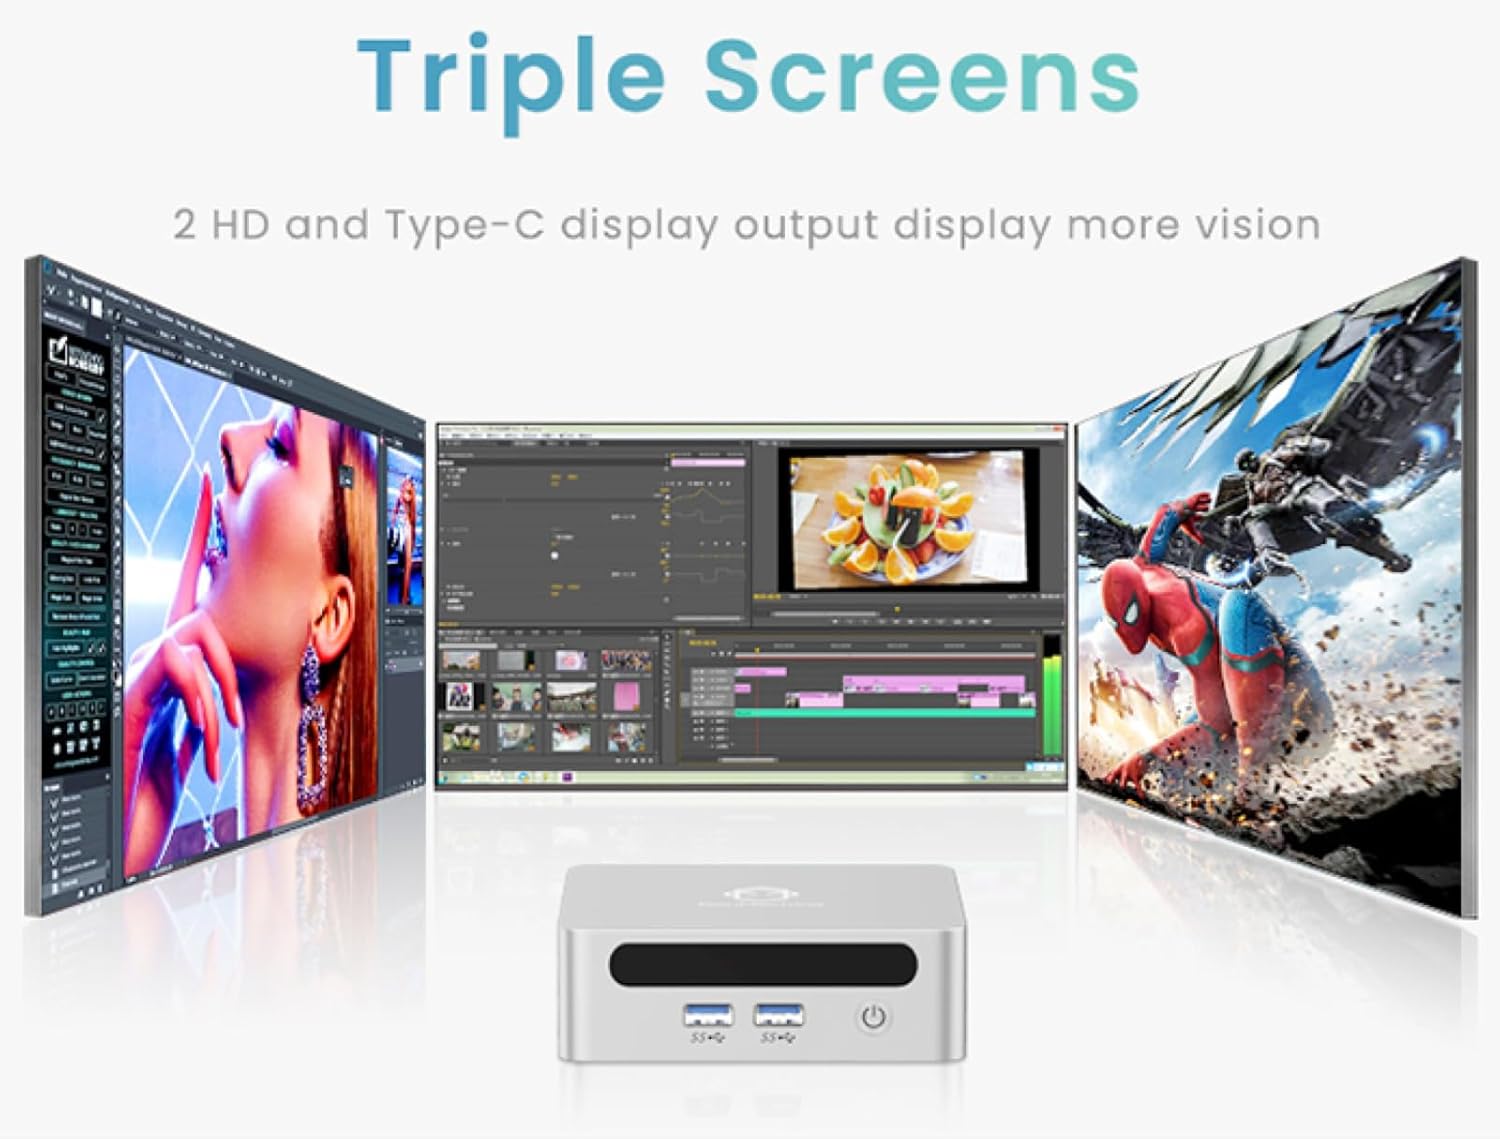
- 4K Ultra HD Visuals & Dual Display Support: Connect up to two 4K monitors for enhanced productivity or immersive entertainment.
- Wi-Fi 6 и Bluetooth 5.2: Enjoy faster and more stable wireless internet and seamless connectivity with Bluetooth peripherals.
- Компактная и бесшумная конструкция: Its small footprint and ultra-quiet cooling system make it suitable for any workspace without distraction.

6. Upgrading Components (Maintenance)
The GenMachine Mini PC allows for easy upgrades of its RAM and SSD to further enhance performance or storage capacity.
Необходимые инструменты:
- Маленькая крестовая отвертка
- Plastic pry tool (optional, for opening the case)
- New SSD (M.2 2280 NVMe or 2.5-inch SATA SSD)
- New RAM (DDR4 SODIMM)
Процедура:
- Выключите мини-ПК и отсоедините все кабели.
- Carefully remove the four rubber foot pads on the bottom of the Mini PC to reveal the hidden screws.
- Открутите четыре винта.
- Gently pry open the bottom plate along the edges. Be careful with the internal clips.
- Locate the existing SSD and RAM modules.
- To remove the SSD: If fixed by screws, unscrew them. If by clips, open the clips and pull out the original SSD.
- To remove RAM: Open the clips at both ends of the memory slot and pull out the original memory vertically.
- Insert the new SSD/RAM into the respective slots, ensuring they are properly seated and secured.
- Replace the bottom plate, aligning it with the clips and screw holes.
- Screw on the previously removed screws and reattach the foot pads.
7. Варианты монтажа
The GenMachine Mini PC can be mounted behind a VESA-compatible monitor using the included mounting bracket, saving desk space and creating a clean setup.

8. Технические характеристики
| Особенность | Деталь |
|---|---|
| Процессор | AMD Ryzen 3 4300U (2.7 ГГц) |
| БАРАН | 8 ГБ DDR4 SDRAM |
| Хранилище | 256GB 2280 SSD (PCIE x 16 interface) |
| Графика | Интегрированная графика AMD Radeon |
| Операционная система | OS (Windows 11 pre-installed) |
| Связность | Wi-Fi 6, Bluetooth 5.2, Ethernet |
| Видеовыход | 2x HDMI (4K @ 60Hz), USB-C (DisplayPort Alt Mode) |
| USB-порты | 2 порта USB 3.0, 2 порта USB 2.0, 1 порт USB-C |
| Размеры | 6.26 x 6.26 x 3.6 дюйма |
| Масса | 2 фунта |
9. Поиск Неисправностей
- Нет питания: Убедитесь, что адаптер питания надежно подключен как к мини-ПК, так и к работающей розетке.
- Нет дисплея: Verify that the HDMI cable(s) are correctly connected to the monitor(s) and the Mini PC. Check monitor input source settings.
- No Internet (Wi-Fi): Ensure Wi-Fi is enabled in Windows settings and you are connected to the correct network.
- Нет проводного интернета: Check the Ethernet cable connection and ensure your router is functioning correctly.
- Низкая производительность: Close unnecessary applications. Check for background updates. Consider upgrading RAM or SSD if issues persist.
10. Гарантия и поддержка
For warranty information, technical support, or service inquiries, please refer to the contact details provided in your product packaging or visit the official GenMachine webсайт. Сохраните чек о покупке на случай гарантийных претензий.