
1. Введение
The MECCANIXITY MPPT Solar Charge Controller is designed to optimize the energy utilization efficiency of photovoltaic systems. It features a built-in maximum power tracking program to ensure your solar panels operate at their peak output point. This intelligent regulator is suitable for 12V/24V auto-adaptive systems and includes an LCD display for monitoring and configuration, along with dual USB ports for convenience.
2. Информация по технике безопасности
- Убедитесь, что аккумулятор имеет достаточный уровень заряда.tage for the controller to recognize the correct battery type during first use.
- Only use photovoltaic panels as a charging source. Do not connect DC or other power sources.
- Always connect the battery to the charge controller first, then connect the solar panel. When disconnecting, disconnect the solar panel first, then the battery.
- Ensure all wiring connections are secure and properly insulated to prevent short circuits or damage to equipment.
- Avoid touching bare wires. If necessary, use electrical tape to cover exposed wire ends.
3. Продукт закончилсяview

Рисунок 3.1: Передняя часть view of the MECCANIXITY MPPT Solar Charge Controller 100A, showing the LCD display, control buttons, and dual USB ports.

Рисунок 3.2: Подробная информация view of the controller's features, including the LCD display, Menu, Page Up, Page Down/Manual buttons, and 2 USB ports.
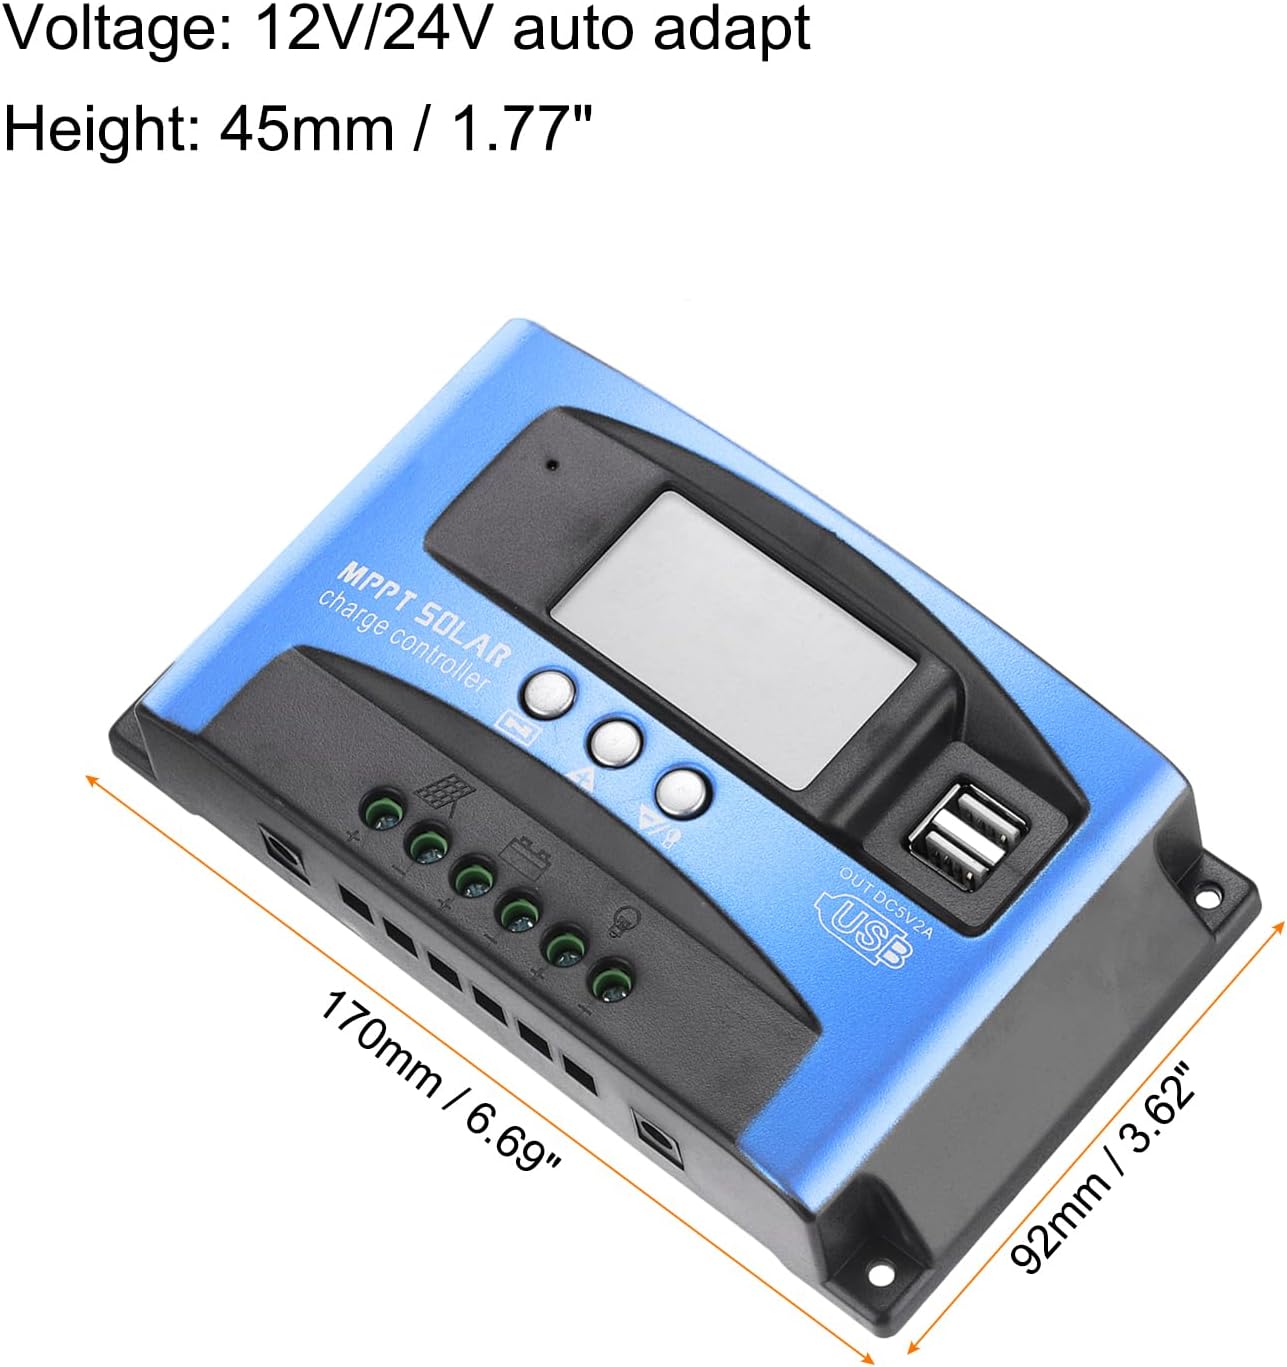
Figure 3.3: Dimensions of the MECCANIXITY MPPT Solar Charge Controller 100A, measuring 170mm (6.69") in length, 92mm (3.62") in width, and 45mm (1.77") in height.
Основные характеристики:
- Технология MPPT: Maximizes energy harvest from solar panels.
- ЖК-дисплей: Provides real-time status and data, allowing for easy mode switching and parameter configuration.
- Двойные порты USB: 5V/2A Max output for charging external devices.
- Автоматическая громкостьtage Adaptation: Supports 12V/24V systems.
- Комплексная защита: Включает переизбытокtage, short circuit, overload, over-charge, and over-discharge protection.
4. Настройка и установка
Схема электропроводки:

Figure 4.1: Wiring diagram illustrating connections for solar panel, battery, load, and inverter.
Этапы установки:
- Подключите аккумулятор: Connect the battery to the charge regulator's positive and negative terminals first. Ensure correct polarity.
- Подключите солнечную панель: Connect the photovoltaic module (solar panel) to the charge regulator's positive and negative terminals.
- Подключите нагрузку: Connect the consumer (load) to the charge regulator's positive and negative terminals.
Important: Always connect the battery first and disconnect the solar panel first to prevent damage to the controller.
Видео по установке:
Video 4.1: This video demonstrates the proper installation sequence for the solar charge controller, emphasizing the importance of connecting the battery before the solar panel and disconnecting the solar panel first. It shows how to secure wiring and check connections.
5. Инструкция по эксплуатации
Функции ЖК-дисплея и кнопок:
The LCD display provides real-time information about your solar system. The control buttons (Menu, Page Up, Page Down/Manual) allow you to navigate through different screens and adjust parameters.
- Основной дисплей: Отображает текущий уровень заряда батареи.tage и состояние зарядки.
- Плавающий объемtage: Отображает объемtage at which the battery is maintained after full charge (e.g., 13.7V for 12V systems).
- Разрядка переподключения: Объемtage at which the load will be reconnected after being disconnected due to low battery (e.g., 12.6V for 12V systems).
- Стоп разряда: Объемtage at which the load will be disconnected to protect the battery from over-discharge (e.g., 10.7V for 12V systems).
- Тип батареи: Allows selection of battery type (e.g., Sealed, Gel, Flooded).
- Режим работы: Configures load output modes (e.g., 24-hour output, dusk-to-dawn, timed output).
Press the 'Menu' button to cycle through different display interfaces. Use the 'Page Up' and 'Page Down/Manual' buttons to adjust settings when in configuration mode (typically by long-pressing the 'Menu' button to enter setting mode).
6. Техническое обслуживание
- Регулярно проверяйте все соединения проводки на герметичность и отсутствие коррозии.
- Для обеспечения надлежащего отвода тепла необходимо содержать контроллер в чистоте, без пыли и мусора.
- Обеспечьте достаточную вентиляцию вокруг контроллера.
- Следите за ЖК-дисплеем на предмет появления кодов ошибок или необычных показаний.
7. Поиск Неисправностей
Распространенные проблемы и решения:
- Нет дисплея/нет питания: Проверьте соединения аккумулятора и уровень громкости.tage. Ensure the battery has sufficient charge.
- Аккумулятор не заряжается: Verify solar panel connections and ensure adequate sunlight. Check for shading on solar panels. Confirm correct battery type setting.
- Загрузка не работает: Check load connections. Ensure the battery voltage is above the discharge reconnect voltage. Verify load work mode settings.
- Повышенная громкостьtage/Over-current Protection: The controller will automatically disconnect to protect the system. Identify the cause (e.g., too many solar panels, incorrect battery voltage) and rectify it before restarting.

Figure 7.1: The controller features a 7-point security protection system, including short circuit, open circuit, over current, over charge, over voltage, over load, and over discharge protection.
8. Технические характеристики
| Параметр | Ценить |
|---|---|
| Томtage | 12V/24V Auto Adapt |
| Номинальный ток зарядки | 100А |
| Ток разряда | 30А |
| Размер | 170*92*45 мм (6.69 x 3.62 x 1.77 дюймов) |
| Рабочая температура | -35-80℃ / -31°F-176°F |
| Объем плавающего зарядаtagе (12 В/24 В) | 13.8В / 27.6В |
| USB-выход | 5V / 2A Max |
| Вес товара | 10.1 унции |
9. Гарантия и поддержка
For warranty information and technical support, please refer to the product packaging or contact MECCANIXITY customer service directly. Keep your purchase receipt for warranty claims.