1. Введение
This manual provides essential information for the safe and efficient assembly, operation, and maintenance of your Generic Motorized Louvered Pergola. Please read this manual thoroughly before installation and retain it for future reference.
The Generic Motorized Louvered Pergola is designed to enhance your outdoor living space, offering adjustable shading and protection from various weather conditions. Its robust aluminum frame and adjustable louvered roof provide versatility and durability.
2. Информация по технике безопасности
Во избежание травм или повреждения изделия всегда соблюдайте следующие правила техники безопасности.
- Перед началом сборки убедитесь, что все компоненты на месте и не повреждены.
- Assembly requires at least two people due to the size and weight of components.
- Во время сборки используйте соответствующие средства индивидуальной защиты, включая перчатки и защитные очки.
- Do not attempt to operate the motorized louvers if there is any obstruction or unusual resistance.
- In areas prone to heavy snowfall, open the louvers before snowfall to prevent accumulation and potential damage to the structure.
- Securely anchor the pergola to the ground using the provided expansion screws to enhance stability.
- Не допускайте детей и домашних животных к месту сборки.
- Disconnect power before performing any maintenance or cleaning on the motorized components.
3. Продукт закончилсяview
The Generic Motorized Louvered Pergola is a versatile outdoor structure designed for comfort and durability. Key features include:
- Adjustable Louvered Top: The roof louvers can be adjusted from 0° to 75° using a handle system, allowing control over sunlight and shade.
- Интегрированная дренажная система: A sloped roof design directs rainwater through beams and columns, preventing water accumulation.
- Высококачественные материалы: Constructed with a powder-coated aluminum alloy frame and galvanized steel louvers for resistance against rust, peeling, and corrosion.
- Optional Netting and Curtains: Features a double track system for easy sliding of netting (for mosquito protection) and privacy curtains.

Рисунок 3.1: Болееview of the Generic Motorized Louvered Pergola.
This image shows the complete pergola structure installed in an outdoor environment, highlighting its design and functionality as a shading solution.
4. Список компонентов
Before starting assembly, verify that all parts listed below are present and undamaged. Refer to the packaging for specific quantities.
| Компонент | Описание | Количество |
|---|---|---|
| Алюминиевые стойки каркаса | Vertical support columns for the pergola structure. | 4 or more (depending on size) |
| Алюминиевые балки каркаса | Horizontal support beams for the louvered roof. | Зависит от модели |
| Galvanized Steel Louvers | Adjustable roof slats. | Несколько |
| Motorized Mechanism/Crank System | System for adjusting louvers. | 1 комплект |
| Компоненты дренажной системы | Internal channels and outlets for water runoff. | 1 комплект |
| Fasteners and Hardware | Bolts, screws, washers, and expansion anchors for assembly and securing. | Ассорти |
| Netting and Curtains (Optional) | Fabric panels for privacy and insect protection. | Varies by package |
5. Настройка и сборка
Assembly of the pergola requires careful attention to detail and adherence to the following steps. It is recommended to have at least two people for assembly.
- Подготовка места: Choose a level and stable surface for installation. Ensure adequate clearance around the pergola for assembly and future use.
- Распакуйте и организуйте: Carefully unpack all components and lay them out according to the component list. Verify all parts are present and undamaged.
- Соберите стойки каркаса: Attach the base plates to the bottom of each aluminum frame post.
- Connect Frame Beams: Connect the horizontal frame beams to the top of the posts, forming the main rectangular or square structure. Ensure all connections are secure.
- Install Louver Supports: Attach the necessary supports for the louvers within the frame.
- Install Louvers: Carefully place each galvanized steel louver into its designated position. Ensure they are correctly aligned for proper operation.
- Install Motorized Mechanism: Integrate the motorized or crank system for louver adjustment. Follow specific instructions provided with the mechanism for wiring (if motorized) or crank assembly.
- Integrate Drainage System: Ensure all drainage channels and outlets are correctly installed and clear of obstructions.
- Закрепить на земле: Using the pre-drilled bases on each post, securely anchor the pergola to the ground with the provided expansion bolts. This step is crucial for stability and wind resistance.
- Install Netting and Curtains (if applicable): If your model includes netting and curtains, install them onto the double track system.

Рисунок 5.1: Example of a fully assembled pergola on a patio.
This image illustrates the pergola after complete assembly, showcasing its integration into an outdoor living space with seating arrangements.
6. Инструкция по эксплуатации
The motorized louvered roof allows for easy adjustment of shade and ventilation.
6.1. Adjusting Louvers
- Motorized System: Use the remote control or wall switch (if applicable) to open or close the louvers. The louvers can be adjusted from 0° (fully closed) to 75° (partially open).
- Crank System: For models with a manual crank, turn the crank handle to adjust the angle of the louvers.
- Optimal Position: Adjust louvers to block direct sunlight, allow ventilation, or provide full rain protection when closed.
6.2. Drainage System
The integrated drainage system is designed to manage rainwater. When louvers are closed, water will flow along the sloped roof, through internal channels in the beams, and down the columns to the ground. Ensure the base of the columns is clear to allow proper drainage.
6.3. Using Netting and Curtains (if applicable)
- Slide the netting along the inner track to protect against insects while maintaining an open view.
- Slide the curtains along the outer track for privacy or to provide additional warmth during cooler weather.
- Secure curtains with windproof hooks or tie them directly to the pillars to prevent flapping in windy conditions.
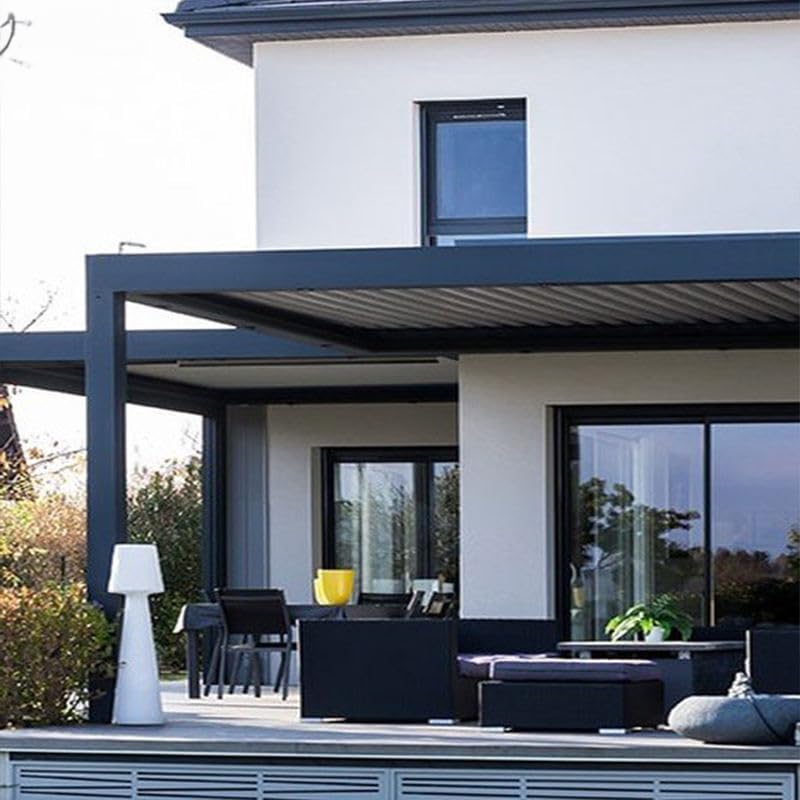
Figure 6.1: Louvers adjusted for partial shade.
This image demonstrates the adjustable louvers in a partially open position, effectively providing shade while allowing some light to filter through.
7. Техническое обслуживание
Регулярное техническое обслуживание обеспечит долговечность и оптимальную работу вашей перголы.
- Cleaning the Frame and Louvers: Clean the aluminum frame and louvers periodically with mild soap and water. Rinse thoroughly with clean water. Avoid abrasive cleaners or harsh chemicals that could damage the powder-coated finish.
- Дренажная система: Regularly inspect the drainage channels and column bases for debris (leaves, dirt) and clear any blockages to ensure proper water flow.
- Механизм Лувера: Check the motorized or crank mechanism for smooth operation. Lubricate moving parts annually with a silicone-based lubricant if necessary, following manufacturer guidelines for the specific mechanism.
- Крепеж: Периодически проверяйте все болты и винты, чтобы убедиться в их надежной фиксации. При необходимости подтяните их.
- Подготовка к зиме: In regions with heavy snowfall, it is crucial to open the louvers before snowfall to prevent snow accumulation on the roof, which can cause structural damage.
- Сетки и шторы: Clean fabric components according to their specific care instructions. Store them indoors during harsh weather conditions or off-season to prolong their life.

Figure 7.1: Pergola with louvers fully closed for rain protection.
This image shows the pergola with its louvers completely closed, demonstrating its capability to provide full overhead protection from rain, highlighting the effectiveness of the drainage system.
8. Поиск Неисправностей
В этом разделе рассматриваются распространенные проблемы, с которыми вы можете столкнуться при использовании перголы.
| Проблема | Возможная причина | Решение |
|---|---|---|
| Louvers not adjusting smoothly (motorized) | Power issue; Obstruction; Motor malfunction. | Check power connection. Inspect for debris or obstructions. If problem persists, contact customer support. |
| Louvers not adjusting smoothly (manual crank) | Obstruction; Mechanism needs lubrication. | Inspect for debris. Apply silicone lubricant to moving parts. |
| Water pooling on roof when louvers are closed | Drainage channels blocked; Louvers not fully closed. | Clear any debris from drainage channels and column bases. Ensure louvers are fully closed. |
| Пергола кажется неустойчивой | Anchoring bolts loose or not installed; Uneven ground. | Check and tighten all anchoring bolts. Ensure the installation surface is level. Re-anchor if necessary. |
| Curtains/Netting not sliding easily | Track obstruction; Damaged rollers. | Clear tracks of debris. Inspect rollers for damage. |
9. Технические характеристики
| Атрибут | Деталь |
|---|---|
| Бренд | Общий |
| Номер модели | OSCAR1-PRO-PERGOLA |
| Материал | Aluminum (Frame), Galvanized Steel (Louvers) |
| Размеры продукта | 118.11"Д x 118.11"Ш x 106.3"В (приблизительно 10 футов x 10 футов x 8.8 футов) |
| Вес товара | 529.11 фунта |
| Уровень водонепроницаемости | Водонепроницаемый |
| Защита от ультрафиолетового излучения | Да |
| Требуется сборка | Да |
| Занятость | 6 |
| Цвет | Белый |
| Производитель | Foshan Oscar Building Materials Co., Ltd |
| Максимальная ветроустойчивость | Grade 7 (31-38 mph) |
| Maximum Snow Thickness Tolerance | 10 дюймов |
10. Гарантия и поддержка
For warranty information or technical support, please contact the manufacturer or your point of purchase. Keep your purchase receipt and model number (OSCAR1-PRO-PERGOLA) readily available when contacting support.
The manufacturer is Foshan Oscar Building Materials Co., Ltd. For customer support, refer to the contact information provided at the time of purchase or on the product packaging.


