1. Введение
This manual provides instructions for the proper use and maintenance of the SUNMI V2SE Smart Mobile Terminal. The V2SE is a versatile device designed for various business applications, featuring an integrated 58mm thermal printer, 1D/2D barcode recognition, NFC capabilities, and running on Android 12.0.
Ключевые особенности включают в себя:
- Integrated 58mm thermal printer with 80mm/s print speed.
- 1D/2D Barcode recognition for efficient scanning.
- NFC for contactless transactions.
- Android 12.0 operating system with a Quad Core 2.0 GHz CPU.
- 2 GB RAM and 8 GB ROM for smooth operation.
- Connectivity: 4G/3G/2G, 2.4G/5G Wi-Fi, Bluetooth 2.1/3.0/4.2.
- Removable Lithium Ion battery.
2. Компоненты устройства
Familiarize yourself with the main components of your SUNMI V2SE terminal.
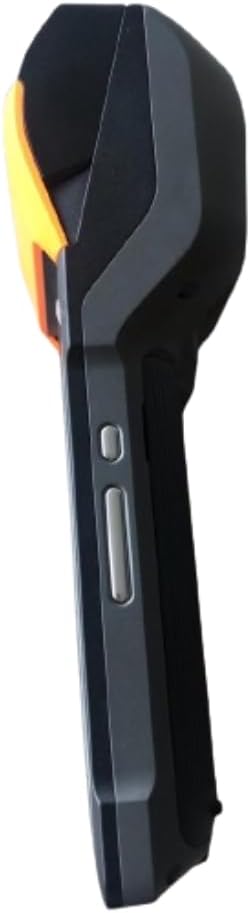
Рисунок 2.1: Передняя и боковая View. This image displays the device's screen, the integrated barcode scanner at the top, and the power and volume buttons located on the side.

Рисунок 2.2: Сторона View. This image shows the side profile of the terminal, including the cover for the SIM card slot and additional buttons.

Рисунок 2.3: Назад View. This image illustrates the rear of the device, featuring the thermal printer cover, the 0.3 MP camera, and the charging contact points.
Список компонентов:
- Экран дисплея: Touch-sensitive LCD for user interaction.
- Сканер штрих-кода: Integrated 1D/2D scanner for data capture.
- Термальный принтер: For printing receipts and other documents.
- Кнопка питания: Для включения/выключения устройства или пробуждения/сна.
- Кнопки громкости: Для регулировки уровня звука.
- Камера: 0.3 MP front photo sensor.
- Слот для SIM-карты: Supports 1 Nano SIM.
- Отсек для батареи: Houses the removable Lithium Ion battery.
- Charging Port/Contacts: Для зарядки устройства.
3. Начальная настройка
3.1. Установка аккумулятора
- Убедитесь, что устройство выключено.
- Найдите крышку батарейного отсека на задней панели устройства (см. рисунок 2.3).
- Снимите крышку, сдвинув или подняв ее в соответствии с отметками.
- Вставьте прилагаемую литий-ионную батарею, убедившись, что контакты правильно совпали.
- Надежно закройте крышку батарейного отсека.
3.2. Установка SIM-карты
- Ensure the device is powered off and the battery is installed.
- Locate the SIM card slot cover on the side of the device (refer to Figure 2.2).
- Откройте крышку.
- Insert a Nano SIM card into the designated slot with the gold contacts facing down and the notched corner aligned.
- Close the SIM card slot cover firmly.
3.3. Thermal Paper Loading
- Locate the printer cover release latch, typically on the top or side of the printer compartment (refer to Figure 2.3).
- Откройте крышку принтера.
- Insert a 58mm thermal paper roll into the compartment, ensuring the paper feeds from the bottom and the leading edge extends out of the printer slot.
- Close the printer cover firmly until it clicks into place. Ensure there is no slack in the paper roll.
3.4. Первоначальная зарядка и включение
- Подключите прилагаемый адаптер питания к зарядному порту устройства.
- Plug the adapter into a power outlet. Allow the device to charge fully before first use.
- To power on, press and hold the Power button (refer to Figure 2.1) until the SUNMI logo appears on the screen.
4. Инструкция по эксплуатации
4.1. Включение/выключение и спящий режим
- Включение питания: Нажмите и удерживайте кнопку питания, пока устройство не завибрирует и не загорится экран.
- Выключение: Нажмите и удерживайте кнопку питания, пока не появится меню управления питанием. Выберите «Выключить» и подтвердите выбор.
- Сон/Пробуждение: Кратковременно нажмите кнопку питания, чтобы перевести устройство в спящий режим или вывести его из него.
4.2. Using the Thermal Printer
The integrated 58mm thermal printer can be used to print receipts, tickets, and other documents.
- Ensure thermal paper is correctly loaded (refer to Section 3.3).
- Open the application that requires printing (e.g., POS software).
- Initiate the print command within the application. The device will automatically print the content.
- Tear off the printed paper against the serrated edge.
4.3. Сканирование штрихкодов
The V2SE supports 1D and 2D barcode recognition.
- Open an application that requires barcode input.
- Point the scanner window (located at the top of the device, refer to Figure 2.1) at the barcode.
- Press the dedicated scan button (if available) or trigger the scan function within the application.
- Убедитесь, что штрих-код находится в поле зрения сканера. view and well-lit for optimal performance.
4.4. Функциональность NFC
The device supports Near Field Communication (NFC) for contactless operations.
- Ensure NFC is enabled in the device settings (Settings > Connected devices > NFC).
- Open an application that utilizes NFC (e.g., payment app, data transfer app).
- Hold the NFC-enabled card or device close to the NFC detection area on your terminal (typically near the top or back of the device).
- Follow the on-screen prompts to complete the transaction or data transfer.
4.5. Сетевое подключение
- Wi-Fi: Go to Settings > Network & internet > Wi-Fi to connect to available wireless networks.
- Мобильные данные (4G/3G/2G): Ensure a valid SIM card is installed and mobile data is enabled in Settings > Network & internet > Mobile network.
- Bluetooth: Для сопряжения с другими устройствами Bluetooth перейдите в Настройки > Подключенные устройства > Bluetooth.
5. Техническое обслуживание
5.1. Очистка устройства.
- Выключите устройство перед очисткой.
- Используйте мягкую, безворсовую ткань, слегкаampened with water or a mild, non-abrasive cleaner to wipe the exterior.
- Для очистки дисплея используйте специальное средство для чистки экранов и салфетку из микрофибры.
- Do not use harsh chemicals, solvents, or abrasive materials. Avoid spraying liquids directly onto the device.
5.2. Уход за аккумулятором
- Charge the battery regularly, avoiding complete discharge whenever possible.
- Не подвергайте аккумулятор воздействию экстремальных температур.
- Если устройство не будет использоваться в течение длительного времени, зарядите аккумулятор примерно на 50% и храните его в прохладном, сухом месте.
- Используйте только оригинальное или одобренное зарядное устройство и аккумулятор.
5.3. Printer Head Cleaning
Regular cleaning of the printer head can prevent print quality issues.
- Power off the device and open the printer cover.
- Слегка протрите ватным тампоном.ampПротрите печатающую головку изопропиловым спиртом.
- Перед закрытием крышки и включением устройства дайте печатающей головке полностью высохнуть.
6. Поиск Неисправностей
| Проблема | Возможная причина | Решение |
|---|---|---|
| Устройство не включается | Низкий заряд батареи; Неисправная батарея; Проблема с кнопкой питания | Charge the device for at least 30 minutes. Ensure battery is correctly installed. Try a different charger. |
| Принтер не печатает | No paper; Paper jammed; Printer head dirty; Application error | Check and load paper. Clear any paper jams. Clean the printer head (Section 5.3). Restart the application or device. |
| Сканер штрихкодов не работает. | Scanner window obstructed; Barcode damaged; Application error | Ensure scanner window is clean. Try scanning a different barcode. Restart the application or device. |
| Нет Wi-Fi соединения | Wi-Fi off; Incorrect password; Out of range | Enable Wi-Fi in settings. Re-enter password. Move closer to the Wi-Fi router. |
| No mobile data | SIM card not installed; Mobile data off; No network coverage | Check SIM card installation. Enable mobile data in settings. Check for network coverage in your area. |
7. Технические характеристики
| Особенность | Деталь |
|---|---|
| Модель | V2SE |
| Операционная система | Андроид 12.0 |
| Процессор | Четырехъядерный 2.0 ГГц |
| БАРАН | 2 ГБ |
| ПЗУ | 8 ГБ |
| Отображать | LCD, 1920 x 1080 resolution, 16:9 Aspect Ratio |
| Принтер | 58 mm thermal printer, 80 mm/s print speed |
| Распознавание штрих-кодов | 1D / 2D Barcode recognition |
| Камера | 0.3 MP Front Photo Sensor |
| Слот для SIM-карты | 1 Nano SIM (Dual SIM support) |
| Связность | 4G/3G/2G Cellular, Wi-Fi (2.4G/5G), Bluetooth 2.1/3.0/4.2, NFC |
| GPS | True, Supports GPS satellite navigation system |
| Аккумулятор | 1 литий-ионный аккумулятор (съемный, входит в комплект) |
| Размеры | 22 х 9 х 9 см |
| Масса | 400 г |
| Производитель | Сунми |
8. Гарантия и поддержка
For warranty information and technical support, please refer to the documentation provided with your purchase or contact your vendor. Keep your proof of purchase for warranty claims.