1 Важная информация по безопасности
Please read all instructions carefully before using the EVTSCAN Projection Clock. Keep this manual for future reference.
- Не подвергайте устройство воздействию экстремальных температур, прямых солнечных лучей или высокой влажности.
- Избегайте падений и сильных ударов по часам.
- Не пытайтесь разбирать или ремонтировать устройство самостоятельно. Обратитесь к квалифицированному специалисту.
- Use only the specified power adapter (DC 5.0V, 1.2A) or appropriate batteries (2xAAA, not included).
- Хранить в недоступном для детей месте.
2. Продукт закончилсяview
The EVTSCAN Projection Clock is a versatile digital alarm clock featuring a 3-inch backlit LCD screen that displays time, date, day of the week, temperature, and humidity. It includes a projection function to display time and temperature on a wall or ceiling, dual alarms with snooze, and a USB port for charging mobile phones.
Основные характеристики:
- 12/24-hour time format display.
- Date and day of the week display (7 languages for week).
- Temperature detection (-9℃ to +50℃) and humidity detection (20% to 95%).
- Projection function with 180-degree rotation for time and temperature.
- Dual alarm clocks with slowly increasinг объем.
- Функция отложенного будильника на 5 минут.
- USB-порт для зарядки мобильных устройств.
- Adjustable backlight with 4 levels (high, medium, low, off).

Рисунок 2.1: Передний view of the EVTSCAN Projection Clock, showing the LCD display and projection lens.
3. Содержимое упаковки
При распаковке убедитесь, что все перечисленные ниже предметы присутствуют и находятся в хорошем состоянии:
- 1 x EVTSCAN Projection Clock
- 1 х USB-кабель
- 1 х Руководство пользователя на английском языке
Note: 2xAAA batteries are required for battery power and are not included in the package.
4. Настройка
4.1 Питание устройства
The EVTSCAN Projection Clock can be powered by either AAA batteries or via the included USB cable.
4.1.1 Установка аккумулятора
- Найдите крышку батарейного отсека на задней панели часов.
- Slide open the cover.
- Вставьте две (2) батарейки типа AAA, соблюдая правильную полярность (+/-).
- Плотно закройте крышку батарейного отсека.
Note: When powered by batteries, the backlight will only light up for 8 seconds when activated to conserve power. The projection lamp will also light up for 8 seconds.
4.1.2 USB Power Connection
- Connect the small end of the provided USB cable to the DC 5.0V 1.2A input port on the back of the clock.
- Connect the larger end of the USB cable to a compatible USB power adapter (not included) or a powered USB port.
Note: When powered by USB, the backlight and projection lamp can remain continuously on, with adjustable brightness for the backlight.
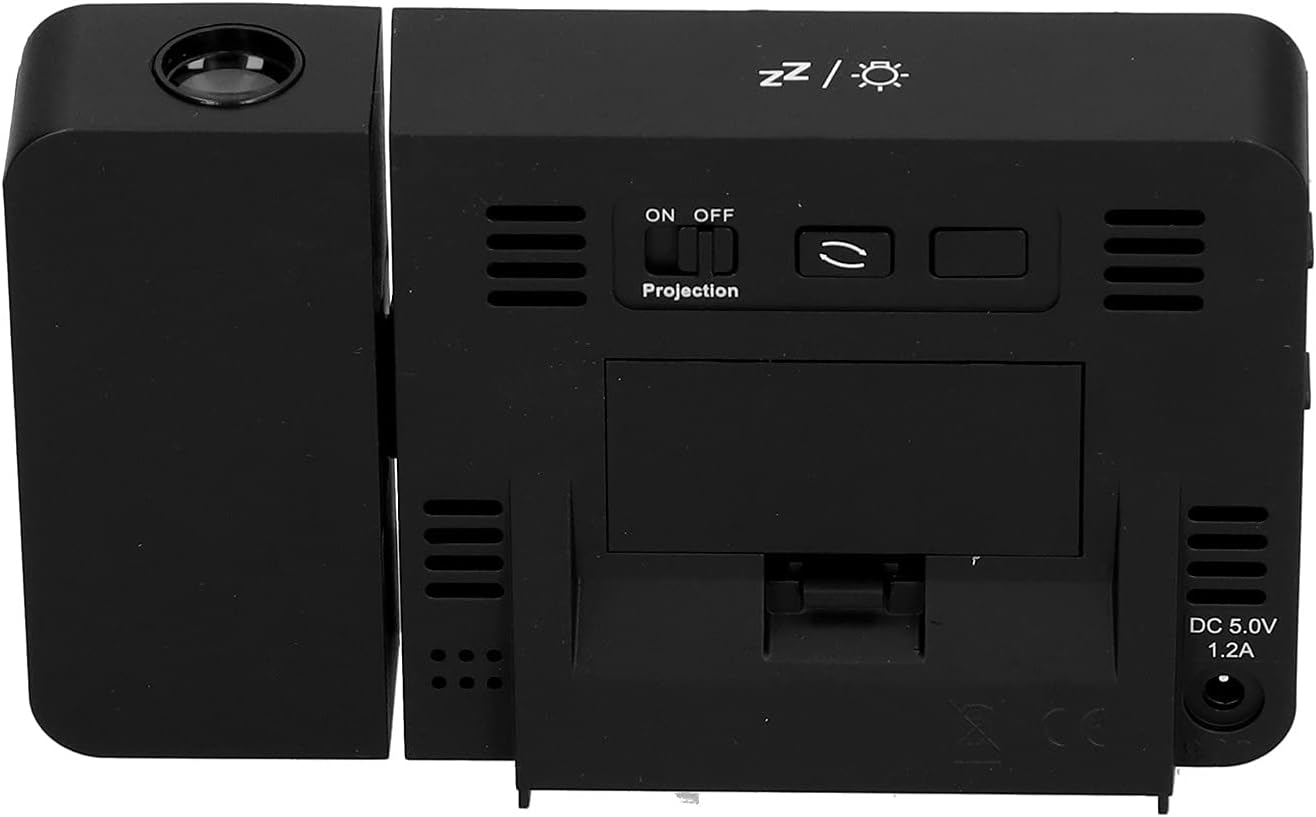
Рисунок 4.1: Задний view of the clock, indicating the battery compartment and DC 5.0V 1.2A power input.
5. Инструкция по эксплуатации
5.1 Функции кнопок
Familiarize yourself with the control buttons located on the front and sides of the clock:
- ВРЕМЯ: Вход в режим установки времени.
- ТРЕВОГА: Переходит в режим настройки будильника.
- +: Increases values, switches 12/24HR format, adjusts backlight.
- -: Decreases values, switches temperature units (℃/℉).
- Projection ON/OFF Switch: Activates or deactivates the projection. (Located on the back/side)
- Alarm 1 ON/OFF Switch: Activates or deactivates Alarm 1. (Located on the side)
- Alarm 2 ON/OFF Switch: Activates or deactivates Alarm 2. (Located on the side)
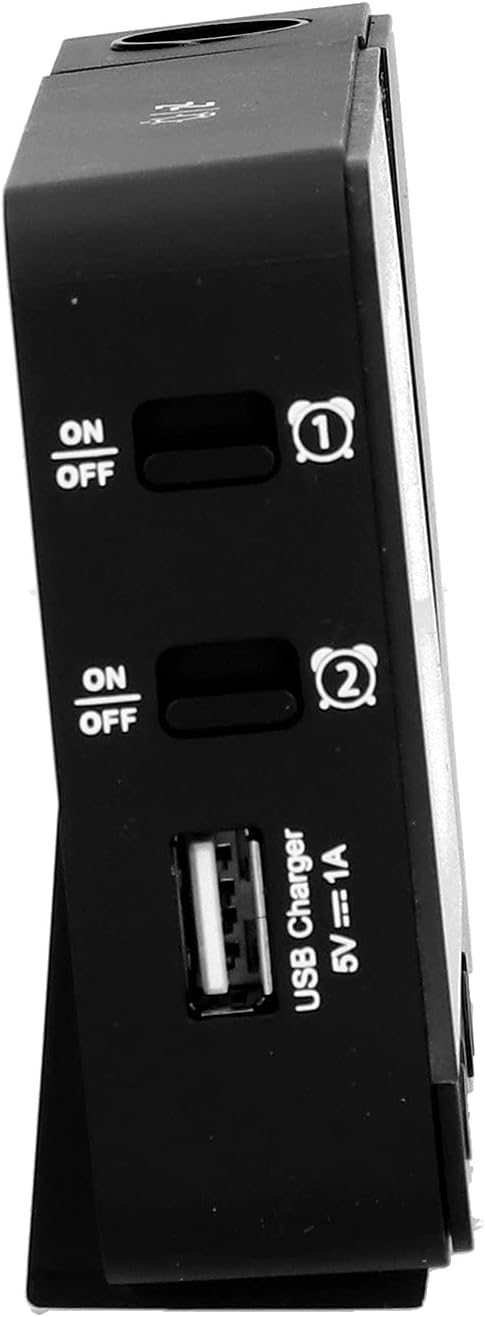
Рисунок 5.1: Сторона view showing Alarm 1 and Alarm 2 ON/OFF switches, and the USB charging port.
5.2 Установка времени и даты
- Нажмите и удерживайте ВРЕМЯ button to enter time setting mode. The hour display will flash.
- Используйте + or - кнопки для настройки часов.
- Нажимать ВРЕМЯ Ещё раз подтвердите время и перейдите к настройке минут. Настройте с помощью + or -.
- Продолжайте нажимать ВРЕМЯ to cycle through setting year, month, and day. Adjust each with + or -.
- После установки дня нажмите ВРЕМЯ Ещё раз, чтобы выйти из режима настроек.
- Чтобы переключиться между 12-часовым и 24-часовым форматом, нажмите кнопку + button during normal time display.
- To switch between Celsius (℃) and Fahrenheit (℉) for temperature, press the - button during normal time display.
5.3 Установка будильников
Часы оснащены двумя независимыми будильниками (Будильник 1 и Будильник 2).
- Нажмите и удерживайте ТРЕВОГА button to enter Alarm 1 setting mode. The Alarm 1 hour display will flash.
- Используйте + or - кнопки для настройки часа будильника.
- Нажимать ТРЕВОГА again to confirm the hour and move to Alarm 1 minute setting. Adjust with + or -.
- Нажимать ТРЕВОГА again to move to Alarm 2 hour setting, and repeat the process for Alarm 2.
- After setting Alarm 2 minutes, press ТРЕВОГА Ещё раз, чтобы выйти из режима настроек.
- To activate or deactivate an alarm, use the corresponding Тревога 1 ВКЛ/ВЫКЛ or Тревога 2 ВКЛ/ВЫКЛ switch on the side of the clock. An alarm icon will appear on the display when active.
5.3.1 Функция повтора
When an alarm sounds, press any button (except the alarm ON/OFF switch) to activate the 5-minute snooze function. The alarm will sound again after 5 minutes. To turn off the alarm completely, slide the corresponding alarm ON/OFF switch to OFF.
5.4 Функция проекции
The clock can project the time and temperature onto a wall or ceiling.
- Найдите Проекция ВКЛ / ВЫКЛ switch on the back of the clock. Slide it to ON to activate the projection.
- Adjust the angle of the projection arm (the part with the lens) to direct the projection as desired. The arm can rotate nearly 180 degrees.
- The projection will display the current time and temperature in a soft red color.

Рисунок 5.2: Сторона view showing the projection arm extended and ready for use.

Рисунок 5.3: The clock projecting time and temperature onto a wall in a bedroom setting.
5.5 Регулировка подсветки
When the clock is powered by USB, the backlight can be adjusted to four levels: high, medium, low, or off. Repeatedly press the + button during normal time display to cycle through the brightness levels.
When powered by batteries, the backlight will illuminate for 8 seconds when any button is pressed, then turn off to conserve power.
5.6 USB-порт для зарядки
The clock features a USB charging port (5V=1A) on its side. You can use this port to charge your mobile phone or other small electronic devices while the clock is connected to USB power.
Note: The USB charging port only functions when the clock is powered via the USB cable. It does not work when the clock is running on battery power.
6. Техническое обслуживание
6.1 Очистка
- Протрите поверхность часов мягкой сухой тканью.
- Не используйте абразивные чистящие средства, растворители или химические спреи, так как они могут повредить покрытие или электронные компоненты.
- Keep the projection lens clean for clear projection. Use a soft, lint-free cloth.
6.2. Замена батареи
When the display becomes dim or the clock functions erratically while on battery power, it's time to replace the AAA batteries. Refer to Section 4.1.1 for battery installation instructions. Always replace both batteries at the same time with new ones.
7. Поиск Неисправностей
| Проблема | Возможная причина | Решение |
|---|---|---|
| Дисплей часов пустой или тусклый. | No power, low batteries, or USB cable not connected. | Check battery installation and replace if necessary. Ensure USB cable is securely connected to a power source. |
| Projection is unclear or not visible. | Projection switch is OFF, lens is dirty, or projection distance is too far/close. | Ensure Projection switch is ON. Clean the projection lens. Adjust the clock's distance from the projection surface. |
| Сигнализация не срабатывает. | Сигнализация не установлена или деактивирована. | Verify alarm time is set correctly. Ensure the corresponding Alarm ON/OFF switch is in the ON position. |
| USB-порт для зарядки не работает. | Clock is running on battery power, or USB cable is not connected to a power source. | Ensure the clock is powered via the USB cable and connected to a functional power adapter. |
| Неверное время/дата. | Время/дата установлены неправильно. | Для установки времени и даты обратитесь к разделу 5.2. |
8. Технические характеристики
| Модель: | B0CLGDFCGX |
| Бренд: | EVTSCAN |
| Материал: | АБС (акрилонитрилбутадиенстирол) |
| Размеры продукта: | Приблизительно 13.5 x 8 x 2.5 см (5.3 x 3.1 x 1.0 дюйма) |
| Масса: | прибл. 242 г (8.5 унции) |
| Тип дисплея: | Цифровой ЖК-дисплей с подсветкой |
| Источник питания: | 2xAAA batteries (not included) or DC 5.0V 1.2A via USB cable |
| USB-выход для зарядки: | 5В=1А |
| Диапазон определения температуры: | -9℃ to +50℃ (1℃ resolution) |
| Диапазон обнаружения влажности: | от 20% до 95% (разрешение 1%) |
| Temperature/Humidity Calibration Time: | 30 секунд |
| Уровни подсветки: | 4 levels (High, Medium, Low, Off) when USB powered; 8s illumination when battery powered. |
| Проекция Lamp: | Always on when USB powered; 8s illumination when battery powered. |

Рисунок 8.1: Product dimensions: 5.3 inches wide by 3.1 inches high.
9. Гарантия и поддержка
EVTSCAN products are manufactured to high quality standards. For specific warranty information, please refer to the warranty card included with your purchase or contact your retailer.
If you encounter any issues or have questions regarding your EVTSCAN Projection Clock, please contact the seller or EVTSCAN customer support for assistance. Please have your model number (B0CLGDFCGX) ready when contacting support.
Для получения дополнительной помощи вы можете посетить EVTSCAN Store on Amazon.