
1. Введение
This manual provides detailed instructions for the installation, operation, and maintenance of your OLONETO 100A Solar Charge Controller. This device is designed to manage power flow from your solar panel to your battery bank and DC loads, ensuring efficient charging and protection for your battery system. It supports 12V, 24V, 36V, and 48V battery systems with automatic voltagе идентификация.
Note: This controller utilizes a combination of MPPT and PWM charging technologies. It is not a 100% true MPPT controller.
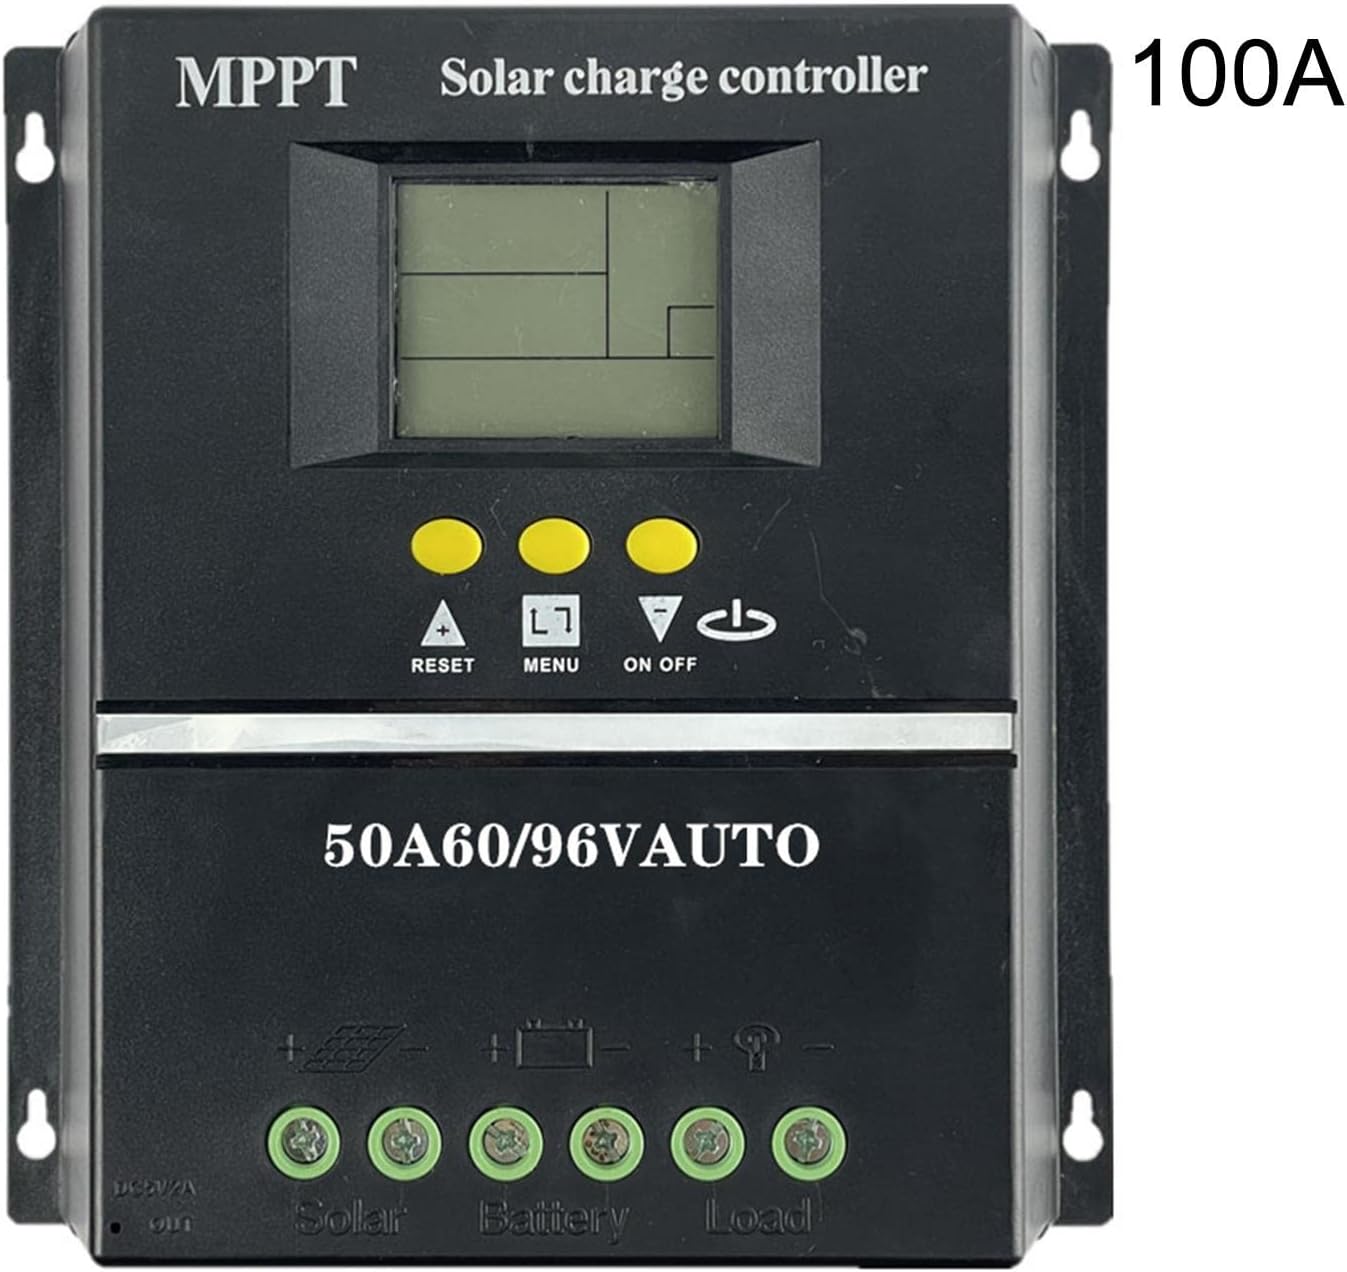
Рисунок 1: Передняя часть view of the OLONETO 100A Solar Charge Controller, showing the LCD display, control buttons, and connection terminals. The "100A" rating is visible on the top right.
2. Инструкции по технике безопасности
- Ensure all connections are tight and correct to prevent damage to the controller or other components.
- Всегда подключайте батарею к контроллеру. первый, and then connect the solar panel. Disconnect in the reverse order: solar panel first, then battery. Failure to follow this sequence may damage the controller.
- Убедитесь, что аккумулятор vol.tage is sufficient for the controller to recognize the system voltage (e.g., >10V for 12V battery, >20V for 24V battery, >30V for 36V battery, >40V for 48V battery).
- Устанавливайте контроллер в хорошо проветриваемом помещении, вдали от прямых солнечных лучей, высоких температур и влаги.
- Не пытайтесь ремонтировать или модифицировать контроллер самостоятельно. Обратитесь к квалифицированному специалисту для обслуживания.
3. Особенности продукта
The OLONETO Solar Charge Controller offers several key features for efficient solar power management:
- Автоматическая громкостьtagе Идентификация: Automatically detects 12V, 24V, 36V, or 48V battery systems.
- ЖК-дисплей: Provides real-time information on battery status, charging parameters, and load status.
- Двойной USB-выход: Convenient 5V output for charging mobile phones and other USB devices.
- Регулируемые параметры: Allows users to customize charging and discharge settings.
- Smart Charge Management: Optimizes battery charging to prolong battery life.
- Охрана окружающей среды: Designed with green environmental protection principles.
- Автоматическое отслеживание фокусировки MPPT: High charging efficiency with non-stop detection during charging and bidirectional focusing tracking.

Figure 2: Diagram illustrating key features of the solar charge controller, including LCD display for battery power supply voltage, smart charge capabilities, 5V USB output, adjustable parameters, and green environmental protection.

Figure 3: Image highlighting the automatic focusing MPPT tracking feature, which ensures high charging efficiency and continuous detection during the charging process.
4. Настройка и установка
4.1 Последовательность подключения
- Подключите аккумулятор: Connect the battery to the controller's battery terminals. Ensure correct polarity (+ to + and - to -). The controller will automatically detect the battery voltage.
- Подключите солнечную панель: Connect the solar panel to the controller's solar panel terminals. Ensure correct polarity.
- Подключите нагрузку постоянного тока (опционально): Подключите нагрузку постоянного тока к клеммам нагрузки контроллера. Убедитесь в правильной полярности.
Important: Always follow this connection order: Battery → Solar Panel → Load. To disconnect, follow the reverse order: Load → Solar Panel → Battery.
4.2 Recommended Solar Panel Voltage
- Для 12В battery systems: Use a solar panel with approximately 18В выход.
- Для 24В battery systems: Use a solar panel with approximately 30-37В выход.
- Для 36В battery systems: Use a solar panel with approximately 45-55В выход.
- Для 48В battery systems: Use a solar panel with approximately 60-72В выход.
4.3 Схем электропроводки

Figure 4: Basic wiring diagram showing connections for the solar panel, battery, and DC loads to the controller. Ensure positive (+) and negative (-) terminals are correctly matched.

Figure 5: Detailed wiring diagram illustrating connections for the solar panel, battery, DC load, and the integrated USB output for charging external devices.
5. Инструкция по эксплуатации
5.1 Первое включение питания и отображение информации на экране
Once the battery is connected, the controller's LCD display will power on, showing current system parameters. The controller automatically identifies the battery voltagе (12 В, 24 В, 36 В или 48 В).
5.2 Функции кнопок
- ▲ (Up/Reset): Used to increase values during setting, or as a reset function.
- МЕНЮ: Used to navigate through display screens and enter/exit setting modes.
- ▼ (Down/On/Off): Used to decrease values during setting, or to toggle the DC load on/off.
5.3 Объем зарядкиtage Настройки
To adjust charging parameters:
- After connecting the battery, ensure the clock is set and saved (see 5.4 Clock Setting).
- Нажмите и удерживайте кнопку "▲" button for 3-5 seconds. The screen will display "L**V" (floating charging voltagд).
- Используйте "▼" button to adjust the floating charging voltage.
- Briefly press "▲" again. The screen will display "H**V" (boost charging voltagд).
- Используйте "▼" button to adjust the boost charging voltage.
- Briefly press "▲" again. The screen will display "F**V" (low-voltagе отсечка объемtage for DC load).
- Используйте "▼" button to adjust the low-voltagе отсечка объемtage.
- After making all desired adjustments, press and hold the "▲" button for 3-5 seconds to save the settings and exit.
5.4 Установка часов
To set the internal clock:
- Убедитесь, что батарея подключена.
- Нажмите кнопку "▲" или "▼" buttons to navigate to the clock setting interface.
- Используйте "▲" и "▼" buttons to adjust the time.
- Briefly press the "MENU" button (represented as "□" in some descriptions) to save the clock setting.
5.5 Load Protection Voltage Ссылка
The following are typical battery charging voltages for different system voltagэс:
- При использовании 12В battery, the battery charging voltage is typically 13.7В.
- При использовании 24В battery, the battery charging voltage is typically 27.4В.
- При использовании 36В battery, the battery charging voltage is typically 41.1В.
- При использовании 48В battery, the battery charging voltage is typically 54.8В.
6. Техническое обслуживание
- Регулярный осмотр: Периодически проверяйте все соединения проводки на герметичность и отсутствие коррозии.
- Чистота: Содержите контроллер в чистоте, не допуская попадания на него пыли и мусора. Используйте для чистки сухую ткань.
- Вентиляция: Для предотвращения перегрева необходимо обеспечить хорошую вентиляцию в месте установки.
- Состояние аккумулятора: Следите за состоянием и уровнем заряда аккумулятора.tage regularly to ensure optimal system performance.
7. Поиск Неисправностей
| Проблема | Возможная причина | Решение |
|---|---|---|
| Дисплей контроллера выключен. | Аккумулятор не подключен или уровень заряда аккумулятораtagе слишком низко. | Connect battery or ensure battery voltage is above minimum threshold (e.g., >10V for 12V system). |
| Зарядка от солнечной панели невозможна. | Solar panel not connected, incorrect polarity, or insufficient sunlight. | Проверьте соединения солнечных панелей и полярность. Обеспечьте достаточное количество солнечного света. |
| Томtage identification error. | Объем аккумулятораtage was too low when connected initially. | Убедитесь, что батарея томtage is above the minimum threshold before connecting to the controller. Disconnect and reconnect the battery. |
| DC load not working. | Load is off, incorrect wiring, or battery voltage is below low-voltagе отсечка. | Check load connection and polarity. Press the "▼" button to toggle load. Check battery voltage and adjust low-voltage cut-off if necessary. |
8. Технические характеристики
| Параметр | Ценить |
|---|---|
| Модель | 100А |
| Бренд | OLONETO |
| Том системыtage | 12В/24В/36В/48В Авто |
| Технология зарядки | MPPT/PWM Hybrid |
| USB-выход | Dual USB, 5V |
| Вес товара | 200 грамм |
| Размеры (приблизительные) | 190 мм (7.48 дюйма) x 180 мм (7.08 дюйма) |

Figure 6: Physical dimensions of the solar charge controller, showing approximate measurements of 190mm (7.48 inches) in width and 180mm (7.08 inches) in height.
9. Гарантия и поддержка
Для получения информации о гарантии и технической поддержке, пожалуйста, обратитесь к документации, прилагаемой к вашей покупке, или свяжитесь с продавцом. Сохраните чек о покупке для предъявления гарантийных претензий.