Yitouniu Yitouniu-EWTH16
EWeLink Wireless Remote TH16 Switch User Manual
Model: Yitouniu-EWTH16
1. Продукт закончилсяview
The Yitouniu EWeLink TH16 Smart Switch is a versatile device designed to integrate into your smart home system, enabling remote and automatic control of appliances. It features temperature monitoring capabilities, allowing connected devices to be turned on or off based on a preset temperature range. This module works in conjunction with the included waterproof DS18B20 temperature sensor to enhance your home's automation.
Key functionalities include real-time temperature monitoring, remote ON/OFF control, timing tasks, automatic mode based on temperature, manual control, smart scene triggering, and voice control compatibility with Amazon Alexa and Google Home.
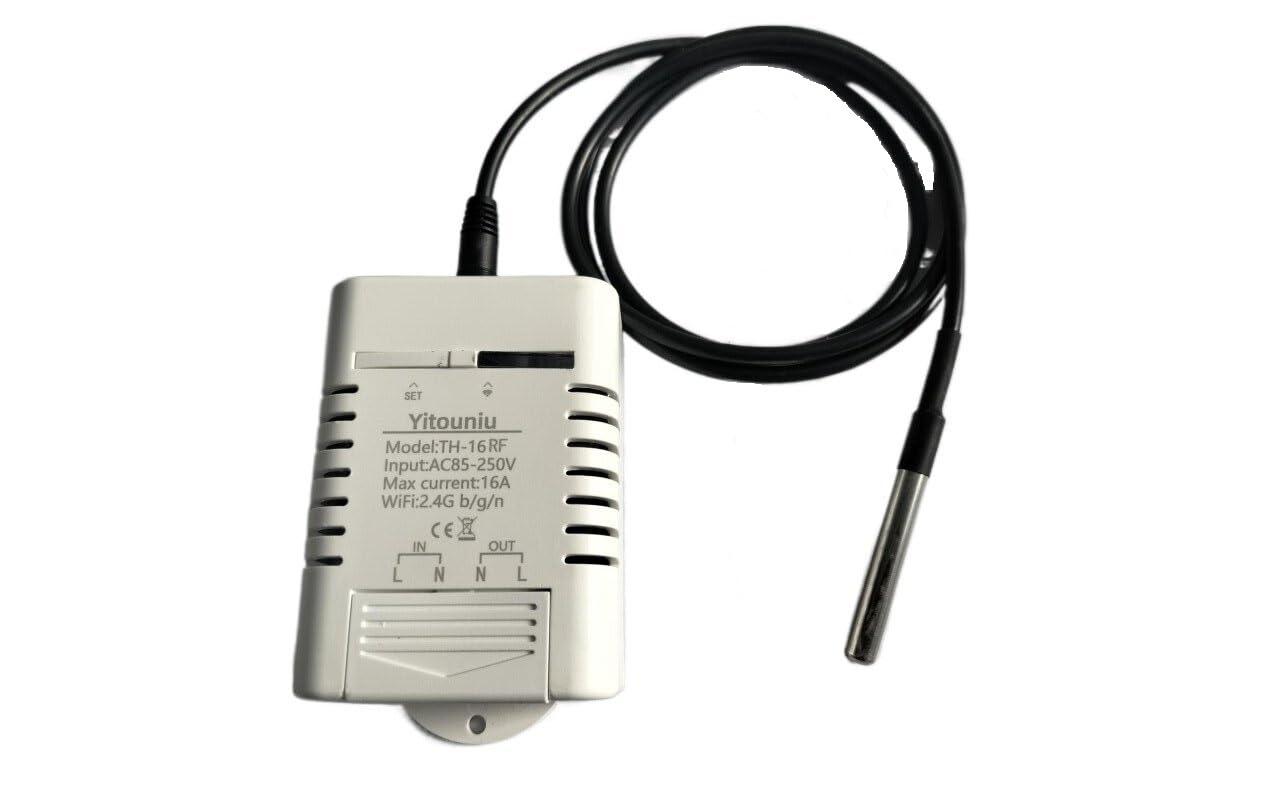
Рисунок 1.1: EWeLink TH16 Smart Switch with connected DS18B20 temperature sensor.
2. Что в коробке
- 1 x TH-16 Smart Switch (Relay housing, relay module)
- 1 x DS18B20 Sensor (Temperature probe)
Note: The sensor can only detect temperature. For humidity detection, a separate humidity sensor is required.
3. Особенности продукта
- Широкое применение: Suitable for various uses including home brewing, fermentation, breeding, incubation, greenhouse temperature control, and more. Supports 85-250V, 16A MAX 3500W.
- Поддержка App: Free eWeLink mobile application available for iOS and Android devices.
- Статус синхронизации: Provides real-time device status and temperature monitoring directly to the eWeLink app. Temperature units (Celsius/Fahrenheit) are switchable.
- Дистанционное включение/выключение: Control electrical devices from any location using the app, with high accuracy temperature readings from the waterproof DS18B20 sensor.
- Голосовое управление: Compatible with Amazon Alexa, Google Home, and Google Nest for convenient voice commands.
- Функции синхронизации: Supports up to 8 enabled countdown, single, or repeat timing tasks to automate device operation at specified times.
- Автоматический режим: Configure the device to automatically turn on or off when the temperature falls within a specified range.
- Ручной режим: Allows for immediate manual control (ON/OFF) of the connected device.
- Smart Scene Trigger: Temperature values can be used as conditions to trigger other eWeLink smart devices.
- Управление доступом: Easily share control of your smart home devices with family members.
- Мониторинг энергопотребления: Отслеживайте потребление энергии в режиме реального времени.
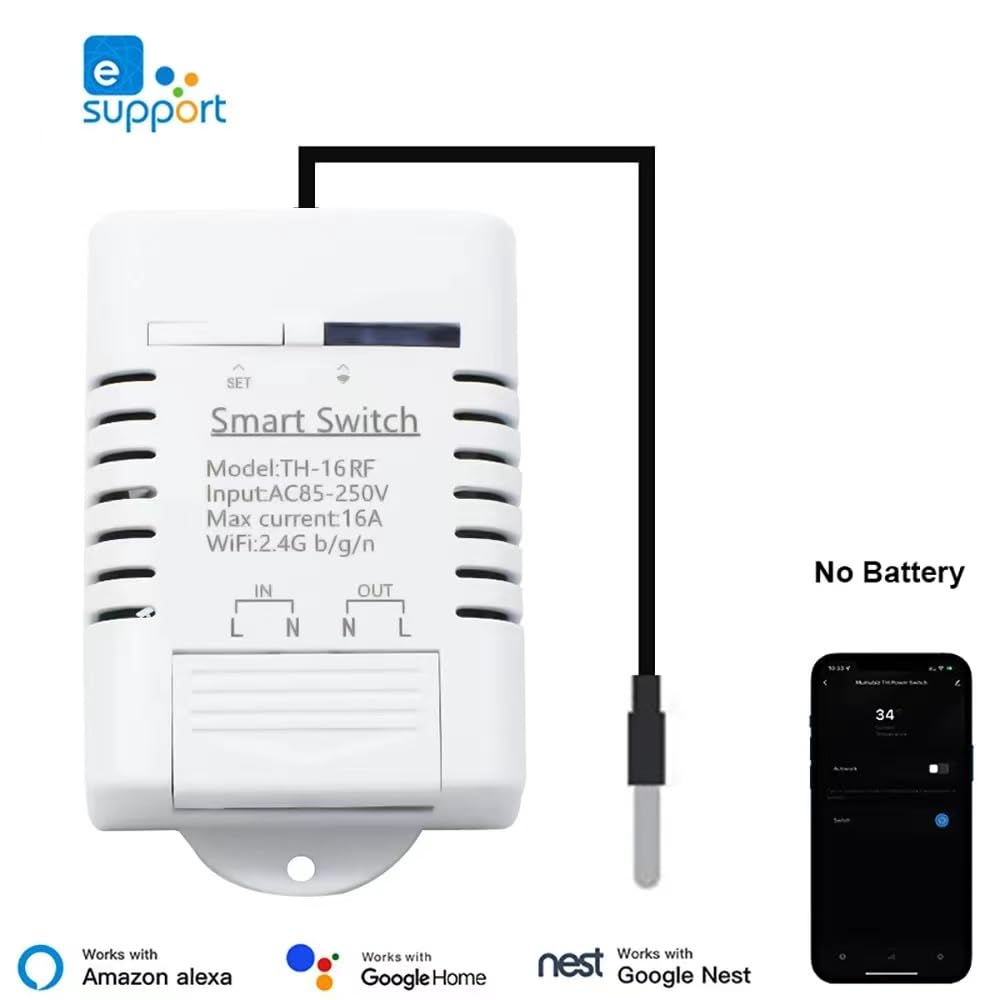
Рисунок 3.1: The Smart Switch integrates with the eWeLink app and is compatible with Amazon Alexa, Google Home, and Google Nest.

Рисунок 3.2: Examples of common usage scenarios for the TH16 Smart Switch.
4. Технические характеристики
4.1. TH-16 Smart Switch
| Атрибут | Ценить |
|---|---|
| Номер модели | Yitouniu-EWTH16 |
| Vol входtage | 85-250 В переменного тока |
| Максимальный ток | 16А |
| Максимальная мощность | 3500 Вт |
| Беспроводной стандарт | WiFi 2.4GHz b/g/n |
| Размеры продукта | 2.79"Д x 1.65"Ш (7.09 x 4.19 см) |
| Материал | Пластик |
| Цвет | Белый |
4.2. DS18B20 Sensor
| Атрибут | Ценить |
|---|---|
| Тип | Водонепроницаемый датчик температуры |
| Зонд | Датчик температуры из нержавеющей стали |
| Диапазон измерения температуры | -20°С ~ +100°С |
| Рабочий объемtage | 3.0-5.5В |
| Длина | 1m |
| Масса | 26 г |

Рисунок 4.1: Подробный view of the waterproof DS18B20 temperature sensor.
5. Настройка и установка
5.1. Подключение интеллектуального коммутатора
Before proceeding, ensure the main power supply to the circuit is turned OFF at the breaker to prevent electrical shock. The TH-16 Smart Switch requires a live (L) and neutral (N) input, and provides a switched live (L) and neutral (N) output to your appliance.
- Определите фазный (L) и нейтральный (N) провода от источника питания.
- Connect the Live wire from the power source to the "IN L" terminal on the switch.
- Connect the Neutral wire from the power source to the "IN N" terminal on the switch.
- Connect the Live wire of your appliance to the "OUT L" terminal on the switch.
- Connect the Neutral wire of your appliance to the "OUT N" terminal on the switch.
- Plug the DS18B20 temperature sensor into the designated port on the smart switch.
- Надежно закрепите все проводные соединения.
Предупреждение: Incorrect wiring can cause damage to the device or electrical hazards. If you are unsure, consult a qualified electrician.

Рисунок 5.1: Wiring diagram for the TH-16 Smart Switch. Ensure correct Live (L) and Neutral (N) connections for both input and output.
5.2. Сопряжение приложений (eWeLink)
The smart switch operates on a 2.4GHz WiFi network. Ensure your mobile device is connected to a 2.4GHz WiFi network during the pairing process.
- Download the "eWeLink" app from the App Store (iOS) or Google Play Store (Android).
- Зарегистрируйте учетную запись eWeLink и войдите в систему.
- Power on the TH-16 Smart Switch. The network indicator LED should be blinking rapidly (if not, press and hold the "SET" button for 5 seconds until it blinks rapidly to enter pairing mode).
- Open the eWeLink app, tap the "+" icon at the bottom center, and select "Quick Pairing Mode".
- Следуйте инструкциям на экране, чтобы подключить устройство к сети Wi-Fi.
- Once successfully paired, the device will appear in your eWeLink app, and the network indicator LED will become solid.
6. Инструкция по эксплуатации
6.1. Remote Control and Status Monitoring
After successful pairing, you can remotely turn the connected appliance ON or OFF from anywhere using the eWeLink app, provided your phone has network access. The app also displays the real-time status of the switch and the current temperature from the DS18B20 sensor.
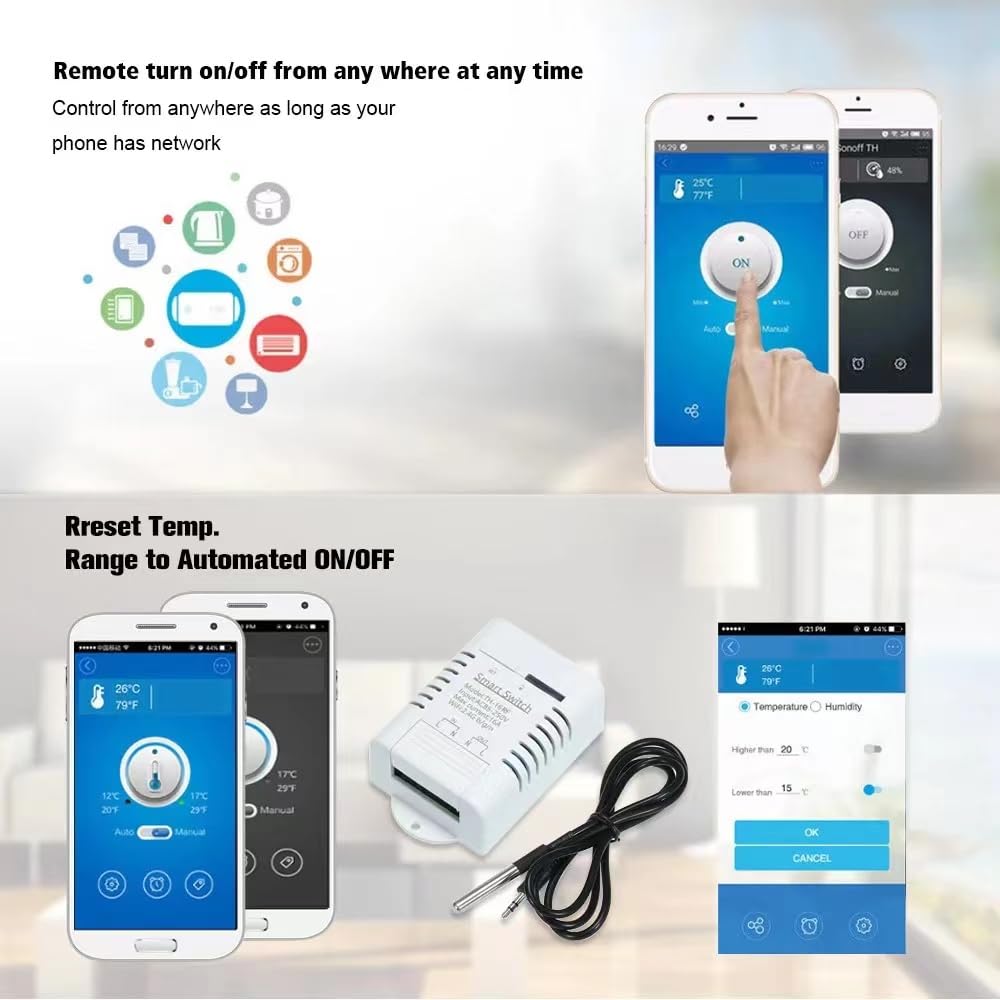
Рисунок 6.1: Remote control and temperature range setting via the eWeLink app.
6.2. Auto Mode (Temperature Control)
Set the switch to automatically turn ON or OFF based on a specified temperature range:
- In the eWeLink app, select your TH-16 device.
- Navigate to the "Auto Mode" settings.
- Set the desired temperature range (e.g., turn ON when temperature is below X°C, turn OFF when temperature is above Y°C).
- Confirm your settings. The device will now operate autonomously based on the temperature readings.
6.3. Ручной режим
For immediate control, you can switch to "Manual Mode" in the eWeLink app or use the physical button on the device to toggle the power ON/OFF.
6.4. Функции синхронизации
Schedule your devices to turn ON/OFF at specific times:
- In the eWeLink app, select your TH-16 device.
- Go to the "Timing" section.
- Вы можете установить:
- Таймеры обратного отсчета: Turn ON/OFF after a set duration.
- Single Timers: Turn ON/OFF at a specific time on a specific date.
- Repeat Timers: Turn ON/OFF at specific times on selected days of the week.
- Save your timing tasks.
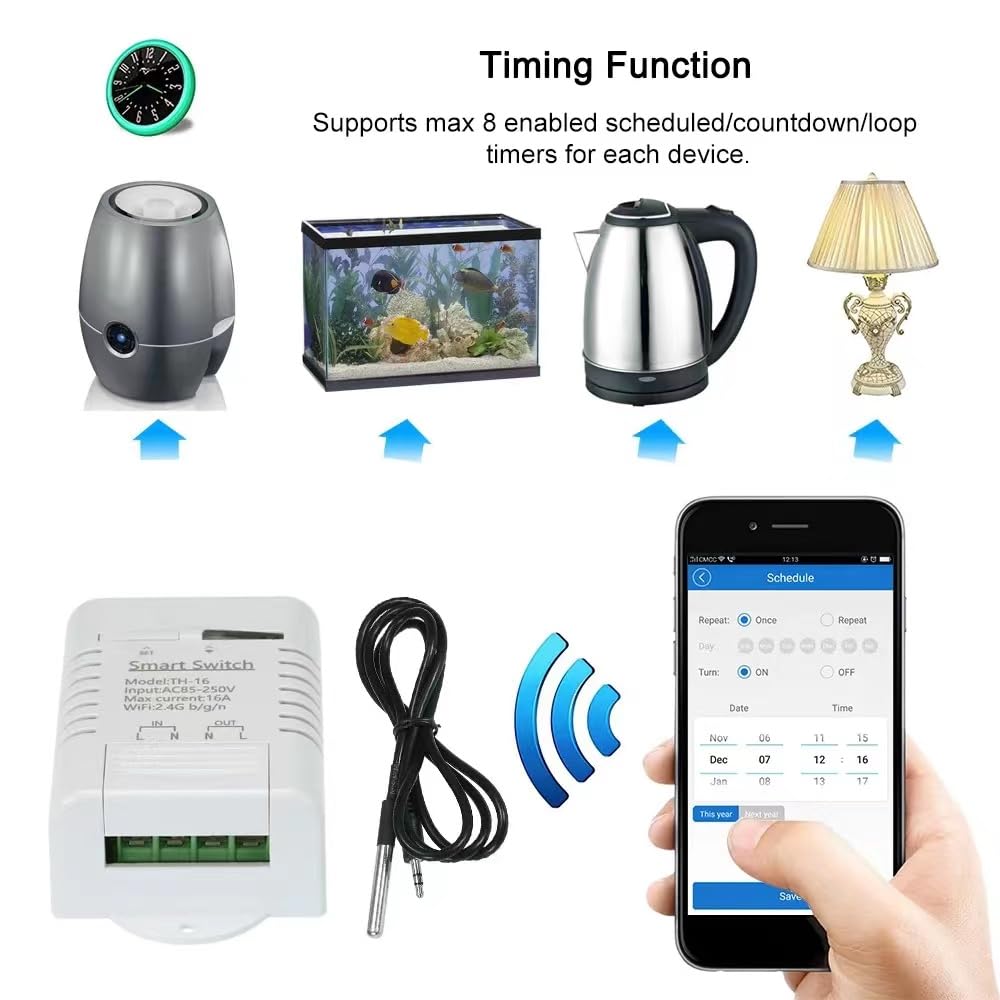
Рисунок 6.2: Setting up timing schedules within the eWeLink app.
6.5. Интеграция голосового управления
To use voice commands with Amazon Alexa or Google Home:
- Ensure your TH-16 Smart Switch is successfully paired with the eWeLink app.
- Откройте приложение Amazon Alexa или Google Home.
- Enable the "eWeLink Smart Home" skill/service.
- Link your eWeLink account.
- Discover devices. Your TH-16 switch should now be controllable via voice commands (e.g., "Alexa, turn on the switch," "Hey Google, turn off the switch").
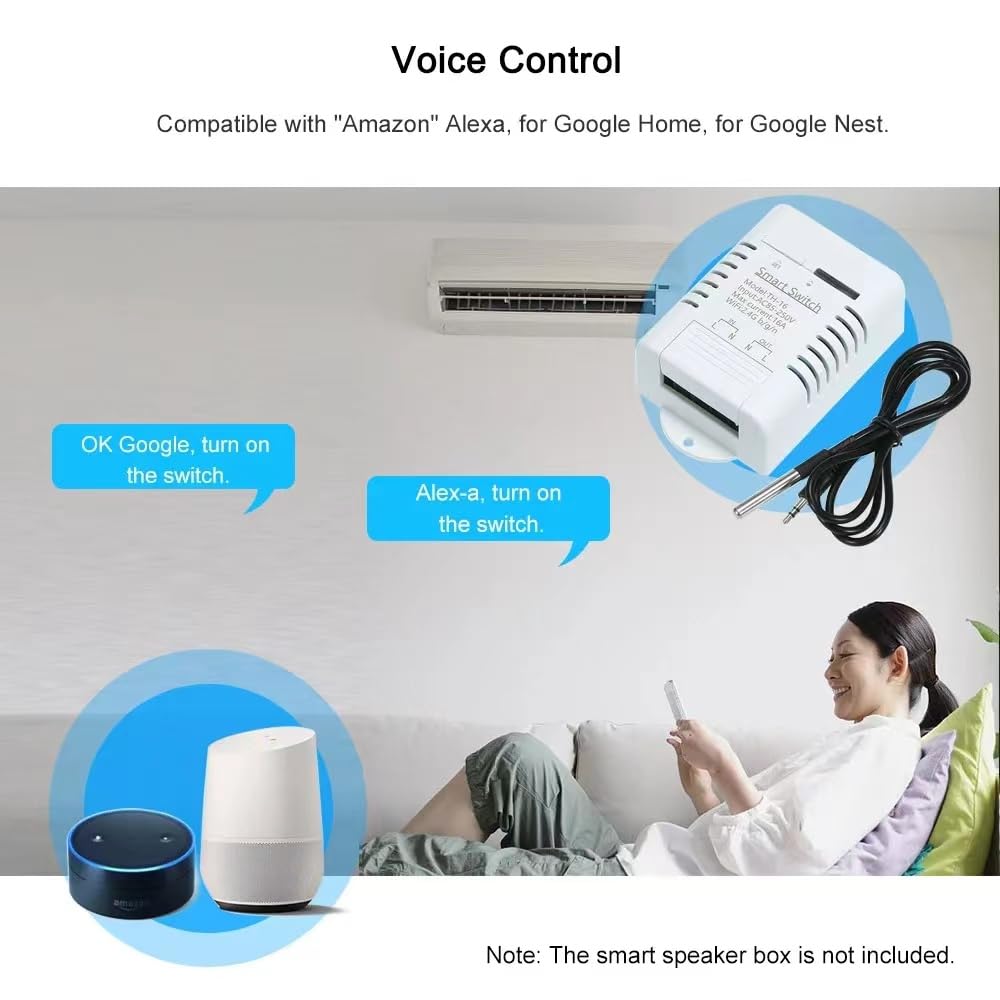
Рисунок 6.3: Совместимость с голосовым управлением Amazon Alexa и Google Home.
6.6. Поделиться контролем
You can share control of your TH-16 Smart Switch with family members or other users:
- In the eWeLink app, select the device you wish to share.
- Tap on the "Share" icon or navigate to the sharing settings.
- Enter the eWeLink account email or phone number of the person you want to share with.
- Set the permissions (e.g., control, view status, set timers).
- The invited user will receive a notification and can accept the shared control.

Рисунок 6.4: Sharing device control with other eWeLink users.
7. Техническое обслуживание
- Уборка: Протирайте устройство мягкой сухой тканью. Не используйте абразивные чистящие средства и не погружайте устройство в воду.
- Обновления прошивки: Regularly check the eWeLink app for available firmware updates to ensure optimal performance and security.
- Уход за датчиком: While the DS18B20 sensor is waterproof, avoid unnecessary exposure to harsh chemicals or extreme physical stress.
- Стабильность сети: Ensure your 2.4GHz WiFi network is stable and has good signal strength where the device is installed for reliable operation.
8. Поиск Неисправностей
- Устройство отключено от сети в приложении:
- Проверьте, включено ли устройство.
- Verify your WiFi router is working and the 2.4GHz network is active.
- Убедитесь, что устройство находится в зоне действия вашего Wi-Fi роутера.
- Try restarting the device and your router.
- If the issue persists, try re-pairing the device with the eWeLink app.
- Невозможно подключить устройство:
- Ensure your phone is connected to a 2.4GHz WiFi network (5GHz networks are not supported).
- Make sure the device is in pairing mode (network indicator blinking rapidly).
- Проверьте правильность пароля вашего WiFi.
- Во время сопряжения переместите устройство ближе к маршрутизатору.
- Голосовое управление не работает:
- Confirm the eWeLink skill/service is enabled and linked in your Alexa/Google Home app.
- Ensure your voice assistant device is online and connected to the same network.
- Try re-discovering devices in the Alexa/Google Home app.
- Неточные показания температуры:
- Ensure the DS18B20 sensor is securely plugged into the switch.
- Проверьте наличие физических повреждений кабеля датчика или зонда.
- Verify the sensor is placed in an appropriate location, away from direct heat sources or drafts that could skew readings.
9. Гарантия и поддержка
This product comes with a standard manufacturer's warranty. For specific warranty terms and conditions, please refer to the documentation provided at the time of purchase or contact the seller directly. For technical support, troubleshooting assistance, or inquiries regarding product functionality, please reach out to the manufacturer or your point of purchase.
Производитель: Йитуниу
Дата первой доступности: 13 июля 2023 г.