1. Введение
This manual provides detailed instructions for the proper setup, operation, and maintenance of your Radioddity QT40 10 Meter SSB Ham Radio. Please read this manual thoroughly before using the device to ensure safe and optimal performance.
2. Информация по технике безопасности
- Не используйте радиостанцию без правильно подключенной антенны.
- Убедитесь, что источник питания vol.tage соответствует требованиям радиостанции.
- Не подвергайте радио воздействию экстремальных температур, прямых солнечных лучей или влаги.
- Не пытайтесь разбирать или модифицировать радиостанцию. Все работы по обслуживанию должны выполняться квалифицированным специалистом.
- Во время передачи соблюдайте безопасное расстояние от антенны, чтобы избежать воздействия радиочастотной энергии.
3. Содержимое упаковки
Проверьте наличие всех предметов в посылке:
- QT40 Radio x 1
- Микрофон х 1
- USB Programming Cable x 1
4. Продукт закончилсяview
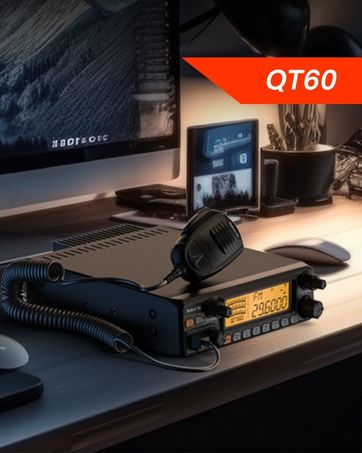
The Radioddity QT40 is a 10-meter SSB ham radio designed for reliable communication. It features 40 watts of transmission power, digital noise reduction, and a frequency range of 28.000-29.695MHz.
4.1 Органы управления на передней панели

This image displays the front panel of the Radioddity QT40, highlighting the various controls and indicators. Key elements include the S-Meter, NB/ANL control, NRC function control, Monitor/10K on/off switch, Echo function control, H/L/WX band switch, TX/RX indicator, Channel Display, 4-Pin Mic Connector, Power/Volume control, Squelch Level control, SSB Frequency FINE function, RF Gain Level, PA/FM/AM/USB/LSB Mode selector, Working Band Selection, Mic Gain Level control, Power Level control, and Channel Switch.
- S-метр: Indicates signal strength and output power.
- NB/ANL Control: Noise Blanker and Automatic Noise Limiter.
- NRC Function Control: Digital Noise Reduction activation.
- Control Monitor/10K on/off: Monitor function and 10KHz step switch.
- ECHO Function Control: Activates and adjusts echo effect.
- H/L/WX Band Switch: High/Low power and Weather band selection.
- Индикатор TX / RX: Shows transmit (TX) or receive (RX) status.
- Отображение канала: Отображает текущий рабочий канал.
- 4-Pin Mic Connector: Для подключения прилагаемого микрофона.
- Регулировка мощности/громкости: Включает/выключает радио и регулирует громкость звука.
- Squelch Level Control: Регулирует порог шумоподавления.
- SSB Frequency FINE Function: Fine-tunes SSB frequency.
- RF Gain Level: Adjusts receiver RF gain.
- PA/FM/AM/USB/LSB Mode: Selects the operating modulation mode.
- Working Band Selection: Selects the operating frequency band.
- Mic Gain Level Control: Adjusts microphone input sensitivity.
- Power Level Control: Adjusts transmit power output.
- Переключение каналов: Selects operating channels.
4.2 Соединения на задней панели

This image illustrates the rear panel connections of the Radioddity QT40. These include the SO-239 Antenna Connector, External PA Jack, PC Programming Port, 3.5MM External Speaker Jack, and Power Supply Jack.
- SO-239 Antenna Connector: For connecting your external antenna.
- External PA Jack: For connecting an external Public Address speaker.
- PC Programming Port: For connecting the USB programming cable to a computer.
- 3.5MM External Speaker Jack: Для подключения дополнительного внешнего динамика.
- Разъем источника питания: For connecting the DC power cable.
4.3 Микрофон

The included microphone features Channel Up/Down buttons, a Push-To-Talk (PTT) button, the microphone element, and a 4-Pin Microphone Connector for connection to the radio.
- Канал вверх: Увеличивает номер канала.
- Канал вниз: Уменьшает номер канала.
- PTT (Push-To-Talk): При нажатии активирует передачу.
- Mic: Microphone element.
- Кабель микрофона: Connects the microphone to the radio.
- 4-Pin Microphone Connector: Connects to the radio's front panel.
5. Настройка
5.1 Подключение антенны
Connect a suitable 10-meter antenna to the SO-239 Antenna Connector on the rear panel of the radio. Ensure the connection is secure. An improperly connected or mismatched antenna can damage the radio.
5.2 Подключение питания
Connect the DC power cable to the Power Supply Jack on the rear panel. Connect the other end of the power cable to a compatible 13.8V DC power source. Observe correct polarity (red to positive, black to negative).
5.3 Подключение микрофона
Plug the 4-Pin Microphone Connector into the corresponding jack on the front panel of the radio.
6. Инструкция по эксплуатации
6.1 Основные операции
- Включение/выключение питания: Поверните Регулятор мощности/громкости clockwise to turn the radio on. Continue rotating to adjust the audio volume.
- Регулировка шумоподавления: Поверните Регулятор уровня шумоподавления clockwise until background noise disappears. Rotate counter-clockwise to hear weaker signals.
- Выбор канала: Используйте Переключатель каналов ручка на передней панели или Канал вверх / вниз buttons on the microphone to select your desired operating channel.
6.2 Modulation Modes (AM/FM/SSB)
Используйте PA/FM/AM/USB/LSB Mode selector to choose your desired modulation mode:
- ЯВЛЯЮСЬ (Ampамплитудная модуляция): Common for local communication.
- FM (частотная модуляция): Offers clearer audio over shorter distances.
- USB (Upper Sideband) / LSB (Lower Sideband): Used for long-distance SSB communication. Fine-tune with the SSB Frequency FINE Function.
- PA (Обращение к общественности): Outputs audio to an external PA speaker.

This image shows the Radioddity QT40 radio in a vehicle, illustrating its capability for AM/FM/SSB modulation, crucial for various communication needs.
6.3 Digital Noise Reduction (NRC)
The QT40 features TX and RX digital noise reduction technology. Activate the NRC Function Control to reduce background noise during transmission and reception, improving audio clarity.
This image depicts the Radioddity QT40 radio installed in a vehicle, emphasizing its digital noise reduction feature for clearer communication in noisy environments.
6.4 Weather Channel and NOAA Alert
To access weather channels and NOAA alerts, use the H/L/WX Band Switch to select the WX band. This feature provides timely weather information and alerts.
6.5 CTCSS/DCS
The radio supports CTCSS (Continuous Tone-Coded Squelch System) and DCS (Digital Coded Squelch) for selective calling. These features can be configured via the programming software.
6.6 Функция голосового управления
The VOX (Voice Operated Transmit) function allows for hands-free operation. When activated, the radio will transmit automatically when it detects your voice. Adjust VOX sensitivity via the programming software.

This image shows the Radioddity QT40 microphone mounted in a vehicle, demonstrating the convenience of the VOX hands-free function for drivers.
6.7 Программирование на ПК
The Radioddity QT40 can be customized using PC programming software and the included USB programming cable. This allows for advanced settings adjustments, including CTCSS/DCS codes, VOX levels, and other features. Software and drivers are typically available on the manufacturer's webсайт.
7. Техническое обслуживание
- Уборка: Используйте мягкий, damp Ткань для чистки корпуса радиоприемника. Не используйте едкие химикаты или абразивные чистящие средства.
- Хранилище: When not in use for extended periods, store the radio in a dry, dust-free environment.
- Проверка антенны: Periodically inspect antenna connections for corrosion or damage.
8. Поиск Неисправностей
| Проблема | Возможная причина | Решение |
|---|---|---|
| Нет электричества | Кабель питания отсоединен; неправильное значение громкости.tagе; перегоревший предохранитель. | Check power connections; verify power source; inspect fuse. |
| Нет приема | Squelch too high; antenna disconnected; incorrect channel/mode. | Adjust squelch; check antenna connection; verify channel and mode settings. |
| Не могу передать | Микрофон не подключен; кнопка PTT неисправна; проблема с антенной. | Ensure microphone is connected; test PTT; check antenna and SWR. |
| Плохое качество звука | Low signal strength; high noise; incorrect mode. | Adjust RF Gain; activate NRC; ensure correct modulation mode. |
| Код ошибки E5 | High SWR (Standing Wave Ratio) detected, indicating an antenna mismatch or fault. | Check antenna connection; verify antenna tuning for the operating frequency; inspect antenna cable for damage. Do not transmit with high SWR to prevent radio damage. |
9. Технические характеристики
| Особенность | Спецификация |
|---|---|
| Бренд | лучезарность |
| Номер модели | QT40 |
| Диапазон частот | 28.000-29.7МГц |
| Количество каналов | 40 |
| Мощность передачи | 40 Вт |
| Режимы модуляции | AM, FM, SSB (USB/LSB), PA |
| Особые возможности | Automatic Squelch, Echo, PC programmable, VOX Function, Digital Noise Reduction, NOAA Alert |
| Вес товара | 3.3 фунта (1.5 кг) |
| Размеры продукта | 11.3 x 7.87 x 2.4 дюйма (287 x 200 x 61 мм) |
| Максимальный диапазон разговора | 10 мили (приблизительно, зависит от условий) |
| Уровень водонепроницаемости | Не водостойкий |

This image provides a visual representation of the Radioddity QT40's dimensions (11.2 inches length, 7.9 inches width, 2.4 inches height) and weight (3.3 lbs).
10. Информация о гарантии
The Radioddity QT40 comes with an 18-month warranty from the date of purchase. This warranty covers manufacturing defects. Please retain your proof of purchase for warranty claims. The warranty does not cover damage caused by misuse, unauthorized modifications, or improper installation.
11 Поддержка
For technical assistance, troubleshooting beyond this manual, or warranty inquiries, please contact Radioddity customer support. Refer to the official Radioddity webсайт для получения самой актуальной контактной информации и ресурсов поддержки.
Official Radioddity Webсайт: www.radioddity.com