1. Введение
This manual provides detailed instructions for the Apera Instruments GroStar Series GS3 EC/ppm Pen Tester Kit (AI103G). This lab-grade conductivity meter is designed for accurate measurement of EC (Electrical Conductivity), 500ppm, and 700ppm, along with temperature, making it suitable for hydroponics and general water quality testing. The device features a replaceable titanium conductivity sensor and a user-friendly interface.
2. Продукт закончилсяview
The GroStar Series GS3 EC/ppm Pen Tester is engineered for reliability and ease of use. Key features include:
- Measures conductivity (EC), 500ppm, 700ppm, and temperature.
- Replaceable titanium sensor for high accuracy in the 0 to 10 EC range.
- Backlit HD screen for clear readings.
- Grower-friendly calibration workflow with a calibration reminder function.

Figure 1: Apera Instruments GroStar Series GS3 EC/ppm Pen Tester.
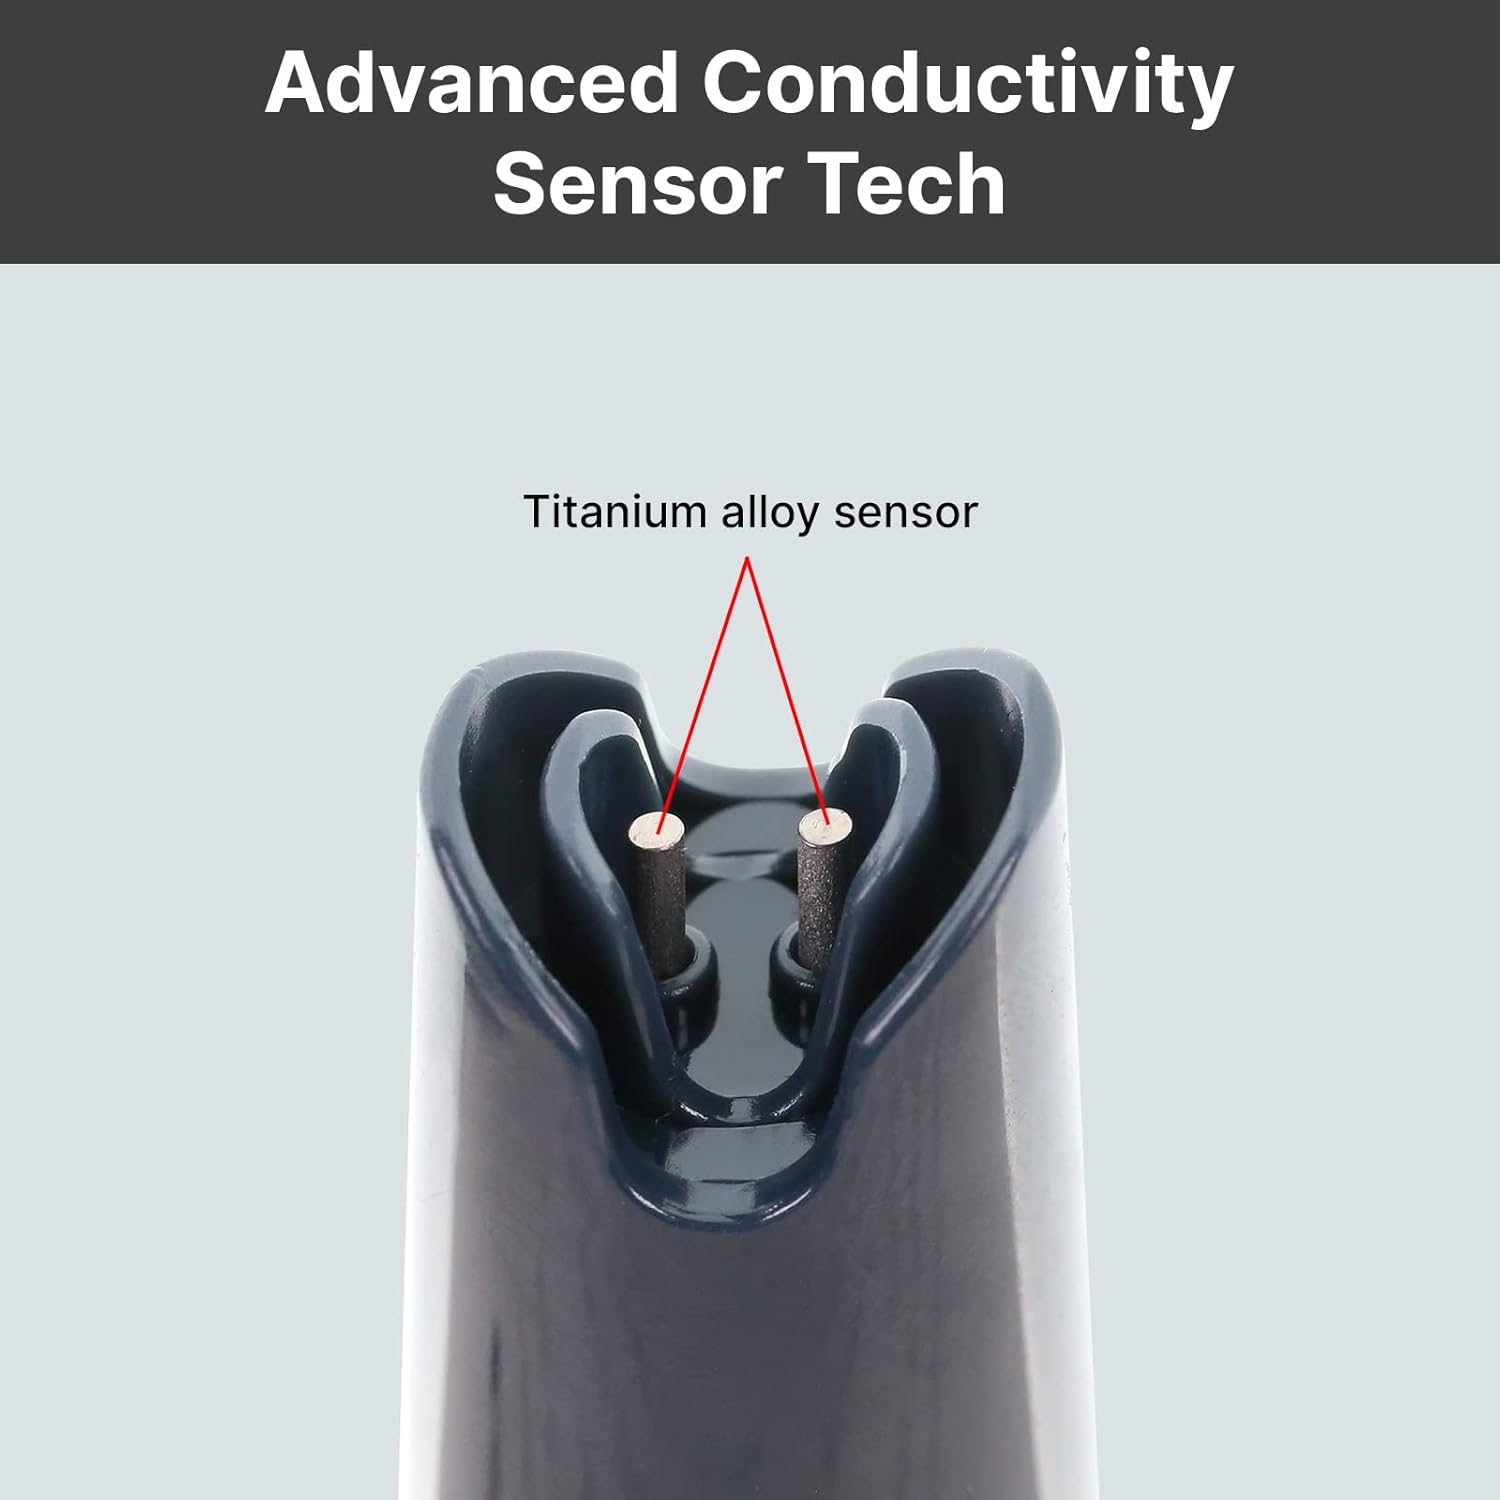
Рисунок 2: Крупный план view of the durable titanium alloy sensor for conductivity measurements.
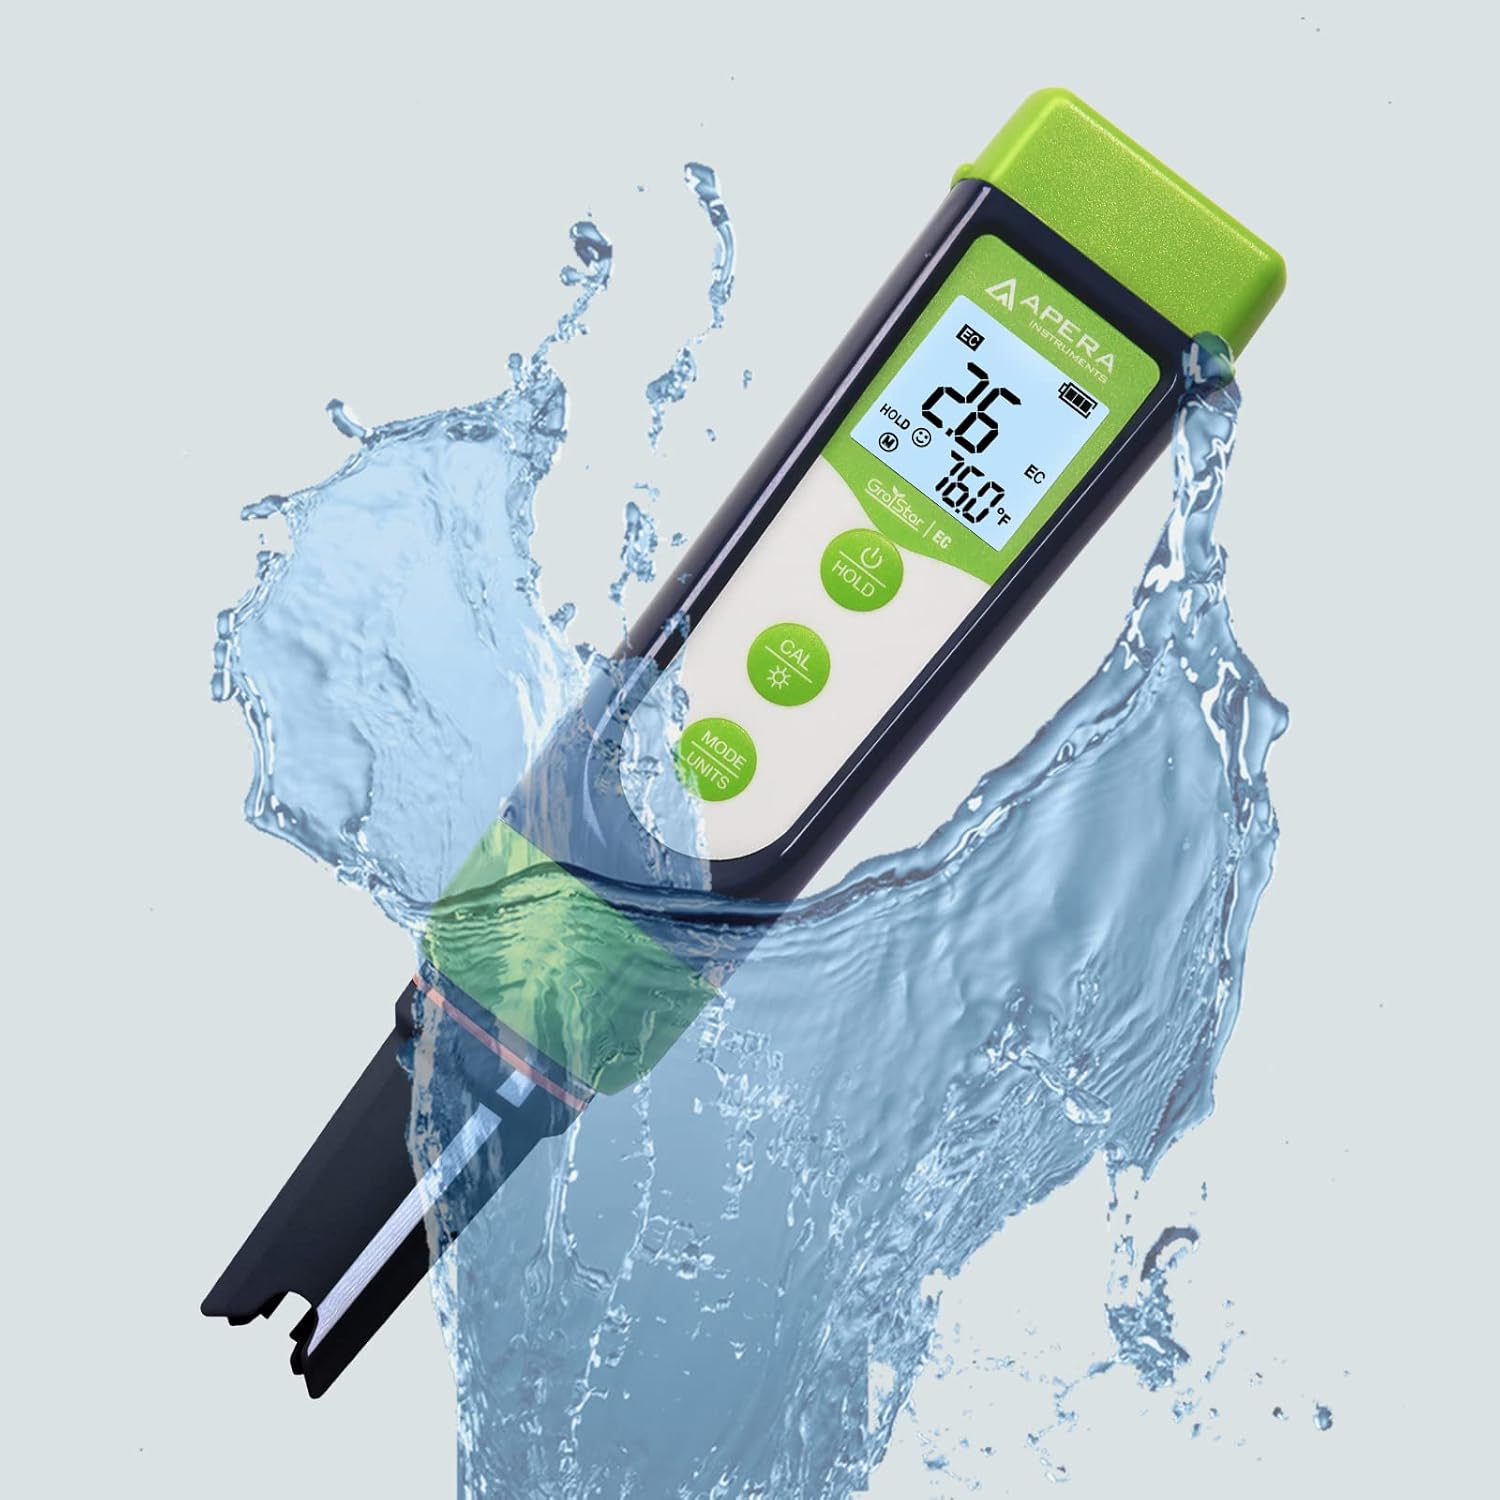
Figure 3: The GroStar GS3 Pen Tester demonstrating its water resistance during use.
3. Настройка
Before first use, ensure all components are present and the device is ready for operation.
3.1 Что в коробке
- Apera Instruments GroStar Series GS3 EC/ppm Pen Tester (Gen II)
- 2.77 EC Calibration Solution
- Шнурки
- 4 батарейки AAA (установлены или входят в комплект отдельно)

Figure 4: The complete kit contents, including the tester, calibration solution, and lanyard.
3.2 Установка аккумулятора
The device requires 4 AAA batteries. If not pre-installed, open the battery compartment located at the top of the tester, insert the batteries according to the polarity indicators, and securely close the compartment.
3.3 Начальная подготовка
- Снимите защитный колпачок с датчика.
- Rinse the sensor with distilled or deionized water.
- Gently shake off excess water.
4. Инструкция по эксплуатации
4.1 Включение/выключение питания
Нажмите ВЛАСТЬ button to turn the tester on or off.
4.2 Проведение измерений
- Ensure the tester is clean and calibrated.
- Погрузите датчик вampРешение заключается в обеспечении полного погружения датчика в воду.
- Аккуратно перемешайте и подождите, пока показания на дисплее стабилизируются.
- The display will show EC/ppm and temperature readings.
4.3 Switching Measurement Modes (EC/ppm)
Нажмите MODE/UNITS button to cycle through EC, 500ppm, and 700ppm measurement modes.

Figure 5: The tester's display cycling through different measurement units.
4.4 Функция удержания
Нажмите ДЕРЖАТЬ Кнопка для фиксации текущего показания на дисплее. Нажмите еще раз для снятия фиксации.
4.5 TruRead Display
The TruRead display provides MAX, AVG, and MIN readings, offering a comprehensive view of your measurements.

Figure 6: The TruRead display feature, showing maximum, average, and minimum recorded values.
5. Калибровка
Regular calibration ensures accurate measurements. The GS3 features a grower-friendly calibration workflow and a reminder function.
5.1 Процесс калибровки
- Включите тестер.
- Нажмите КАЛ кнопка для входа в режим калибровки.
- Immerse the sensor into the 2.77 EC calibration solution.
- The tester will automatically recognize the solution and calibrate. Wait for the stable reading and confirmation.
- Rinse the sensor with distilled water after calibration.

Figure 7: Visual representation of the tester's display in measurement, calibration, and error states.
5.2 Calibration Reminder
The tester will automatically remind you when recalibration is due, ensuring consistent accuracy.
6. Техническое обслуживание
6.1 Очистка сенсора
After each use, rinse the sensor thoroughly with distilled or deionized water to prevent residue buildup. Do not scrub the sensor vigorously.
6.2 Хранение
Always replace the protective cap after use. For long-term storage, ensure the sensor is kept moist. Refer to the product packaging or Apera Instruments website for specific storage solution recommendations if applicable.
6.3 Замена датчика
The titanium EC sensor is replaceable. If the sensor performance degrades significantly or it becomes damaged, a new sensor can be purchased and easily installed by twisting off the old one and attaching the new one.
7. Поиск Неисправностей
| Проблема | Возможная причина | Решение |
|---|---|---|
| Неточные показания | Sensor is dirty or dry; Calibration is outdated or incorrect; Damaged sensor. | Clean the sensor; Recalibrate the tester; Replace the sensor if damaged. |
| Тестер не включается. | Разряженные батареи; Неправильная установка батарей. | Замените батарейки; проверьте полярность батареек. |
| "CAL Er" error during calibration | Incorrect calibration solution; Contaminated solution; Sensor issue. | Ensure correct 2.77 EC solution is used; Use fresh calibration solution; Clean or replace sensor. |
8. Технические характеристики
- Номер модели: AI103G
- Размеры продукта: 7 x 1.5 x 1.3 дюйма
- Масса: 4.69 унции
- Источник питания: 4 батарейки ААА (в комплекте)
- Тип датчика: Replaceable Titanium EC Probe
- Параметры измерения: EC, 500ppm, 700ppm, Temperature
- Первая доступная дата: 28 сентября 2022 г.
9. Гарантия и поддержка
Apera Instruments products are backed by a manufacturer's warranty. For detailed warranty information, technical support, or to purchase replacement parts, please visit the official Apera Instruments webили обратитесь в службу поддержки напрямую. Сохраните чек о покупке для предъявления гарантийных претензий.
Производитель: Инструменты Апера