
1. Введение
This manual provides detailed instructions for the setup, operation, and maintenance of your XTUGA U-260 Dual Channel UHF Wireless Microphone System. Please read this manual thoroughly before using the product to ensure proper functionality and to maximize its lifespan. Retain this manual for future reference.
2. Продукт закончилсяview
The XTUGA U-260 is a professional-grade dual UHF wireless microphone system designed for various applications including church events, karaoke, weddings, and other live events. It features a robust design, adjustable frequencies, and convenient auto-scan and IR pairing functions.
2.1. Включенные компоненты
- U-260 UHF Wireless Receiver (1 unit)
- UHF Wireless Handheld Microphones (2 units)
- Антенны (2 шт.)
- Адаптер питания (1 шт.)
- Руководство пользователя (1 шт.)
- Аудиокабель (1 шт.)
- Anti-skid Rings (2 units)
- Power Plugs (2 units)
- Силовые кабели (2 шт.)

Figure 2.1: All components included with the XTUGA U-260 Wireless Microphone System, including the receiver, two microphones, antennas, power adapter, cables, and anti-skid rings.
2.2.Основные характеристики
- Dual UHF Channels: Two independent channels with 100 selectable frequencies each (Channel 1: 540.1 - 564.85 MHz; Channel 2: 568.1 - 592.85 MHz).
- Auto Scan Function: Automatically searches for the least interference channel.
- ИК-синхронизация: Seamlessly pairs the receiver and microphones.
- Блокировка частоты: Prevents accidental frequency changes.
- Long Range Operation: Up to 492ft (150 meters) operating distance.
- Прочная конструкция: Microphones feature sturdy metal construction.
- Превосходное качество звука: High-quality dynamic cartridge designed to limit feedback and interference.
- Rechargeable Microphones: Built-in lithium batteries provide up to 8 hours of use on a 3-hour charge via USB-C.
- Dashboard-Inspired Display: Receiver features a unique display for AF and RF signal indication.

Figure 2.2: The receiver's display screen, featuring a dashboard-inspired design for clear signal indication.
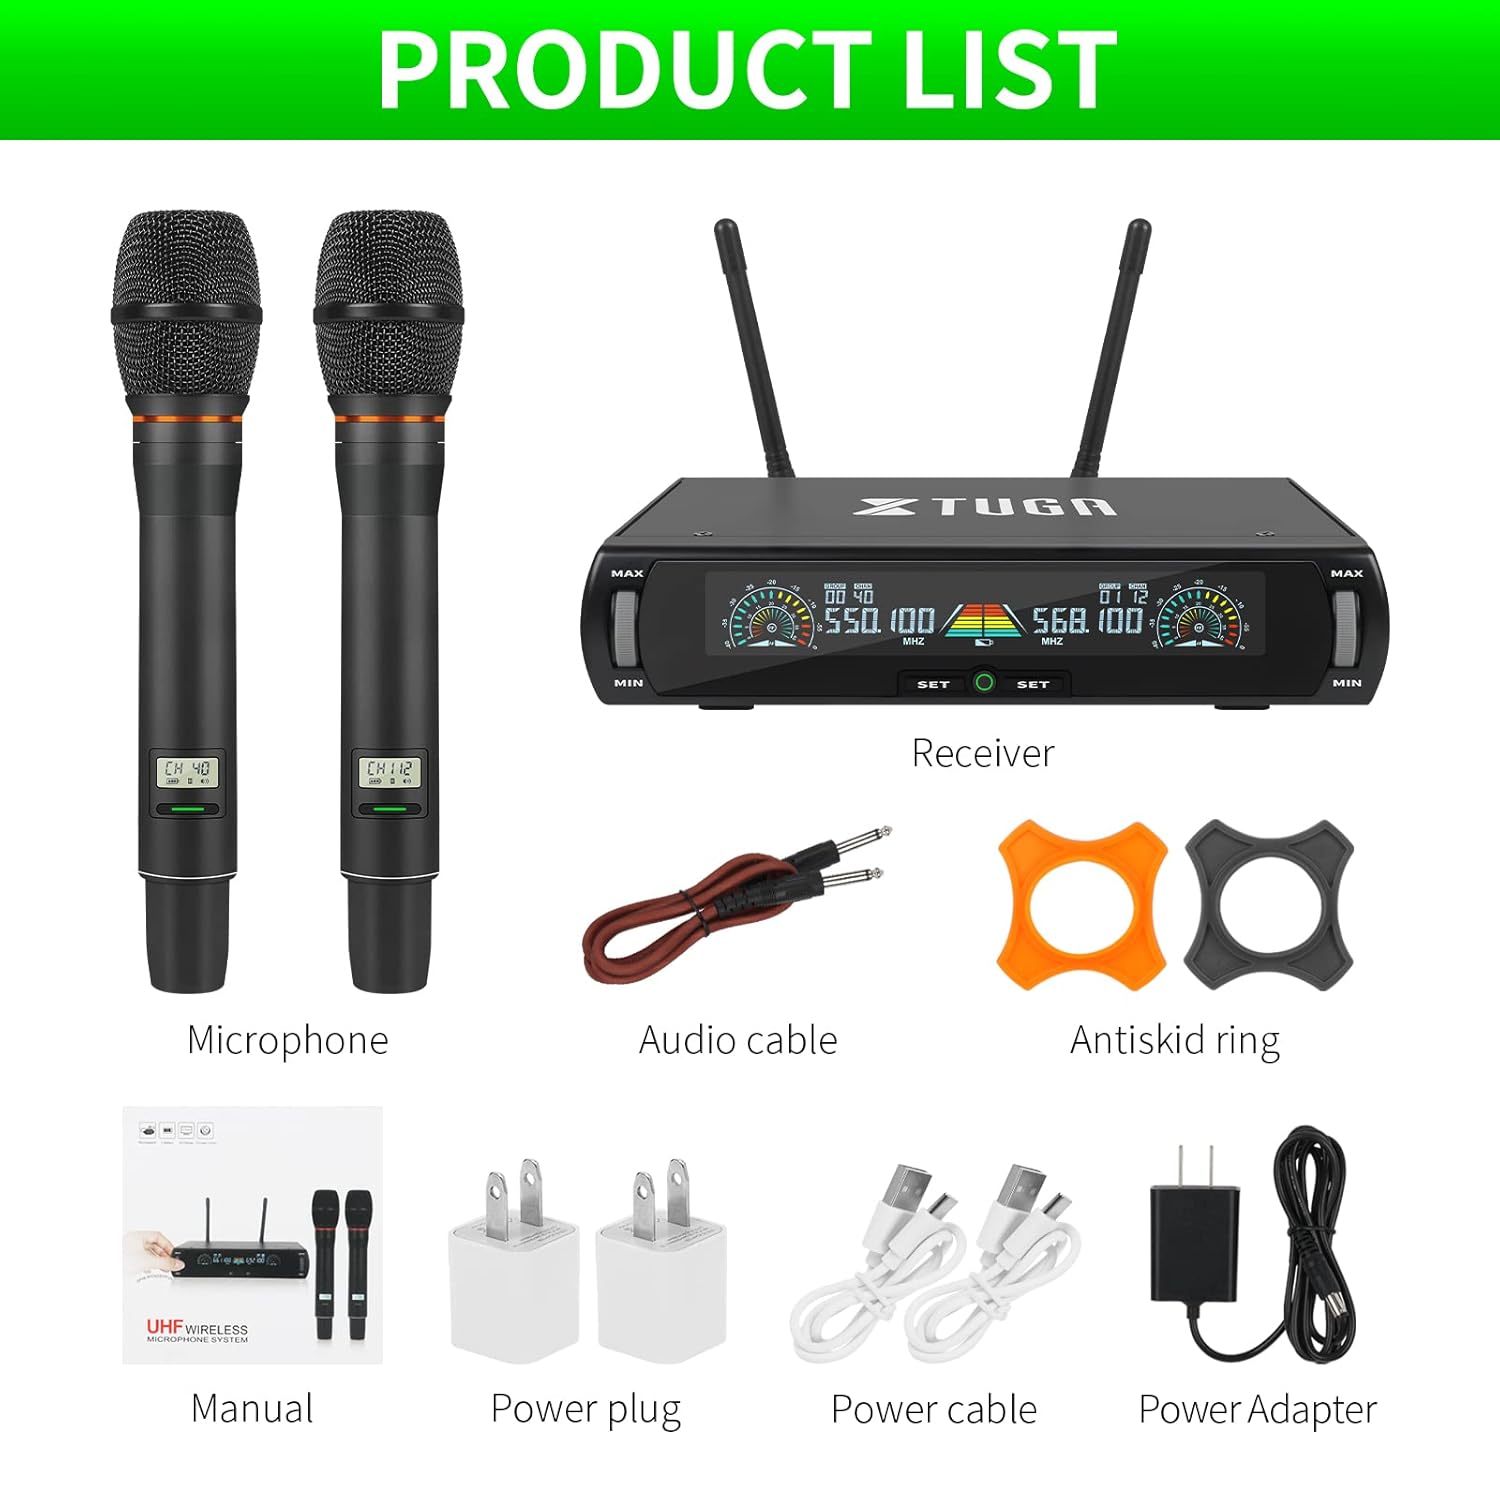
Figure 2.3: Illustration of the microphone's cardioid pickup pattern, designed to reduce noise and capture sound realistically.
2.3. Идентификация компонентов

Рисунок 2.4: Подробная информация view of the receiver and microphone components.
- Регулировка громкости
- Function settings button
- Switch (Power/Mode)
- Экран дисплея
- Power socket (DC 12V)
- Антенный разъем
- XLR выход
- Audio output (6.35mm/1/4 inch)
- Steel meshed head (Microphone)
- Display screen (Microphone)
- Switch (Microphone Power)
- Type-C charging port (Microphone)
3. Инструкции по настройке
- Распаковываем компоненты: Осторожно извлеките все предметы из упаковки.
- Подключите антенны: Screw the two antennas into the antenna jacks on the rear of the receiver. Ensure they are securely tightened.
- Подключение питания: Connect the power adapter to the receiver's power socket (DC 12V) and plug it into a suitable power outlet.
- Аудиовыход:
- For balanced output, connect XLR cables from the receiver's XLR outputs to your mixer or ampпожизненнее.
- For unbalanced output, use the provided 6.35mm (1/4 inch) audio cable to connect the receiver's audio output to your mixer or ampпожизненнее.
- Включите приемник: Press the power switch on the receiver. The display screen should illuminate.
- Зарядка микрофонов: Before first use, ensure both microphones are fully charged using the provided USB-C cables and power plugs. The microphone display will show charging status.
- Включите микрофоны: Press and hold the power switch on each microphone until its display illuminates.

Figure 3.1: The XTUGA U-260 system ready for operation, showing the receiver with antennas and two handheld microphones.
4. Инструкция по эксплуатации
4.1. Frequency Selection and IR Pairing
The system features an auto-scan function to find clear frequencies and IR synchronization for easy pairing.

Figure 4.1: Diagram illustrating the IR pairing process between the microphone and receiver.
- Initiate Auto Scan: On the receiver, press the "SET" button three times quickly for the desired microphone channel (left or right). The receiver will scan for the clearest available frequency.
- Select Frequency (Optional): If you wish to manually select a frequency after the scan, rotate the volume knob corresponding to the microphone channel you are adjusting.
- IR Pairing: Once a frequency is displayed on the receiver, hold the front of the microphone (where its display is located) close to the IR sensor on the receiver. The IR sensor is located on the bottom left side of the receiver's screen.
- Подтвердите сопряжение: While holding the microphone near the IR sensor, press the "SET" button on the receiver once for the corresponding microphone channel. A small indicator light on the receiver should flash, and the microphone's display will update to show the new frequency, confirming successful pairing. This process may require a couple of attempts to ensure proper alignment and timing.
4.2. Frequency Lock Function
To prevent accidental changes to the selected frequency, use the frequency lock function.

Figure 4.2: Visual representation of the frequency lock function, showing a padlock icon.
- Запереть: Press and hold the "SET" button on the receiver for the desired microphone channel until a lock icon appears on the display.
- Чтобы разблокировать: Press and hold the "SET" button again until the lock icon disappears.
4.3. Регулятор громкости
Each microphone channel has an independent volume control knob on the receiver. Rotate the "MIN/MAX" knobs to adjust the output volume for each microphone.
4.4. Microphone Charging
The handheld microphones are equipped with built-in rechargeable lithium batteries.

Figure 4.3: Illustration of microphone battery life (8 hours work) and charging time (3 hours) via USB-C.
- Connect a USB-C cable to the charging port at the bottom of the microphone.
- Connect the other end of the USB-C cable to a power adapter or a USB power source.
- A dim red light on the microphone's display bar indicates charging. The light will turn off or change color when fully charged.
- Полная зарядка обычно занимает около 3 часов и обеспечивает до 8 часов непрерывной работы.
5. Техническое обслуживание
- Уборка: Для очистки приемника и микрофонов используйте мягкую сухую ткань. Не используйте жидкие чистящие средства или растворители.
- Хранилище: Когда система не используется, храните ее в прохладном, сухом месте, вдали от прямых солнечных лучей и экстремальных температур.
- Уход батареи: For optimal battery life, avoid fully discharging the microphones frequently. Recharge them regularly, especially if storing for extended periods.
- Управление кабелями: Убедитесь, что все кабели надежно подключены и не перетянуты и не перекручены.
6. Поиск Неисправностей
| Проблема | Возможная причина | Решение |
|---|---|---|
| Звук не выводится. |
|
|
| Помехи или статический шум. |
|
|
| Микрофон не подключается. |
|
|
| Microphone battery drains quickly. |
|
|
7. Технические характеристики
| Особенность | Деталь |
|---|---|
| Модель | У-260 |
| Бренд | ХТУГА |
| Форм-фактор микрофона | Микрофонная система (ручная) |
| Технология связи | UHF Wireless, XLR |
| Количество каналов | 2 (2x100 selectable frequencies) |
| Frequency Range (Channel 1) | 540.1 - 564.85 МГц |
| Frequency Range (Channel 2) | 568.1 - 592.85 МГц |
| Рабочий диапазон | До 492 футов (150 метров) |
| Полярная диаграмма | Однонаправленный (кардиоидный) датчик |
| Сопротивление | 600 Ом |
| Отношение сигнал / шум | 120 дБ |
| Источник питания микрофона | Встроенная литиевая аккумуляторная батарея |
| Время работы микрофона от батареи | До 8 часов |
| Время зарядки микрофона | Примерно 3 часа (через USB-C) |
| Источник питания приемника | Адаптер питания постоянного тока 12 В |
| Материал | Metal (Microphones) |
| Включенные компоненты | Receiver, 2 Handheld Microphones, 2 Antennas, Power Adapter, User Manual, Audio Cable, Anti-skid Rings, Power Plugs, Power Cables |
| Вес товара | 2 кг |
8. Гарантия и поддержка
XTUGA provides a one-year free warranty period for products with authentic brand logos. For any questions, technical assistance, or warranty claims, please contact XTUGA customer support through your purchase platform or the official XTUGA webсайт.
Сохраните чек о покупке для подтверждения гарантии.