
Введение
Thank you for choosing the iTOMA CKS213 Digital Alarm Clock. This manual provides detailed instructions for setting up, operating, and maintaining your new alarm clock. Please read this manual thoroughly before use to ensure proper function and to maximize your user experience.
Информация по безопасности
- Не подвергайте устройство воздействию экстремальных температур, прямых солнечных лучей, пыли или влажности.
- Ensure the power adapter is connected to an easily accessible outlet.
- Используйте только прилагаемый адаптер питания. Использование неоригинальных адаптеров может привести к повреждению устройства и аннулированию гарантии.
- Держите устройство вдали от воды или других жидкостей.
- Do not attempt to disassemble or modify the unit. This may cause damage or injury.
- The backup battery is for memory retention only; the clock requires main power for full operation.
Содержимое упаковки
Проверьте комплектацию на наличие следующих предметов:
- iTOMA CKS213 Digital Alarm Clock
- Power Adapter (60-inch cable)
- CR2032 Backup Battery (pre-installed or included)
- Руководство пользователя (этот документ)
Продукт болееview
Familiarize yourself with the various features and controls of your iTOMA CKS213 Digital Alarm Clock.

Настраивать
1. Подключение питания
Connect the provided power adapter to the DC input port on the back of the alarm clock, then plug the adapter into a standard wall outlet. The clock display will illuminate.
2. Installing Backup Battery
The clock includes a pre-installed CR2032 battery for backup. This battery preserves time and alarm settings during a power outage. The clock will not operate on battery power alone; it requires main power for the display and alarm functions.
3. Начальная установка времени
Upon initial power connection, the clock may automatically set the time. If manual adjustment is needed, press and hold the 'CLOCK' button located on the top of the unit. Use the 'SETTING+' and 'SETTING-' buttons to adjust the hour and minute. Press 'CLOCK' again to confirm.
4. 12/24-часовой формат.
To switch between 12-hour and 24-hour time formats, press the '12/24H' button (often integrated with 'CLOCK' or 'SETTING' buttons, refer to the top panel diagram on your device). In 12-hour format, 'AM' or 'PM' indicators will be displayed.
Инструкция по эксплуатации
1. Setting Dual Alarms (AL1 & AL2)
The iTOMA CKS213 features two independent alarms. Follow these steps to set an alarm:
- Press and hold the 'AL1' or 'AL2' button to enter alarm setting mode. The hour display will flash.
- Use the 'SETTING+' and 'SETTING-' buttons to adjust the desired alarm hour.
- Press 'AL1' or 'AL2' again to confirm the hour and move to minute adjustment. The minute display will flash.
- Use the 'SETTING+' and 'SETTING-' buttons to adjust the desired alarm minute.
- Press 'AL1' or 'AL2' again to confirm the minute and select the alarm mode.
- Use 'SETTING+' or 'SETTING-' to cycle through the 4 alarm modes:
- ALL-7-DAY: Будильник срабатывает каждый день.
- ДЕНЬ БУДНИ: Сигнализация срабатывает с понедельника по пятницу.
- WEEKEND: Сигнал тревоги звучит в субботу и воскресенье.
- SINGLE DAY: Alarm sounds only on the selected day.
- Press 'AL1' or 'AL2' one last time to save the alarm settings and activate the alarm. An alarm icon will appear on the display.

2. Функция повтора сигнала
When an alarm sounds, press the large 'SNOOZE' button on the top of the clock to temporarily silence the alarm for 9 minutes. You can repeat this up to 6 times. To turn off the alarm completely, press the 'AL1 OFF' or 'AL2 OFF' button.

3. Display Brightness and Automatic Dimmer
The clock features a 0.9-inch orange LED display with adjustable brightness. You can manually set the brightness or enable the automatic dimmer function.
- Ручная регулировка яркости: Press the 'DIMMER' button repeatedly to cycle through 3 brightness levels (High, Medium, Low).
- Автоматический диммер: The built-in sensor automatically adjusts the display brightness based on ambient light conditions in the room. This feature ensures the display is not too bright in a dark room or too dim in a well-lit environment.

4. Работа ночного освещения
The clock includes a 2-level orange night light. To activate or adjust the night light, locate the 'NIGHT LED' button (or similar) on the top panel and press it to cycle through the brightness levels or turn it off.
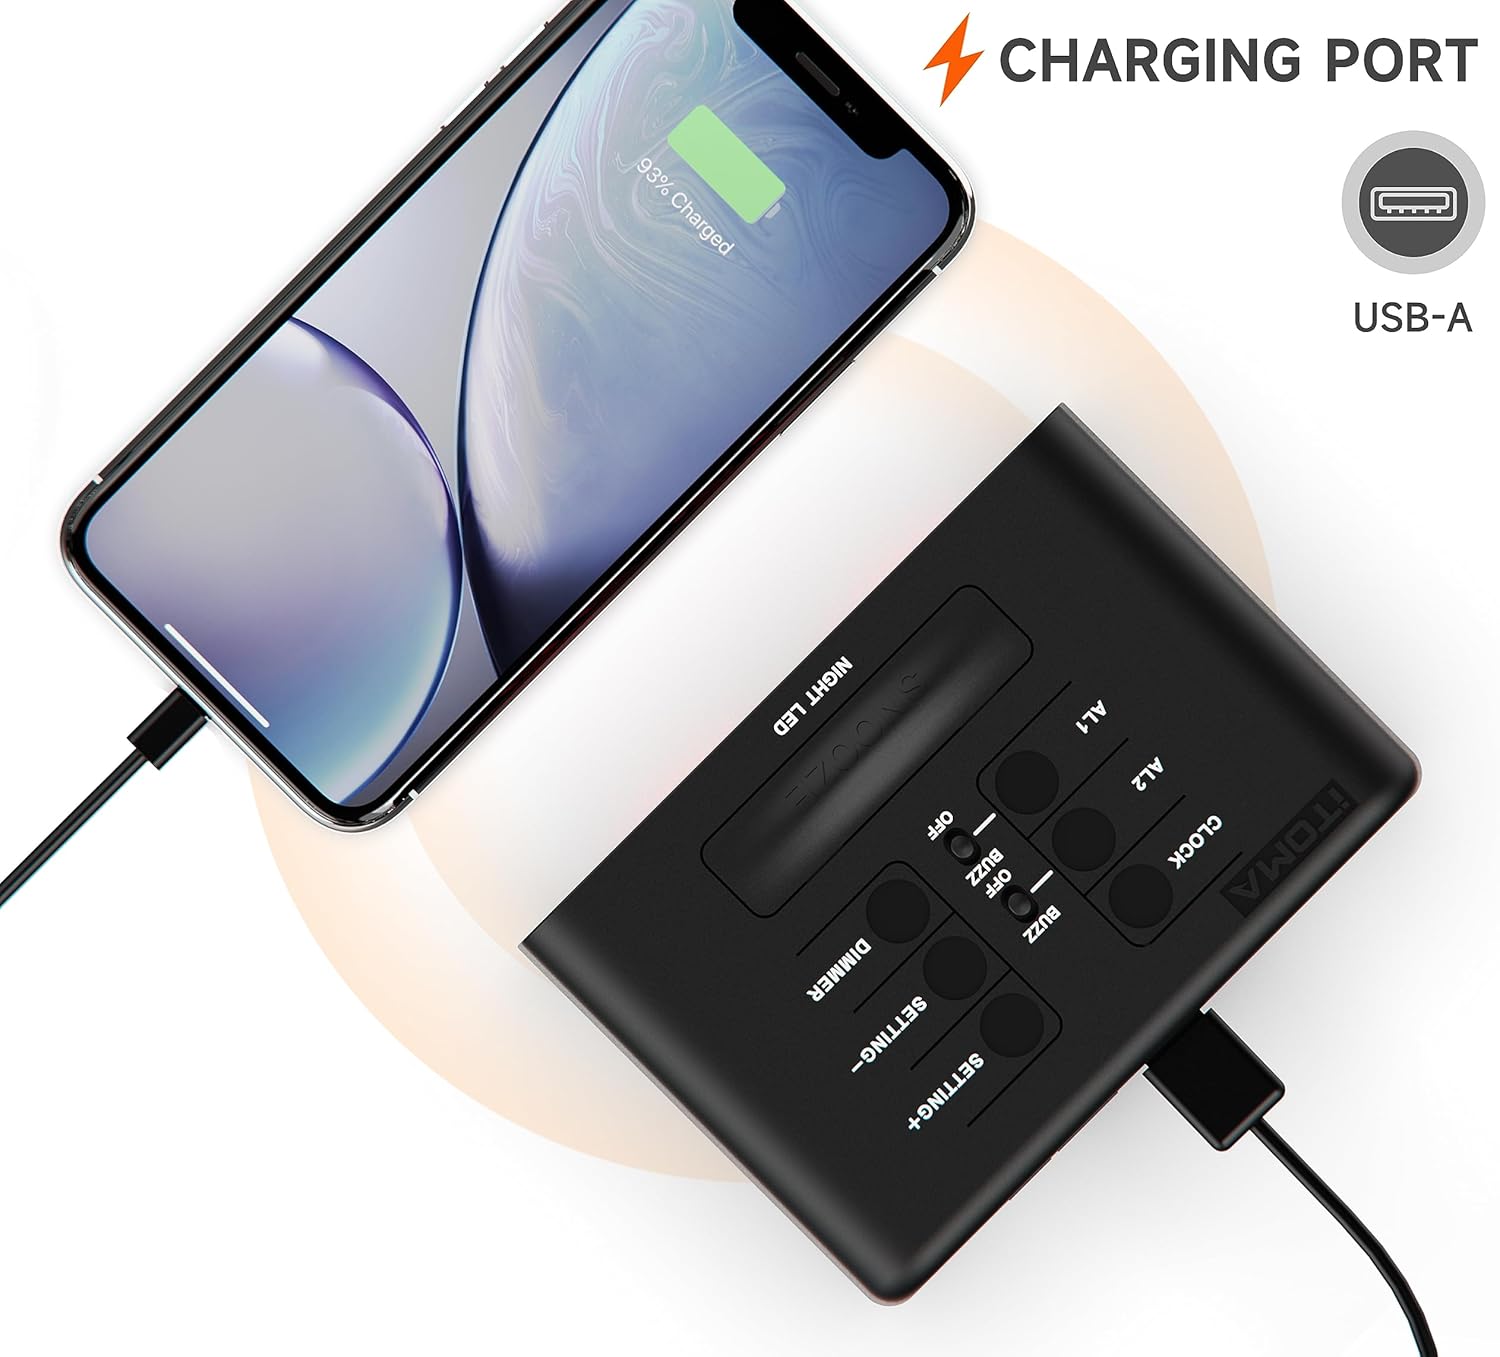
5. USB-порт для зарядки.
A USB-A charging port is located on the back of the unit. You can use this port to charge your smartphone or other mobile devices. Connect your device's USB charging cable to this port. The output is typically 1A.
Обслуживание
- Уборка: Протрите часы мягкой сухой тканью. Не используйте абразивные чистящие средства или растворители.
- Замена батареи: If the backup battery needs replacement, open the battery compartment on the bottom of the unit and replace the CR2032 battery with a new one, observing polarity.
Поиск неисправностей
| Проблема | Решение |
|---|---|
| Дисплей часов пуст. | Ensure the power adapter is securely connected to both the clock and a working wall outlet. Check if the outlet has power. |
| Сигнализация не срабатывает. | Verify that the alarm is activated (alarm icon visible). Check the alarm time and ensure it is set correctly for the desired day(s) of the week. |
| USB-порт для зарядки не работает. | Ensure the clock is powered by the main adapter. Check the USB cable and the device being charged. The port is for charging only, not data transfer. |
| Время или настройки сбрасываются после отключения питания.tage. | The CR2032 backup battery may be depleted and needs replacement. |
Технические характеристики
| Особенность | Деталь |
|---|---|
| Номер модели | CKS213 |
| Тип дисплея | 0.9" Orange LED Digital Display |
| Формат времени | 12/24 Hour Selectable |
| Сигнализации | Dual Alarms with 4 Modes (7-Day, Weekday, Weekend, Single Day) |
| Длительность повтора | 9 Minutes (up to 6 times) |
| Регулировка яркости | 3 Manual Levels & Automatic Dimmer |
| Ночной Свет | 2-Level Orange Night Light |
| USB-порт для зарядки | USB-A (Output: 1A) |
| Источник питания | Адаптер переменного тока |
| Резервная батарея | 1 x CR2032 (в комплекте) |
| Размеры продукта (Д x Ш x В) | 8.2 x 3.81 x 6.2 см (3.23 x 1.5 x 2.44 дюймов) |
| Вес товара | 280 г |
| Материал | Акрилонитрилбутадиенстирол (АБС) |

Гарантия и поддержка
iTOMA products are designed for reliability and performance. For any questions, concerns, or technical support regarding your CKS213 Digital Alarm Clock, please refer to the contact information provided with your purchase or visit the official iTOMA webсайт. Пожалуйста, сохраните доказательство покупки для гарантийных претензий.