
RadioMaster TX12 MKII
RadioMaster TX12 MKII 2.4GHz 16 Channel ELRS/OpenTX/EdgeTX Radio Controller User Manual
Model: TX12 MKII (HP157-0006-M2) | Brand: RadioMaster
1. Введение
The RadioMaster TX12 MKII is a compact and versatile 2.4GHz 16-channel radio controller designed for various RC applications, including drones. It comes pre-installed with the EdgeTX operating system and supports ExpressLRS (ELRS) and CC2500 RF chips, offering broad compatibility and advanced features. This manual provides essential information for setting up, operating, and maintaining your TX12 MKII radio controller.

Рисунок 1: Передняя часть view of the RadioMaster TX12 MKII Radio Controller.
2. Настройка
2.1 Распаковка и первоначальный осмотр
Upon receiving your TX12 MKII, carefully unbox all components and inspect for any damage. The package typically includes the TX12 MKII Radio Controller, an antenna, a USB-C cable, a quick start guide, and a sticker. Battery cells are sold separately.
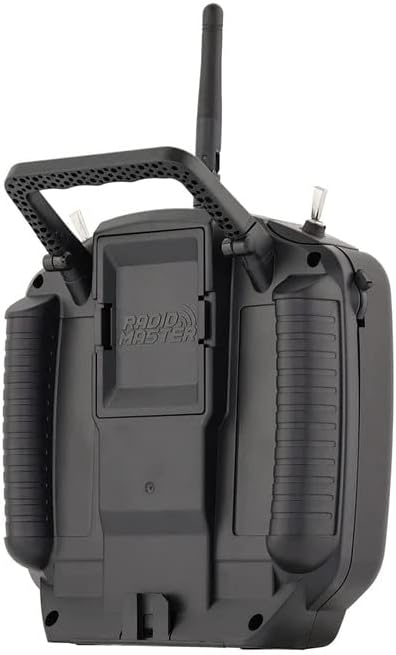
Figure 2: Contents of the RadioMaster TX12 MKII package.
2.2 Установка и зарядка аккумулятора
The TX12 MKII requires dual 18650 or 21700 Li-ion cells, or a 2S Lipo battery (up to 74x60x22mm), which are not included. Install the batteries into the designated compartment. The radio supports QC3 USB-C charging. Connect the provided USB-C cable to the USB-C port on the back of the controller and to a compatible power source to charge the batteries.

Figure 3: Battery compartment for dual 18650 or 21700 Li-ion cells, or 2S Lipo.
2.3 Установка антенны
Ensure the antenna is securely attached to the top of the radio controller before powering on. This is crucial for proper signal transmission and reception.
2.4 Встроенное и программное обеспечение
The TX12 MKII comes with EdgeTX operating system pre-installed. Firmware upgrades can be performed via USB/SD card using EdgeTX Buddy online or EdgeTX Companion PC software. Regular updates are recommended to ensure optimal performance and access to new features.
3. Инструкция по эксплуатации
3.1 Включение/выключение питания
To power on the controller, press and hold the power button until the screen illuminates. To power off, press and hold the power button again until the shutdown sequence completes.
3.2 Basic Controls and Ergonomics
The TX12 MKII features high-precision hall gimbals for smooth and accurate control. The rear case has comfortable grips, and the S1/S2 slider grips have been improved for better tactile feedback. The controller also includes a standard JR module bay for external modules.

Figure 4: Precision hall-effect gimbals, adjustable without disassembly (Min. 38°, Max. 54°).
3.3 Дисплей и навигация
The 128x64 monochrome LCD display provides clear information. Use the navigation buttons (SYS, RTN, PAGE>, PAGE<, TELE) to move through menus and adjust settings within the EdgeTX operating system.
3.4 Binding and Pairing (ELRS Protocol)
The TX12 MKII supports ExpressLRS (ELRS) and CC2500 RF chips. For ELRS binding, ensure your drone has a compatible ELRS receiver. The power-on pairing method is typically used: power on the drone three consecutive times. Observe the receiver light; it should flash twice continuously, indicating it's in pairing mode. Then, on the remote control, switch to ELRS 2.4G protocol (if not already) and initiate the binding process. The remote control may vibrate, and the receiver light will steady upon successful pairing.
Video 1: Tutorial on how to pair an ELRS drone with a compatible remote control. This demonstrates the power-on pairing method and visual cues for successful binding.
3.5 Использование симулятора
The TX12 MKII can be connected to a computer via its USB-C port for use with flight simulators. This allows for practice and skill development without risking actual models. Ensure the simulator software is configured to recognize the controller as a joystick.

Figure 5: USB-C Data Port for simulator connection and charging, alongside the TRS 3.5mm Trainer Socket.
4. Техническое обслуживание
4.1 Уход за аккумулятором
Always use compatible batteries and follow manufacturer guidelines for charging and storage. Avoid overcharging or fully discharging Li-ion/Lipo batteries to prolong their lifespan. Store batteries in a cool, dry place away from direct sunlight.
4.2 Чистка и хранение
Clean the controller regularly with a soft, dry cloth. Avoid using harsh chemicals or abrasive materials. When not in use, store the controller in a protective case to prevent dust accumulation and physical damage. Ensure the antenna is folded or removed if applicable for compact storage.
5. Поиск Неисправностей
5.1 Общие проблемы
- Нет питания: Проверьте установку аккумулятора и уровень заряда. Убедитесь, что аккумуляторы правильно установлены и полностью заряжены.
- Ошибка связывания: Verify that both the controller and receiver are set to the correct protocol (e.g., ELRS). Ensure the receiver is in pairing mode (often indicated by a specific light pattern after multiple power cycles).
- Неотвечающие элементы управления: Calibrate gimbals and switches through the EdgeTX menu. For simulator use, ensure USB drivers are updated and the simulator recognizes the controller.
- Short Range/Signal Loss: Ensure the antenna is securely attached and not obstructed. Check for local interference. Update firmware on both the radio and receiver.
5.2 обновлений прошивки
Many issues can be resolved by ensuring your TX12 MKII is running the latest firmware. Refer to the official RadioMaster website or EdgeTX documentation for detailed instructions on updating your radio via USB/SD card using EdgeTX Buddy or EdgeTX Companion software.
6. Технические характеристики
| Элемент | TX12 Mark II Radio |
| Размер | 170*159*108 мм |
| Масса | 363 г (0.8 фунта) |
| Частота | 2.400GHZ-2.480GHZ |
| RF чип | ExpressLRS (ELRS) / CC2500 |
| Рабочий ток | 320mA@8.4V (ELRS) / 180mA@8.4V (CC2500) |
| Томtage Диапазон | 6.6-8.4 В постоянного тока |
| Прошивка радио | EdgeTX (Transmitter) / ExpressLRS (RF module) / MPM (RF module) |
| Каналы | Up to 16 (depending on the receiver) |
| Отображать | Монохромный ЖК-дисплей 128*64 |
| Карданный подвес | High precision hall gimbals |
| Внешний модуль | Совместимость с JR/FrSKY/Crossfire |
| Метод обновления | USB/SD card & EdgeTX Buddy online or EdgeTX Companion PC software |
| USB-зарядка | QC3 USB-C |
| SD-карта | Включено |
| Размеры продукта | 7 x 7 x 4 дюйма |
| Номер модели товара | HP157-0006-M2 |
| Производитель | РадиоМастер |
7. Гарантия и поддержка
For warranty information, technical support, or service inquiries, please contact RadioMaster directly or refer to their official webсайт. Дополнительные планы защиты могут быть доступны у вашего продавца.
Для получения дополнительной помощи посетите RotorLogic Store.
8. Дополнительные ресурсы
8.1 продукта болееview Видео
Видео 2: Краткий обзорview of the RadioMaster TX12 MKII 16CH ELRS EdgeTX Hall Gimbals Radio, highlighting its features and design.
Ask a question about this manual
Ask about setup, troubleshooting, compatibility, parts, safety, or missing instructions. Manuals+ will review the question and use this page’s manual context to help answer it.