
Продукт болееview
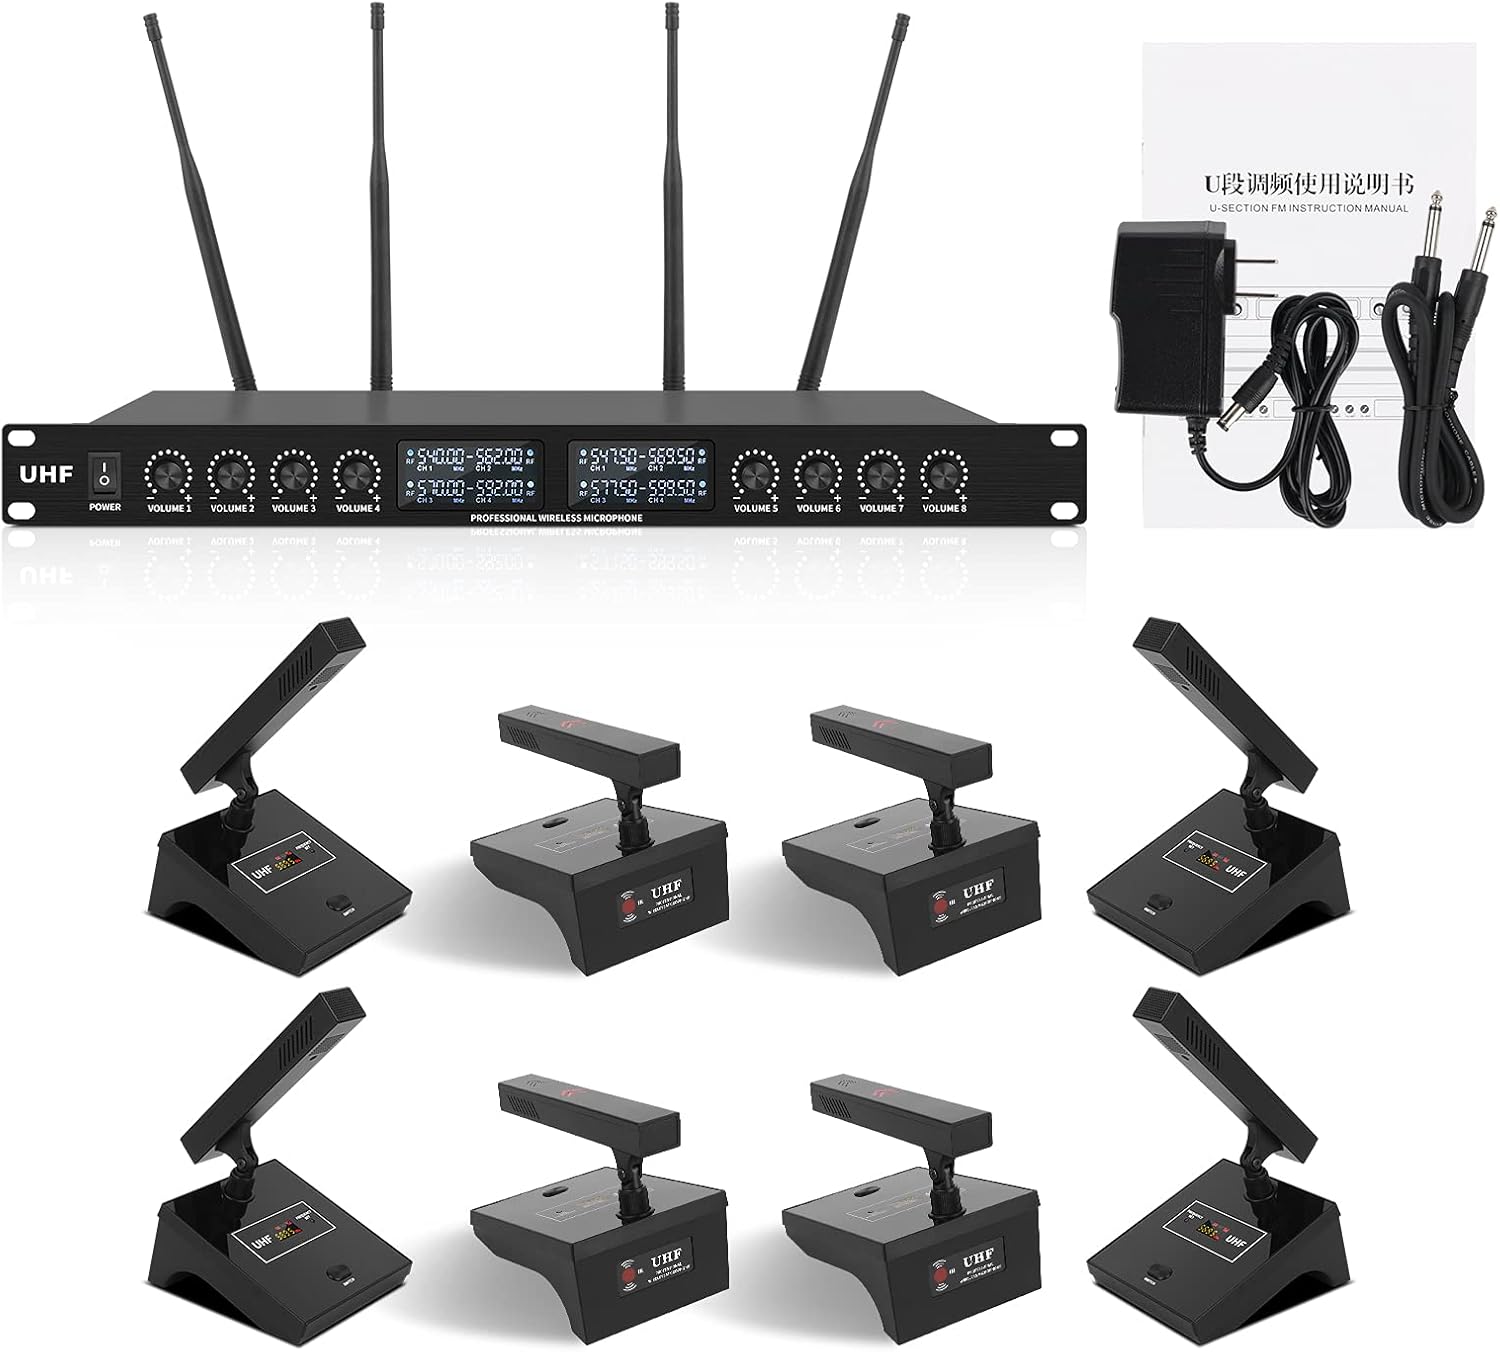
The XTUGA YT8 UHF 8-Channel Desktop Gooseneck Microphone System is designed for large conferences, public speaking, and similar applications, offering super-low background noise and reliable transmission. It features adjustable frequencies and four professional antennas with high frequency stability and accuracy. The PLL digital phase-locked loop multi-channel frequency synthesis technology minimizes interference. The system includes a durable metal housing for the receiver and microphones.
Key features include a super pickup design for high signal-to-noise ratio performance, an operation range of up to 230 feet (70 meters) within line of sight, and an 8-channel UHF wireless network with infrared automatic frequency pairing. The system operates within the 540MHz-599.5MHz frequency range, offering 15 frequency bands per channel. Each microphone has independent volume control and an LED liquid crystal display for real-time work parameters. The metal receiver provides 1 XLR output, 1 MIX output, and 8 audio inputs for versatile connectivity to amplifiers, mixers, or other PA systems.
Что в коробке?
- Адаптер питания
- Руководство пользователя
- XTUGA YT8 UHF 8-Channel Receiver
- 8 x Desktop Gooseneck Microphones
- Antennas (typically 4 for this system)
- Audio Cables (e.g., 1/4" TS cables)
Инструкции по установке
- Распаковываем компоненты: Carefully remove all items from the packaging and inspect them for any damage.
- Расположите приемник: Place the UHF receiver unit in a central location, ideally within line of sight of where the microphones will be used. Ensure it is away from large metal objects or other electronic devices that could cause interference.

Figure 2: The XTUGA YT8 receiver unit with its eight gooseneck microphones, ready for setup. This image shows the complete system components laid out, highlighting the receiver and the individual microphone units. - Прикрепите антенны: Screw the four provided antennas securely into the corresponding antenna ports on the rear of the receiver. Ensure they are oriented vertically for optimal signal reception.
- Подключите питание: Connect the power adapter to the DC INPUT port on the receiver and plug it into a suitable power outlet.
- Подключитесь к аудиосистеме:
- For a mixed output: Connect an XLR cable from the "BALANCED MIX OUT" port on the receiver to your mixer or ampвклад лифера.
- For individual microphone outputs: Connect 1/4" TS cables from the individual audio output jacks (1-8) on the receiver to separate input channels on your mixer.

Figure 3: Rear panel of the XTUGA YT8 receiver, detailing the DC input, antenna connections, individual 1/4" audio outputs, and the balanced XLR mix output. This view helps in identifying the correct ports for connecting the system to external audio equipment. - Вставьте батарейки в микрофоны: Each desktop microphone requires batteries (type typically AA, check manual for specifics). Open the battery compartment and insert them correctly, observing polarity.
- Включение питания: Turn on the receiver unit using the power switch. Then, turn on each microphone.
- Automatic Frequency Pairing (IR Auto-Pairing): The system features infrared automatic frequency pairing. To pair a microphone with a channel on the receiver, ensure both are powered on. Point the IR sensor on the microphone towards the IR sensor on the receiver's corresponding channel. The system will automatically link the frequency.

Figure 4: Illustration of the IR auto-pairing function. This diagram shows how to align the microphone's IR sensor with the receiver's sensor to automatically synchronize frequencies, simplifying setup. - Отрегулируйте угол наклона микрофона: The gooseneck microphones allow for adjustable angles to optimize sound pickup.

Figure 5: A close-up of the XTUGA YT8 gooseneck microphone demonstrating its 120-degree adjustable angle. This feature allows users to position the microphone for optimal sound capture during conferences or public speaking.
Инструкция по эксплуатации
- Регулировка громкости: Use the individual volume control knobs on the receiver for each microphone channel to precisely balance and adjust vocal sound levels. The LED liquid crystal display on the receiver shows real-time work parameters.
- Использование микрофона: Position the gooseneck microphone approximately 6-12 inches from the speaker's mouth for optimal sound pickup. The system is designed for wide pickup, ensuring clear audio even from a short distance.

Figure 6: A user speaking into an XTUGA YT8 gooseneck microphone, demonstrating its wide pickup range of approximately 16 inches. This highlights the microphone's ability to capture clear audio from a reasonable distance. - Выбор частоты: While the system features auto-pairing, you can manually adjust frequencies if interference is encountered. Refer to the receiver's display and controls for frequency band selection. The system offers 15 frequency bands per channel to avoid interference.

Figure 7: Visual representation of the 120 available frequency bands for the XTUGA YT8 system. This image emphasizes the system's capability to avoid re-frequency interference by offering a wide range of high-frequency bands. - Monitoring Signal Strength: Observe the signal indicators on the receiver to ensure a strong and stable connection between the microphones and the receiver. The system provides a stable signal and clear sound with an operation range of up to 230 feet (70 meters) within line of sight.

Figure 8: An illustration depicting the long receiving distance of the XTUGA YT8 system, showing effective operation up to 230 feet in a conference room environment. This highlights the system's robust signal range for large spaces.
Обслуживание
- Уборка: Use a soft, dry cloth to clean the receiver and microphones. Avoid using liquid cleaners or abrasive materials.
- Замена батареи: Replace microphone batteries regularly, especially before important events, to ensure consistent performance.
- Хранилище: Когда система не используется, храните ее в прохладном, сухом месте, вдали от прямых солнечных лучей и экстремальных температур.
- Уход за антенной: Handle antennas carefully to prevent bending or damage, which can affect signal quality.
Поиск неисправностей
| Проблема | Возможная причина | Решение |
|---|---|---|
| Нет звука |
|
|
| Помехи/статическое напряжение |
|
|
| Weak Signal/Dropouts |
|
|
Технические характеристики
- Бренд: ХТУГА
- Название модели: Desktop Microphone (YT8 System)
- Форм-фактор микрофона: Микрофонная система
- Количество каналов: 8
- Рабочий диапазон частот: 540MHz-599.5MHz (15 frequency bands per channel)
- Диапазон действия: Up to 230 Feet (70 Meters) within line of sight
- Материал: Металл (корпус)
- Источник питания: Battery Powered (microphones), AC Power (receiver)
- Технологии подключения: XLR, 1/4" TS
- Сигнал-шум: 3 дБ
- Уровень шума: 80 дБ
- Чувствительность звука: 25 дБ
- Диаграмма направленности: Однонаправленный
- Вес товара: 16.28 фунта (7.4 килограмма)
- Размеры продукта (Д x Ш x В): 20.47 x 14.17 x 9.06 дюйма
- Аппаратная платформа: PC (compatible)
Официальное видео о продукте
Это видео дает визуальное представлениеview of the XTUGA YT8 UHF 8 Channel Desktop Gooseneck Microphone System, demonstrating its components, setup, and key features in action. It highlights the design and functionality of both the receiver and the individual gooseneck microphones.
Гарантия и поддержка
For warranty information and technical support, please refer to the warranty card included with your product or contact XTUGA customer service directly. Contact details can typically be found on the manufacturer's official webна сайте или внутри упаковки продукта.
Дополнительные планы защиты, позволяющие расширить действие гарантии сверх стандартной гарантии производителя, могут быть приобретены отдельно.