
1. Продукт закончилсяview
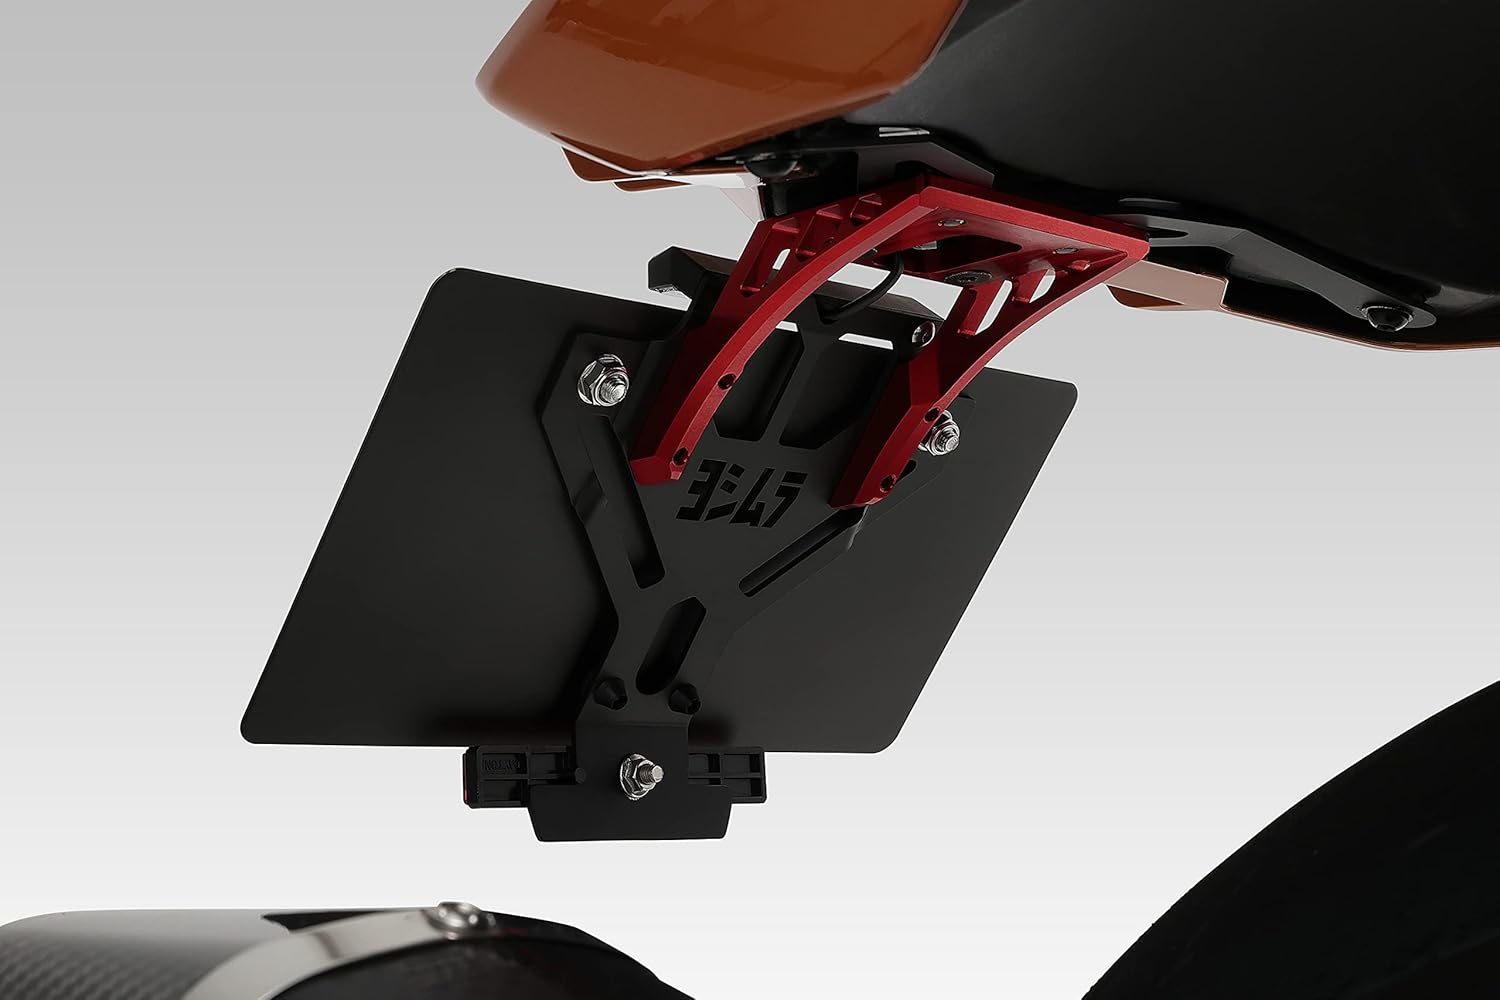
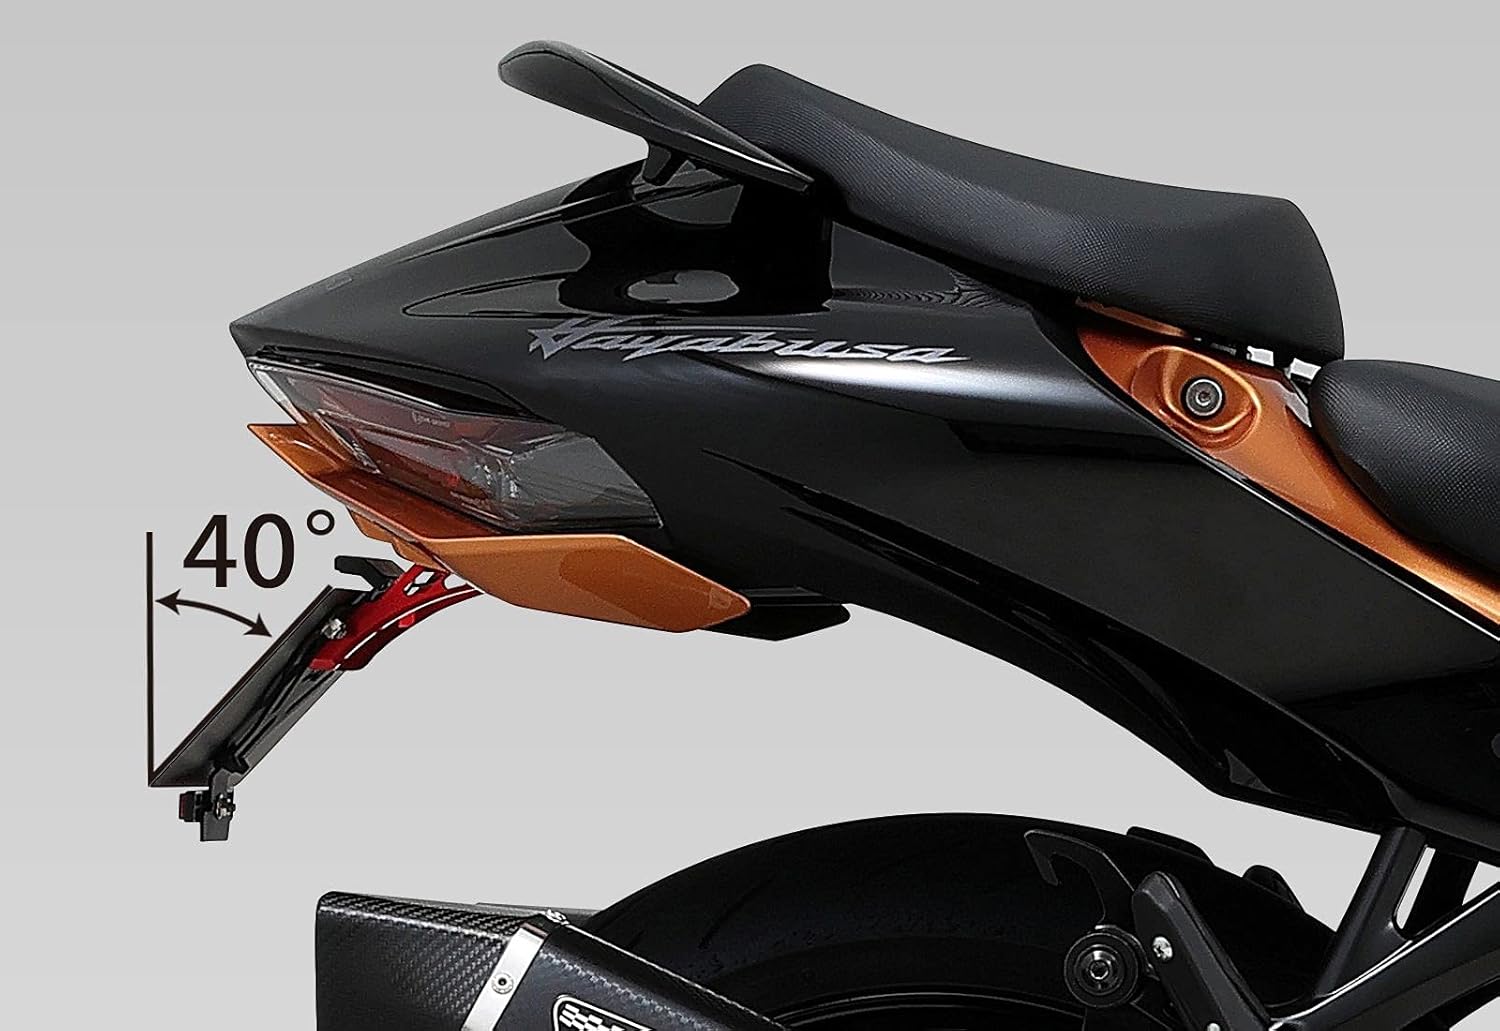
The YOSHIMURA Fender Eliminator Kit is designed to enhance the aesthetic appeal of your Suzuki Hayabusa (2021-2024 models) by providing a compact and streamlined rear fender solution. This kit is engineered with a focus on both design integration and structural integrity, utilizing durable stainless steel components.
Ключевые особенности включают в себя:
- Интеграция дизайна: Matches the motorcycle's design while achieving a compact form factor.
- Durability and Strength: Constructed from stainless steel with a three-slit cutout design, ensuring rigidity and strength while contributing to weight reduction.
- Согласие: Meets the upward 40° safety standard (new regulations).
- Совместимость: Designed to be compatible with genuine (OEM) turn signals.
- Простота установки: Bracket structure is designed to facilitate installation.
- Интегрированное освещение: Includes an LED license plate light for clear visibility.
2. Содержимое упаковки
Before beginning installation, please verify that all the following components are present in your kit:
- Main Stay
- License Plate Stay
- Рефлектор
- Светодиодная подсветка номерного знака
- Sticker (for placement under the reflector)
- Крепежные элементы (болты, шайбы, гайки)
- Руководство по эксплуатации

3. Информация по технике безопасности
Предупреждение:
- Installation should be performed by a qualified mechanic or an individual with sufficient mechanical knowledge and tools. Improper installation can lead to product failure, damage to the motorcycle, or personal injury.
- Always disconnect the motorcycle's battery before performing any electrical work.
- При выполнении монтажных работ необходимо использовать соответствующие средства индивидуальной защиты (СИЗ), такие как перчатки и защитные очки.
- Ensure all fasteners are tightened to the manufacturer's specified torque values. Overtightening or undertightening can cause damage or failure.
- After installation, thoroughly check all functions, including lighting and turn signals, before operating the motorcycle.
Important Note on Structural Changes:
If the installation of this kit results in a change to the overall length of the vehicle by more than 30mm, an application for structural change may be required by your local transport authority. Please consult your local regulations to ensure compliance.
4. Настройка и установка
This section outlines the general steps for installing the Fender Eliminator Kit. Specific details regarding the removal of OEM components may vary and should be referenced from your motorcycle's service manual.
4.1. Подготовка
- Припаркуйте мотоцикл на устойчивой, ровной поверхности.
- Выключите зажигание и выньте ключ.
- Disconnect the negative terminal of the battery to prevent electrical shorts.
- Gather all necessary tools (e.g., wrenches, screwdrivers, wire cutters/strippers, multimeter).
4.2. Removal of OEM Fender Assembly
Carefully remove the original rear fender assembly, including the license plate holder, turn signals, and license plate light. This typically involves:
- Removing the tail cowl: This can be complex. It is often sufficient to remove only the right side of the tail cowl to access the necessary wiring and mounting points. Exercise caution to avoid breaking plastic tabs or clips.
- Disconnecting wiring for the OEM license plate light and turn signals.
- Unbolting the fender assembly from the subframe.

4.3. Installing the YOSHIMURA Kit
- Attach the Main Stay to the motorcycle's subframe using the provided hardware. Ensure it is securely fastened.
- Mount the License Plate Stay to the Main Stay.
- Install the LED License Plate Light onto the License Plate Stay.
- Wiring the LED License Plate Light:
- Identify the positive and negative wires from the motorcycle's original license plate light harness using a multimeter.
- Connect the YOSHIMURA LED light wires to the corresponding wires on the motorcycle. Note that the YOSHIMURA light may have a different wire gauge (e.g., 0.2Φ) compared to the OEM wiring (e.g., 0.5Φ). Use appropriate connectors or soldering for a secure connection.
- Ensure correct polarity. Incorrect polarity will prevent the LED light from functioning.
- Attach the Reflector to the designated position, typically below the license plate. Apply the YOSHIMURA sticker if desired.
- Reinstall the OEM turn signals onto the new fender eliminator bracket.
- Управление кабелями: Route all wiring neatly and securely, ensuring no wires are pinched or exposed to moving parts or excessive heat. If there are gaps where wires pass from the fender to the tail cowl, it is recommended to seal these with rubber grommets or similar material to prevent water ingress from tire spray.
- Mount your license plate to the License Plate Stay.

4.4. Заключительные проверки
- Reconnect the motorcycle's battery.
- Turn on the ignition and test the license plate light, brake light, and turn signals to ensure they function correctly.
- Verify that all bolts and nuts are securely tightened.
- Ensure there is no interference between the new components and any moving parts of the motorcycle (e.g., rear wheel, suspension).
- Reinstall the tail cowl, taking care to align all tabs and fasteners.
5. Инструкция по эксплуатации
Once properly installed, the YOSHIMURA Fender Eliminator Kit operates in conjunction with your motorcycle's existing lighting system. No special operating procedures are required beyond ensuring the license plate light and turn signals are functioning correctly before each ride.
- Regularly check the functionality of the LED license plate light.
- Ensure the reflector is clean and unobstructed for maximum visibility.
6. Техническое обслуживание
To ensure the longevity and proper function of your YOSHIMURA Fender Eliminator Kit, follow these maintenance guidelines:
- Уборка: Clean the kit components regularly with a mild soap and water solution. Avoid abrasive cleaners or solvents that could damage the finish or electrical components.
- Проверки креплений: Periodically inspect all mounting bolts and nuts for tightness. Vibrations from riding can cause fasteners to loosen over time. Retighten as necessary.
- Проверка проводки: Check the wiring for any signs of wear, fraying, or damage. Ensure all connections remain secure and protected from the elements.
- Reflector Condition: Keep the reflector clean and free from dirt or damage to maintain its reflective properties.
7. Поиск Неисправностей
В этом разделе рассматриваются распространенные проблемы, которые могут возникнуть во время или после установки.
| Проблема | Возможная причина | Решение |
|---|---|---|
| LED License Plate Light does not illuminate. | Incorrect wiring polarity, loose connection, faulty LED unit, blown fuse. |
|
| Difficulty removing the OEM tail cowl. | Complex OEM design with hidden clips/tabs. |
|
| Water/dirt ingress into the tail section. | Unsealed gaps where wiring passes through. |
|
8. Технические характеристики
| Особенность | Деталь |
|---|---|
| Название продукта | Комплект для удаления крыльев |
| Бренд | ЁШИМУРА |
| Номер модели | 599-592-0000 |
| Совместимое транспортное средство | Suzuki Hayabusa (2021-2024) |
| Материал | Stainless Steel (Bracket) |
| Стандарт безопасности | Upward 40° compliant (New Standards) |
| Included Lighting | Светодиодная подсветка номерного знака |
| Turn Signal Compatibility | Compatible with genuine (OEM) turn signals |
| Страна происхождения | Япония |
9. Гарантия и поддержка
This product is manufactured by YOSHIMURA. For warranty information, please refer to the specific warranty documentation included with your purchase or visit the official YOSHIMURA Japan webсайт. Как правило, гарантия распространяется на производственные дефекты при нормальном использовании.
For technical support, installation assistance, or inquiries regarding replacement parts, please contact YOSHIMURA customer service directly. Contact information can usually be found on their official webсайте или в упаковке продукта.
Рекомендуется сохранить чек о покупке для предъявления гарантийных претензий.