
1. Введение
This manual provides comprehensive instructions for the installation, operation, and maintenance of your SENSTREE WTC200 Wireless Thermostat Plug-in Temperature Controller Outlet. Please read this manual thoroughly before using the device to ensure proper function and safety. Keep this manual for future reference.
2. Продукт закончилсяview
2.1 Включенные компоненты
- Wireless Thermostat Receiver (Plug-in Outlet)
- Беспроводной пульт дистанционного управления
- 2m/6ft NTC Temperature Probe
- Руководство пользователя (Этот документ)
- 2 AAA batteries (for remote controller, may be included or required separately)
2.2 Основные характеристики
- Беспроводная работа: Control temperature remotely with the handheld unit.
- Высокоточный датчик: The temperature is detected automatically by the thermostat outlet or remote.
- Heating & Cooling Modes: Automatically activates or deactivates connected devices based on preset temperatures.
- Кнопка ручного включения/выключения: The plug-in outlet features a manual power button.
- Переключатель единицы температуры: Легко переключайтесь между градусами Цельсия (℃) и Фаренгейта (℉).
- Программируемый: Simple two-step setup for heating or cooling applications.
- Сигнализации высокой/низкой температуры: Предоставляет оповещения о температурных отклонениях.
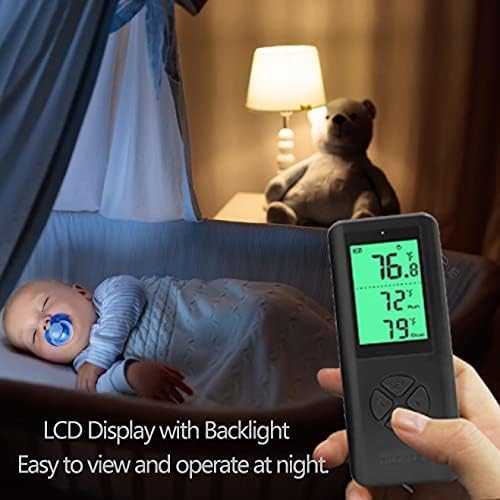
- ЖК-дисплей с подсветкой: Clear digital display for easy reading, even in low light.
2.3 Product Components Visual Guide


3. Инструкции по настройке
3.1 Установка батареи в пульт дистанционного управления
- Найдите батарейный отсек на задней панели пульта дистанционного управления.
- Откройте крышку батарейного отсека.
- Вставьте две батарейки типа ААА, соблюдая правильную полярность (+/-).
- Закройте крышку батарейного отсека.
3.2 Connecting the Temperature Probe
- Identify the NTC temperature probe cable.
- Plug the probe's jack into the designated port on the side of the wireless thermostat receiver (plug-in outlet).
- Position the probe in the area where you wish to measure and control the temperature. Ensure it is not obstructed or directly exposed to heat/cold sources that do not represent the ambient temperature.
3.3 Первоначальное включение и сопряжение
- Plug the wireless thermostat receiver into a standard 3-prong grounded electrical outlet.
- The remote controller and receiver are designed to automatically pair upon initial power-up. The display on the remote should activate and show temperature readings.
- If the remote does not display readings or connect, ensure batteries are correctly installed and the receiver is powered. Refer to the Troubleshooting section if issues persist.
4. Инструкция по эксплуатации
4.1 Расположение кнопок пульта дистанционного управления

The remote controller features a digital display and several buttons:
- Кнопка SET: Используется для ввода и подтверждения настроек.
- Кнопки вверх (▲) / вниз (▼): Used to adjust temperature values and navigate menu options.
- Кнопка M (режим): Used to switch between heating and cooling modes, and other functions.
4.2 Setting Temperature and Mode
- Выберите режим: Нажмите M button to toggle between Heating (indicated by a flame icon or similar) and Cooling (indicated by a snowflake icon or similar) modes.
- Enter Setting: Нажмите НАБОР button once. The target temperature display will begin to flash.
- Отрегулируйте температуру: Используйте Вверх (▲) и Вниз (▼) buttons to set your desired target temperature.
- Подтвердите настройку: Нажмите НАБОР button again to confirm and save the target temperature. The display will stop flashing.
- The thermostat will now automatically turn on or off the connected device to maintain the set temperature.
4.3 Переключение единиц измерения температуры (℃/℉)
Для переключения между градусами Цельсия (℃) и Фаренгейта (℉):
- With the remote display active, press and hold the M button for approximately 3 seconds. The temperature unit on the display will change.
- Release the button once the desired unit is shown.
4.4 Сигнализация о высокой/низкой температуре
The WTC200 features adjustable high and low-temperature alarms. When the ambient temperature exceeds the high alarm setting or falls below the low alarm setting, the remote controller will emit an audible alert.
- Нажмите НАБОР button twice to enter the alarm setting mode.
- Используйте Вверх (▲) и Вниз (▼) buttons to adjust the high-temperature alarm threshold.
- Нажимать НАБОР again to switch to the low-temperature alarm threshold.
- Используйте Вверх (▲) и Вниз (▼) buttons to adjust the low-temperature alarm threshold.
- Нажимать НАБОР a third time to save and exit the alarm settings.
4.5 Manual ON/OFF on the Outlet
The plug-in outlet receiver has a manual power button. Press this button to manually turn the connected device ON or OFF, overriding the thermostat's automatic control. The remote will reflect the current status.
5. Техническое обслуживание
5.1 Очистка
- Перед очисткой убедитесь, что устройство отключено от сети.
- Wipe the surfaces of the remote controller and plug-in outlet with a soft, dry cloth.
- Не используйте абразивные чистящие средства, растворители и не погружайте устройство в воду.
5.2. Замена батареи
When the battery indicator on the remote controller's display shows low power, replace the AAA batteries as described in Section 3.1. Prompt battery replacement ensures continuous and reliable operation.
6. Поиск Неисправностей
| Проблема | Возможная причина | Решение |
|---|---|---|
| Remote display is blank or unresponsive. | Низкий заряд или полная разрядка батарей; неправильная установка батарей. | Замените батарейки типа ААА, соблюдая полярность. |
| Thermostat not controlling connected device. | Device not plugged into the outlet; outlet not receiving power; incorrect mode (heating/cooling); temperature settings outside range. | Ensure device is securely plugged into the thermostat outlet. Verify the thermostat outlet is plugged into a live wall socket. Check if the correct mode (heating/cooling) is selected. Adjust target temperature settings. |
| Показания температуры неточные. | Temperature probe is disconnected or improperly placed; probe is damaged. | Ensure the temperature probe is securely connected to the outlet. Reposition the probe away from direct heat/cold sources or drafts. If damage is suspected, contact support. |
| Remote and outlet not communicating. | Вне диапазона; помехи; проблема сопряжения. | Move the remote closer to the outlet. Ensure no large metal objects or strong electronic devices are between them. Re-power both units to attempt re-pairing. |
| Неожиданно срабатывает сигнализация. | Ambient temperature has reached a set high or low alarm threshold. | Check the current temperature and your alarm settings. Adjust alarm thresholds if necessary (refer to Section 4.4). |
7. Технические характеристики
| Особенность | Деталь |
|---|---|
| Бренд | SENSTREE |
| Номер модели | ВТЦ200 |
| Тип контроллера | Удаленный |
| Тип контроля температуры | Автоматический |
| Технология связи | РЧ (радиочастота) |
| Источник питания | Электрический |
| Томtage | 1.5 Volts (Remote), 100-240 Volts (Outlet) |
| Максимальная нагрузка | 14A, 1500W (at 110V), 3000W (at 220V) |
| Тип дисплея | Цифровой ЖК-дисплей с подсветкой |
| Метод контроля | Button Control, Remote |
| Температурный зонд | 2m/6ft NTC probe |
| Батарейки (пульт) | Требуется 2 батарейки типа ААА |
| Вес товара | 8.4 унции |
| Размеры упаковки | 4.8 x 4.17 x 2.32 дюйма |
8. Гарантия и поддержка
8.1 Гарантия на продукт
The SENSTREE WTC200 Wireless Thermostat Plug-in Temperature Controller Outlet comes with a гарантия один год с даты покупки. Данная гарантия распространяется на дефекты материалов и изготовления при нормальном использовании. Она не распространяется на повреждения, вызванные неправильным использованием, несчастным случаем, несанкционированной модификацией или неправильной установкой.
8.2 Поддержка клиентов
For technical assistance, troubleshooting, or warranty claims, please contact SENSTREE customer support. Refer to the product packaging or the official SENSTREE webсайт для получения самой актуальной контактной информации.