
1. Введение
This manual provides detailed instructions for the setup, operation, maintenance, and troubleshooting of your UF-TOOLS 7-Inch LCD Digital Microscope. Please read this manual thoroughly before using the device to ensure proper functionality and to maximize its lifespan.
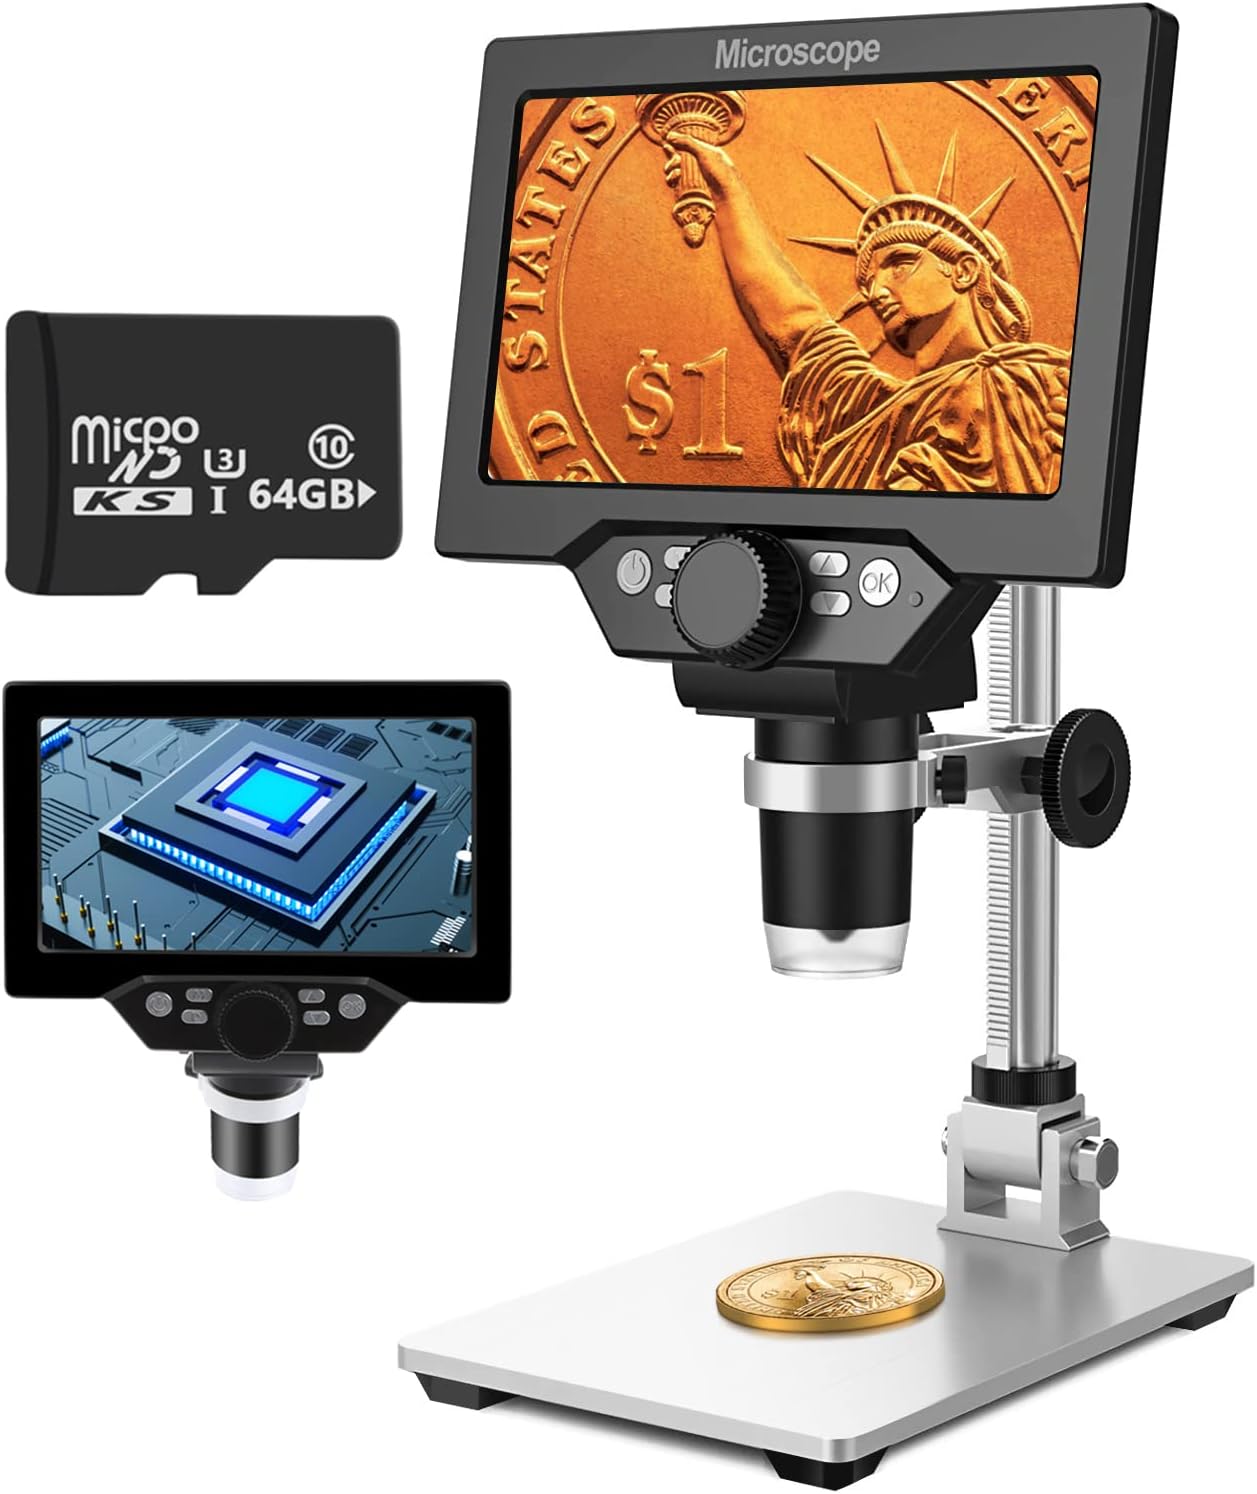
Image 1.1: UF-TOOLS 7-Inch LCD Digital Microscope with included 64GB TF card, showing the main unit and stand.
1.1 Основные характеристики
- 7-дюймовый ЖК-экран: Provides a clear, high-definition display for direct viewing without a computer.
- Увеличение 10X-1200X: Continuous zoom capability for observing various objects.
- Камера 12MP: Captures high-resolution images and 1080P video.
- 64GB TF Card: Included for direct storage of photos and videos. Supports up to 128GB.
- 8 регулируемых светодиодных ламп: Ensures optimal illumination for detailed observation.
- Flexible Aluminum Alloy Stand: Allows for 90° angle adjustment and 2-10cm focus distance adjustment.
- Встроенный аккумулятор емкостью 3000 мАч: Offers portability with up to 6 hours of operation on a full charge.
- Подключение к ПК: Compatible with Windows 7/8/10 for larger display and data transfer.
2. Содержимое упаковки
Убедитесь, что в вашей посылке присутствуют все перечисленные ниже предметы:
- UF-TOOLS 7-Inch LCD Digital Microscope Unit
- Adjustable Aluminum Alloy Stand
- Карточка 64GB TF
- USB-кабель
- Адаптер питания (если входит в комплект)
- Руководство пользователя (этот документ)

Image 2.1: The microscope package includes a 64GB TF card for storage.
3. Руководство по установке
3.1 Сборка микроскопа
- Осторожно распакуйте все компоненты из коробки.
- Attach the microscope unit to the adjustable aluminum alloy stand. Ensure it is securely fastened using the provided screws or locking mechanisms.
- Insert the 64GB TF card into the designated slot on the microscope unit.
- Place the assembled microscope on a stable, flat surface.

Image 3.1: Product dimensions and adjustable stand features, including 270° rotation and height adjustment.
3.2 Зарядка аккумулятора
The microscope has a built-in 3000mAh rechargeable battery. Before first use, fully charge the device.
- Connect the USB cable to the microscope's charge port and the other end to a power adapter or a computer's USB port.
- Индикатор зарядки покажет состояние зарядки.
- Полной зарядки обычно хватает до 6 часов непрерывной работы.

Image 3.2: The microscope features a long-lasting rechargeable battery, charged via USB.
4. Инструкция по эксплуатации
4.1 Устройство большеview и элементы управления

Изображение 4.1: оконченоview of the microscope's controls and ports, including charge port, MicroSD slot, light regulation, fixed knob, lifting adjusting bracket knob, and various function buttons.
- Включение/выключение питания: Нажмите и удерживайте кнопку питания, чтобы включить или выключить устройство.
- Video/Camera Playback: Use dedicated buttons to switch between video recording, photo capture, and playback modes.
- System Key Programming: Access menu settings for various configurations.
- Object Distance Adjustment: Отрегулируйте расстояние между объективом и объектом.
- Страница вверх/вниз: Navigate through menus or captured media.
- Confirm Key/Camera Button: Select options or capture photos/videos.
- Light Regulation: Отрегулируйте яркость 8 светодиодных ламп.
- Фиксированная ручка: Secures the microscope unit to the stand.
- Lifting Adjusting Bracket Knob: Adjusts the height of the microscope unit on the stand.
4.2 Регулировка увеличения и фокусировки
- Поместите объект, который вы хотите наблюдать, на опорную пластину.
- Adjust the height of the microscope unit using the Lifting Adjusting Bracket Knob to get a rough focus.
- Use the focus wheel on the microscope lens to fine-tune the focus until the image on the 7-inch LCD screen is clear.
- The magnification range is 10X to 1200X. Adjust the distance between the lens and the object, along with the focus wheel, to achieve the desired magnification.

Image 4.2: The microscope features an adjustable screen, free length adjustment, and precise focus control.

Image 4.3: Digital magnification from 10X to 1200X, demonstrating the zoom capability on small objects.
4.3 Использование светодиодных фонарей
The microscope is equipped with 8 adjustable LED lights to illuminate your subject. Use the Light Regulation control to increase or decrease brightness as needed for optimal viewинж.

Image 4.4: The 8 LED lights provide adequate illumination for observing objects in various lighting conditions.
4.4 Съемка фотографий и видео
With the included 64GB TF card, you can directly save images and videos.
- In photo mode, press the Confirm/Camera button to capture an image.
- In video mode, press the Confirm/Camera button to start recording, and press again to stop.
- Captured media can be reviewed using the playback function.
4.5 Подключение к ПК
К view observations on a larger screen or transfer files, connect the microscope to a Windows PC (Windows 7/8/10) using the provided USB cable.
- Connect the microscope to your PC via the USB cable.
- The microscope should be recognized as a storage device or a webcam, depending on the mode selected on the microscope.
- You can then access the stored images/videos or use the microscope as a live camera feed.

Image 4.5: Connect the microscope to a PC for a larger viewing experience and data management.
5. Техническое обслуживание
5.1 Очистка
- Объектив: Используйте мягкую безворсовую ткань, специально предназначенную для оптических линз. Для удаления стойких пятен можно нанести небольшое количество раствора для чистки линз на ткань, а не непосредственно на линзу.
- Экран: Wipe the LCD screen gently with a microfiber cloth. Avoid harsh chemicals.
- Тело: Clean the microscope body and stand with a soft, dry cloth. Do not use abrasive cleaners or solvents.
5.2 Хранение
- Храните микроскоп в прохладном, сухом месте, вдали от прямых солнечных лучей и экстремальных температур.
- При длительном хранении убедитесь, что аккумулятор частично заряжен (примерно на 50%), чтобы продлить срок его службы.
- Keep the lens covered to prevent dust accumulation.
5.3 Уход за аккумулятором
- Избегайте частой полной разрядки аккумулятора.
- Регулярно заряжайте аккумулятор, даже если он не используется, чтобы поддерживать его работоспособность.
- Не подвергайте батарею воздействию высоких температур.
6. Поиск Неисправностей
- Нет питания:
- Ensure the battery is charged. Connect the microscope to a power source and try again.
- Проверьте подключение силового кабеля.
- Размытое изображение:
- Аккуратно отрегулируйте колесо фокусировки.
- Adjust the height of the microscope unit on the stand.
- Ensure the object is properly illuminated by adjusting the LED lights.
- Если на линзе есть пятна или пыль, очистите ее.
- Cannot Capture Photos/Videos:
- Убедитесь, что TF-карта вставлена и правильно отформатирована.
- Проверьте, достаточно ли места на карте памяти TF.
- Verify the device is in the correct photo or video capture mode.
- ПК не распознает устройство:
- Ensure the USB cable is securely connected to both the microscope and the PC.
- Попробуйте использовать другой порт USB на вашем компьютере.
- Restart both the microscope and the PC.
- Ensure your PC is running Windows 7/8/10.
7. Технические характеристики
| Особенность | Деталь |
|---|---|
| Название модели | SUGON-Digital Microscope |
| Размер экрана | 7-дюймовый ЖК-дисплей |
| Увеличение | 10X-1200X |
| Разрешение камеры | 12МП |
| Разрешение видео | 1080P |
| Хранилище | 64GB TF Card (Max 128GB supported) |
| Освещение | 8 светодиодных ламп |
| Емкость аккумулятора | Литий-полимерный емкостью 3000 мАч |
| Срок службы батареи | До 6 часов (приблизительно) |
| Совместимость с ПК | Windows 7/8/10 |
| Материал | Металл, Пластик |
| Вес товара | 2.44 фунта (1.11 кг) |
| Размеры упаковки | 9.8 x 8.19 x 3.35 дюйма |
8. Гарантия и поддержка
UF-TOOLS provides the following warranty and support for this product:
- Срок возврата: 45 days limited product return period.
- Политика обмена: 18 months exchange for product defects.
For technical support or warranty claims, please contact UF-TOOLS customer service through the retailer where the product was purchased or visit the official UF-TOOLS webсайт для контактной информации.
Примечание: Условия гарантии могут различаться в зависимости от региона и продавца. Сохраните чек о покупке.