1. Введение
Thank you for choosing the CREATE SILKAIR CONNECT 3-in-1 Mobile Air Conditioner. This versatile appliance is designed to provide cooling, dehumidification, and fan functions for your living space. With its Wi-Fi connectivity, you can conveniently control the unit via a mobile application. Please read this manual thoroughly before operation to ensure safe and efficient use.
Модель: 64274_145198
Бренд: СОЗДАВАТЬ
2. Информация по технике безопасности
Всегда соблюдайте основные меры предосторожности при использовании электроприборов, чтобы снизить риск возникновения пожара, поражения электрическим током и травм.
- Убедитесь, что источник питания соответствует мощностиtagе указано на паспортной табличке.
- Не используйте устройство с поврежденным шнуром или вилкой.
- Держите устройство вдали от источников тепла и прямых солнечных лучей.
- Не блокируйте отверстия для входа и выхода воздуха.
- Перед чисткой или техническим обслуживанием всегда отключайте устройство от сети.
- В этом приборе используется хладагент R290. Не прокалывайте контур хладагента.
- Следите за детьми и следите за тем, чтобы они не играли с прибором.
3. Содержимое упаковки
Carefully unpack your air conditioner and check that all items are present and in good condition.
- CREATE SILKAIR CONNECT Mobile Air Conditioner Unit
- Выхлопной шланг
- Window Sealing Kit (Adjustable window slider, hose adapter)
- Дистанционное управление
- Руководство пользователя

Figure 1: The CREATE SILKAIR CONNECT Mobile Air Conditioner unit shown alongside a smartphone displaying its control application interface.
4. Продукт закончилсяview
4.1 Панель управления

Figure 2: Close-up of the top-mounted control panel, featuring an LED display and touch-sensitive buttons for various functions such as power, mode selection, fan speed, and timer.
4.2 Компоненты и размеры
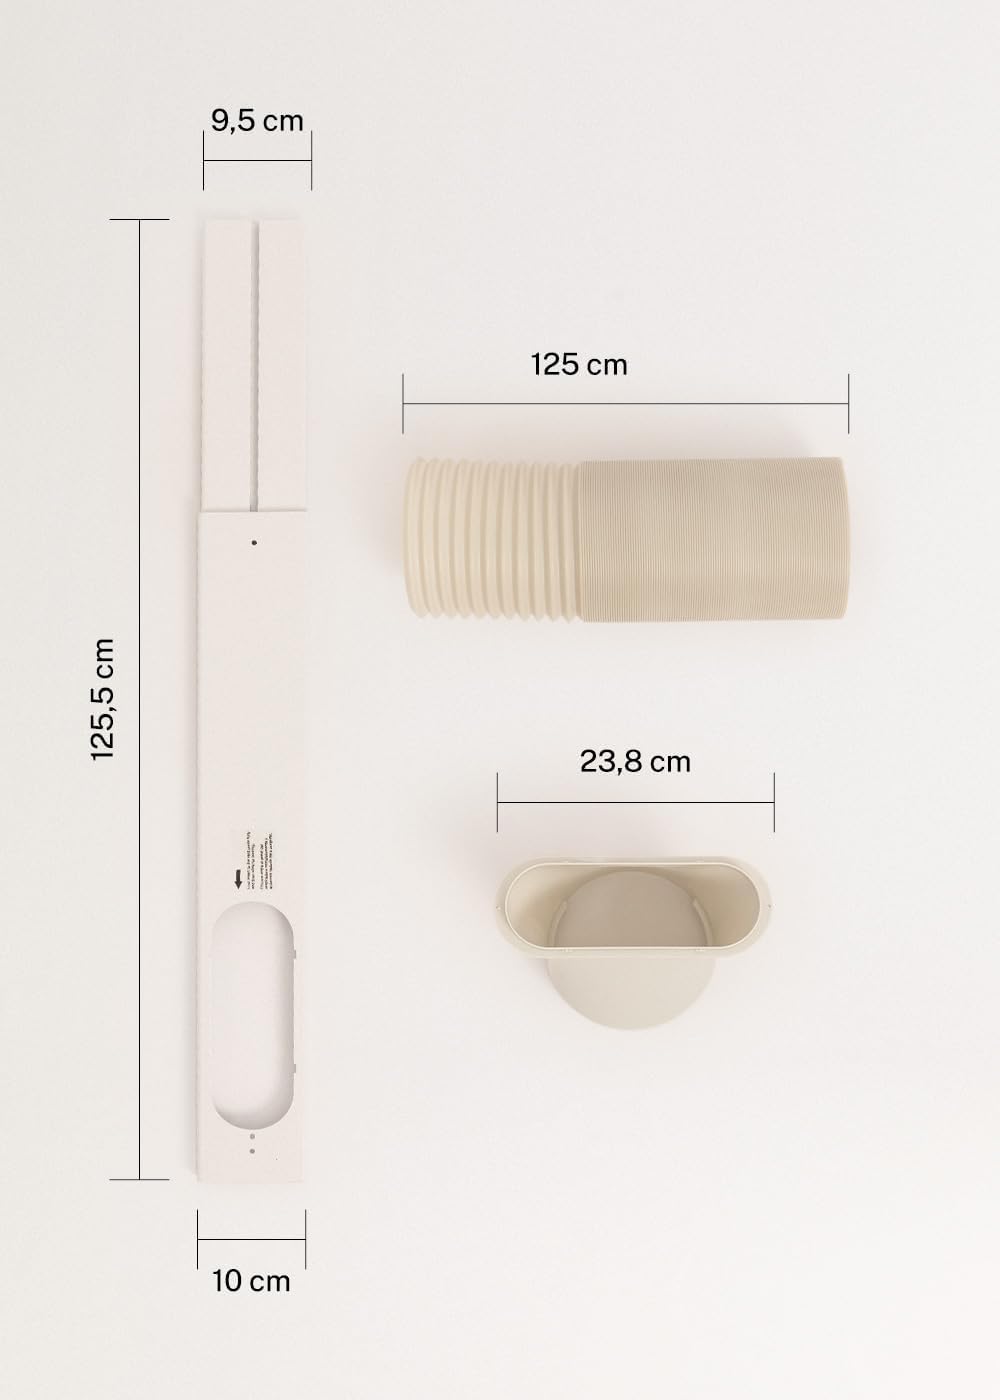
Figure 3: Detailed diagram illustrating the dimensions of the window sealing plate (125.5 cm length, 10 cm width, 9.5 cm adjustable width) and the exhaust hose (125 cm length) with its adapter (23.8 cm diameter).
5. Настройка и установка
Proper installation is crucial for the efficient operation of your mobile air conditioner.
5.1 Размещение устройства
- Поместите устройство на плоскую устойчивую поверхность.
- Для обеспечения надлежащей циркуляции воздуха убедитесь, что вокруг устройства имеется зазор не менее 30 см.
- Разместите устройство рядом с окном или отверстием для вытяжного шланга.
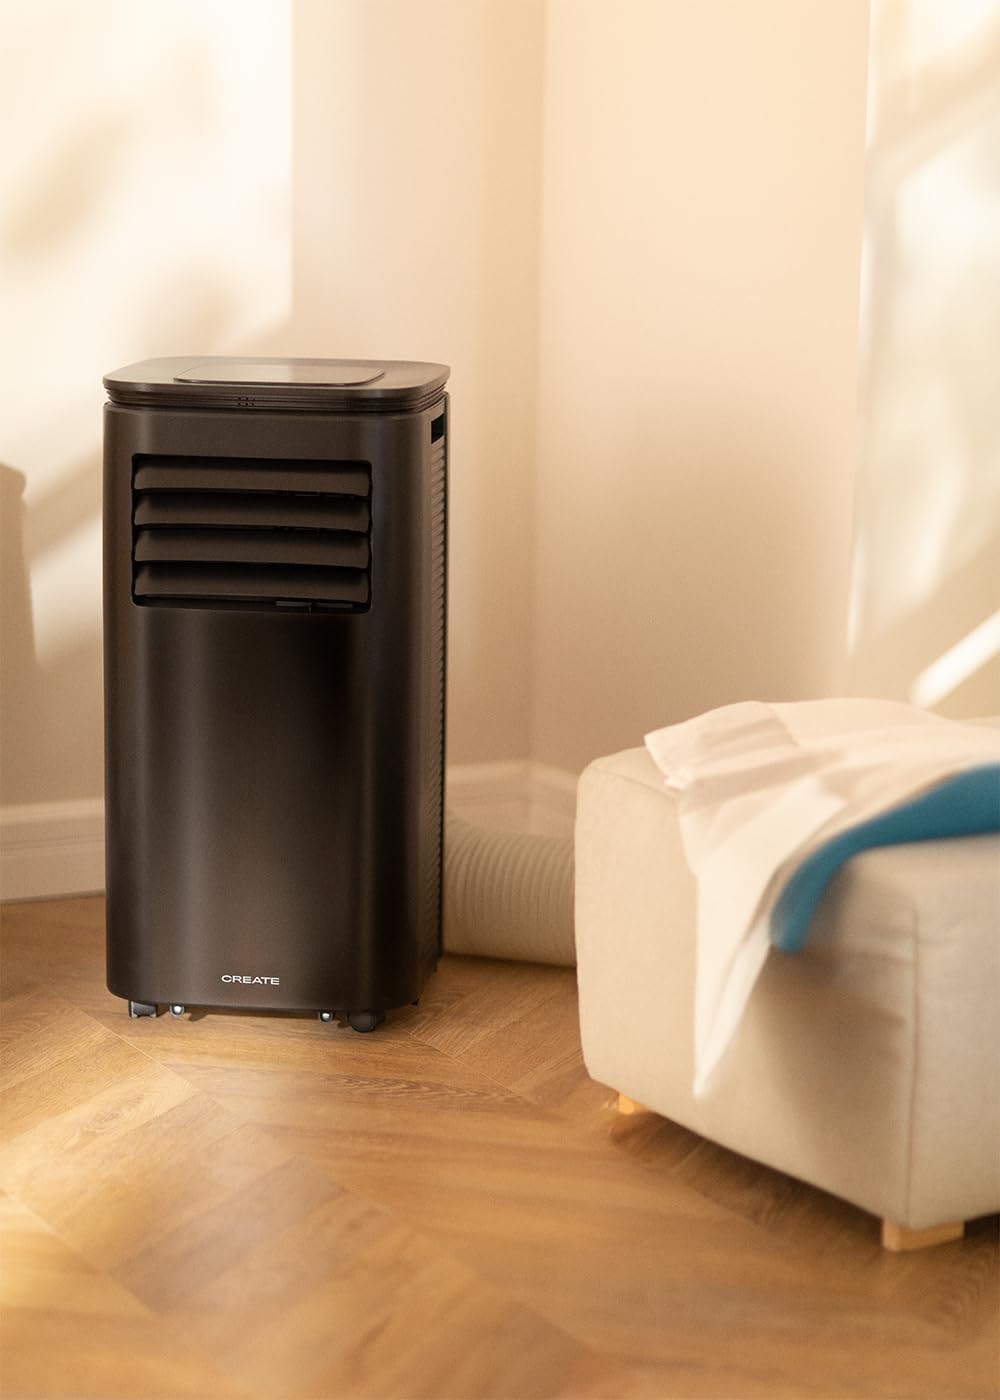
Figure 4: The air conditioner unit positioned in a room, demonstrating the typical setup with the exhaust hose directed towards a window for heat expulsion.
5.2 Installing the Exhaust Hose and Window Kit
- Присоедините переходник для шланга к одному концу выхлопного шланга.
- Connect the other end of the exhaust hose to the air outlet on the back of the unit.
- Install the adjustable window sealing kit in your window opening. Extend it to fit the window frame.
- Insert the hose adapter into the opening of the window sealing kit.

Figure 5: Illustrates the secure connection of the flexible exhaust hose to the designated port at the rear of the air conditioning unit.
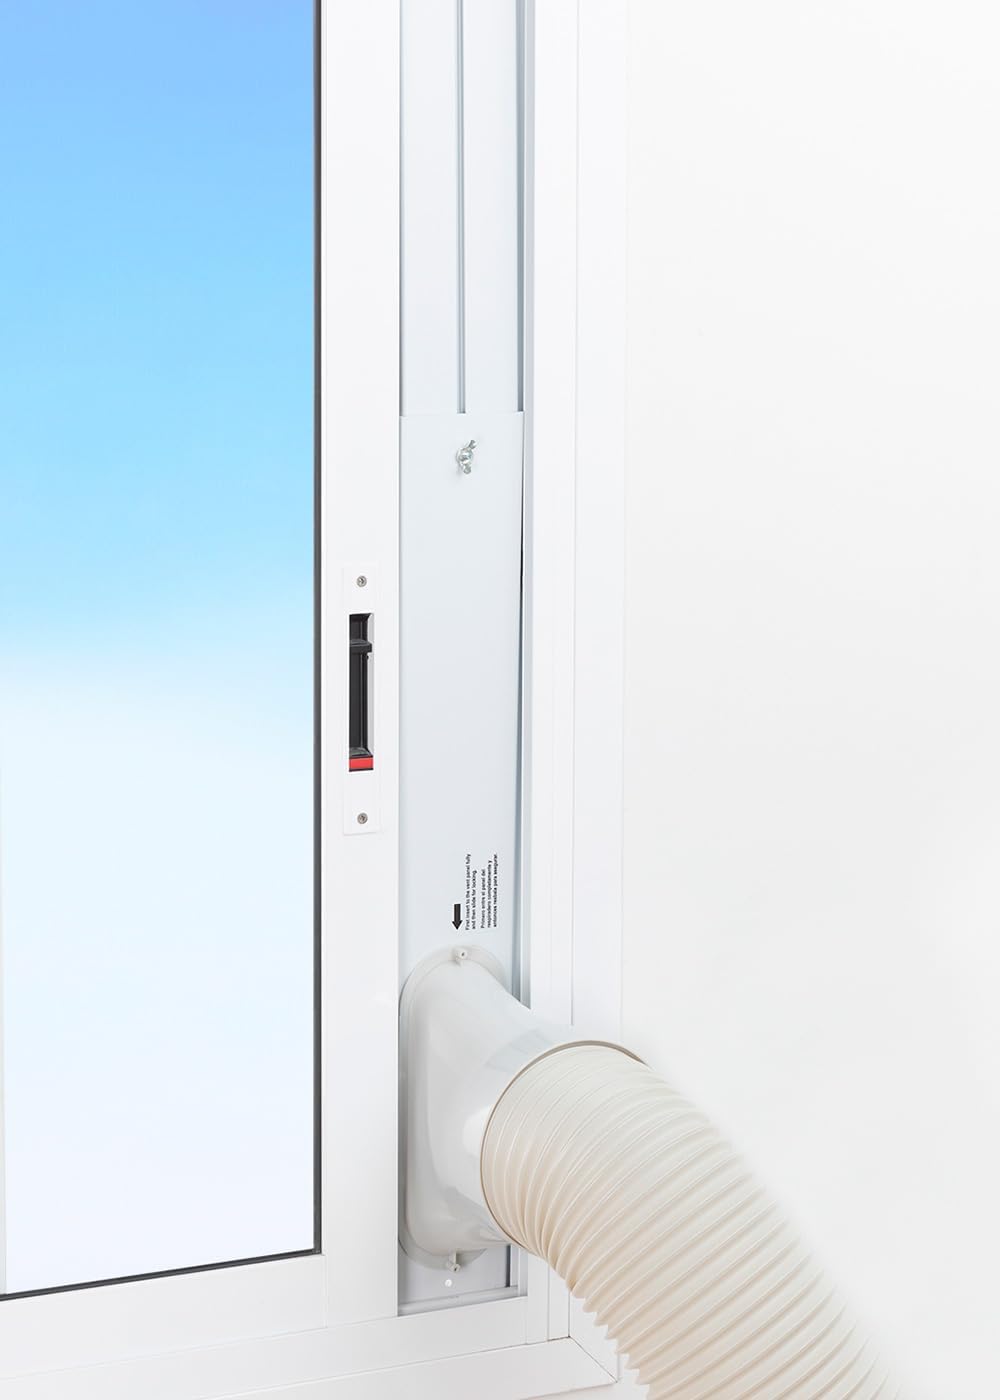
Figure 6: The window sealing kit is shown properly installed in a window frame, with the exhaust hose securely fitted into the kit's opening to vent hot air outside.
6. Инструкция по эксплуатации
6.1 Использование панели управления
The control panel on top of the unit allows direct operation.
- Кнопка питания: Нажмите, чтобы включить или выключить устройство.
- Кнопка режима: Переключайтесь между режимами охлаждения, вентиляции и осушения воздуха.
- Кнопка скорости вентилятора: Adjust fan speed (Low, High).
- Кнопки регулировки температуры (+/-): Adjust desired temperature in Cooling mode.
- Кнопка таймера: Set the auto-on or auto-off timer (up to 24 hours).
- Кнопка спящего режима: Включает более тихий режим работы для использования в ночное время.
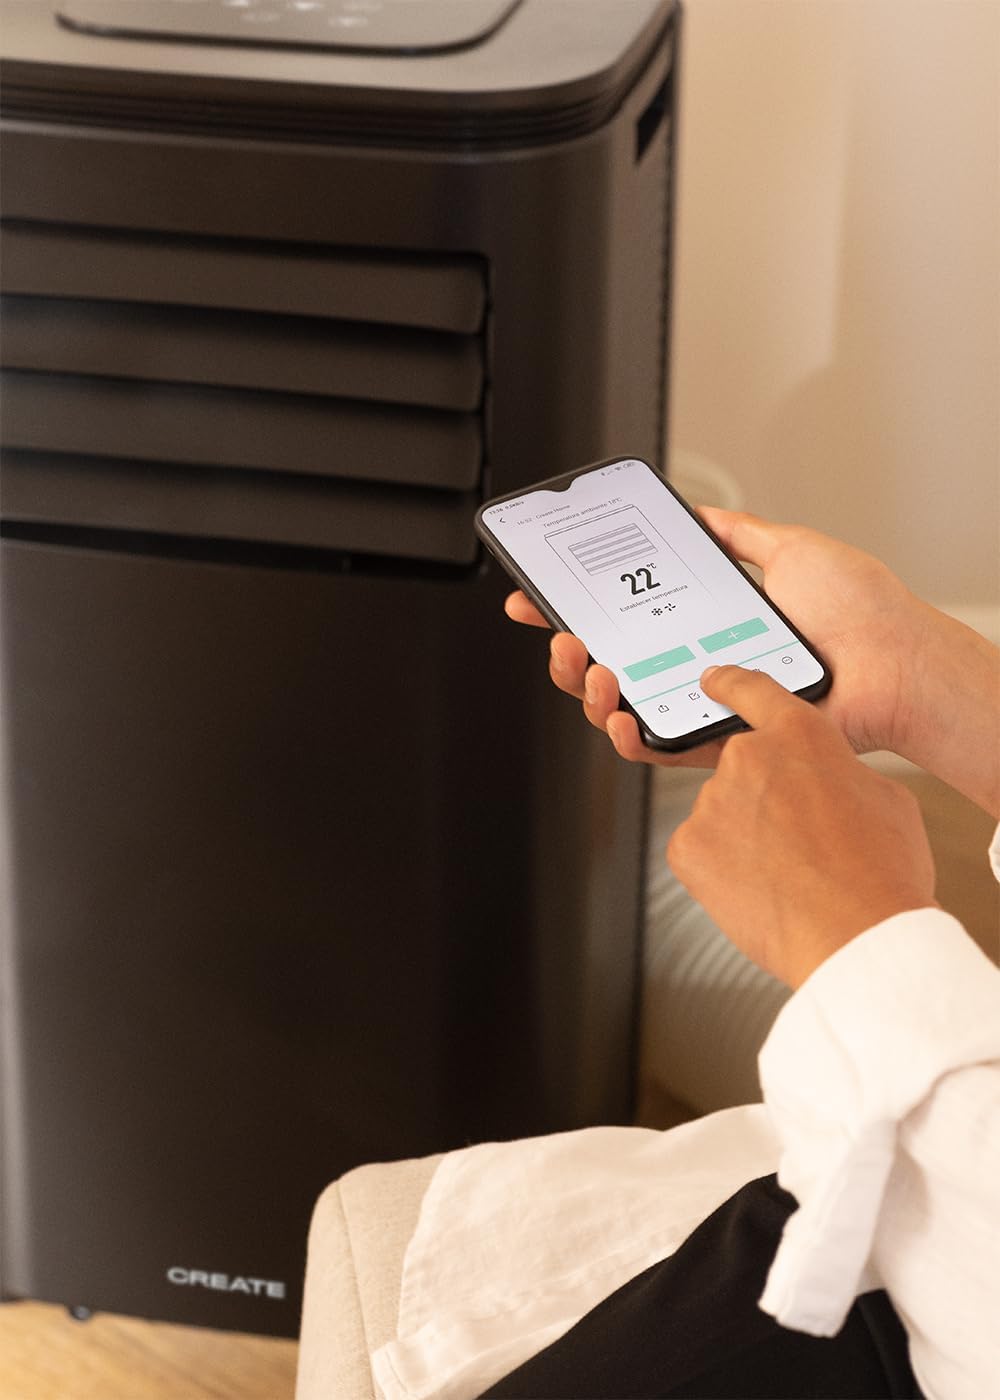
Figure 7: A user's hand interacting with the touch-sensitive control panel located on the top surface of the air conditioner, demonstrating direct manual operation.
6.2 Использование пульта дистанционного управления
Пульт дистанционного управления обеспечивает удобное управление на расстоянии.

Figure 8: A hand holding the dedicated remote control for the air conditioner, illustrating its use for convenient operation from a distance.
6.3 Wi-Fi и управление приложениями
Download the CREATE Home app from your smartphone's app store. Follow the in-app instructions to connect your air conditioner to your home Wi-Fi network. Once connected, you can control all functions of the unit from your smartphone, including mode selection, temperature adjustment, fan speed, and timer settings.
Figure 9: A user interacting with the mobile application on a smartphone to remotely control the air conditioner, showcasing the Wi-Fi connectivity feature.
7. Техническое обслуживание
Регулярное техническое обслуживание обеспечивает оптимальную производительность и продлевает срок службы вашего устройства.
7.1 Очистка воздушного фильтра
Воздушный фильтр следует чистить каждые две недели или чаще в зависимости от интенсивности использования и качества воздуха.
- Выключите устройство и отсоедините его от розетки.
- Найдите панель воздушного фильтра на задней панели устройства.
- Аккуратно снимите фильтр.
- Clean the filter with warm, soapy water or a vacuum cleaner. Rinse thoroughly and allow it to air dry completely before reinserting.

Figure 10: Demonstrates the process of removing the air filter from the rear of the air conditioner unit for cleaning or replacement.
7.2 Слив воды
In Dehumidifier mode or high humidity conditions, the internal water tank may fill up. The unit will stop operating when the tank is full. Drain the water from the drainage port at the bottom rear of the unit.
8. Поиск Неисправностей
| Проблема | Возможная причина | Решение |
|---|---|---|
| Устройство не включается. | No power; Power cord not plugged in; Water tank full. | Check power outlet; Plug in power cord; Drain water tank. |
| Устройство не охлаждается эффективно | Загрязнённый воздушный фильтр; Неправильно установлен выхлопной шланг; Слишком большая комната; Открытые двери/окна. | Clean air filter; Ensure hose is sealed; Use in recommended room size (14-25 m²); Close doors/windows. |
| Громкий шум | Unit not on a flat surface; Obstruction in fan. | Place on flat surface; Check for obstructions. |
| Проблемы с подключением Wi-Fi | Неверный пароль от Wi-Fi; роутер расположен слишком далеко; проблемы с приложением. | Verify password; Move unit closer to router; Restart app/unit. |
9. Технические характеристики
| Особенность | Спецификация |
|---|---|
| Номер модели | 64274_145198 |
| Мощность охлаждения | 9000 BTU / 2270 Watt |
| Емкость осушения | 24 литров/день |
| Расход воздуха | До 350 м³/ч |
| Рекомендуемый размер комнаты | 14-25 м² |
| Уровень шума | 65 дБ |
| Хладагент | R290 (ECO-friendly) |
| Томtage | 240 Вольт |
| Ватtage | 2600 Вт |
| Размеры (Д x Ш x В) | 35.5 х 36.5 х 71.3 см |
| Материал | АБС |
| Класс энергоэффективности | A |

Figure 11: The energy efficiency label for the CREATE SILKAIR CONNECT, indicating an A-class energy rating, 2.6 kW cooling capacity, and a noise level of 65 dB. More details can be found at eprel.ec.europa.eu/qr/1580267.
10. Гарантия и поддержка
For warranty information and technical support, please refer to the warranty card included with your product or visit the official CREATE webСохраните чек в качестве подтверждения покупки.
Производитель: СОЗДАВАТЬ
Контакт: Refer to CREATE's official support channels.