
1. Продукт закончилсяview
The GREENCYCLE Smart Wireless Light Switch and Receiver system provides a convenient solution for controlling lights and appliances. This kit includes a wireless switch panel and a compact receiver module. It supports traditional manual control, remote control via a smartphone application, and voice control through Amazon Alexa and Google Home. The system is designed for easy installation without the need for new wiring to the switch location, offering flexibility in placement and control.

Рисунок 1: GREENCYCLE Smart Wireless Light Switch and Receiver. The image displays the white, rectangular wireless switch panel on the left and the smaller, white receiver module with an antenna on the right. The receiver has input/output labels and a warning sticker.
2. Содержимое упаковки
Проверьте наличие всех предметов в посылке:
- 1 x Wireless Switch Panel
- 1 x Receiver Module
- 2 x Adhesive Rubbers
- 1 х Руководство пользователя
3. Технические характеристики
| Номер модели | M-KS-WLSWH-1B-1PK+WLREV-WIFI-1PK-001 |
| Vol входtagе (приемник) | Переменный ток 80-270 В, 50/60 Гц |
| Максимальная нагрузка (приемник) | 10A / 1000W (LED) |
| Частота беспроводной связи | 433MHz (Switch to Receiver) |
| Wi-Fi Стандартный | 2.4GHz (Receiver to Router) |
| Расстояние передачи на открытом воздухе | >500м |
| Расстояние передачи внутри помещения | >40m (through walls) |
| Переключатель батареи | CR2032 button lithium battery |
| Switch Battery Lifetime | Up to 20 years (approx. 4-6 years with 10 operations/day) |
| Switch Button Life | 800,000 раза |
| Receiver Life | 400,000 раза |
| Switch Waterproof Rating | IP54 |
| Материал | Поликарбонат |
| Сертификаты | CE, CQC, FCC, RoHS |

Рисунок 2: Dimensions of the Wireless Switch (3.38 x 3.38 inches) and Receiver (2.95 x 1.10 x 1.12 inches).
4 Важная информация по безопасности
Перед установкой и использованием внимательно ознакомьтесь со всеми инструкциями по технике безопасности. Несоблюдение этих инструкций может привести к поражению электрическим током, возгоранию или другим опасным ситуациям.
- ПРЕДУПРЕЖДЕНИЕ: Always turn off power at the circuit breaker before installing or servicing the receiver module.
- Установка должна выполняться квалифицированным электриком или в соответствии с местными электротехническими нормами.
- Не превышайте максимальную номинальную нагрузку 10А / 1000Вт.
- Ensure proper wiring connections (Live In, Neutral In, Live Out, Neutral Out) as indicated on the receiver.
- The wireless switch is IP54 water-resistant, suitable for damp environments like bathrooms, but should not be submerged in water.
- Храните продукт в недоступном для детей месте.
5. Настройка и установка
5.1 Подключение приемника
- Отключить питание: Найдите автоматический выключатель, управляющий светильником, и отключите питание. Убедитесь, что питание отключено, с помощью измерителя напряжения.tagе тестер.
- Подключите ресивер: The receiver module should be wired between the power supply and the light fixture. Refer to the wiring diagram below.
- Подключите Жить в wire from the power supply to the 'L IN' terminal on the receiver.
- Подключите Нейтральный вход wire from the power supply to the 'N IN' terminal on the receiver.
- Подключите Жить вне wire to the light fixture to the 'L OUT' terminal on the receiver.
- Подключите Нейтральный выход wire to the light fixture to the 'N OUT' terminal on the receiver.
- Secure the receiver: The compact receiver can be placed inside a wiring box, canopy, or electrical box.
- Восстановите электроснабжение: Once all connections are secure, turn the power back on at the circuit breaker.

Рисунок 3: Wiring diagram showing the receiver connected between the power source (AC 80-270V) and the lamp. Live and Neutral input wires connect to 'IN', and Live and Neutral output wires connect to 'OUT'.
5.2 Wireless Switch Placement
The wireless switch requires no wiring and can be mounted anywhere using the provided adhesive rubbers or screws (not included).
- Clean the desired surface for mounting.
- Peel off the backing from the adhesive rubbers and firmly press the switch panel onto the surface.
- Alternatively, use screws to secure the switch panel to a wall or junction box.

Рисунок 4: Examples of the wireless switch installed in different rooms, demonstrating its flexible placement without wiring.
5.3 Pairing the Wireless Switch with the Receiver
The switch and receiver are typically pre-paired. If re-pairing is needed or for multi-way control setup:
- Убедитесь, что приемник включен.
- Press and hold the pairing button on the receiver (refer to receiver diagram for location, usually a small button or indicator). The indicator light on the receiver will start blinking.
- While the receiver indicator is blinking, press the desired button on the wireless switch panel.
- The receiver's indicator light will stop blinking or flash a confirmation, indicating successful pairing.
- To set up multi-way control, repeat steps 2-3 with additional wireless switch panels.
5.4 Подключение к Wi-Fi и настройка приложения
To enable smart control features, connect the receiver to your home Wi-Fi network and set up the companion application.
- Загрузите приложение: Искать the "Wireless Smart" app on the Apple App Store (for iOS) or Google Play Store (for Android) and install it on your smartphone.
- Зарегистрироваться/Войти: Откройте приложение и следуйте инструкциям на экране, чтобы создать учетную запись или войти в систему.
- Добавить устройство: In the app, select the option to add a new device. Follow the app's instructions to put the receiver into Wi-Fi pairing mode (this usually involves a specific power cycle or button press on the receiver).
- Подключитесь к Wi-Fi: Enter your 2.4GHz Wi-Fi network name and password when prompted by the app. The receiver will connect to your home network.
- Назовите устройство: Assign a descriptive name to your smart switch (e.g., "Living Room Light") for easy identification and voice control.

Рисунок 5: A smartphone displaying the "Wireless Smart" app interface, showing control over various light fixtures (Kitchen, Bedroom, Living Room).
6. Инструкция по эксплуатации
6.1 Ручное управление
Press the wireless switch panel to toggle the connected light or appliance on and off. The switch transmits a 433MHz signal to the receiver.
6.2 Управление приложениями
Use the "Wireless Smart" application on your smartphone to control your lights from anywhere with an internet connection.
- Open the "Wireless Smart" app.
- Select the desired smart switch from your device list.
- Tap the on/off icon to toggle the light.
- If the connected light fixture supports dimming and the app provides the function, you can adjust brightness levels.
6.3 Голосовое управление (Amazon Alexa и Google Home)
Integrate your GREENCYCLE Smart Wireless Light Switch with Amazon Alexa or Google Home for convenient voice control.
- Связать аккаунт: In your Alexa or Google Home app, navigate to the 'Skills' or 'Works with Google' section. Искать and enable the "Wireless Smart" skill/service. Link your "Wireless Smart" account.
- Откройте для себя устройства: Попросите голосового помощника "Обнаружить устройства" или запустите обнаружение устройств вручную в приложении.
- Голосовые команды: После обнаружения вы можете использовать такие команды, как:
- «Алекса, включи [имя устройства]»
- «Окей, Google, выключи [имя устройства]»
- "Alexa, set [Device Name] to 50%" (if dimming is supported)
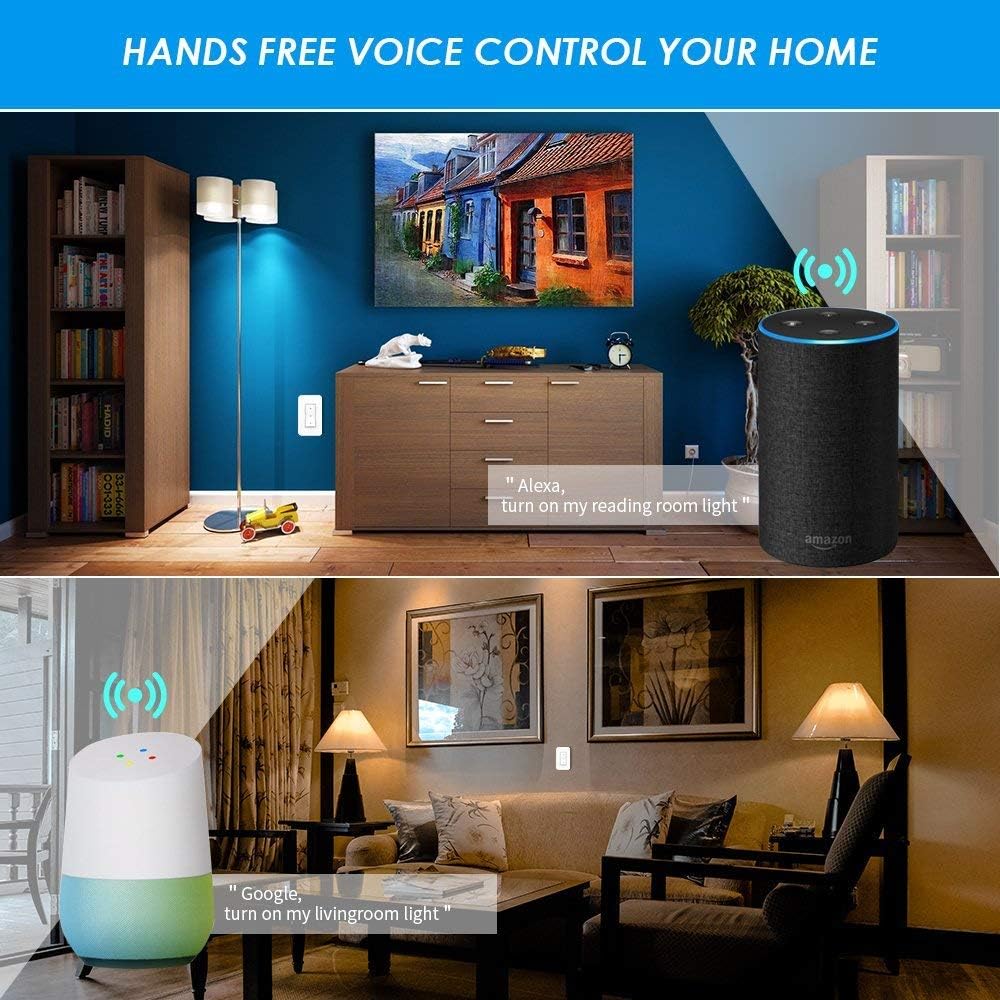
Рисунок 6: Examples of voice control in a home setting, showing an Amazon Echo and Google Home device responding to commands to control lights.
6.4 Функция синхронизации
Utilize the app's timing functions to automate your lights and appliances.
- Scheduled Timer: Set specific times for your lights to turn on or off daily.
- Таймер обратного отсчета: Установите таймер, по истечении которого свет выключится.
- Циклический таймер: Настройте повторяющиеся циклы включения/выключения.
- Sunrise/Sunset Sync: Schedule lights to turn on or off based on local sunrise and sunset times.
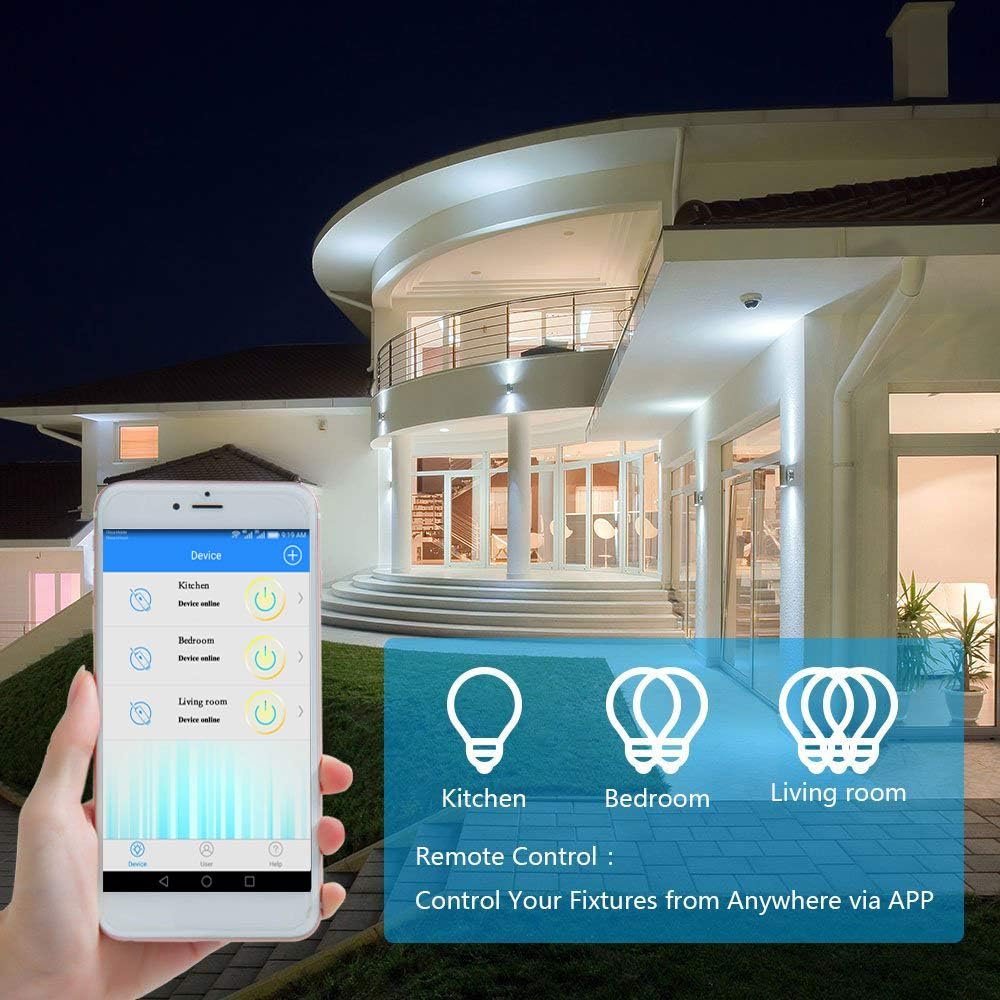
Рисунок 7: Screenshots from the app demonstrating scheduled timers for lights, including daily on/off times and synchronization with sunrise/sunset.
7. Техническое обслуживание
7.1 Очистка
Wipe the wireless switch panel and receiver with a soft, dry cloth. Do not use abrasive cleaners or solvents, as these may damage the surface or internal components.
7.2 Wireless Switch Battery Replacement
The wireless switch is powered by a CR2032 button lithium battery, which has a long lifespan (up to 20 years, or 4-6 years with typical use). If the switch becomes unresponsive, the battery may need replacement.
- Carefully pry open the back cover of the wireless switch panel.
- Удалите старую батарею CR2032.
- Вставьте новую батарею CR2032 положительным (+) полюсом вверх.
- Плотно зафиксируйте заднюю крышку на месте.
8. Поиск Неисправностей
8.1 Light Not Responding to Wireless Switch
- Проверьте питание приемника: Ensure the receiver is properly wired and receiving power.
- Проверьте сопряжение: Re-pair the wireless switch with the receiver (refer to Section 5.3).
- Проверка батареи: Replace the CR2032 battery in the wireless switch (refer to Section 7.2).
- Расстояние/Препятствия: Ensure the switch is within the effective range of the receiver (up to 40m indoors) and there are no excessive obstructions.
8.2 App/Voice Control Not Working
- Wi-Fi-подключение: Verify that your receiver is connected to your 2.4GHz Wi-Fi network. Check your router and internet connection.
- Статус приложения: Ensure the "Wireless Smart" app shows the device as "Online".
- Привязка аккаунта: Confirm that your "Wireless Smart" account is correctly linked to Amazon Alexa or Google Home.
- Имя устройства: Use the exact device name configured in the app for voice commands.
- Router Interference: If you have a dual-band router, ensure the receiver is connected to the 2.4GHz band.
8.3 Light Flickers or Does Not Turn On/Off Correctly
- Совместимость нагрузки: Ensure the connected light fixture's wattage does not exceed the receiver's maximum load (1000W).
- Проверка проводки: Double-check all wiring connections to the receiver (Live In, Neutral In, Live Out, Neutral Out) for looseness or incorrect placement.
- Функция затемнения: If attempting to dim, ensure the light bulb itself is dimmable and the app supports dimming for this specific device.
9. Гарантия и поддержка
For warranty information or technical support, please contact GREENCYCLE customer service. Refer to the product packaging or the GREENCYCLE official webсайт для получения самых актуальных контактных данных.
Производитель: GREENCYCLE TECH INC.