1. Введение
Thank you for choosing the STEINEL Master Check 3 Voltage Tester. This device is engineered for professional use, offering a robust, versatile, and practical solution for electrical testing. It is specifically designed for working on electrical installations and for safely verifying the presence of live circuits. The Master Check 3 accurately tests both AC (Alternating Current) and DC (Direct Current) voltage, with clear indication provided by integrated LEDs.
2. Инструкции по технике безопасности
To ensure safe operation and prevent personal injury or damage to the device, please read and adhere to the following safety guidelines:
- Всегда исходите из того, что электрические цепи находятся под напряжением, пока не доказано обратное.
- Не используйте устройство, если оно повреждено или неисправно.
- Ensure your hands are dry and you are standing on an insulated surface when testing.
- Никогда не пытайтесь измерить объем.tages exceeding the specified maximum ratings of the device.
- Данное устройство предназначено для...tage testing only. Do not use it for other purposes.
- Держите устройство в недоступном для детей месте.
3. Продукт закончилсяview
The STEINEL Master Check 3 is a compact and durable voltage tester. Its primary function is to detect and indicate AC and DC voltages across a wide range. The device is battery-powered for portability and ease of use in various environments.
Основные характеристики:
- ТомtagЭлектронное тестирование: Capable of testing both AC and DC voltagес.
- Светодиодная индикация: Томtage levels are clearly indicated by a series of LEDs.
- Томtagд Диапазоны: Supports common voltage levels including 6V, 12V, 24V, 50V, 120V, 220V, 380V (and 240V/415V for specific applications).
- Прочная конструкция: Built for durability in professional settings.
- Источник питания: Operates on batteries.
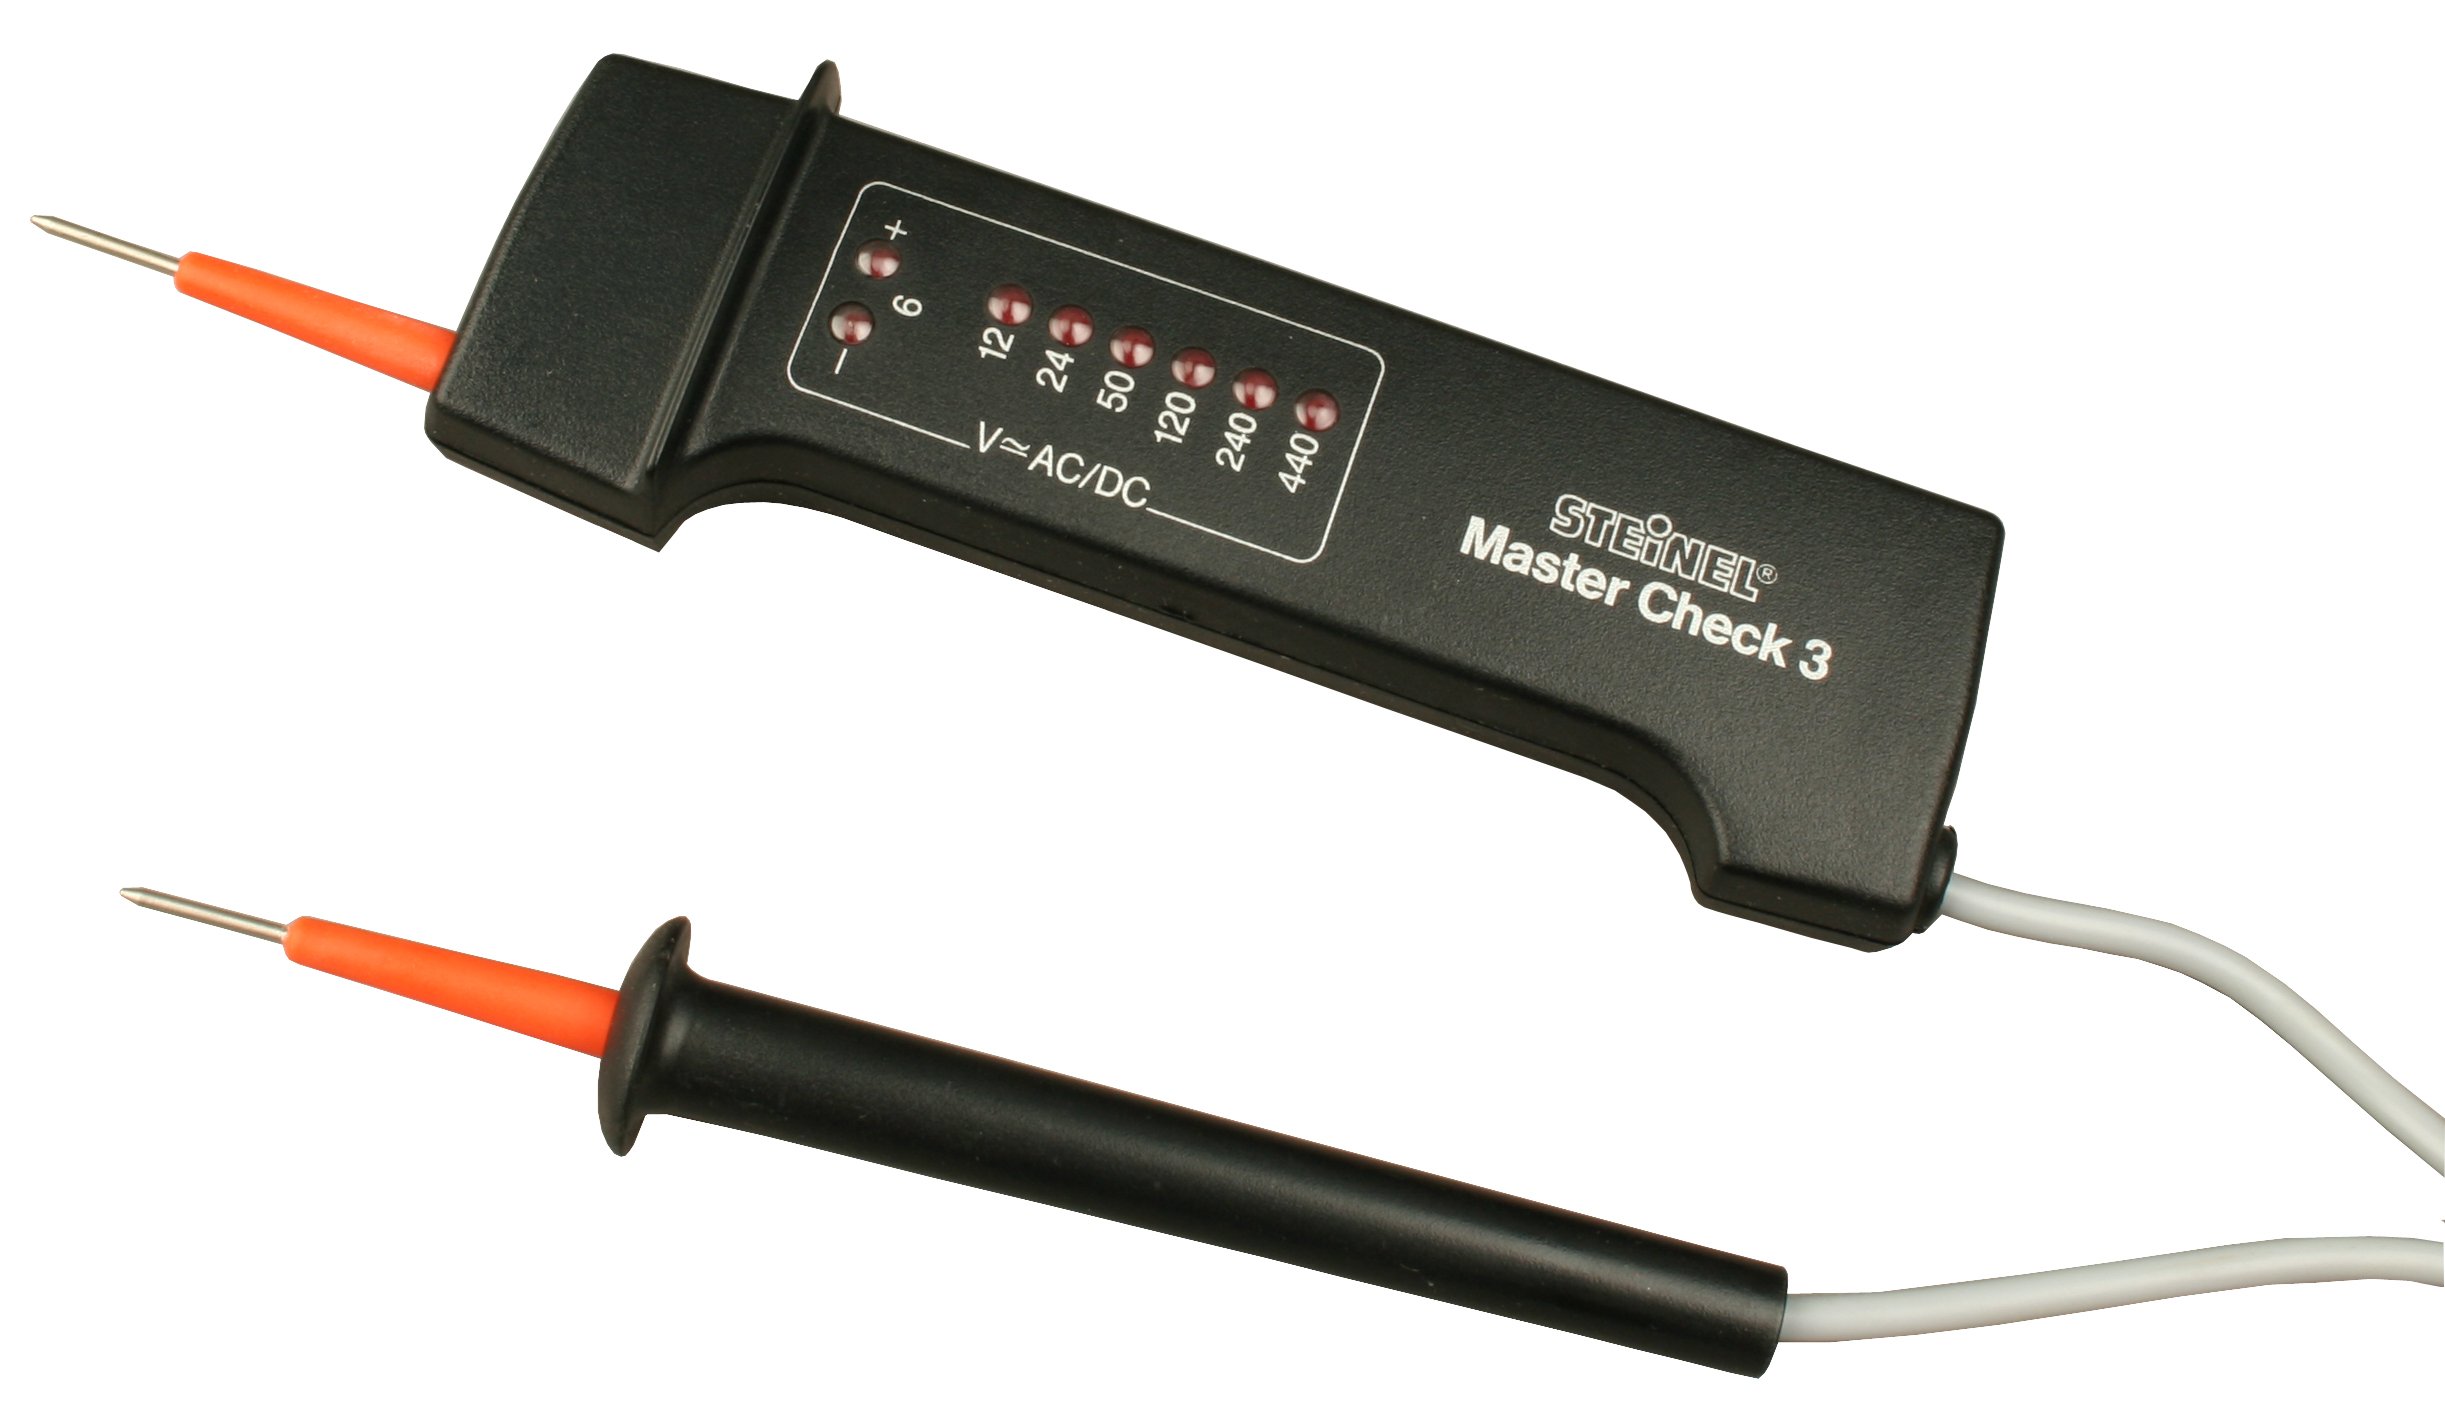
This image displays the STEINEL Master Check 3 Voltage Tester, highlighting its durable construction and the two test probes used for electrical measurements.
4. Настройка
4.1 Установка аккумулятора
The STEINEL Master Check 3 is powered by batteries. Before initial use, or when the indicators become dim, batteries must be installed or replaced.
- Найдите крышку батарейного отсека на задней панели устройства.
- Для открытия батарейного отсека используйте подходящий инструмент (например, небольшую отвертку).
- Вставьте необходимые батарейки, соблюдая полярность (+ и - клеммы). Обратитесь к маркировке внутри отсека.
- Надежно закройте крышку батарейного отсека.
4.2 Первоначальная проверка
Before using the tester on an unknown circuit, it is recommended to test it on a known live circuit (e.g., a wall outlet) to confirm proper functionality.
5. Инструкция по эксплуатации
The Master Check 3 is designed for straightforward voltagе обнаружение.
5.1 Performing a Voltage Тест
- Ensure the test probes are clean and free from damage.
- Carefully apply the two test probes to the points of the circuit you wish to test. For AC voltage, this would typically be phase and neutral. For DC voltage, this would be positive and negative terminals.
- Observe the LED indicators on the device.
5.2 Интерпретация светодиодных индикаторов
The Master Check 3 features a series of LEDs that illuminate to indicate the detected voltage level. The LEDs are typically labeled with voltage values (e.g., 6V, 12V, 24V, 50V, 120V, 220V, 380V). The highest illuminated LED indicates the approximate voltage present. For example, if the 220V LED illuminates but the 380V LED does not, the voltage находится между 220 В и 380 В.
The device automatically detects whether the voltage is AC or DC and indicates accordingly, often through specific LED patterns or dedicated indicators if present on the model.
6. Техническое обслуживание
6.1 Очистка
Чтобы очистить устройство, протрите его мягкой, damp Используйте ткань. Не используйте абразивные чистящие средства или растворители. Перед хранением или следующим использованием убедитесь, что устройство полностью сухое.
6.2. Замена батареи
Replace batteries as described in Section 4.1 when the LED indicators become dim or the device fails to respond. Always dispose of used batteries responsibly according to local regulations.
6.3 Хранение
Store the Master Check 3 in a dry, cool place, away from direct sunlight and extreme temperatures. If storing for extended periods, it is advisable to remove the batteries to prevent leakage.
7. Поиск Неисправностей
If you encounter issues with your STEINEL Master Check 3, refer to the following common problems and solutions:
- No LED indication when testing a known live circuit:
- Проверьте установку аккумуляторов и при необходимости замените аккумуляторы.
- Ensure probes are making good contact with the circuit points.
- Verify the circuit is indeed live with another known working device.
- Dim or flickering LEDs:
- Батарейки разряжены. Замените их.
- Непоследовательные показания:
- Ensure probes are clean and free from corrosion.
- Confirm stable contact with the test points.
If the problem persists after attempting these solutions, contact STEINEL customer support for further assistance.
8. Технические характеристики
| Особенность | Спецификация |
|---|---|
| Бренд | СТАЙНЕЛЬ |
| Модель | Master Check 3 |
| Источник питания | Питание от батареи |
| ТомtagЭлектронный испытательный полигон | 6V, 12V, 24V, 50V, 120V, 220V, 380V (240V/415V) |
| Томtage Тип | Переменный и постоянный ток |
| ASIN | B003IPCZ84 |
| Производитель | Штейнел |
| Стиль | Стандарт |
| Количество единиц | 1.0 шт. |
9. Гарантия и поддержка
Specific warranty information for the STEINEL Master Check 3 Voltage Tester is not provided within this manual. For details regarding warranty coverage, terms, and conditions, please refer to the documentation included with your purchase or visit the official STEINEL website. For technical support or service inquiries, please contact STEINEL customer service through their official channels.